Eleventy, (also written as 11ty) - tagged the simpler static site generator is anti-framework and does exactly what it says it does; generate static sites. Static sites are slowly becoming the standard for deploying content driven web applications.
Eleventy, thought not a popular choice (at the moment) comes with not only the smaller bundle size it is known for but a wealth of templating languages that give developers the flexibility to build with what they like. It supports templating languages like .njk, .html, .md, .11ty.js ,.liquid, .hbs, .ejs, .haml and .pug to mention a few. In my Top 10 Static Site Generators in 2020 article, I described the tools ability to decouple your web pages from your content to make any future migrations easier just in case you decide to use something else later, yay for data ownership. It’s worth pointing out that Eleventy is not a JavaScript framework—that means zero boilerplate client-side JavaScript.
Recently, Zach Leatherman, the creator of Eleventy shared Vue template support for Eleventy.
For context, in this tutorial, you will build a static blog with Eleventy and Strapi. You will also learn how to create a content model in Strapi that can be used for a blog, consume data via the Strapi GraphQL API and use that data to generate a static blog with Eleventy.
Prerequisites
Great so now that we have an idea of what Eleventy is and what it can do, let’s get started with building our blog. I want to start out with the Strapi part, defining our content model first will help us define how our blog consumes data. So let's get started!
Your Strapi Backend
1. Installing Strapi and creating a new project
Open your terminal.
- Run
yarn create strapi-app backend --quickstart- this creates a new folder called backend and builds the admin UI.
2. Create an Administrator user
Navigate to http://localhost:1337/admin.
- Complete the form to create the first Administrator user.
- Click Ready to start
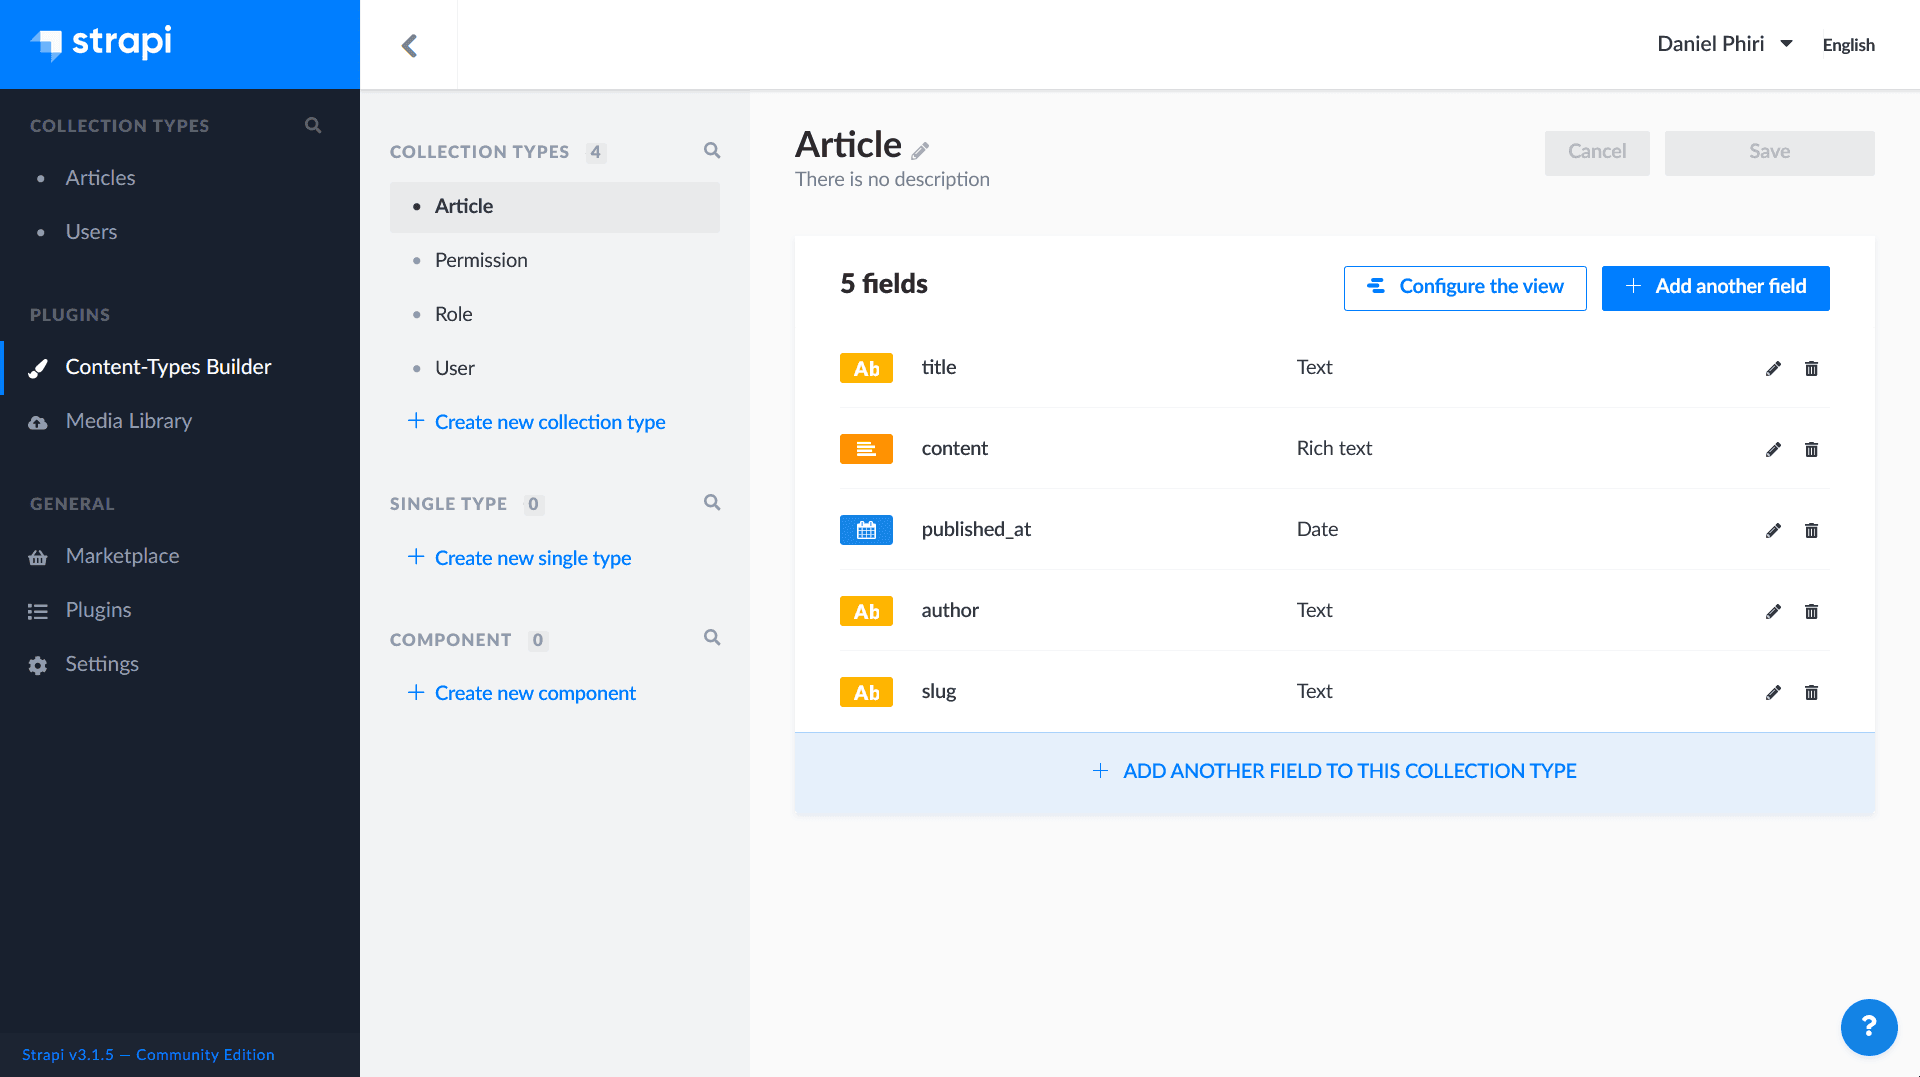
3. Create an Article Collection Type
- Navigate to Content-Types Builder under Plugins in the left-hand menu.
- Click the "+ Create new collection type" link
- Name it article and click continue
- Add a Text field (short text) and name it title
- Click the **"+ Add another field" ** button
- Add a Rich Text field and name it content
- Click the** "+ Add another field"** button
- Add a Date field (date) and name it published_at
- Click the** "+ Add another field"** button
- Add a Text field (short text) and name it author
- Click the** "+ Add another field"** button
- Add a **Text field **(short text) and name it slug
- Click the "Finish" button
- Click the Save button and wait for Strapi to restart
These fields will store our article content
4. Add content to the Article Collection Type
Navigate to Article under Collection Types in the left-hand menu.
-
Click “Add new Article”
-
Fill in this information in the fields specified :
**title**: *The Boy Who Cried Wolf* **content**: *Don’t be him, please.. just don’t.* **author**: *Daniel Phiri* **published_at**: *pick a date of your choice* **slug**: *the-boy-who-cried-wolf* -
Click Save
Before making requests, you need to make your collection type accessible by tweaking its permissions.
5. Set Roles and Permissions
In Strapi v3.1.6 (the latest as of writing) the Roles and Permissions have been moved to settings. Here are more details on the release notes.
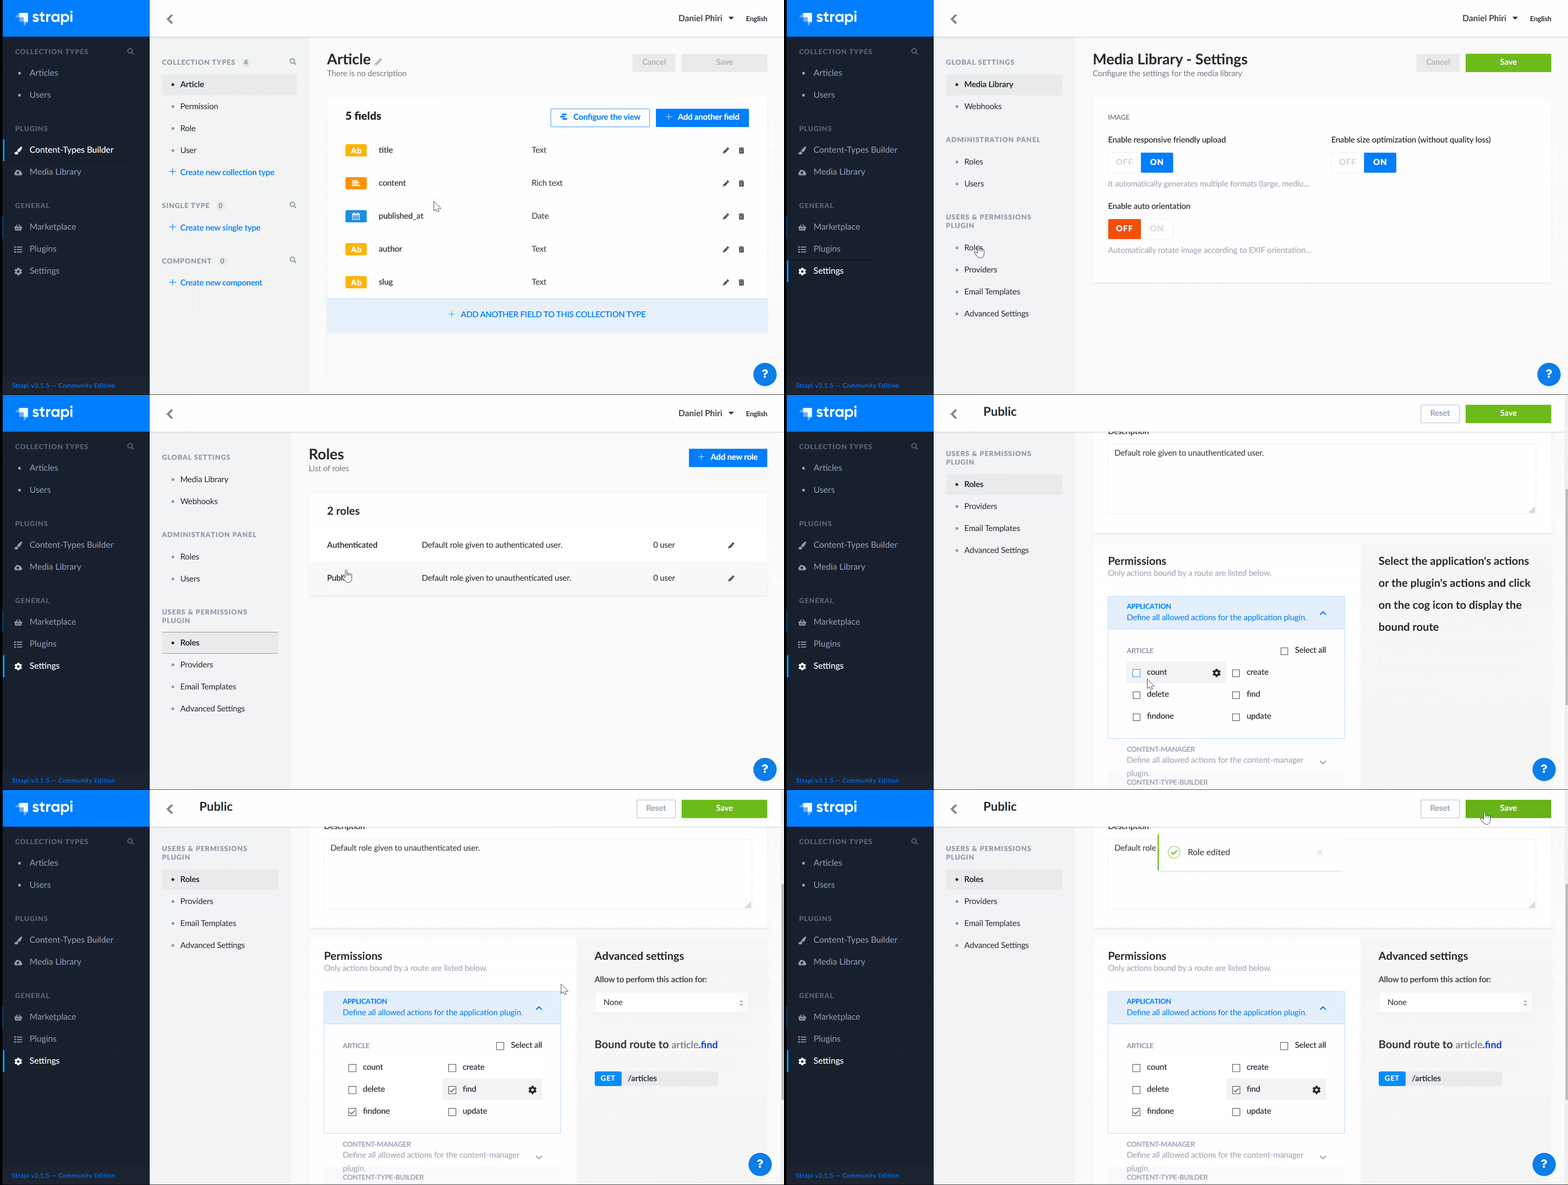
Navigate to Settings under General in the left-hand menu. On the Settings page, navigate to Roles under the User and Permissions Plugin.
- Click the **Public ** Role
- Scroll down under Permissions, find Articles
- Tick the boxes next to find and findone
- Click Save
You have a collection type, you’ve added some content to it, you’ve set up permissions, let’s send requests to your API? Yes!
6. Send requests to the Collection Types API
Navigate to http://localhost:1337/articles to query your data.
If everything went on smoothly, you should get back some JSON data containing the content you just added. For this tutorial, however, you will be using Strapi's GraphQL API.
To enable it, navigate to ./backend
- Run
cd backendto change directories - Run
yarn strapi install graphqlto install the GraphQL plugin
or
Navigate to Marketplace under General in the left-hand menu.
- Click** Download** on the GraphQL card
- Wait for Strapi to restart.
When you have the GraphQL plugin up and running, you can test queries in your GraphQL Playground. That is all for your backend. Now to our Eleventy frontend? Yes
Your 11ty Frontend
To get started, in your root folder install Eleventy globally by running yarn global add @11ty/eleventy. Now that we’ve got this out the way we’ll go ahead and use the official Eleventy blog starter.
- Run
git clone https://github.com/11ty/eleventy-base-blog.git frontendin your project folder, to clone the repo. - Run
cd frontendto change directories - Run
yarn installto install project dependencies - Run
yarn serveto generate our static files and start the project server
Great! Now we should have our project running on localhost and your web page should look like this.
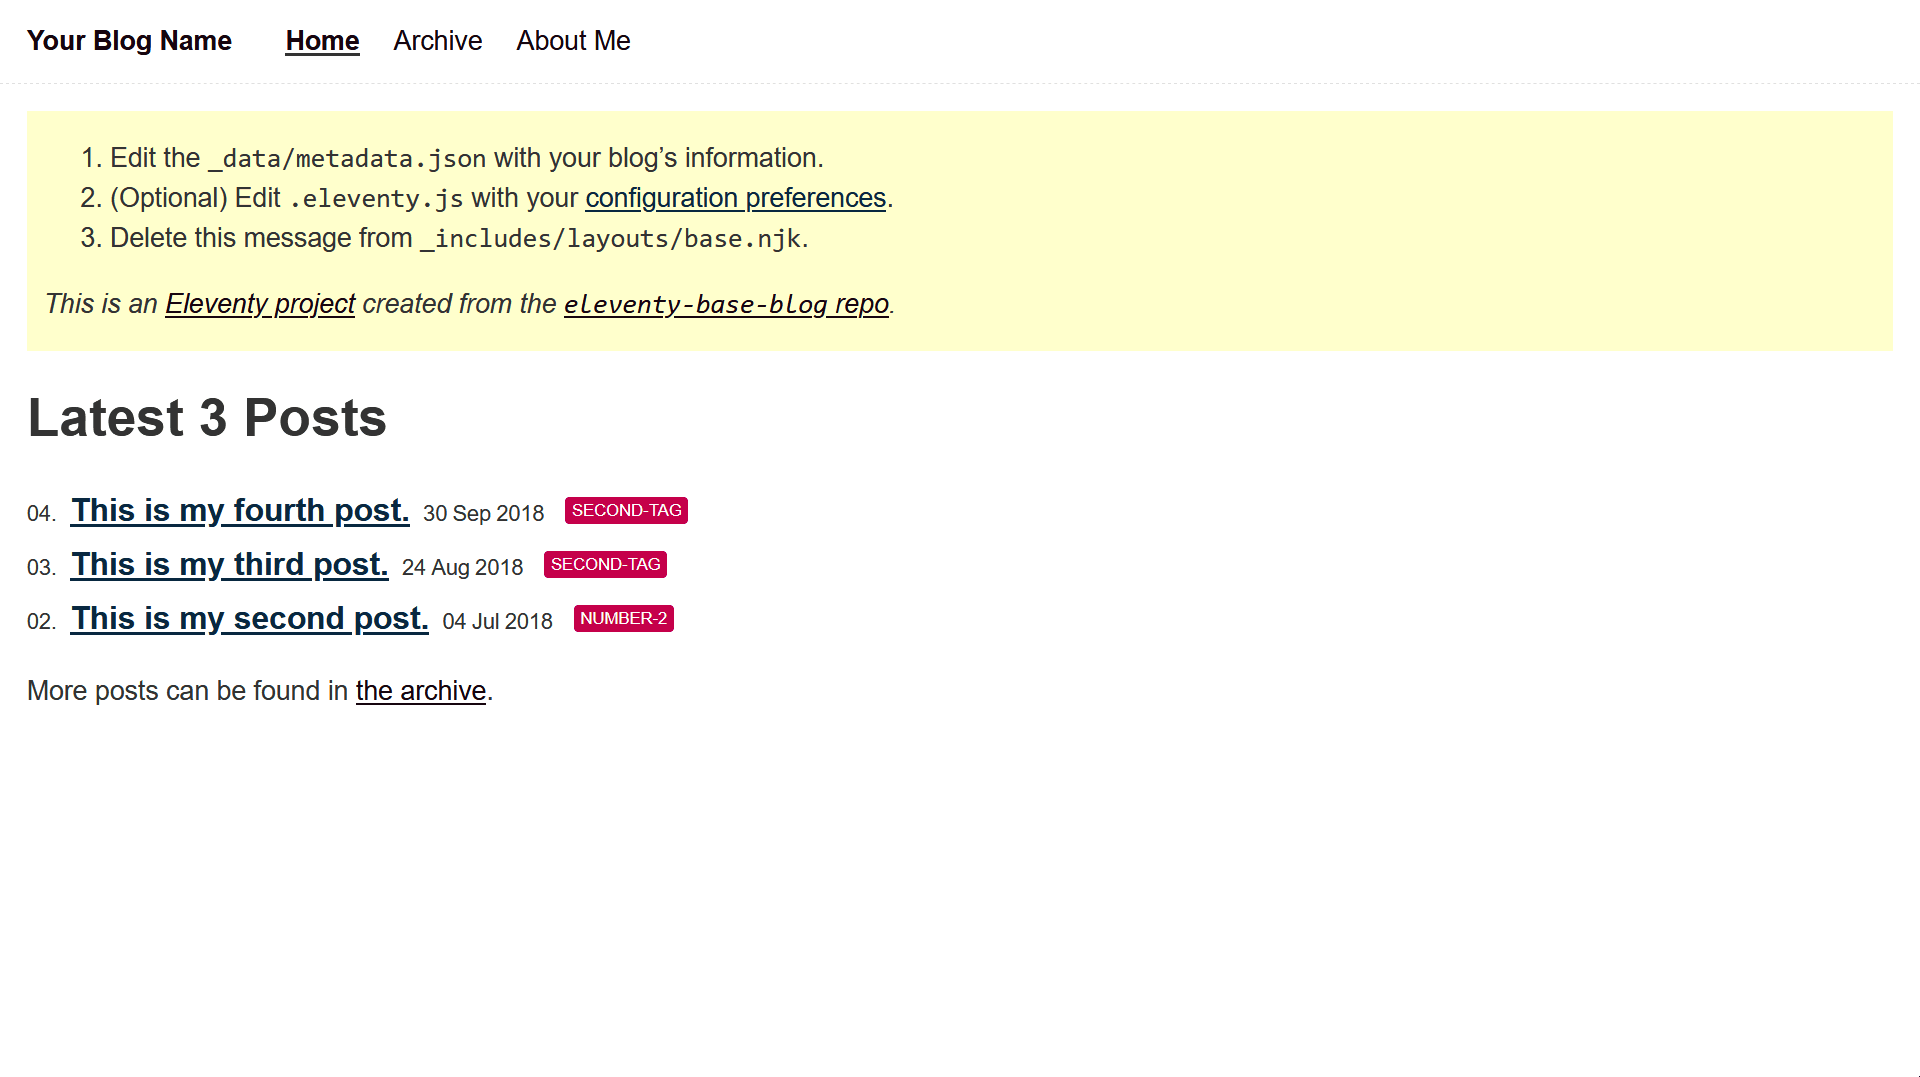
We have a basic version of our application running. Let’s talk about how Eleventy works. In our ./frontend folder, we have a couple folders and files and do a lot to make Eleventy work the way it does. Let’s highlight a few.
.eleventy.js - this file is at the root of your folder and helps you configure your project. _sites - this folder stores all your statically generated files. It appears after building your project _includes - this folder stores your default layout templates. _data - this folder helps us store data from sources outside Eleventy i.e. JSON files and APIs
I’ve mentioned templates quite a bit already. What are they? My definition; templates are moulds that help us add structure to something. Eleventy does this with it’s templating languages. In this tutorial we are using Nunjucks (the .njk files you see). These template files are what we use to create a mould that our content can fit in. Think of a glass and water, water is our content and the glass is our template. Together they make a glass of water and anyone can drink that. The water is what’s important, the glass is just a tool. With eleventy, we can add our content (water) to different templates (glasses, jars, cups) and this way we have the freedom to use our content wherever we need to without having too much reliance on what’s being used to display this content.
Let’s have a practical example. The About us page on the website is powered by content in ./frontend/about/index.md. In the file, we define our layout i.e ./frontend/_includes/layouts/post.njk which acts as our template. In the post.njk file we have section {{ content | safe }} which will populate the page with content from a child layout which in our case is index.md.
Great now we can get to building out our blogs section.
Now that we understand the concept of populating data into templates, let’s do exactly that with Strapi.
In the ./_data folder, create a file called blogposts.js and paste the following code into it.
const fetch = require("node-fetch");

// function to get blogposts
async function getAllBlogposts() {
  // max number of records to fetch per query
  const recordsPerQuery = 100;

  // number of records to skip (start at 0)
  let recordsToSkip = 0;

  let makeNewQuery = true;

  let blogposts = [];

  // make queries until makeNewQuery is set to false
  while (makeNewQuery) {
    try {
      // initiate fetch
      const data = await fetch("<your Strapi GraphQL Endpoint>", {
        method: "POST",
        headers: {
          "Content-Type": "application/json",
          Accept: "application/json",
        },
        body: JSON.stringify({
          query: `{
              articles {
              id
              title
              content
              published_at
              author
              slug
            }
          }`,
        }),
      });

      // store the JSON response when promise resolves
      const response = await data.json();

      // handle CMS errors
      if (response.errors) {
        let errors = response.errors;
        errors.map((error) => {
          console.log(error.message);
        });
        throw new Error("Houston... We have a CMS problem");
      }

      // update blogpost array with the data from the JSON response
      blogposts = blogposts.concat(response.data.articles);

      // prepare for next query
      recordsToSkip += recordsPerQuery;

      // stop querying if we are getting back less than the records we fetch per query
      if (response.data.articles.length < recordsPerQuery) {
        makeNewQuery = false;
      }
    } catch (error) {
      throw new Error(error);
    }
  }

  // format blogposts objects
  const blogpostsFormatted = blogposts.map((item) => {
    return {
      id: item.id,
      title: item.title,
      slug: item.slug,
      body: item.content,
      author: item.author,
      date: item.published_at
    };
  });

  // return formatted blogposts
  return blogpostsFormatted;
}

// export for 11ty
module.exports = getAllBlogposts;
This file queries a Strapi GraphQL API, and maps the response data to a constant - blogpostsFormatted. We’ll now be able to use this data from our API which in our case is Strapi to populate a Nunjuck template. Before anything, let's build out those templates.
In ./frontend create a folder called blogs. In that folder, create a file called list.njk and paste in the following code.
---
layout: layouts/home.njk
templateClass: tmpl-post
eleventyNavigation:
  key: Blog
  order: 4
pagination:
  data: blogposts
  size: 12
permalink: blog{% if pagination.pageNumber > 0 %}/page{{ pagination.pageNumber + 1}}{% endif %}/index.html
---

{% include "postslist.njk" %}
{% set htmlTitle = item.title %}

{% block content %}
  <h2>Unfiltered, raw and probably full of typos</h2>

  {# loop through paginated item #}
  {% for item in pagination.items %}
    {% if loop.first %}<ul>{% endif %}
      <li>
        <h2><a href="/blog/{{ item.slug }}">{{ item.title }} </a></h2>
        <p>by {{ item.author }}  </p>
        <br>
      </li>
    {% if loop.last %}</ul>{% endif %}
  {% endfor %}

  {# pagination #}
  {% if pagination.hrefs | length > 0 %}
  <ul>
    {% if pagination.previousPageHref %}
      <li><a href="{{ pagination.previousPageHref }}">Previous page</a></li>
    {% endif %}
    {% if pagination.nextPageHref %}
      <li><a href="{{ pagination.nextPageHref }}">Next page</a></li>
    {% endif %}
  </ul>
  {% endif %}

{% endblock %}
At the top of our file in our front matter, we define a couple properties for our file. This is where we use the 11ty pagination functionaliy to first initialise data we can use in our template. This then enables us to loop our our response data from blogposts.js using pagination.items in the main section of our file. We also include our page layout using {% include "postslist.njk" %} a define a pagnination solution for when our blog gets busy.
Now we have to create a template for individual blog posts, in ./frontend/blogs create a file called entry.njk and paste the following code.
---
layout: layouts/home.njk
templateClass: tmpl-post
pagination:
  data: blogposts
  size: 1
  alias: blogpost
permalink: blog/{{ blogpost.slug }}/index.html
---
{% include "postslist.njk" %}
{% set htmlTitle = blogpost.title %}

{% block content %}
  {# blogpost #}

  <h1>{{ blogpost.title }}</h1>
{{ blogpost.body | safe }}

{% endblock %}
Just like we did for the list.njk, we define properties in our front matter. The permalink is super important here. Because of the way we structure it. We will have a unique permalink created for each blog post we enter into Strapi. The blog posts corresponding title and content will them be displayed in the main section of our file.
Having created two templates and added the blogpost data from the blogposts.js file, when we run yarn serve to generate the static files and start our server the data from our API will 1. Create a page that shows all blog posts from Strapi and 2. Create individual pages for each post in Strapi for our reading please :p
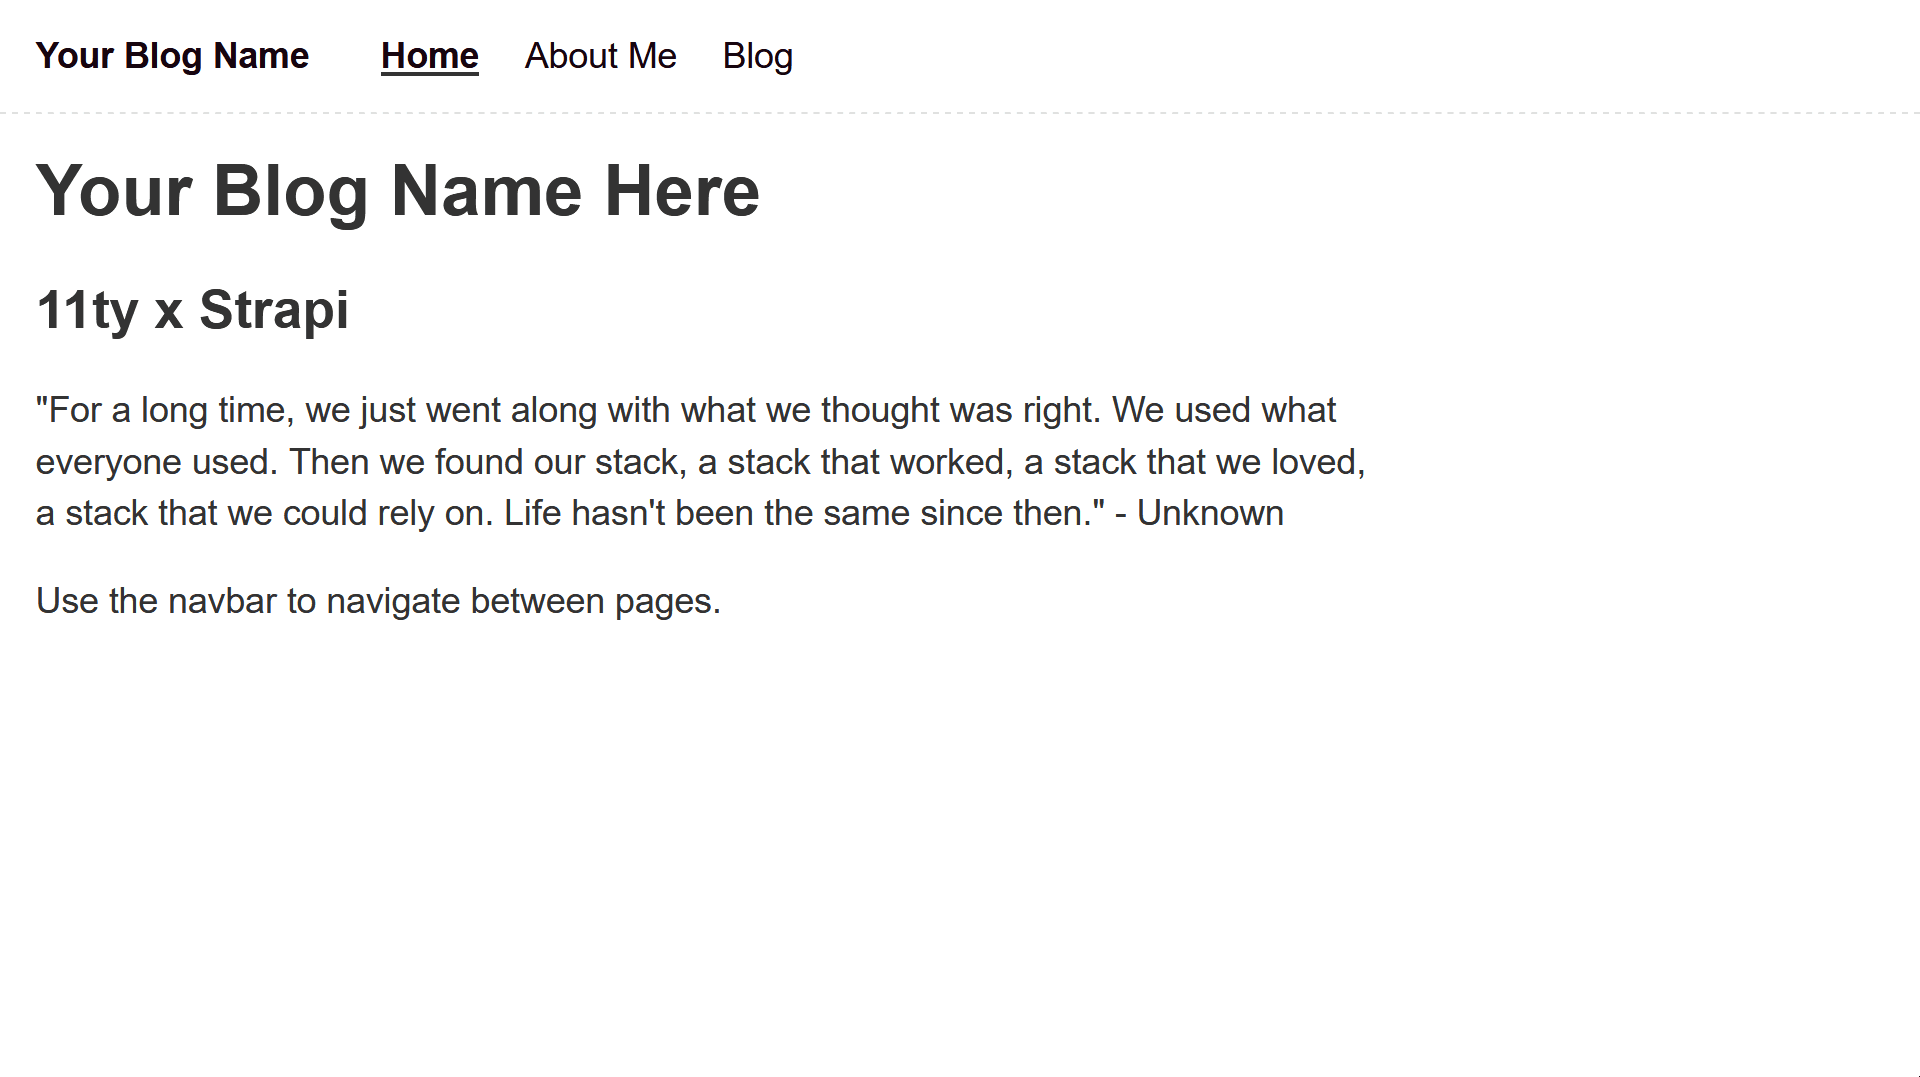
You'll notice a few other files and folders that we didn't touch, you can safely delete archive.njk after which your site should look something like this when your server restarts.
Conclusion
That was fun! We went through building a blog content model with Strapi, enabling the Strapi GraphQL API, setting up an Eleventy project, understanding templates and Eleventy internals and adding an external data source. Hopefully this gives you a glimpse of how to work with both Eleventy and Strapi. You can now go on to build what your heart desires. I can't wait to see it. Share your projects with us in our Community Slack or tweet at me, I'll be sure to respond. Till next time!