Introduction
Cron jobs, also known as scheduled tasks, are a feature of any serious backend application. Whether you need to send a weekly newsletter, sync data from an external API, or clean up stale records, you need a reliable way to run code at specific times without a human pressing a button.
In Strapi 5, this is handled through cron jobs.
This tutorial walks you through everything you need to know:
- What cron jobs are
- How Strapi manages cron jobs internally
- How to configure and implement cron jobs in Strapi
- And how to avoid the common pitfalls that trip up most developers.
In Brief (TL;DR)
- Cron jobs in Strapi 5 let you run code on a schedule, such as newsletters, syncs, cleanups, and so on.
- Enable Strapi cron job
cron: { enabled: true }inconfig/server.tsas it's off by default. - Use the object format
myJob: { task, options: { rule } }, and avoid the bare-expression key, which creates a job you can't remove. - Pick the right file location
config/cron-tasks.tsfor static jobs. - Use
strapi.cron.add()when you need to add cron jobs programmatically at runtime (e.g., from a plugin'sbootstrap()lifecycle). Also when scheduling jobs dynamically based on runtime data. - If you run more than one instance, every instance runs every job, so you need a lock, an external scheduler, or a designated cron node.
Prerequisites
A working Strapi 5 project and basic Node.js knowledge.
Strapi Cron Job Concepts & Fundamentals
Think of a cron job like a recurring calendar reminder, except instead of reminding you to do something, it tells your server to run a piece of code automatically.
The name "cron" comes from the Unix cron daemon, a time-based job scheduler.
In practical terms, cron jobs are used for tasks like:
- Sending scheduled newsletters
- Syncing data from external APIs
- Creating database backups
- Cleaning up expired sessions or records, etc.
The key characteristic is that these tasks run on a schedule, not in response to a user request.
How Strapi Handles Cron Internally
When your Strapi server boots, it initializes a CronService, which is a custom module powered by the node-schedule package.
Here's what happens under the hood during startup:
- Strapi checks whether
server.cron.enabledistruein your serverconfigfile. - If enabled, it reads any tasks defined in
server.cron.tasksand passes them tostrapi.cron.add(). - It then calls
strapi.cron.start(), which schedules all registered jobs.
NOTE: An important detail:
crononly uses a single timer at any given time, rather than re-evaluating upcoming jobs every second or minute. This makes it efficient but also means the scheduler is stateless. So if your server restarts, all jobs are re-registered from scratch. There is no built-in persistence of job state across restarts.
Strapi Cron Expression Syntax
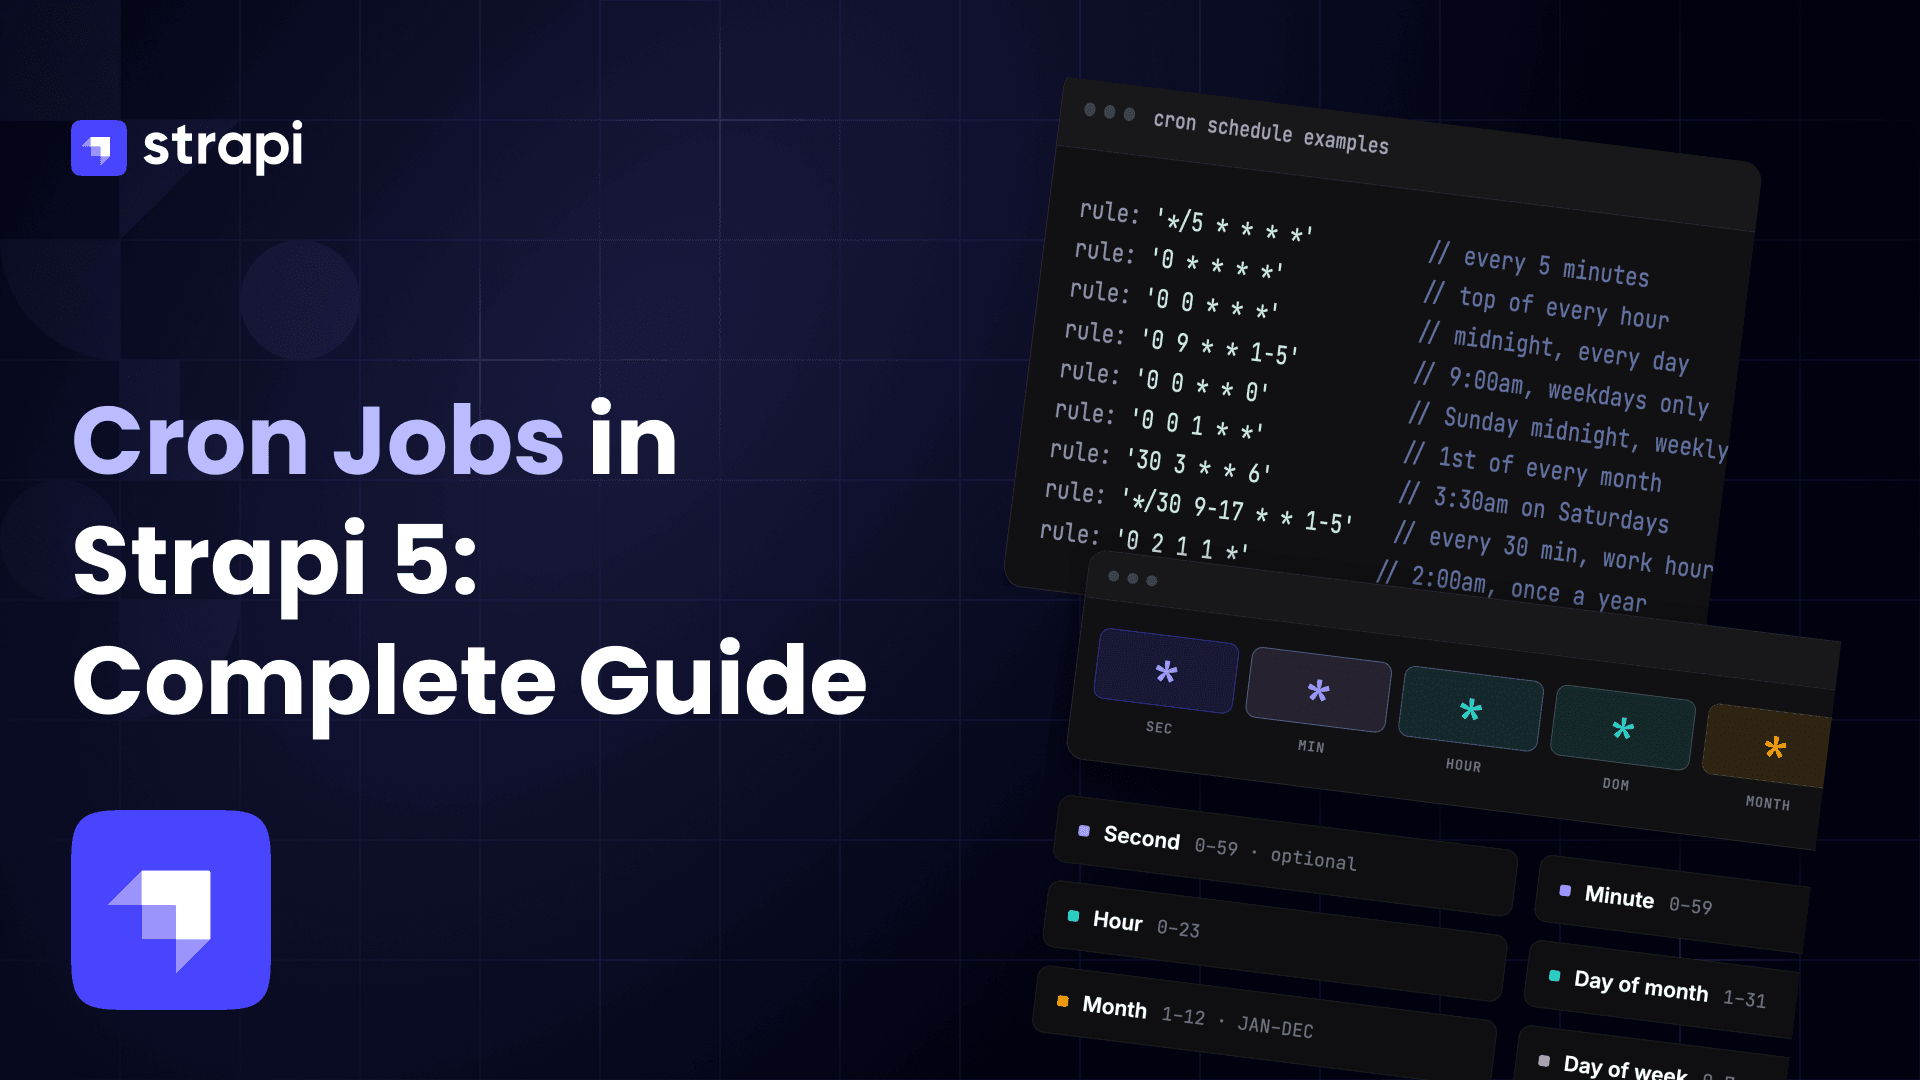
Strapi uses the standard cron expression format, extended with an optional "seconds" field:
*    *    *    *    *    *
┬    ┬    ┬    ┬    ┬    ┬
│    │    │    │    │    |
│    │    │    │    │    └ day of week (0 - 7, or SUN - SAT) (0 or 7 is Sun)
│    │    │    │    └───── month (1 - 12, or JAN - DEC)
│    │    │    └────────── day of month (1 - 31)
│    │    └─────────────── hour (0 - 23)
│    └──────────────────── minute (0 - 59)
└───────────────────────── second (0 - 59, OPTIONAL)
So, the six stars stand for second, minute, hour, day of month, month, and day of week.
✋NOTE: The first star is always optional
In cron syntax, there are special operators or symbols that define how schedules are interpreted:
| Symbol | Name / Term | Meaning |
|---|---|---|
| * | Wildcard | Matches all possible values (e.g., every minute, every hour) |
| , | List Separator | Specifies multiple values (e.g., 1,15,30 = 1st, 15th, and 30th) |
| - | Range | Defines a range of values (e.g., 1-5 = Monday to Friday) |
| / | Step (Increment) | Specifies intervals/steps (e.g., */5 = every 5 units) |
Practical Examples:
| Expression | Meaning |
|---|---|
0 15 14 1 * * | At 14:15 on day-of-month 1. |
0 * * * * | Every hour |
0 0 * * * | Daily at midnight |
0 0 1 * * 1 | Every Monday at 1am (with seconds field) |
* * * * * * | Every second |
The seconds field is optional. If you provide 5 fields, the first field is minutes. If you provide 6 fields, the first field is seconds. This is a common source of confusion. More on that in later sections.
For me, I prefer using the 5 fields.
How to Enable Cron Jobs in Strapi
The single most common mistake beginners make in writing a cron task is forgetting to enable the feature.
Cron jobs are disabled by default in Strapi. You must explicitly turn them on. Set cron.enabled to true, import and declare your cron task as shown below:
// ./config/server.ts

import type { Core } from "@strapi/strapi";

const config = ({
  env,
}: Core.Config.Shared.ConfigParams): Core.Config.Server => ({
  host: env("HOST", "0.0.0.0"),

  // ... other configurations

  // enable cron job
  cron: {
    enabled: true
  },
});

export default config;
How to Define Cron Jobs (Format/Syntax)
You have two main options for defining cron jobs in Strapi, and choosing the right one matters.
1. Using Object Format (Recommended)
The Object format (recommended) uses a named key with task and options properties. The object format is the recommended approach.
// Path: ./config/cron-tasks.ts
import type { Core } from '@strapi/strapi';

export default {
  myJob: {
    task: async ({ strapi }: { strapi: Core.Strapi }) => {
      // Add your job logic here
    },
    options: {
      rule: '*/2 * * * *',
    },
  },
};
2. Using the Key format (Discouraged)
You can use the cron expression itself as the key, thereby creating an anonymous job that cannot be removed.
// Path: ./config/cron-tasks.ts
import type { Core } from '@strapi/strapi';

export default {
  '*/2 * * * *': async ({ strapi }: { strapi: Core.Strapi }) => {
    // Add your job logic here
  },
};
You can also use both of them together in the same code as shown in the code below, but the key format is highly discouraged:
// Path: ./config/cron-tasks.ts
import type { Core } from '@strapi/strapi';

export default {
  myJob: {
    task: async ({ strapi }: { strapi: Core.Strapi }) => {
      // Add your job logic here
    },
    options: {
      rule: '*/2 * * * *',
    },
  },

  '*/2 * * * *': async ({ strapi }: { strapi: Core.Strapi }) => {
    // Add your job logic here
  },
};
⚠️ NOTE Avoid the key format
The key format, e.g., "0 0 1 * * 1": () => {}, creates an anonymous cron job that cannot be removed later with strapi.cron.remove(), and may cause issues with some plugins.
Learn more about using the key format
Where to Define Cron Jobs (Location):
There are 3 locations where you can define cron jobs in Strapi
1. Create Cron Task File and Import in Server Config File
Create your cron tasks in a dedicated file, config/cron-tasks.js|ts, and import it into the config/server.js|ts file.
// Path: ./config/cron-tasks.ts
import type { Core } from '@strapi/strapi';

export default {
  myJob: {
    task: ({ strapi }: { strapi: Core.Strapi }) => {
      // Add your own logic here (e.g. send a queue of email, create a database backup, etc.).
    },
    options: {
      rule: '0 0 1 * * 1', // Every Monday at 1am
    },
  },
};
Import and define inside the server config file./config/server.js
// Path: ./config/server.ts
import type { Core } from '@strapi/strapi';
import cronTasks from './cron-tasks';

export default ({ env }: Core.Config.Shared.ConfigParams): Core.Config.Server => ({
  host: env('HOST', '0.0.0.0'),
  port: env.int('PORT', 1337),

  // ... Other configurations

  cron: {
    enabled: true,
    tasks: cronTasks, // define cron tasks
  },
});
2. Create Inside cron.tasks Key in Server Config File
You can directly create a task inside the cron.tasks key of config/server.js|ts as shown below:
// Path: ./config/server.ts
import type { Core } from '@strapi/strapi';

export default ({ env }: Core.Config.Shared.ConfigParams): Core.Config.Server => ({
  host: env('HOST', '0.0.0.0'),
  port: env.int('PORT', 1337),

  // ... Other configurations

  cron: {
    enabled: true,

    // create job here
    tasks: {
      myJob: {
        task: async ({ strapi }: { strapi: Core.Strapi }) => {
          // Add your own logic here
        },
        options: {
          rule: '0 0 1 * * 1', // Every Monday at 1am
        },
      },
    },
  },
});
3. Programmatically Create Jobs with strapi.cron.add()
You can also create cron jobs anywhere in your custom code using the strapi.cron.add() function.
This could be in your bootstrap function inside the src/index.js|ts file, or in a plugin's strapi-server.js file.
You can also use this method when you need access to the fully initialized Strapi instance.
// ./src/plugins/my-plugin/strapi-server.ts

export default () => ({
  bootstrap({ strapi }) {
    strapi.cron.add({
      myJob: {
        task: async ({ strapi }) => {
          console.log("hello from plugin");
        },
        options: {
          rule: "* * * * * *", // Runs every second
        },
      },
    });
  },
});
Key Differences Between Options 1, 2 and 3
Options 1 and 2 are essentially the same, as both define jobs statically at startup via the server config. The only difference is file organization. Option 1 is preferred when you have many jobs and want to keep config/server.js|ts clean.
Option 3 is fundamentally different because:
- It runs after Strapi is fully initialized, giving you access to the Strapi instance (e.g., to query the database)
- It supports dynamic scheduling at runtime (e.g. adding or removing jobs based on user actions)
- It is the only option for plugin authors who need to register jobs as part of their plugin lifecycle
How to Remove a Cron Job in Strapi
In some cases, there may be a need for you to remove some cron jobs. Here are some reasons you might want to remove cron jobs.
1. Application Shutdown (Cleanup with destroy())
When Strapi is shutting down, you should remove cron jobs registered during bootstrap() to avoid resource leaks or orphaned jobs. This is done in the destroy() lifecycle.
// ./src/index.ts

let cronJobKey: string | undefined;

export default {
  async bootstrap({ strapi }) {
    cronJobKey = "log-reminders";

    strapi.cron.add({
      [cronJobKey]: {
        task: async ({ strapi }) => {
          strapi.log.info("Remember to review new content in the admin panel.");
        },
        options: {
          rule: "0 */6 * * *", // Every 6 hours
        },
      },
    });
  },

  async destroy({ strapi }) {
    if (cronJobKey) {
      strapi.cron.remove(cronJobKey);
    }
  },
};
2. Rescheduling a Job
When a job needs to run at a different time, you remove the old job before adding the new one.
// Remove the old scheduled job
strapi.cron.remove('publishRelease_1');

// Define the new schedule date
const newScheduleDate = new Date(Date.now() + 10000); // e.g. 10 seconds from now

// Add the new one with updated schedule
strapi.cron.add({
  publishRelease_1: {
    async task() {
      // publish logic
    },
    options: newScheduleDate,
  },
});
3. Plugin Cleanup
When a plugin shuts down, it should remove any cron jobs it registered.
// ./src/plugins/my-plugin/server/src/destroy.ts

import type { Core } from "@strapi/strapi";

export default ({ strapi }: { strapi: Core.Strapi }) => {
  strapi.cron.remove("myJob");
};
4. Feature/License-Based Removal
When a feature is disabled (e.g., a license expires), its associated cron jobs should be removed.
strapi.cron.remove("deleteExpiredRecords");In summary, you should remove a cron job when a user action changes the schedule of a dynamically added job at runtime. This will ensure that the old job is cancelled and a new one is created to avoid duplicate executions.
Defining Cron Job Inside a Plugin
If you're building a Strapi plugin and want to include a cron task scoped to that plugin, register it in the plugin's bootstrap function:
// /src/plugins/my-plugin/server/src/index.ts
import type { Core } from '@strapi/strapi';

export default () => ({
  bootstrap({ strapi }: { strapi: Core.Strapi }) {
    strapi.cron.add({
      // runs every second
      myJob: {
        task: async ({ strapi }: { strapi: Core.Strapi }) => {
          console.log('hello from plugin');
        },
        options: {
          rule: '* * * * * *',
        },
      },
    });
  },
});
To remove it cleanly when the plugin is destroyed, use strapi.cron.remove("myJob").
// /src/plugins/my-plugin/server/src/index.ts
import type { Core } from '@strapi/strapi';

export default () => ({
  bootstrap({ strapi }: { strapi: Core.Strapi }) {
    strapi.cron.add({
      // runs every second
      myJob: {
        task: ({ strapi }: { strapi: Core.Strapi }) => {
          console.log('hello from plugin');
        },
        options: {
          rule: '* * * * * *',
        },
      },
    });
  },

  destroy({ strapi }: { strapi: Core.Strapi }) {
    strapi.cron.remove('myJob');
  },
});
Learn more about adding or removing cron jobs
Working with the Document Service and Cron Jobs
Inside a cron task, you have full access to the Strapi instance via the { strapi } argument. In Strapi 5, use strapi.documents() to interact with your content and not strapi.entityService, which is deprecated in Strapi 5.
// Path: ./config/cron-tasks.ts

import type { Core } from '@strapi/strapi';

export default {
  unpublishExpiredPromotions: {
    task: async ({ strapi }: { strapi: Core.Strapi }) => {
      const now = new Date().toISOString();

      const expiredPromotions = await strapi.documents('api::promotion.promotion').findMany({
        status: 'published',
        filters: {
          expiresAt: { $lte: now },
        },
      });

      strapi.log.info(`[unpublishExpiredPromotions] Found ${expiredPromotions.length} expired promotions.`);

      for (const promotion of expiredPromotions) {
        await strapi.documents('api::promotion.promotion').unpublish({
          documentId: promotion.documentId,
        });
      }
    },
    options: {
      rule: '0 0 0 * * *', // Every day at midnight
    },
  },
};
How to Query Single Type vs Collection Type in a Cron Task
The way you query data inside a cron task depends on your content type:
Collection Types
Collection types have multiple entries. You'll typically query for entries matching certain criteria (e.g., all draft articles with a scheduledAt date that has passed).
// Path: ./config/cron-tasks.ts
import type { Core } from '@strapi/strapi';

export default {
  publishScheduledArticles: {
    task: async ({ strapi }: { strapi: Core.Strapi }) => {
      const now = new Date().toISOString();

      // Collection type: find many draft entries whose scheduledAt date has passed
      const articles = await strapi.documents('api::article.article').findMany({
        status: 'draft',
        filters: {
          scheduledAt: {
            $lte: now,
          },
        },
      });

      for (const article of articles) {
        await strapi.documents('api::article.article').publish({
          documentId: article.documentId,
        });
      }
    },
    options: {
      rule: '0 * * * *', // Every hour
    },
  },
};
Single Types
Single types have exactly one entry. You query them without filtering by ID.
// ./config/cron-tasks.ts
export default {
  syncHomepage: {
    task: async ({ strapi }) => {
      // Single type: no ID or filter needed, just findFirst()
      const homepage = await strapi.documents("api::homepage.homepage").findFirst({
        status: "published",
      });

      // Do something with homepage data...
    },
    options: {
      rule: "0 0 * * *", // Every day at midnight
    },
  },
};
Both are accessed through the Document Service API. The cron task structure is the same in both cases.
The only thing that differs is the query.
Working with Time Zones in Strapi Cron Jobs
By default, a job runs in the server's local timezone.
To pin it to a specific zone, add a tz value to options with a valid tz-database name — for example, tz: "Asia/Dhaka" runs the rule on Dhaka time regardless of where the server lives.
// ./config/cron-tasks.ts

export default {
  /**
   * Cron job with timezone example.
   * Every Monday at 1am for Asia/Dhaka timezone.
   * List of valid timezones: https://en.wikipedia.org/wiki/List_of_tz_database_time_zones#List
   */

  myJob: {
    task: ({ strapi }) => {
      /* Add your own logic here */
    },
    options: {
      rule: "0 0 1 * * 1",
      tz: "Asia/Dhaka",
    },
  },
};
Example Project: Build a Cron Job Manager with Strapi 5 & Next.js
For a full deep dive on a project-based example of Strapi cron jobs, explore the following tutorials:
- Part 1: Setting up Strapi and Extending Strapi Cron Jobs
- Part 2: Building the Next.js Dashboard for Managing Cron Jobs
Strapi Cron Jobs Advanced Considerations
Multi-Instance Deployments
When you run a single Strapi instance, cron jobs are straightforward: one server, one scheduler, one execution per interval.
But in production, you often run multiple Strapi instances behind a load balancer for redundancy and scale. This is where cron jobs become dangerous.
The problem
Each Strapi instance initializes its own CronService independently. If you have 3 instances running, a cron job that fires every hour will execute 3 times once per instance at the same time.
For a newsletter send, that means 3x the emails going out to your subscribers.
The Solution Strapi's Content Releases feature handles Multi-Instance Deployments
Strapi's own content releases scheduling feature (which uses cron internally) addresses this with a database-level locking strategy.
When a scheduled release fires, it sets up a transaction that locks the release row using SQL forUpdate. Any other process attempting to access the same row is put on hold until the first one finishes. Read more here.
-
Step 1: Create a
cron_lockscontent type or database table. You need acron_lockstable in your database. Create a content type (or migration) with these fields:job_name(String, unique),locked_at(DateTime),released_at(DateTime, nullable). -
Step 2: Create the
CronLockutility
// Path: ./src/utils/cron-lock.ts
import type { Core } from '@strapi/strapi';

const LOCK_MODEL = 'api::cron-lock.cron-lock';

export async function withCronLock(
  strapi: Core.Strapi,
  jobName: string,
  task: () => Promise<void>
): Promise<void> {
  await strapi.db.transaction(async ({ trx }) => {
    // Attempt to acquire a lock on the row for this job
    const lock = await strapi.db
      .queryBuilder(LOCK_MODEL)
      .where({ job_name: jobName, released_at: null })
      .select(['id', 'job_name', 'locked_at', 'released_at'])
      .first()
      .transacting(trx)
      .forUpdate()
      .execute();

    if (!lock) {
      // No lock row exists yet, insert one
      await strapi.db
        .queryBuilder(LOCK_MODEL)
        .insert({ job_name: jobName, locked_at: new Date() })
        .transacting(trx)
        .execute();
    } else if (lock.released_at) {
      // Already ran, skip silently
      strapi.log.info(`[CronLock] Job "${jobName}" already ran. Skipping.`);
      return;
    }

    try {
      await task();

      // Release the lock after successful execution
      await strapi.db
        .queryBuilder(LOCK_MODEL)
        .where({ job_name: jobName })
        .update({ released_at: new Date() })
        .transacting(trx)
        .execute();

      strapi.log.info(`[CronLock] Job "${jobName}" completed successfully.`);
    } catch (error) {
      strapi.log.error(`[CronLock] Job "${jobName}" failed.`, error);
      throw error;
    }
  });
}- Step 3: Use it in your cron tasks
// Path: ./config/cron-tasks.ts
import type { Core } from '@strapi/strapi';
import { withCronLock } from '../src/utils/cron-lock';

export default {
  publishScheduledArticles: {
    task: async ({ strapi }: { strapi: Core.Strapi }) => {
      await withCronLock(strapi, 'publishScheduledArticles', async () => {
        const now = new Date().toISOString();

        const articles = await strapi.documents('api::article.article').findMany({
          status: 'draft',
          filters: {
            scheduledAt: { $lte: now },
          },
        });

        for (const article of articles) {
          await strapi.documents('api::article.article').publish({
            documentId: article.documentId,
          });
        }
      });
    },
    options: {
      rule: '0 * * * *', // Every hour
    },
  },
};
How the Logic Works The logic works like this:
- If the first instance successfully publishes the release, it updates
releasedAtwith the current timestamp and releases the lock. - When the second instance's process finally gets access to the row, it sees
releasedAtis already set and fails silently — the work is already done. - If the first instance fails, the release status is set to
failed, and subsequent attempts also fail silently until a user intervenes. [Content Releases Scheduling]
Strategies you can apply to your own Cron Tasks
-
Database locking: Before executing your task, attempt to acquire a lock on a database record (e.g., a
CronLocktable). If the lock is already held by another instance, skip execution. Release the lock when done. -
External scheduler: Move scheduling responsibility outside of Strapi entirely. Use a single external scheduler (a cloud cron service, BullMQ, or Agenda) that makes an HTTP request to one designated Strapi instance, or to a dedicated worker process, rather than letting every instance run its own timer.
-
Designate a single cron instance: In your infrastructure, configure only one instance to have
cron.enabled: true. All other instances run with cron disabled. This is the simplest approach but introduces a single point of failure for scheduled tasks.
Environment-Based Scheduling
It's common to want cron jobs to run more frequently in development (so you can test them quickly) and less frequently, or not at all, in production.
Strapi Environment Configuration Strapi's environment configuration already handles this.
You can use NODE_ENV inside your cron task file to switch the rule:
// ./config/cron-tasks.ts
const isDev = process.env.NODE_ENV === 'development';

export default {
  sendScheduledNewsletters: {
    task: async ({ strapi }) => {
      // your task logic
    },
    options: {
      // Every 30 seconds in dev, every 5 minutes in production
      rule: isDev ? "*/30 * * * * *" : "*/5 * * * *",
    },
  },
};
Strapi's environment-specific config files
Alternatively, you can use Strapi's environment-specific config files. Place a different cron-tasks.ts in ./config/env/production/ that imports and overrides specific task rules for production. Learn more in environment configurations.
Disable Cron in an Environment
You can also disable cron entirely in certain environments by setting cron.enabled conditionally in your server config:
// ./config/server.ts
import cronTasks from "./cron-tasks";

export default ({ env }) => ({
  host: env("HOST", "0.0.0.0"),
  port: env.int("PORT", 1337),
  cron: {
    enabled: env.bool("CRON_ENABLED", true),
    tasks: cronTasks,
  },
});
This lets you control cron via an environment variable (CRON_ENABLED=false) without changing code.
This is useful for disabling cron on all but one instance in a multi-instance setup.
When NOT to Use Strapi's Built-in Cron
Strapi's built-in cron is excellent for simple, low-frequency scheduled tasks. But there are clear signs you've outgrown it:
Signs you need something more robust:
- You need job queues. Cron fires a task at a time, but it doesn't queue work. If your task takes longer than the interval, the next run starts before the previous one finishes, and you have no visibility into the backlog.
- You need retries. Strapi can log a failed cron execution, but it provides no automatic retry, backoff, persistent failure state, dead-letter queue, or alerting.
- You're running multiple instances and the locking strategies above feel too complex or fragile for your use case.
- You need job history and monitoring. Strapi's cron gives you no dashboard, no job history, and no alerting out of the box.
- Your tasks are long-running. Cron tasks run in the same Node.js process as your API. A heavy task can block the event loop and degrade API performance.
- You need dynamic scheduling. Strapi's cron rules are defined at startup. If you need to schedule a one-off job at a user-specified time (e.g., "publish this article at 3 pm tomorrow"), you need either the scheduling service pattern used by Content Releases (which dynamically calls
strapi.cron.add()) or an external queue. [Content Releases Scheduling]
When to reach for an external tool:
- BullMQ or Agenda — Node.js job queue libraries backed by Redis. Excellent for retries, concurrency control, and job history. Your Strapi bootstrap function can enqueue jobs; a separate worker process consumes them.
- Cloud-based cron — AWS EventBridge Scheduler, Google Cloud Scheduler, or similar. These call an HTTP endpoint on your Strapi instance at the scheduled time. Simple, reliable, and instance-count-agnostic.
Testing & Debugging
1. Testing cron jobs locally
The fastest way to verify a cron task is working is to set its interval to something very short — every second or every 5 seconds — during development:
export default {
  myJob: {
    task: ({ strapi }) => {
      strapi.log.info('Task fired!');
    },
    options: {
      rule: "* * * * * *", // every second — for testing only
    },
  },
};
Watch your terminal after restarting Strapi. You should see the log message every second. Once confirmed, change the rule to your intended production schedule.
2. Triggering a task manually during development
Strapi's cron service does not expose a built-in "run now" method. The simplest workaround is to extract your task logic into a standalone service function, then call that function directly from a temporary admin route or from the Strapi bootstrap function during development. This way you can test the logic independently of the scheduler.
3. One-off tasks for testing
You can also schedule a task to run exactly once, a few seconds after startup, using a Date object as the option:
export default {
  myOneOffJob: {
    task: ({ strapi }) => {
      strapi.log.info('One-off task fired!');
    },
    // only run once after 10 seconds
    options: new Date(Date.now() + 10000),
  },
};
This is useful for quickly testing task logic without waiting for a recurring interval.
4. Using an online cron editor
Feel free to practice your Cron Expression Syntax using crontab guru or any other online editor for cron expressions.

5. Using a Plugin from the Strapi Community Hub
You can download several plugins from the Strapi Community Hub to extend the features of your Strapi project.
The Hub is the new home for everything built by and for the community, all in one place:
- The plugin Marketplace,
- Framework Integrations,
- Project Showcases,
- Partners, and Community Member Profiles.
In the Strapi community hub, you will find the Cron Manager plugin, which allows you to visually add and manage cron jobs.

Logging and Error Handling Best Practices
Every production cron task should follow this pattern:
export default {
  sendScheduledNewsletters: {
    task: async ({ strapi }) => {
      strapi.log.info('[Newsletter Cron] Starting run...');

      try {
        // your task logic here
        strapi.log.info('[Newsletter Cron] Completed successfully.');
      } catch (error) {
        strapi.log.error('[Newsletter Cron] Task failed:', error);
        // Catch errors so you can add useful context and perform cleanup.
        // Whether you rethrow depends on how failures are monitored;
        // rethrowing allows the scheduler's error listener to record the task as failed.
      }
    },
    options: {
      rule: "*/5 * * * *",
    },
  },
};
Key practices:
- Always wrap in
try/catch. An unhandled error inside a cron task can propagate unexpectedly. Catch it, log it, and let the task exit cleanly. - Use namespaced log prefixes like
[Newsletter Cron]. When you have multiple cron tasks, prefixes make it easy to filter logs. - Log at the start and end of each run. This gives you a clear record of when tasks fired and whether they completed.
- Log meaningful context on errors — not just the error message, but which record was being processed, what state it was in, etc. This is invaluable when debugging production failures.
- Use
strapi.log.infoandstrapi.log.errorrather thanconsole.log. Strapi's logger integrates with your logging infrastructure and respects log level configuration.
Strapi's cron service also attaches an error listener to each job: [Cron service source]
job.on('error', (error) => {
  strapi.log.error(`Cron job "${taskName ?? taskExpression}" failed`, error);
});
This means unhandled errors from node-schedule itself are caught and logged automatically — but errors thrown inside your task function are your responsibility to handle.
Common Mistakes when working with Strapi Cron Jobs
Here's a checklist of the most frequent mistakes when working with Strapi cron jobs:
1. Forgetting to enable cron in config/server.ts
The single most common issue. Cron is disabled by default. Without cron: { enabled: true }, no tasks will ever run. [Enabling cron jobs]
2. Using the key format instead of the object format
The key format (where the cron expression is the object key) creates an anonymous job that cannot be removed with strapi.cron.remove(). Always use the object format with a named key. [Using the key format]
3. Wrong cron expression field count
Strapi supports both 5-field (minute-level) and 6-field (second-level) cron expressions.
If you write a 6-field expression expecting the first field to be minutes, your task will fire at the wrong time or never.
Remember: with 6 fields, the first field is seconds.
4. No duplicate-send protection
If your task sends emails or triggers external actions, you must update a status field after each successful send. Without this guard, every cron run will re-process the same records.
5. Using entityService in Strapi 5
strapi.entityService is deprecated in Strapi 5. Use strapi.documents() instead. Code copied from Strapi v4 tutorials will silently fail or behave unexpectedly.
6. Defining tasks in register() instead of bootstrap()
The register() lifecycle runs before Strapi is fully initialized.
Cron tasks that depend on database access or other services must be added in bootstrap(), where the full Strapi instance is available.
7. Not cleaning up cron jobs in destroy()
If you add a cron job dynamically via strapi.cron.add() in bootstrap(), you should remove it in destroy() to avoid memory leaks or ghost jobs during hot reloads in development. Learn more about combined usage.
Conclusion
You've now covered the full lifecycle of cron jobs in Strapi 5 — from defining static tasks in your server config to dynamically scheduling jobs at runtime with strapi.cron.add().
The most important decisions come down to where you define your tasks and how you format them: always use the object format with a named key, and reach for strapi.cron.add() when you need access to the fully initialized Strapi instance or need to reschedule jobs based on user actions.
Further reading:
- Strapi v5 Cron Jobs documentation: The canonical reference for all configuration options
- Strapi v5 Server Configuration: For
cron.enabledand related server settings - Strapi v5 Lifecycle Functions: For understanding
register,bootstrap, anddestroy node-scheduleon npm: The underlying scheduler Strapi uses, with full documentation on expression formats andSpecoptions