This is my first time using Lovable to build a frontend for a Strapi backend. Here's what I learned.
AI tools like Lovable and Claude Code help you bring ideas to life faster. They're great for quick prototypes and trying new approaches. But they're not magic—they're tools.
Like any tool, they have strengths and weaknesses. Success comes from knowing what each tool does well and using it appropriately.
You still need to understand what you're building. You need to know your data structure, the problems you're solving, and your tech stack. And yes—you still need to know how to code.
These tools are powerful, but they sometimes hallucinate or create errors. The better you understand your project structure and how AI tools work, the better your results will be.
In this post, I'll walk you through building a frontend with Lovable that connects to a Strapi backend.
TLDR: Summary at a Glance
What This Covers: Using Lovable (AI coding tool) to build a frontend for your Strapi backend
Key Insights:
- AI tools aren't magic—you still need to understand your data, API, and how to code
- Backend-first approach: Start with Strapi + OpenAPI spec, let Lovable build from real data
- Two strategies: One-shot (not recommended) vs. Iterative (recommended approach )
Critical Success Factors:
- Context is everything: Real API responses, Strapi v5 patterns, exact field names
- Use Knowledge files, Chat Mode, version pinning, and guardrails
- Test after each feature, not at the end
Common Mistakes:
- Vague prompts → Generic code
- Missing version info → Wrong Strapi patterns
- No real data examples → Incorrect field names
- Testing too late → Bugs compound
What is Lovable?
Lovable is a browser-based AI development platform. You describe what you want in plain English, and Lovable writes the code for you.
What is Vibe Coding?
Vibe coding is a relaxed, creative way to build applications using AI tools. Instead of writing every line of code yourself, you describe what you want and let the AI handle the heavy lifting. Then you guide and refine the work step by step.
The "vibe" is about maintaining momentum—trying ideas quickly without getting stuck on setup or syntax.
These tools have their place, especially when you want to prototype or iterate on initial ideas quickly.
Why Use Lovable with Strapi?
Here's why this combination works:
Your rubber ducky (that codes) Talk to Lovable like you'd talk through a problem with a teammate. It helps you think out loud, propose structures, and generate a first pass so you're not staring at a blank file.
Quick iteration loops Change a prompt, regenerate, test against your Strapi API, repeat. It's great for exploring layouts, components, and flows without hand-wiring every detail upfront.
Fast POCs and trying new ideas Need a demo by this afternoon? Lovable can scaffold the UI and basic logic while Strapi gives you real content types, draft/publish workflow, and an API you can trust.
Boilerplate handled Forms, lists, detail pages, basic CRUD—Lovable generates the scaffolding so you can focus on the parts that actually need your expertise.
Content-first development With Strapi defining the schema and relationships, you can point Lovable at the API and have it build around your real data shape instead of lorem ipsum.
Backend First vs Frontend First
When building an application that manages content, you have three main approaches:
- Frontend first - Design your user interface, then build the backend to support it
- Backend first - Set up your data and API, then build the frontend to display it
- Both at once - Build frontend and backend simultaneously (this often leads to mismatches and extra work)
For this tutorial, we're starting with the backend using Strapi. Here's why:
- Your data shapes your design - When you know what content you have, deciding what components and pages you need becomes easier
- Catch errors early - TypeScript types generated from your API help prevent bugs before they happen
- Work with real content - Test your app with actual data instead of fake placeholders
- AI-friendly documentation - Strapi creates an OpenAPI spec that tells AI tools exactly how your API works
- Teamwork made easy - Content editors can start adding material while you're building the frontend
Downsides to Consider
- Planning required - You need to think through your data structure before you see anything visual
- Risk of overthinking - It's tempting to add extra fields and connections you might not actually need
- Delayed gratification - You won't see the interface come together until later
Even with these tradeoffs, starting with your data first (using Strapi) is the most practical approach.
What is OpenAPI and Why Should You Use It?
OpenAPI Specification (formerly Swagger) is a standard way to describe how your API works. Think of it as a detailed instruction manual that explains:
- What endpoints are available and what they do (GET, POST, PUT, DELETE, etc.)
- What parameters each endpoint accepts and what data types they expect
- What data comes back in responses
- How authentication works
- What error messages you might encounter
Here's a simple example:
openapi: 3.0.0
paths:
  /api/articles:
    get:
      summary: Get all articles
      responses:
        "200":
          description: Success
          content:
            application/json:
              schema:
                type: object
                properties:
                  data:
                    type: array
                    items:
                      $ref: "#/components/schemas/Article"
components:
  schemas:
    Article:
      type: object
      properties:
        id:
          type: integer
        title:
          type: string
        content:
          type: string
How OpenAPI Helps When Building with AI
OpenAPI provides a way to document your API that makes it a useful reference when prompting AI tools.
One limitation: Lovable has a context window, and if your specification.json file is too large, it may not fit. But you can still add it as an attachment.
Either way, it's a valuable reference worth including.
How it helps:
- Stops the AI from guessing - The AI gets exact details about your API instead of making assumptions
- Creates matching code - The AI generates TypeScript types that perfectly align with your backend
- Makes accurate requests - The AI knows exactly which endpoints exist, what data they need, and what they return
- Works as documentation - Both humans and AI can read and understand the specification
- Catches mistakes - You can verify if your requests and responses match expectations
Generating OpenAPI Spec in Strapi
Strapi makes this simple with one command:
# Generate OpenAPI spec
npx strapi openapi generate

# This creates an specification.json file in your project rootThis file contains everything about your API—all your content types, components, and endpoints with their exact data structures. It's exactly what AI tools like Lovable need to understand your backend.
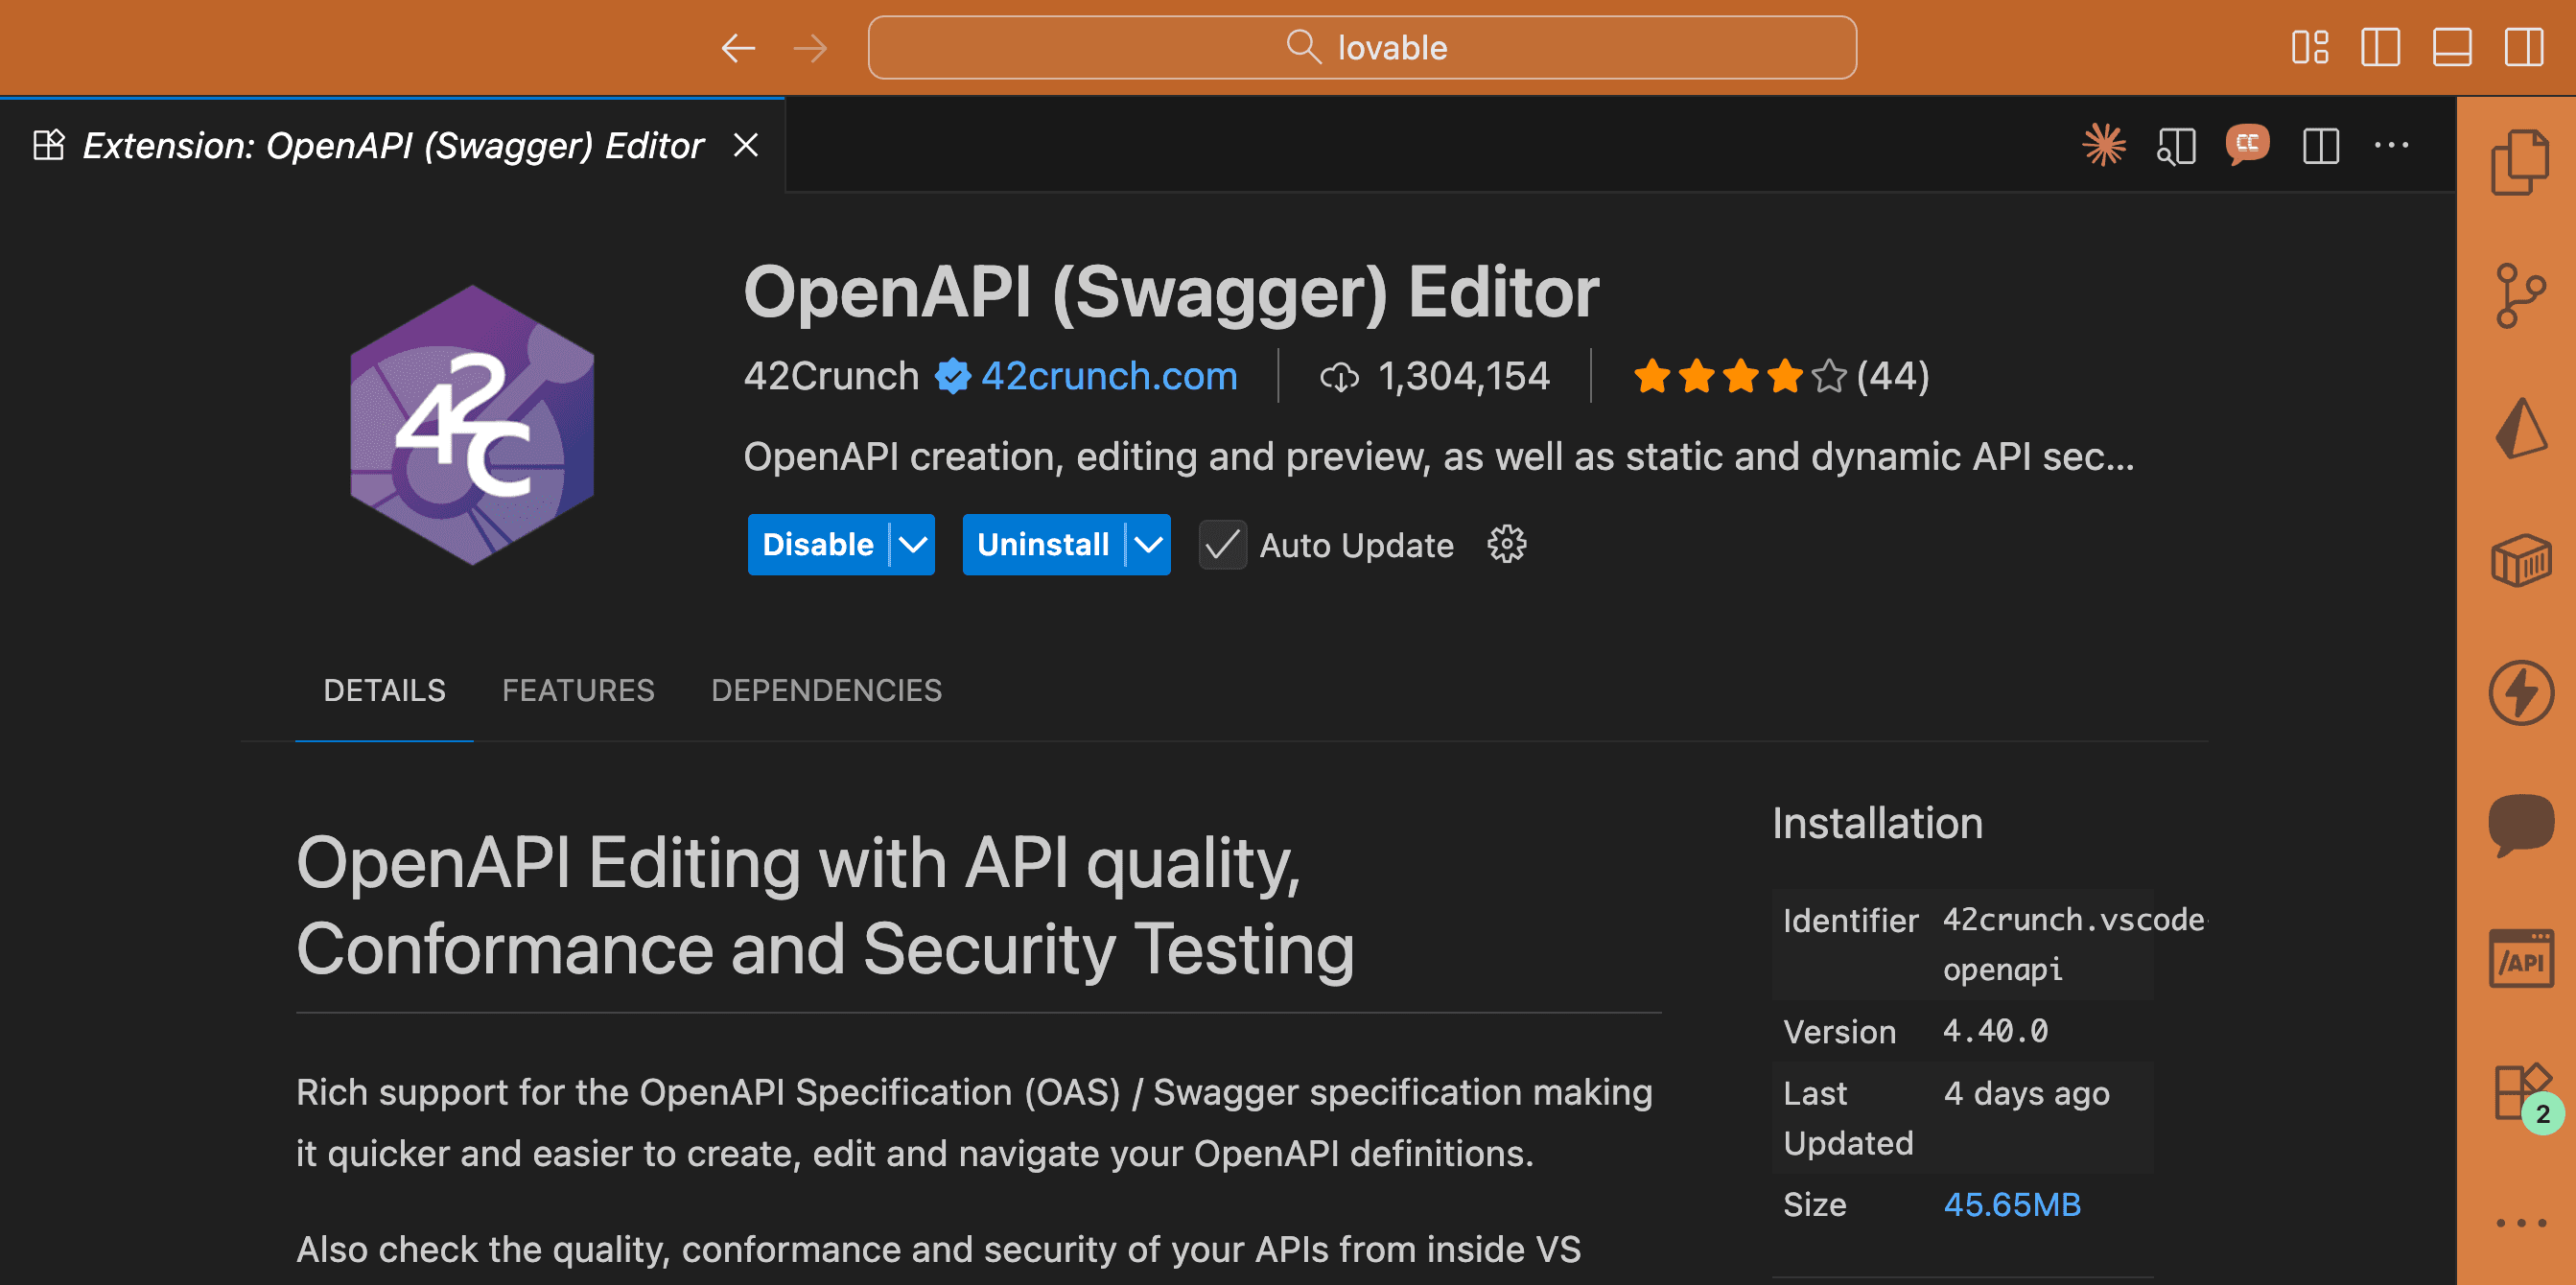
Pro tip: I use the OpenAPI extension in VS Code to browse through the endpoints visually.
We'll explore how to use this specification in detail as we go through the tutorial.
Let's Start: Building a Frontend with Lovable for Your Strapi Backend
Now we'll walk through building a frontend with Lovable that connects to a Strapi backend.
Before We Begin
Let's check what you need:
- ✅ Do you have a Strapi project? (Don't worry if you don't—we'll set one up)
- ✅ Have you created content types in Strapi? (We'll use ours from our demo project)
- ✅ Can you access your Strapi API? (Either running locally or deployed online)
Step 1: Set Up Your Strapi Project
Don't have a Strapi project yet? No problem. We'll use a pre-built one from my Strapi Crash Course. If you want to learn how the backend was created, check out the video tutorial.
Since this guide focuses on the frontend, let's grab the ready-made backend project:git clone https://github.com/PaulBratslavsky/pauls-strapi-crashcourse serverChange into the server folder:
cd serverInstall all the dependencies using either yarn or npm:
yarnor
npm installCreate a .env file in the root of the project. Copy the configuration from the .env.example file:
HOST=0.0.0.0
PORT=1337
APP_KEYS="toBeModified1,toBeModified2"
API_TOKEN_SALT=tobemodified
ADMIN_JWT_SECRET=tobemodified
TRANSFER_TOKEN_SALT=tobemodified
JWT_SECRET=tobemodified
ENCRYPTION_KEY=tobemodified
Replace each placeholder string with a unique value of your choice.
Seed the project with initial data:
yarn strapi import -f ./seed-data.tar.gzWhen prompted, type y for Yes:
➜  server git:(main) yarn strapi import -f ./seed-data.tar.gz
yarn run v1.22.22
$ strapi import -f ./seed-data.tar.gz
? The import will delete your existing data! Are you sure you want to proceed? (y/N) y
Type y again:
[2025-10-24 10:09:33.381] warn: (Schema Integrity) admin::session does not exist on source
? There are differences in schema between the source and destination, and the data listed above will be lost. Are you sure you want
to continue? (y/N)
This is just a warning about a schema mismatch. It's safe to ignore.
Once the import finishes, you should see:
Starting import...
✔ entities: 55 transferred (size: 46.7 KB) (elapsed: 64 ms) (729.6 KB/s)
✔ assets: 8 transferred (size: 300 KB) (elapsed: 21 ms) (13.9 MB/s)
✔ links: 171 transferred (size: 32.2 KB) (elapsed: 11 ms) (2.9 MB/s)
✔ configuration: 47 transferred (size: 135.4 KB) (elapsed: 8 ms) (16.5 MB/s)
┌─────────────────────────────────────────┬───────┬───────────────┐
│ Type                                    │ Count │ Size          │
├─────────────────────────────────────────┼───────┼───────────────┤
│ entities                                │    55 │      46.7 KB  │
├─────────────────────────────────────────┼───────┼───────────────┤
│ -- api::article.article                 │    12 │ (    22.3 KB) │
├─────────────────────────────────────────┼───────┼───────────────┤
│ -- api::author.author                   │     2 │ (     534 B ) │
├─────────────────────────────────────────┼───────┼───────────────┤
│ -- api::global.global                   │     2 │ (     3.3 KB) │
├─────────────────────────────────────────┼───────┼───────────────┤
│ -- api::landing-page.landing-page       │     2 │ (     7.9 KB) │
├─────────────────────────────────────────┼───────┼───────────────┤
│ -- api::page.page                       │     4 │ (     1.6 KB) │
├─────────────────────────────────────────┼───────┼───────────────┤
│ -- api::tag.tag                         │     3 │ (     820 B ) │
├─────────────────────────────────────────┼───────┼───────────────┤
│ -- plugin::i18n.locale                  │     1 │ (     253 B ) │
├─────────────────────────────────────────┼───────┼───────────────┤
│ -- plugin::upload.file                  │     8 │ (     4.1 KB) │
├─────────────────────────────────────────┼───────┼───────────────┤
│ -- plugin::upload.folder                │     2 │ (     519 B ) │
├─────────────────────────────────────────┼───────┼───────────────┤
│ -- plugin::users-permissions.permission │    16 │ (     4.4 KB) │
├─────────────────────────────────────────┼───────┼───────────────┤
│ -- plugin::users-permissions.role       │     2 │ (     656 B ) │
├─────────────────────────────────────────┼───────┼───────────────┤
│ -- plugin::users-permissions.user       │     1 │ (     464 B ) │
├─────────────────────────────────────────┼───────┼───────────────┤
│ assets                                  │     8 │       300 KB  │
├─────────────────────────────────────────┼───────┼───────────────┤
│ -- .avif                                │     3 │ (   292.1 KB) │
├─────────────────────────────────────────┼───────┼───────────────┤
│ -- .svg                                 │     5 │ (     7.9 KB) │
├─────────────────────────────────────────┼───────┼───────────────┤
│ links                                   │   171 │      32.2 KB  │
├─────────────────────────────────────────┼───────┼───────────────┤
│ configuration                           │    47 │     135.4 KB  │
├─────────────────────────────────────────┼───────┼───────────────┤
│ Total                                   │   281 │     514.2 KB  │
└─────────────────────────────────────────┴───────┴───────────────┘
Import process has been completed successfully!
✨  Done in 15.24s.
Start your Strapi project:
yarn devNavigate to http://localhost:1337
You'll see the admin login screen. Create your first Admin user:
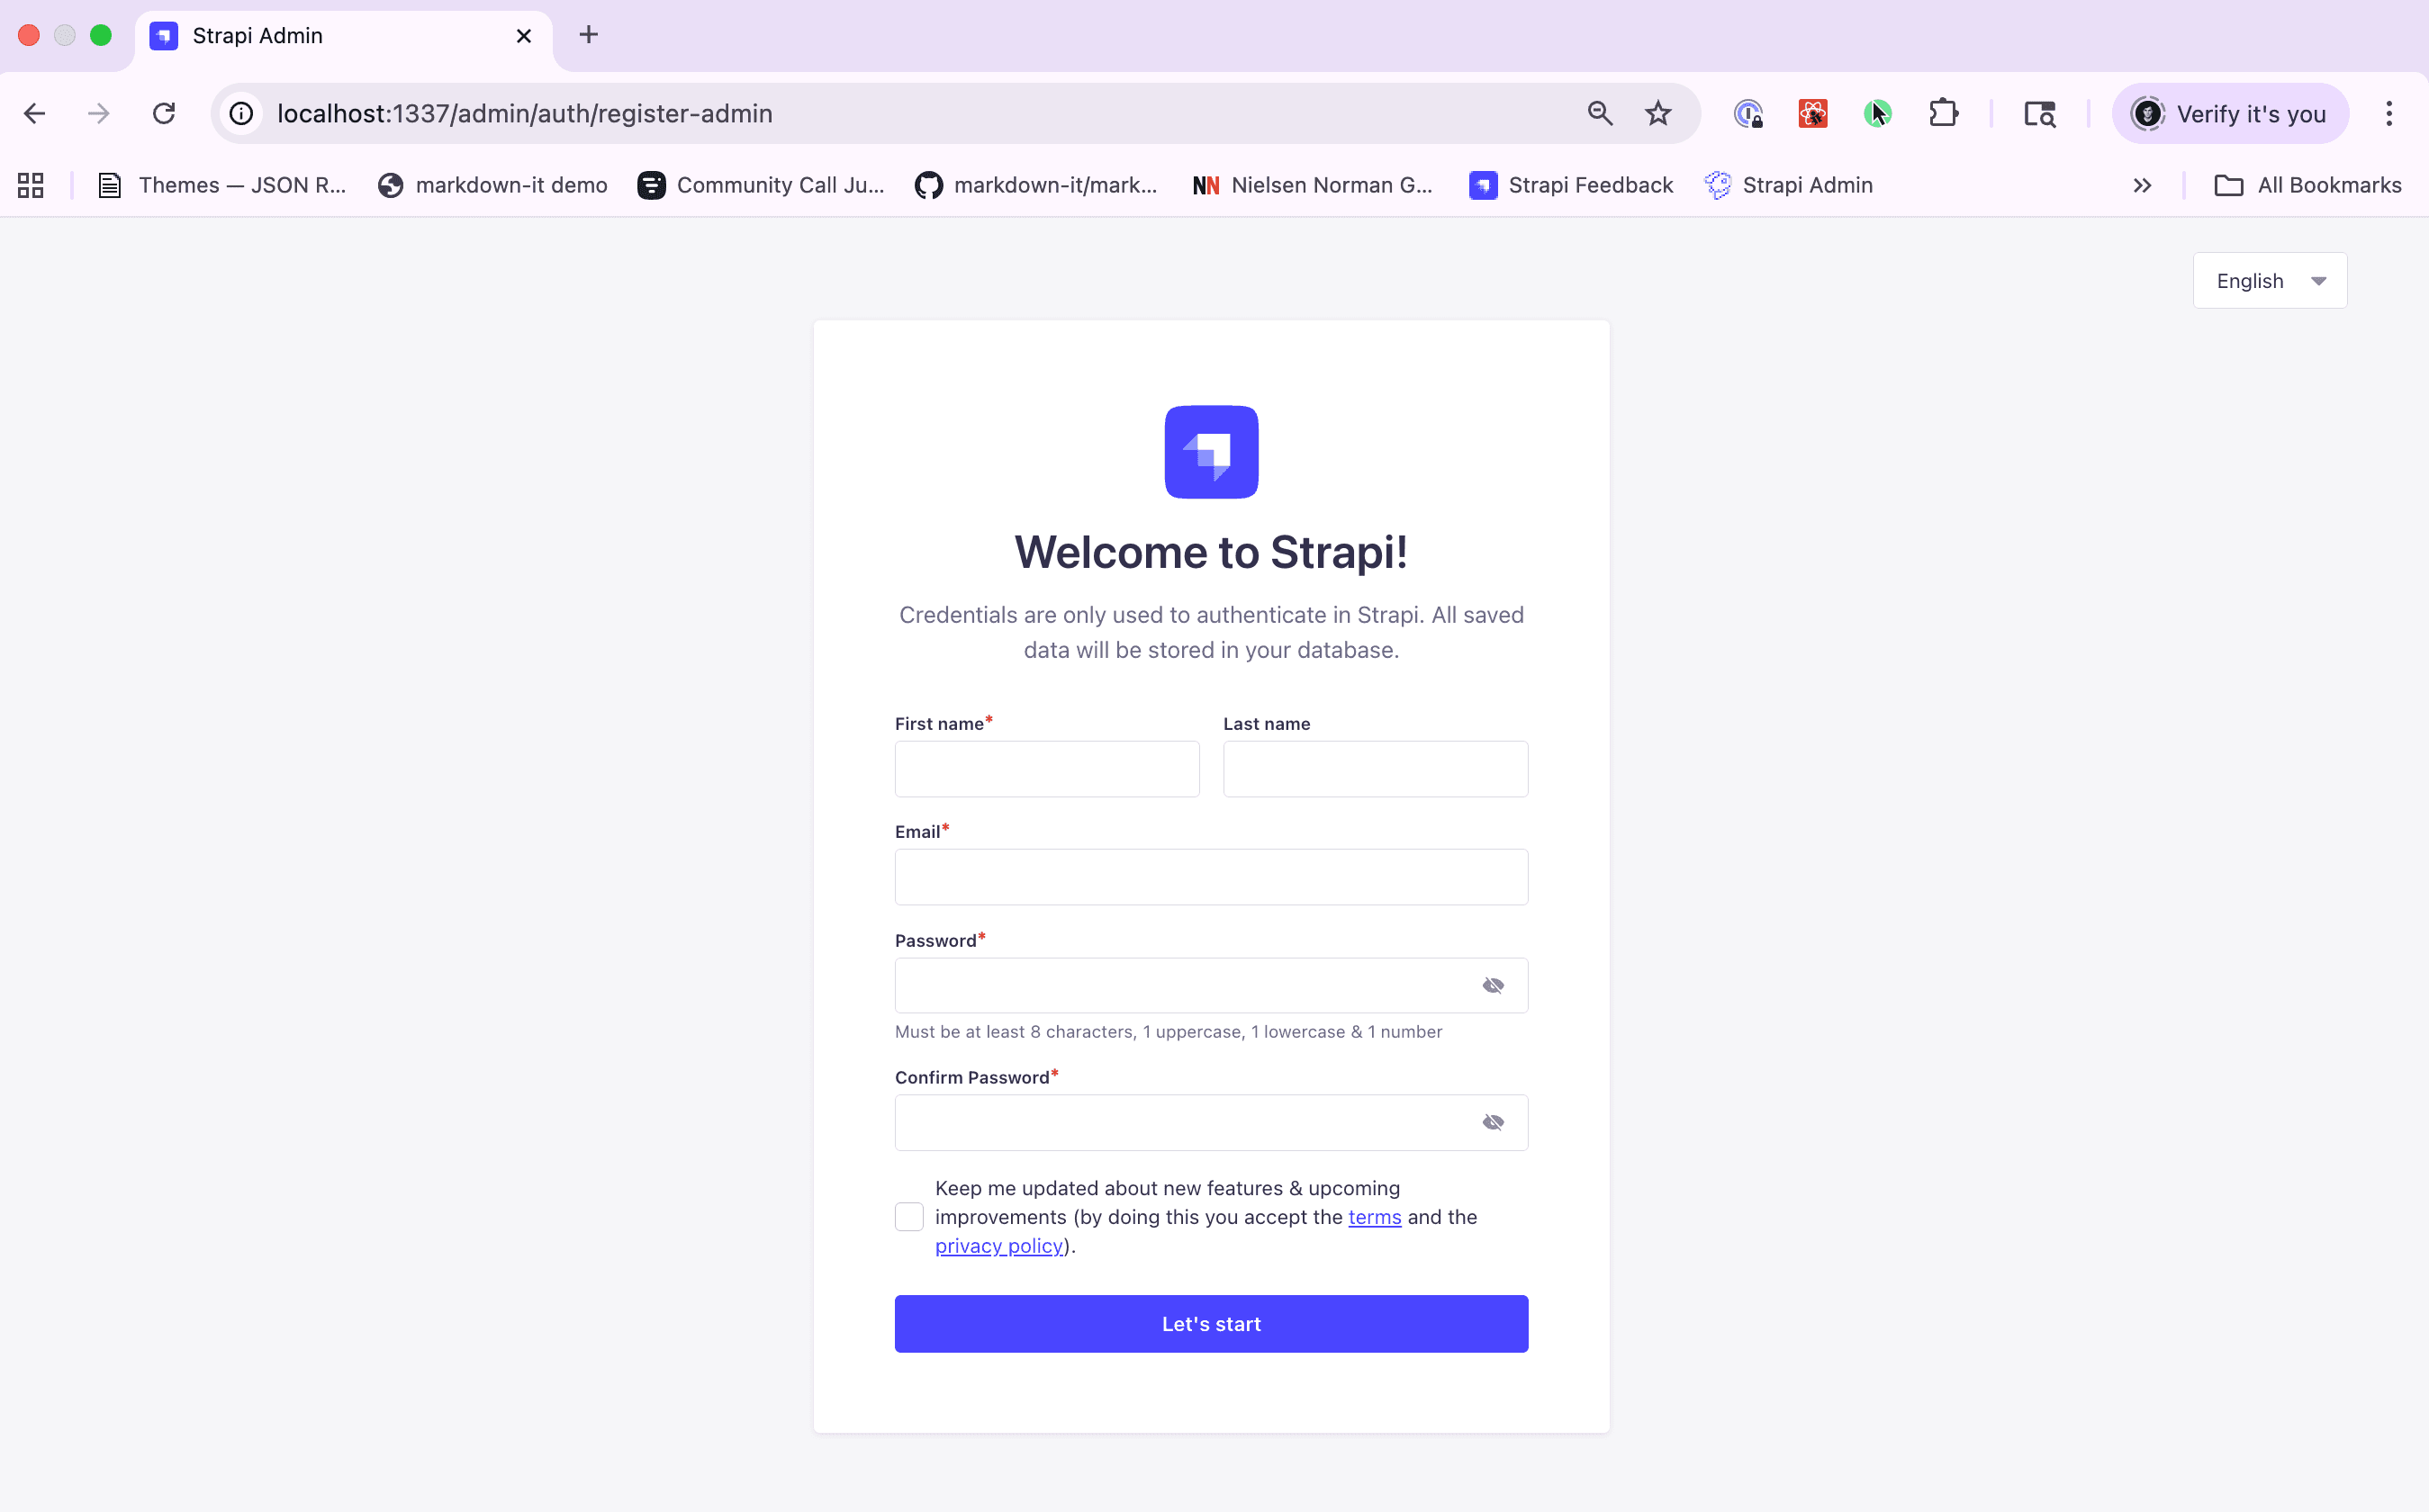
After creating your user, you'll see the Strapi dashboard:

Great! Now let's look at what content types we have available.
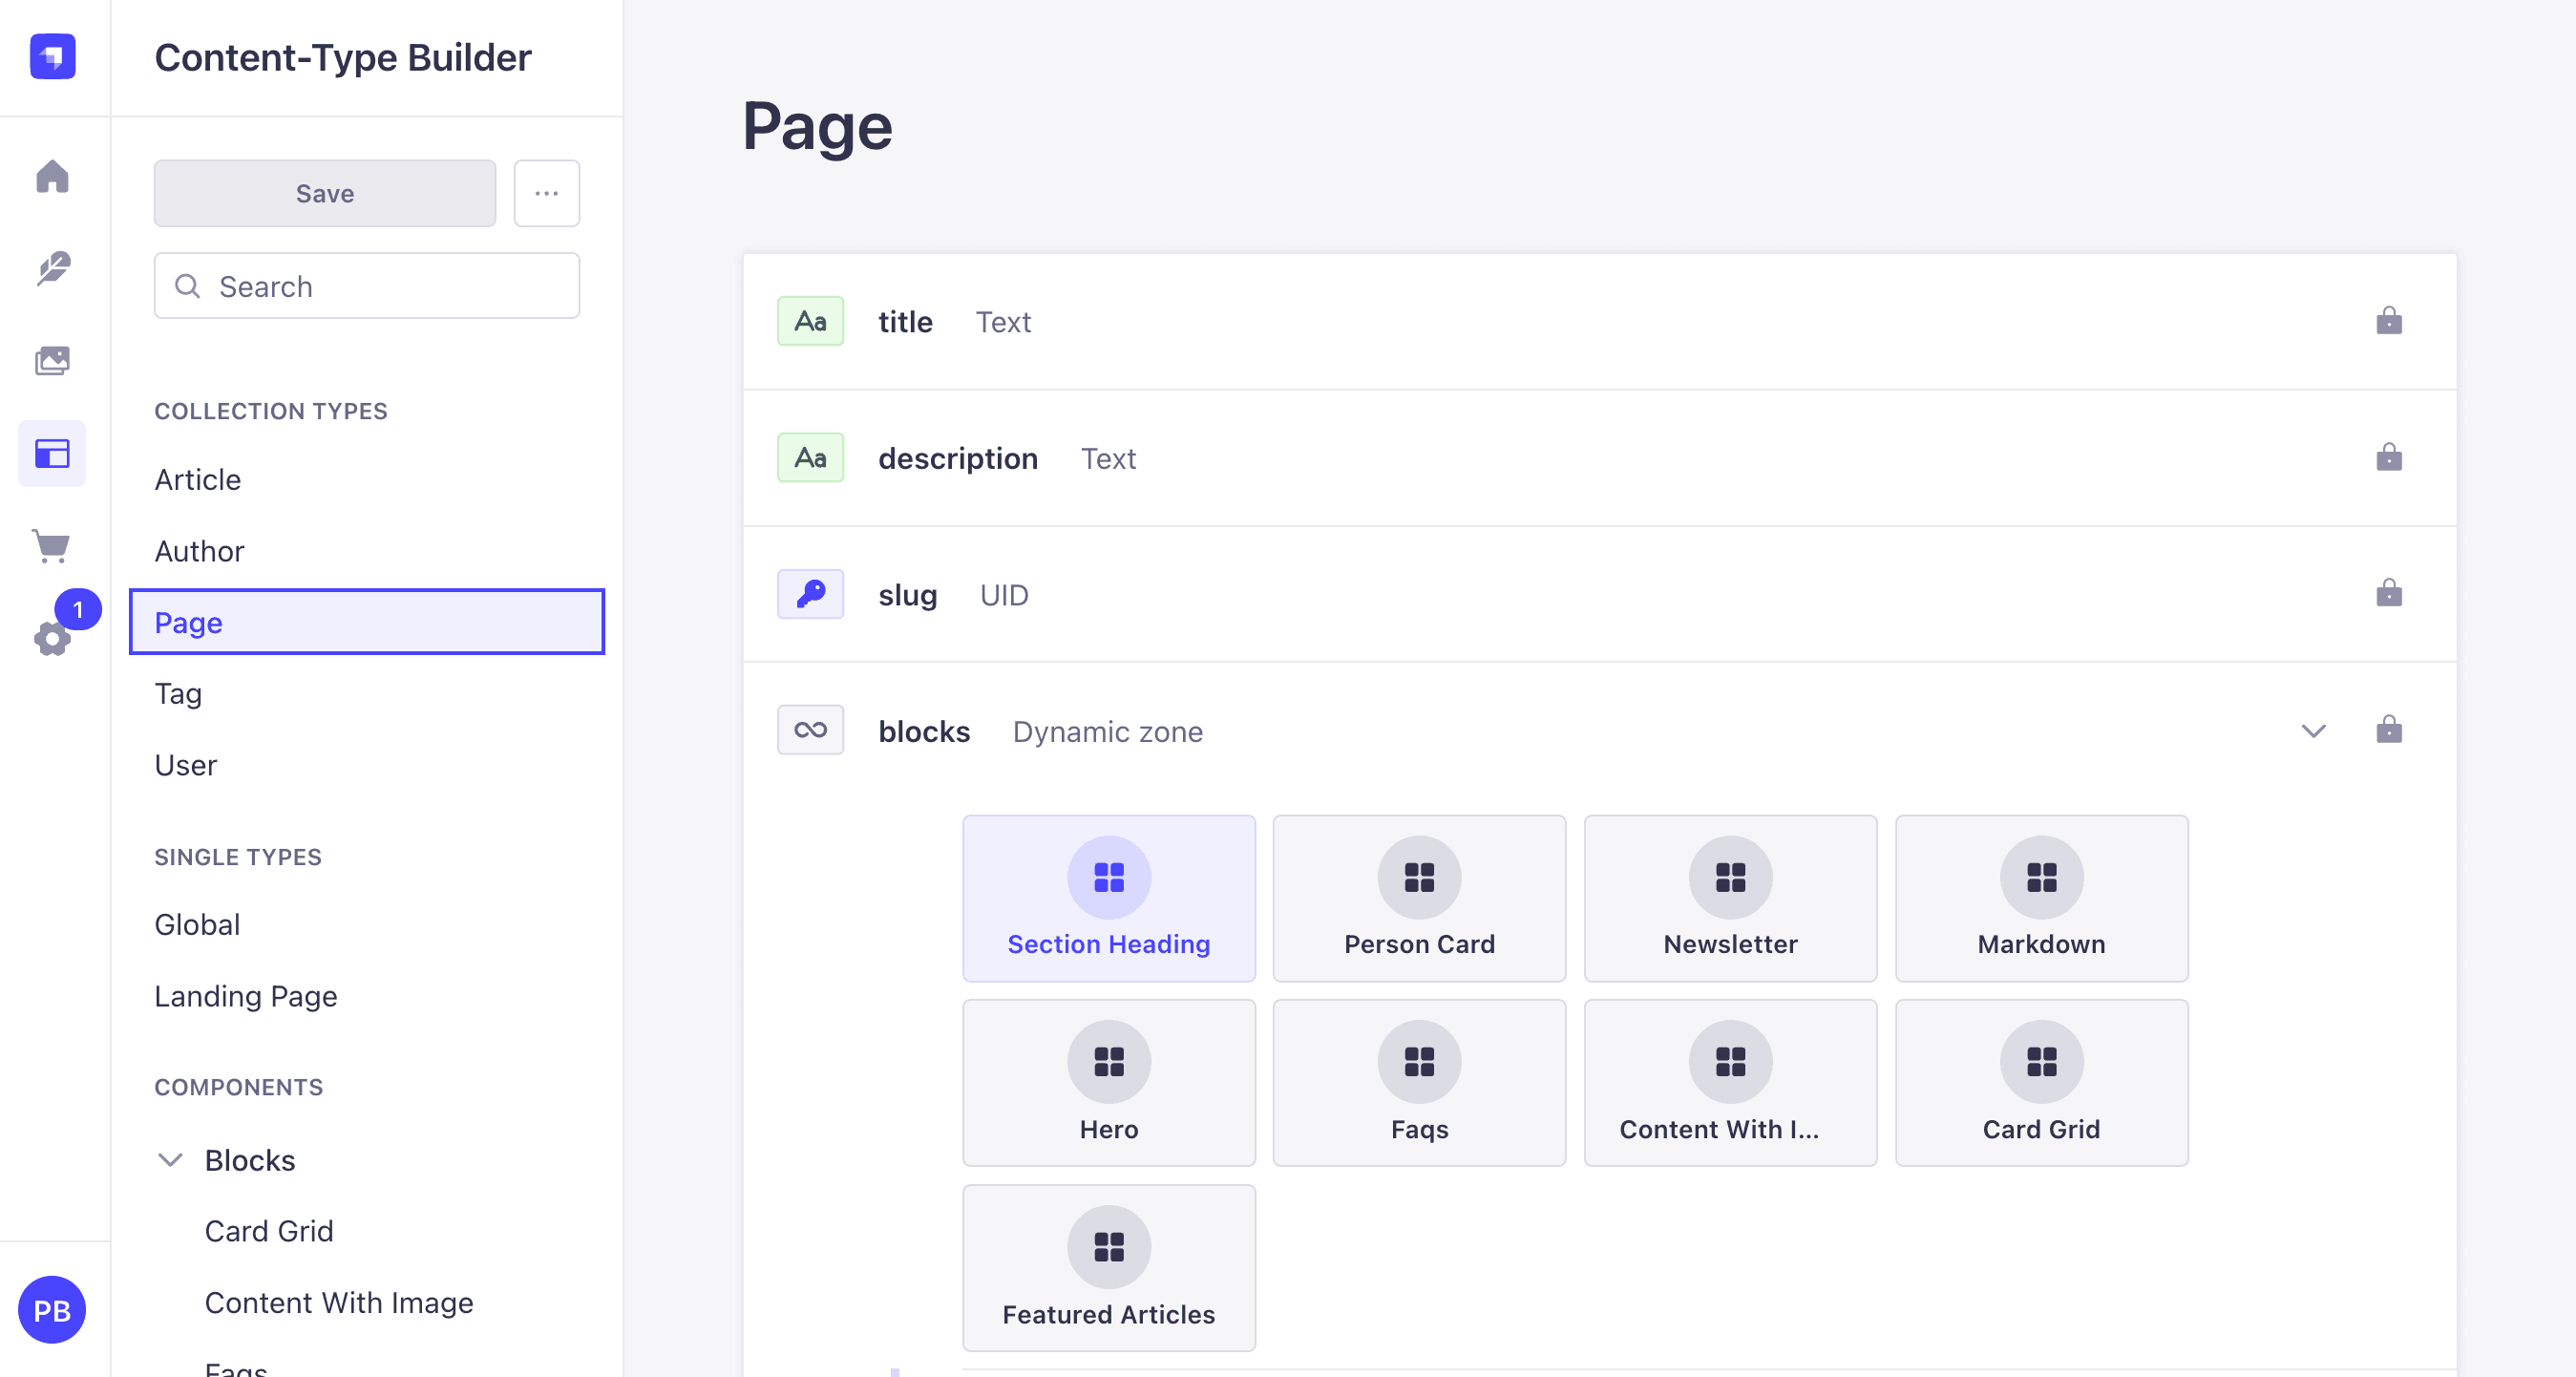
Here's how the articles content type works and how to get its data from the API:
The Strapi backend has several content types in /server/src/api. For this tutorial, we'll build three main pages:
- Landing Page - A flexible homepage built with customizable content blocks
- Articles Listing Page - Shows all your published articles
- Article Detail Page - Displays a single article with all its content
Here are the main content types:
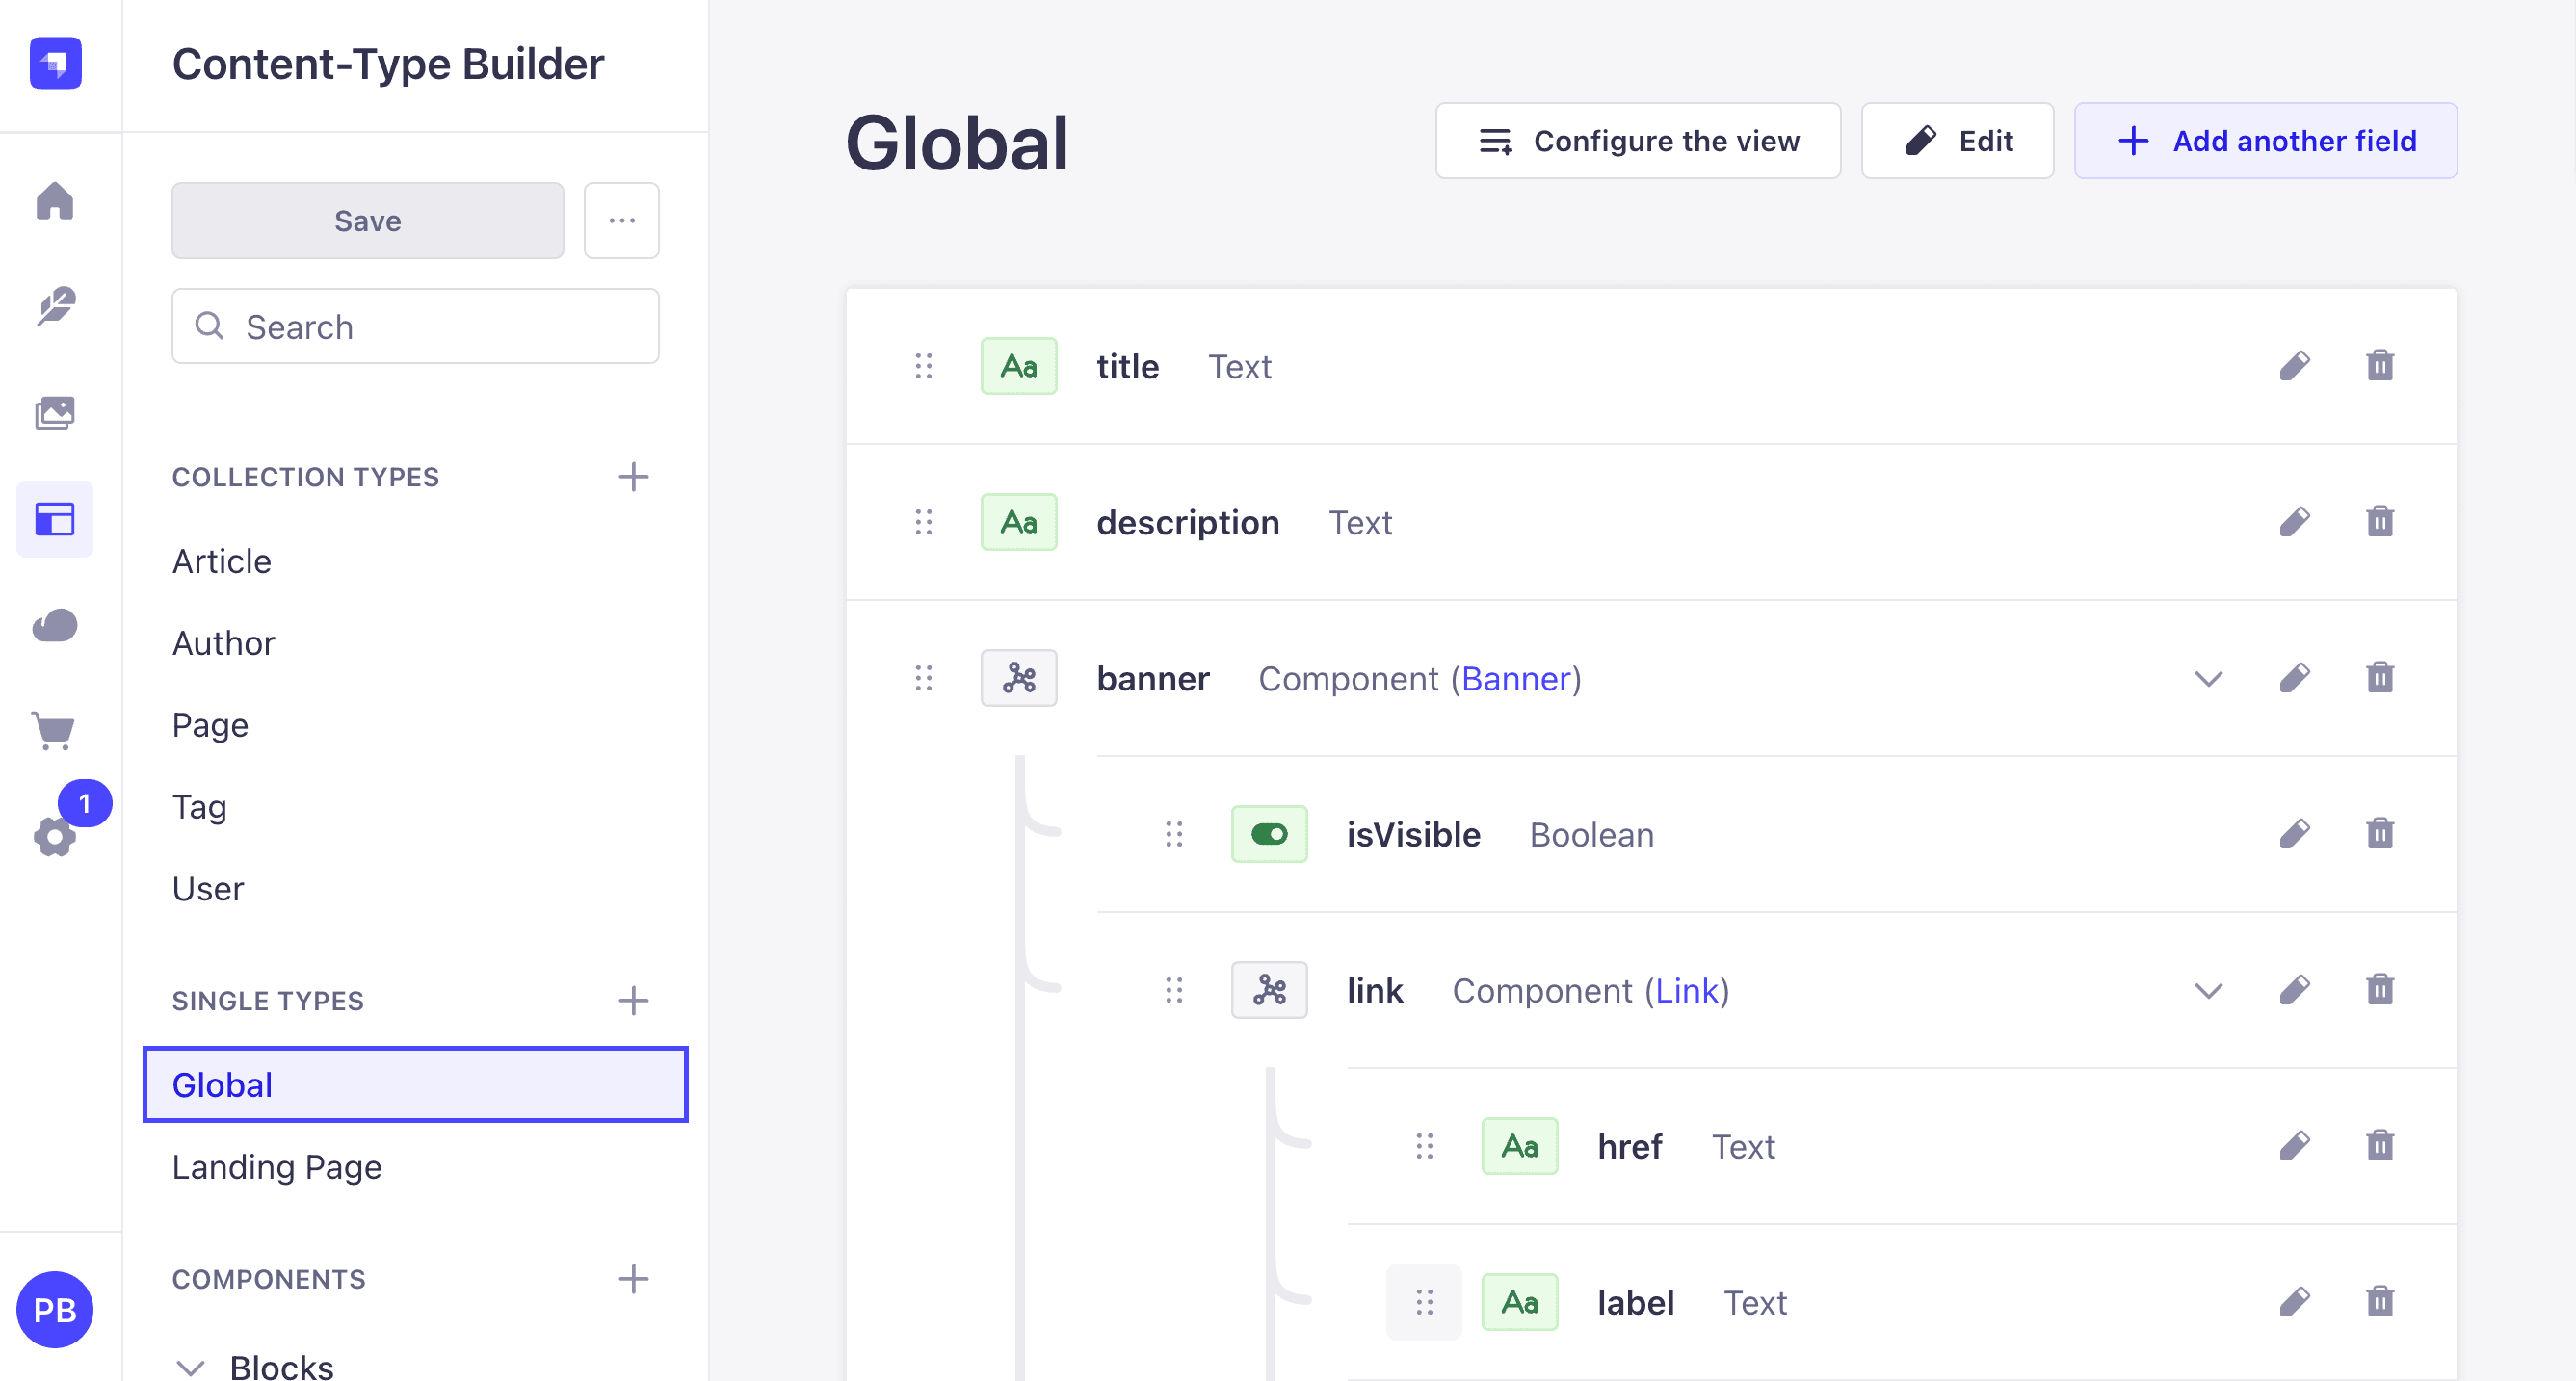
Global Content Type (api::global.global):
- title (Text)
- description (Text)
- banner (Component - layout.banner)
- header (Component - layout.header)
- footer (Component - layout.footer)
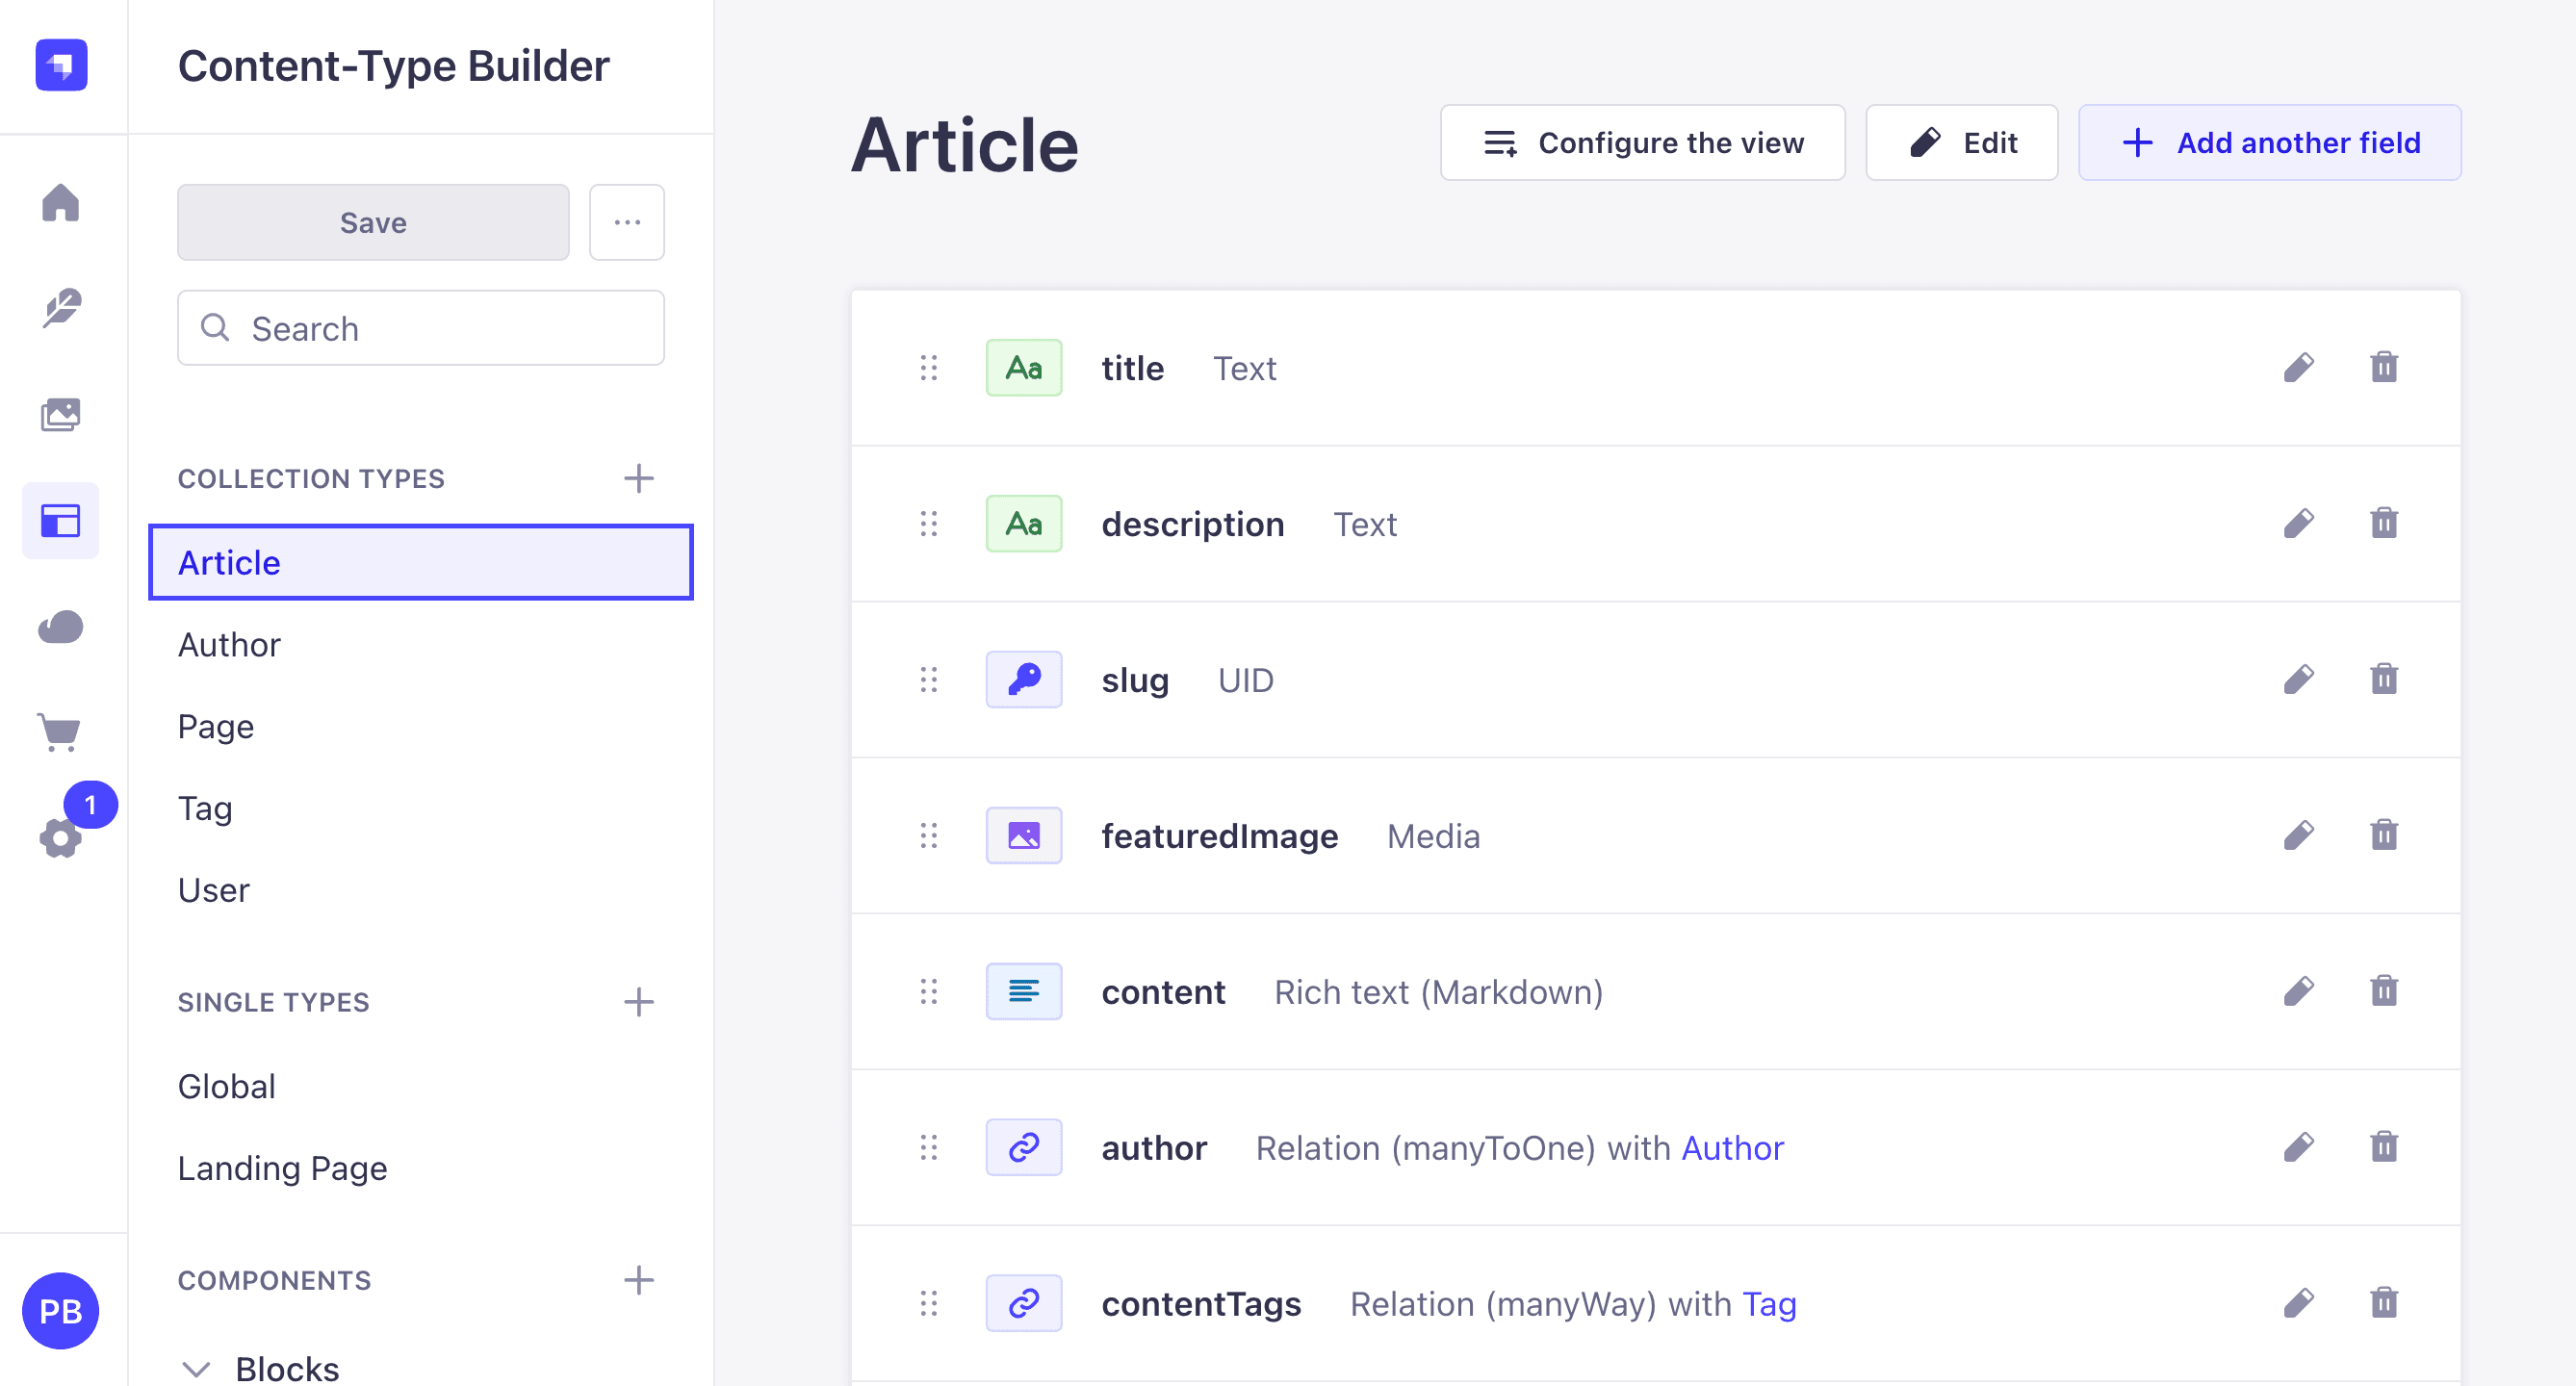
Article Content Type (api::article.article):
- title (Text)
- description (Text)
- slug (UID based on title)
- content (Rich Text)
- featuredImage (Media - Single)
- author (Relation to Author - manyToOne)
- contentTags (Relation to Tag - oneToMany)
- blocks (Dynamic Zone - for flexible content sections)
- relatedArticles (Relation to Article - oneToMany)
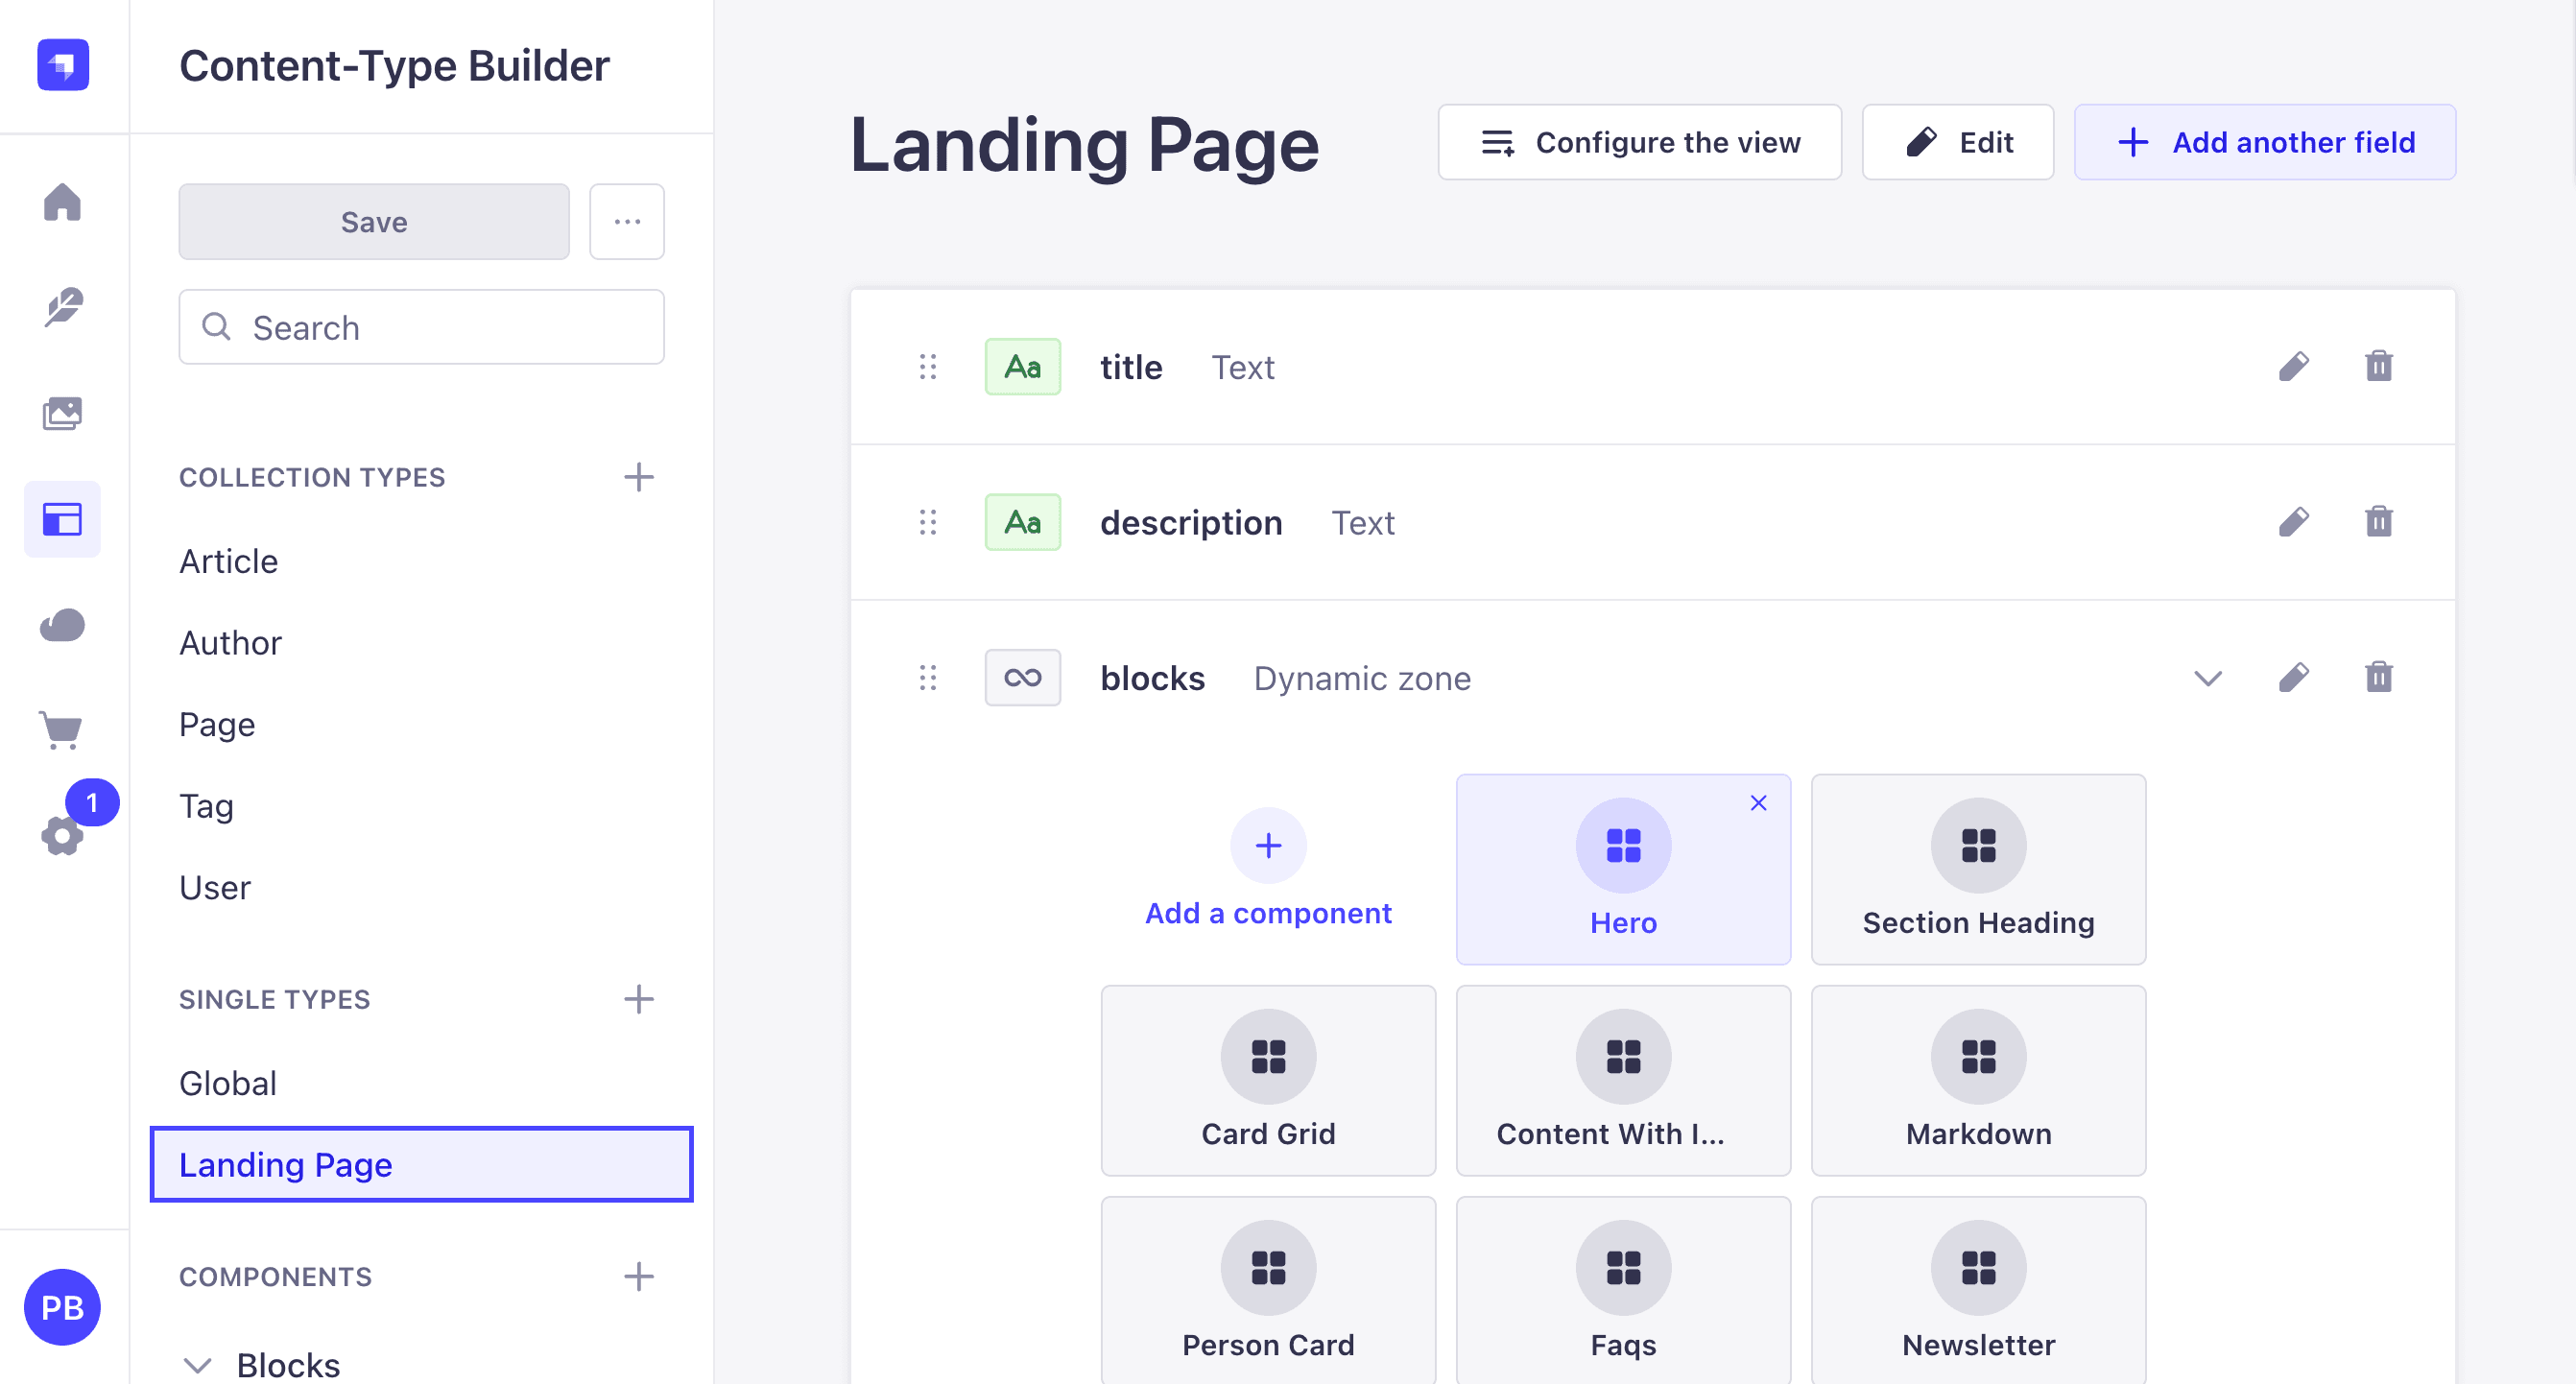
Landing Page Content Type (api::landing-page.landing-page):
- title (Text)
- description (Text)
- blocks (Dynamic Zone with components):
- Hero
- Section Heading
- Card Grid
- Content with Image
- Markdown
- Person Card
- FAQs
- Newsletter
- Featured Articles
Author Content Type (api::author.author):
- name (Text)
- bio (Text)
- avatar (Media - Single)
- articles (Relation to Article - oneToMany)
Tag Content Type (api::tag.tag):
- name (Text)
- slug (UID based on name)
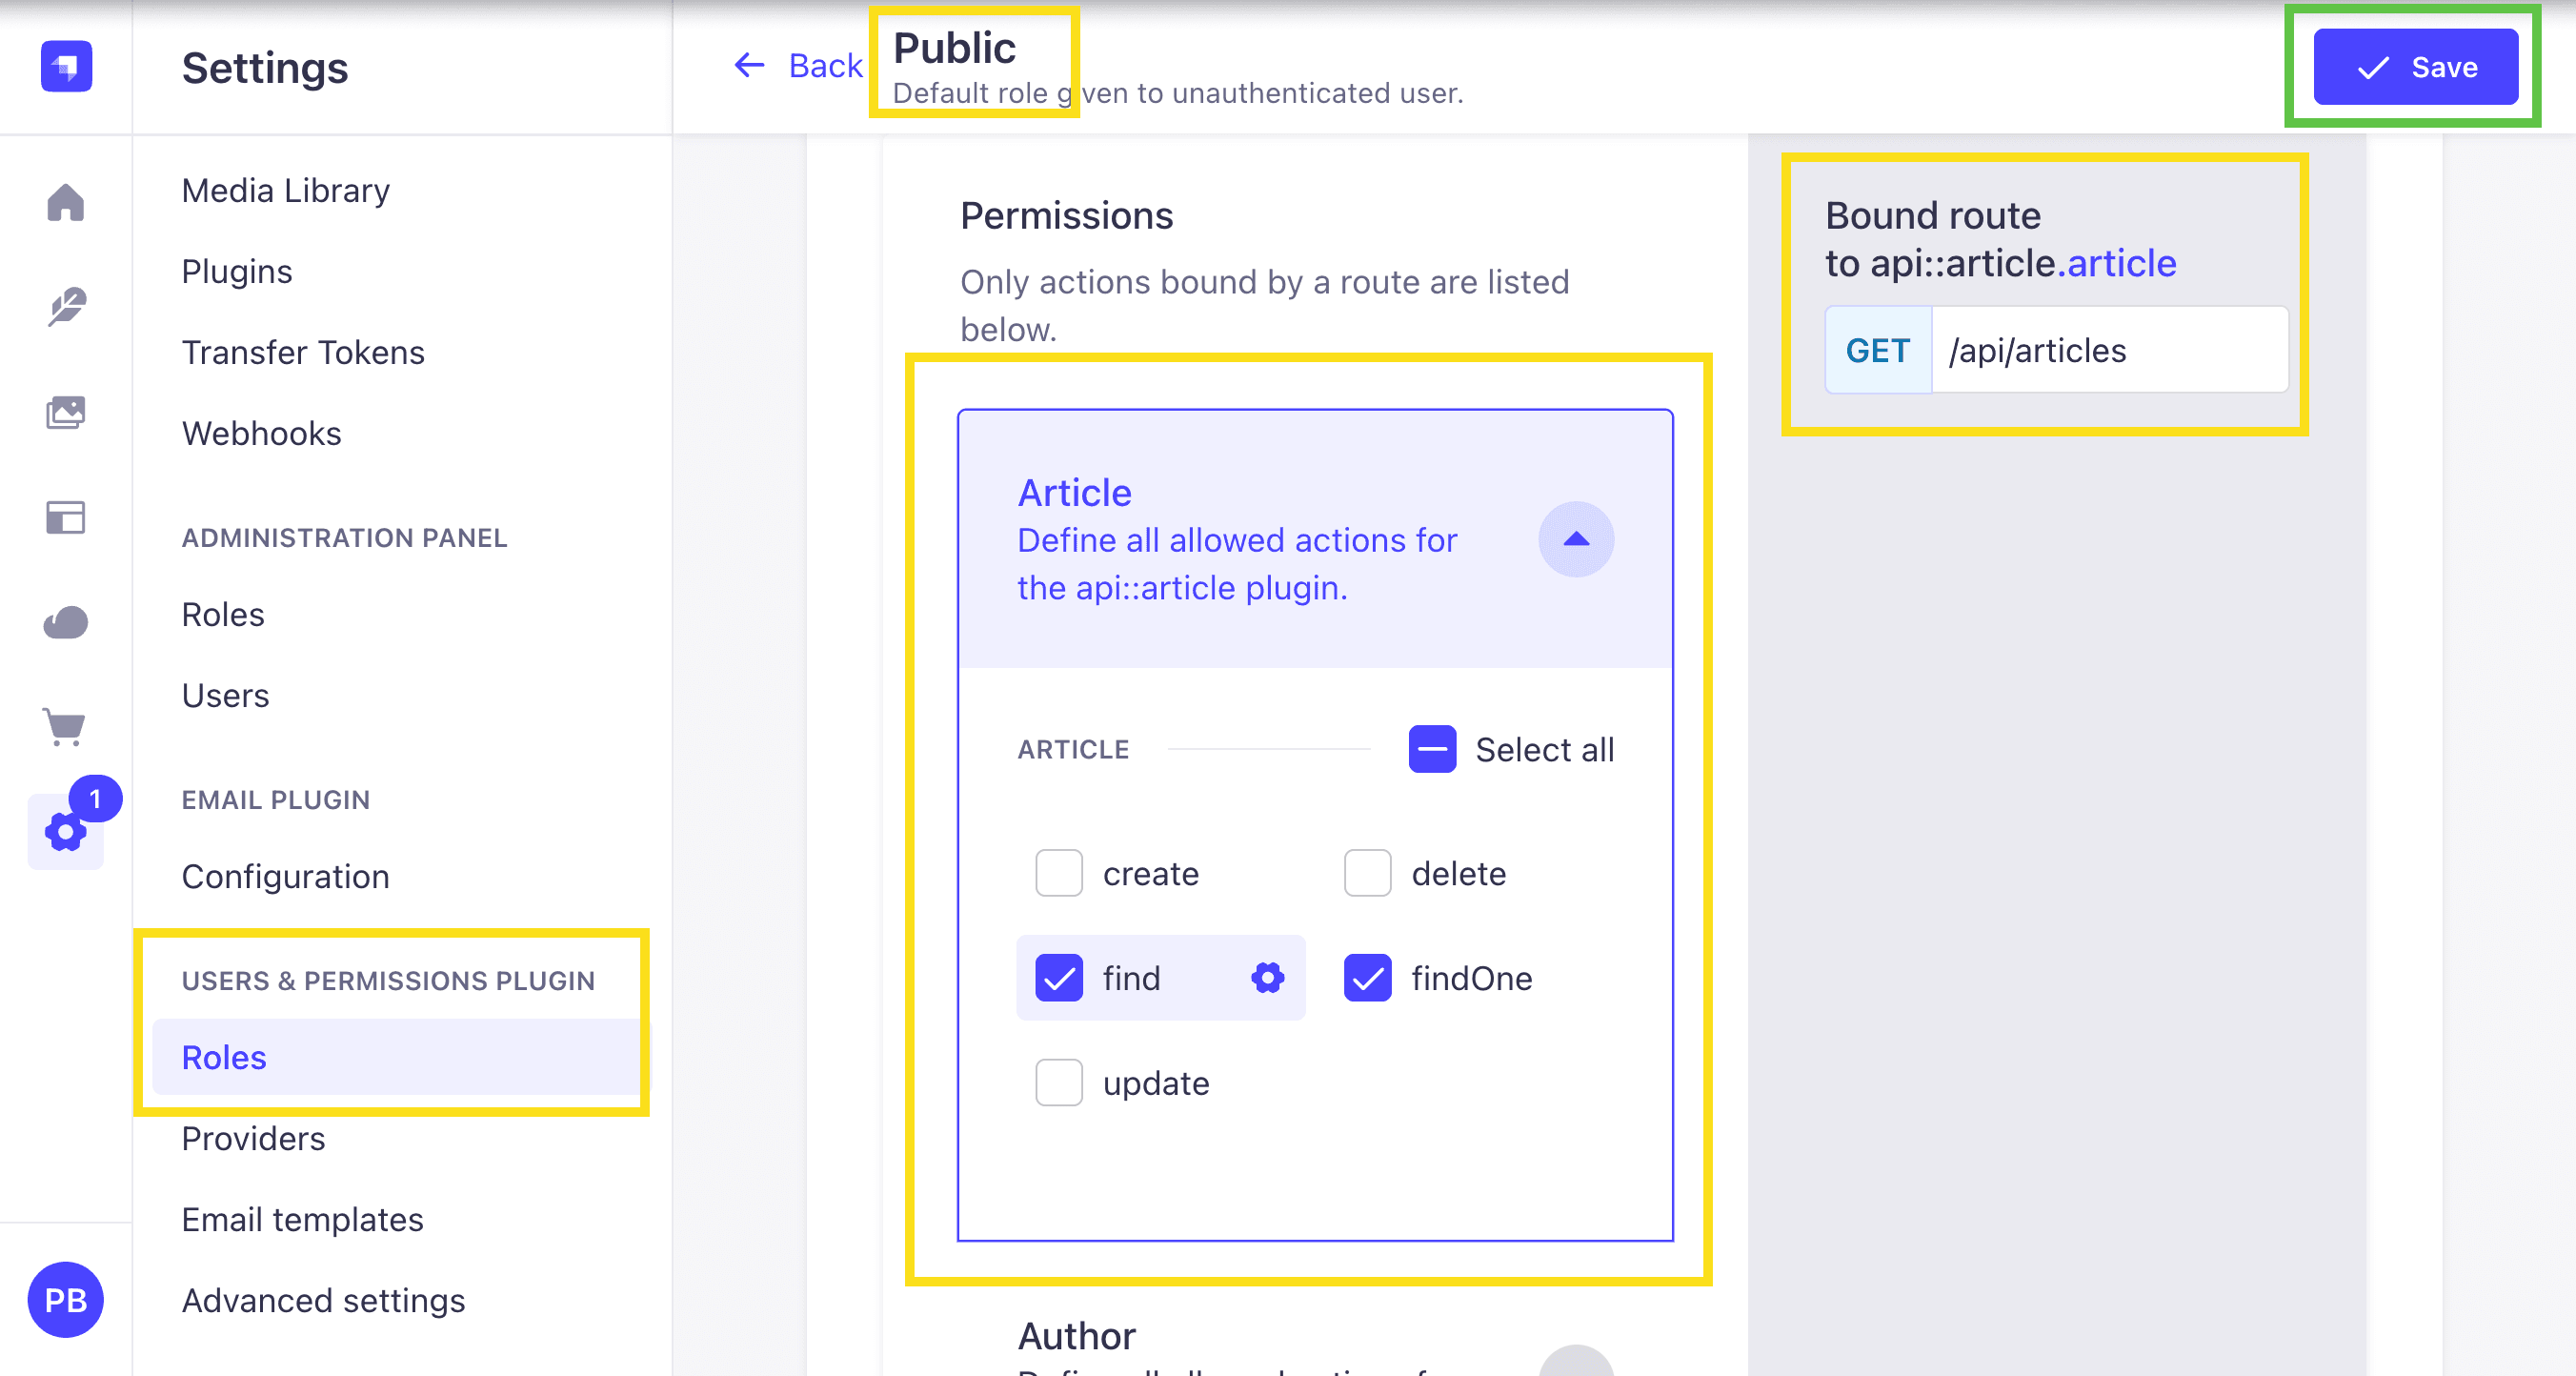
Enabling Public API Access
The seed data we imported already has public access configured, so anyone can read your content without authentication. If you're building your own Strapi project from scratch, you'll need to enable this yourself.
Here's how:
- Go to Settings → Users & Permissions Plugin → Roles → Public
- Open each content type (Article, Landing Page, Author, Tag)
- Check the boxes next to
findandfindOne - Click Save
The API Endpoints You'll Use
We'll work with four main endpoints:
-
Global Settings (Single Type): GET
http://localhost:1337/api/globalGets your site-wide settings like header navigation, footer, and banner. You'll use this data on every page.
-
Landing Page (Single Type): GET
http://localhost:1337/api/landing-pageGets your homepage content with all its customizable blocks.
-
Articles List (Collection Type): GET
http://localhost:1337/api/articlesGets all your published articles with their authors, tags, and images.
-
Single Article (Collection Type): GET
http://localhost:1337/api/articles?filters[slug][$eq]=why-java-script-is-still-the-most-popular-programming-languageGets one specific article by its slug (the URL-friendly version of the title).
-
Page By Slug (Collection Type): GET
http://localhost:1337/api/pages?filters[slug][$eq]=aboutGets one specific page by its slug. Pages use the same block system as the landing page, allowing you to create dynamic content pages like About, Contact, etc.
Things to note:
- The
filters[slug][$eq]part is how Strapi filters data by specific field values - All URLs use port
1337(Strapi's default) - You can test these URLs in your browser or with tools like Postman before building your frontend
Step 2: Generate Your OpenAPI Specification
Now that your content types are set up, let's create the OpenAPI specification file:
# In your Strapi project directory
yarn strapi openapi generate
This creates a specification.json file with all your API details. Want to browse it visually? Install the OpenAPI VS Code extension.
Step 3: Deploy Strapi (Optional but Recommended)
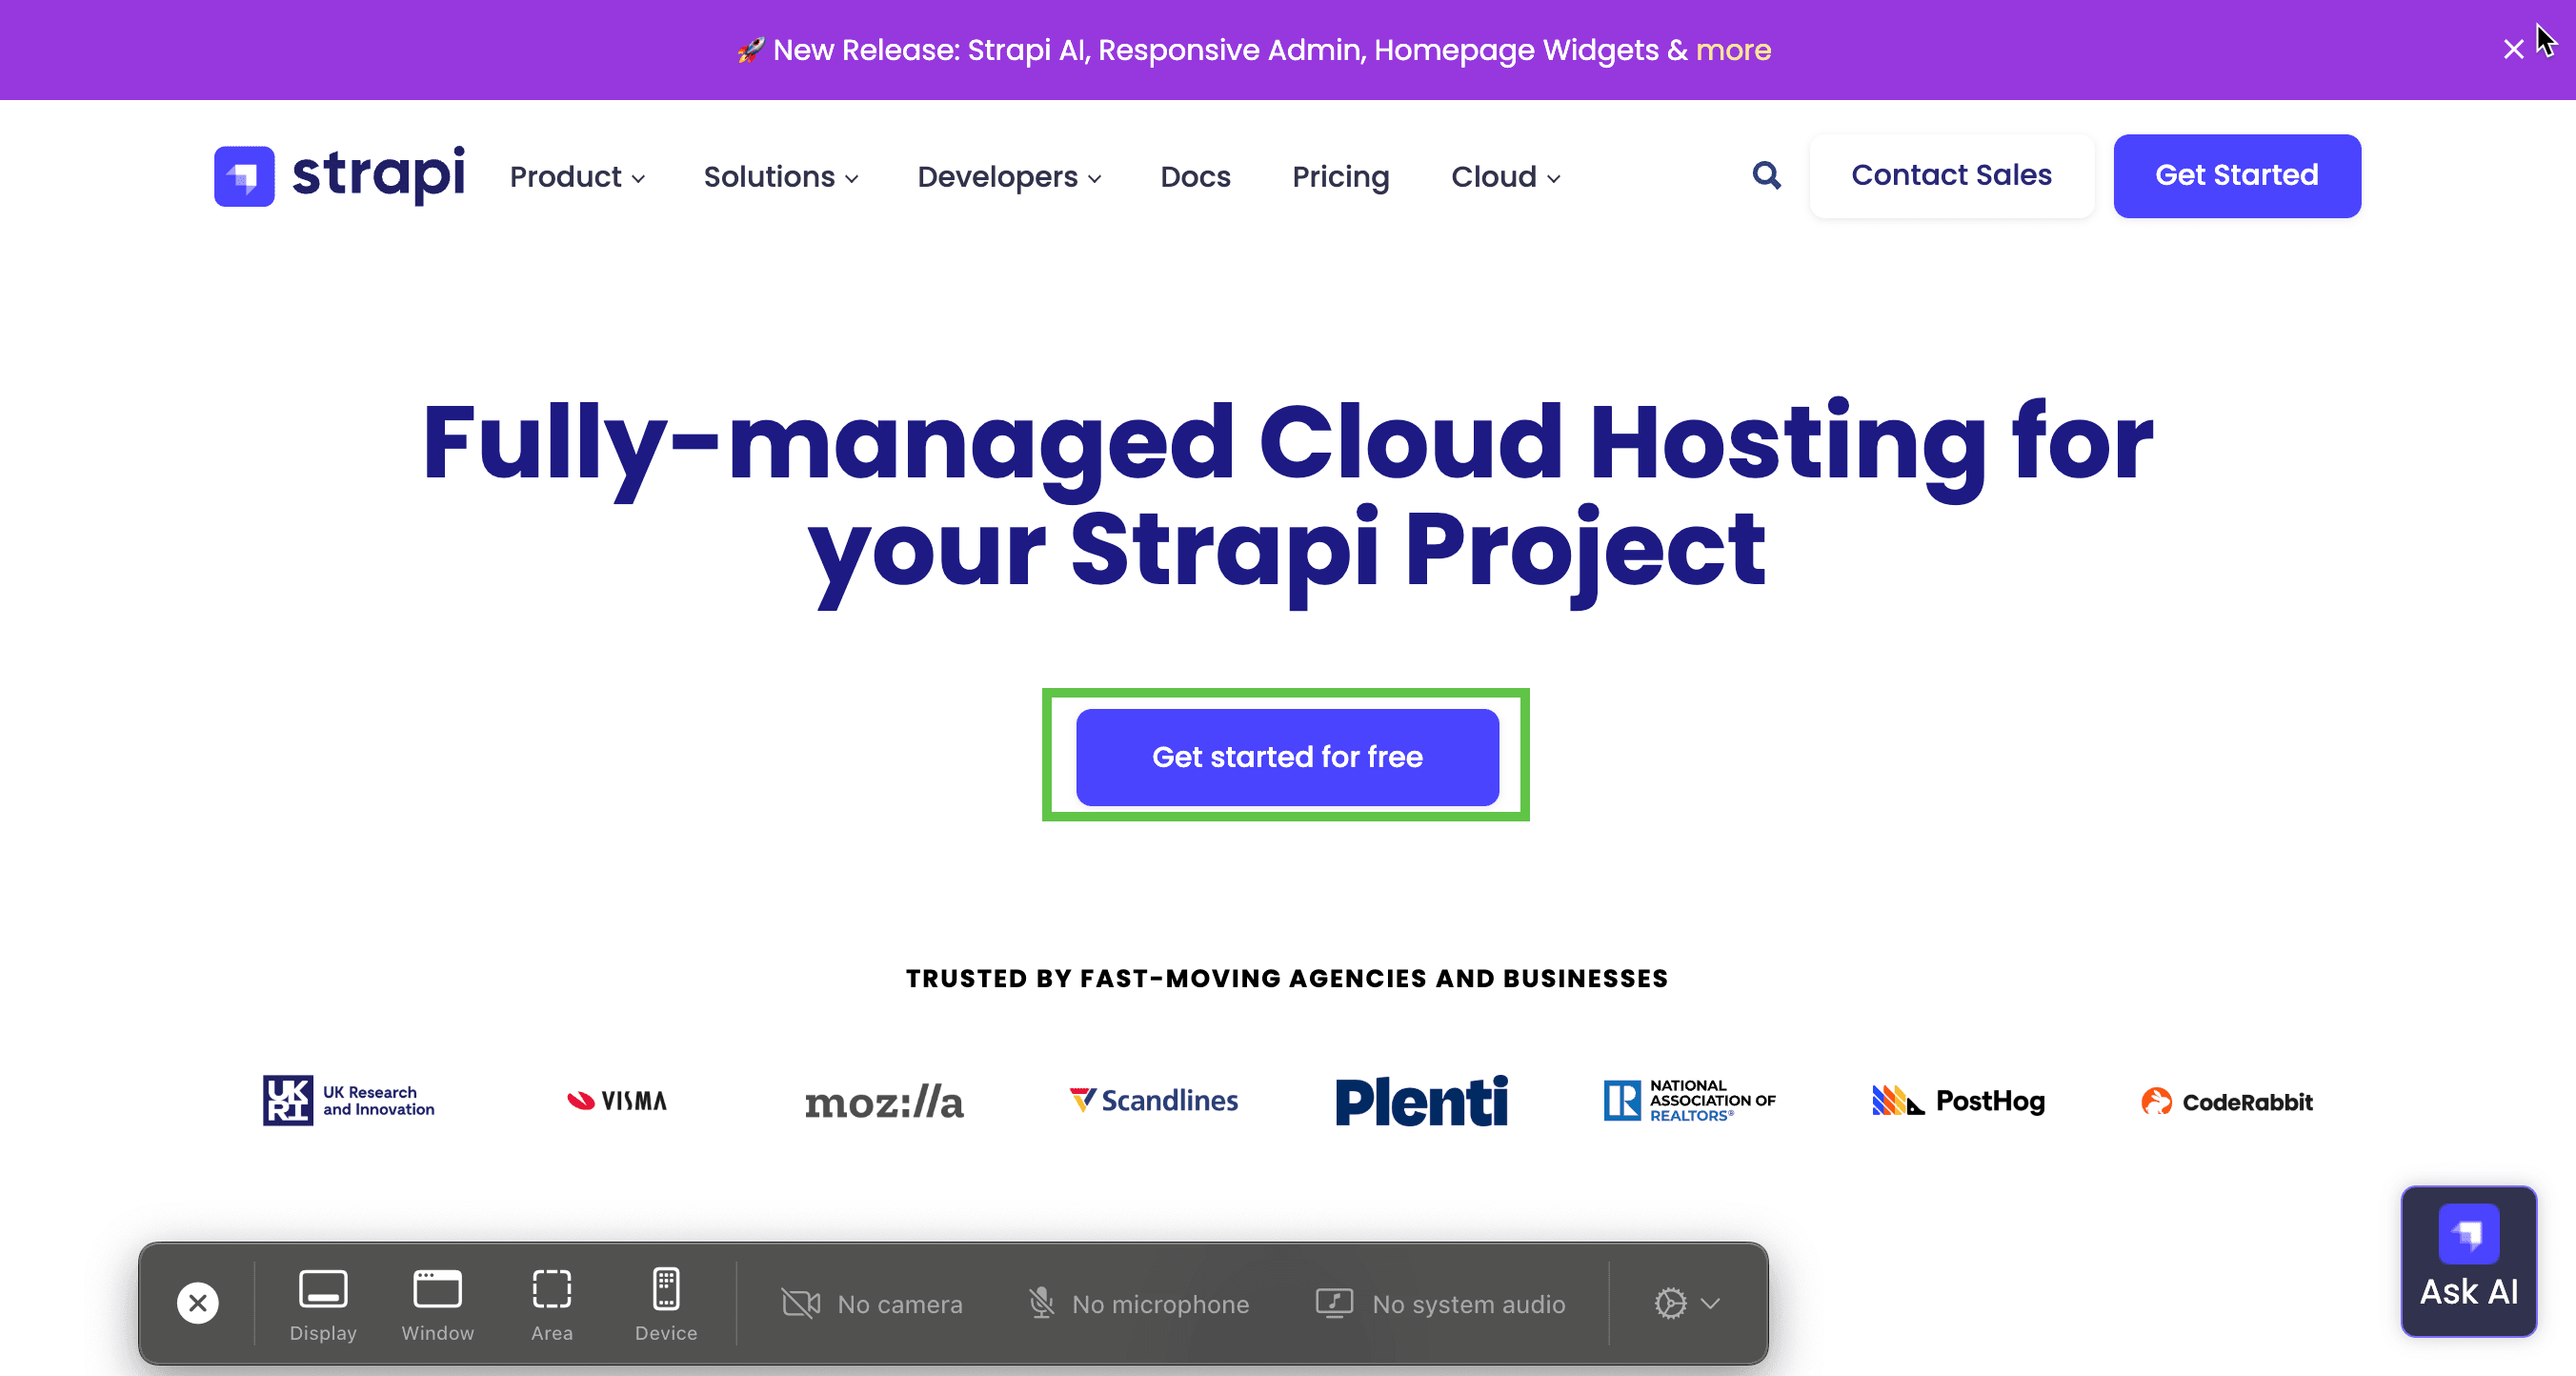
While you can keep Strapi running locally, deploying it makes working with Lovable much easier. We'll use Strapi Cloud, which has a free tier.
Want to keep Strapi running on your computer? You can use ngrok to create a temporary public URL:
# Install ngrok first from https://ngrok.com/download
# Then run this command to expose your local Strapi instance
ngrok http 1337
You'll get a public URL (like https://abc123.ngrok.io) that Lovable can use to reach your local Strapi.
But I'll show you how to deploy to Strapi Cloud for free. You can choose which path to take.
Deploy to Strapi Cloud (Recommended)
For a more permanent solution, deploy to Strapi Cloud:
Navigate to Strapi Cloud and create an account if you don't already have one:
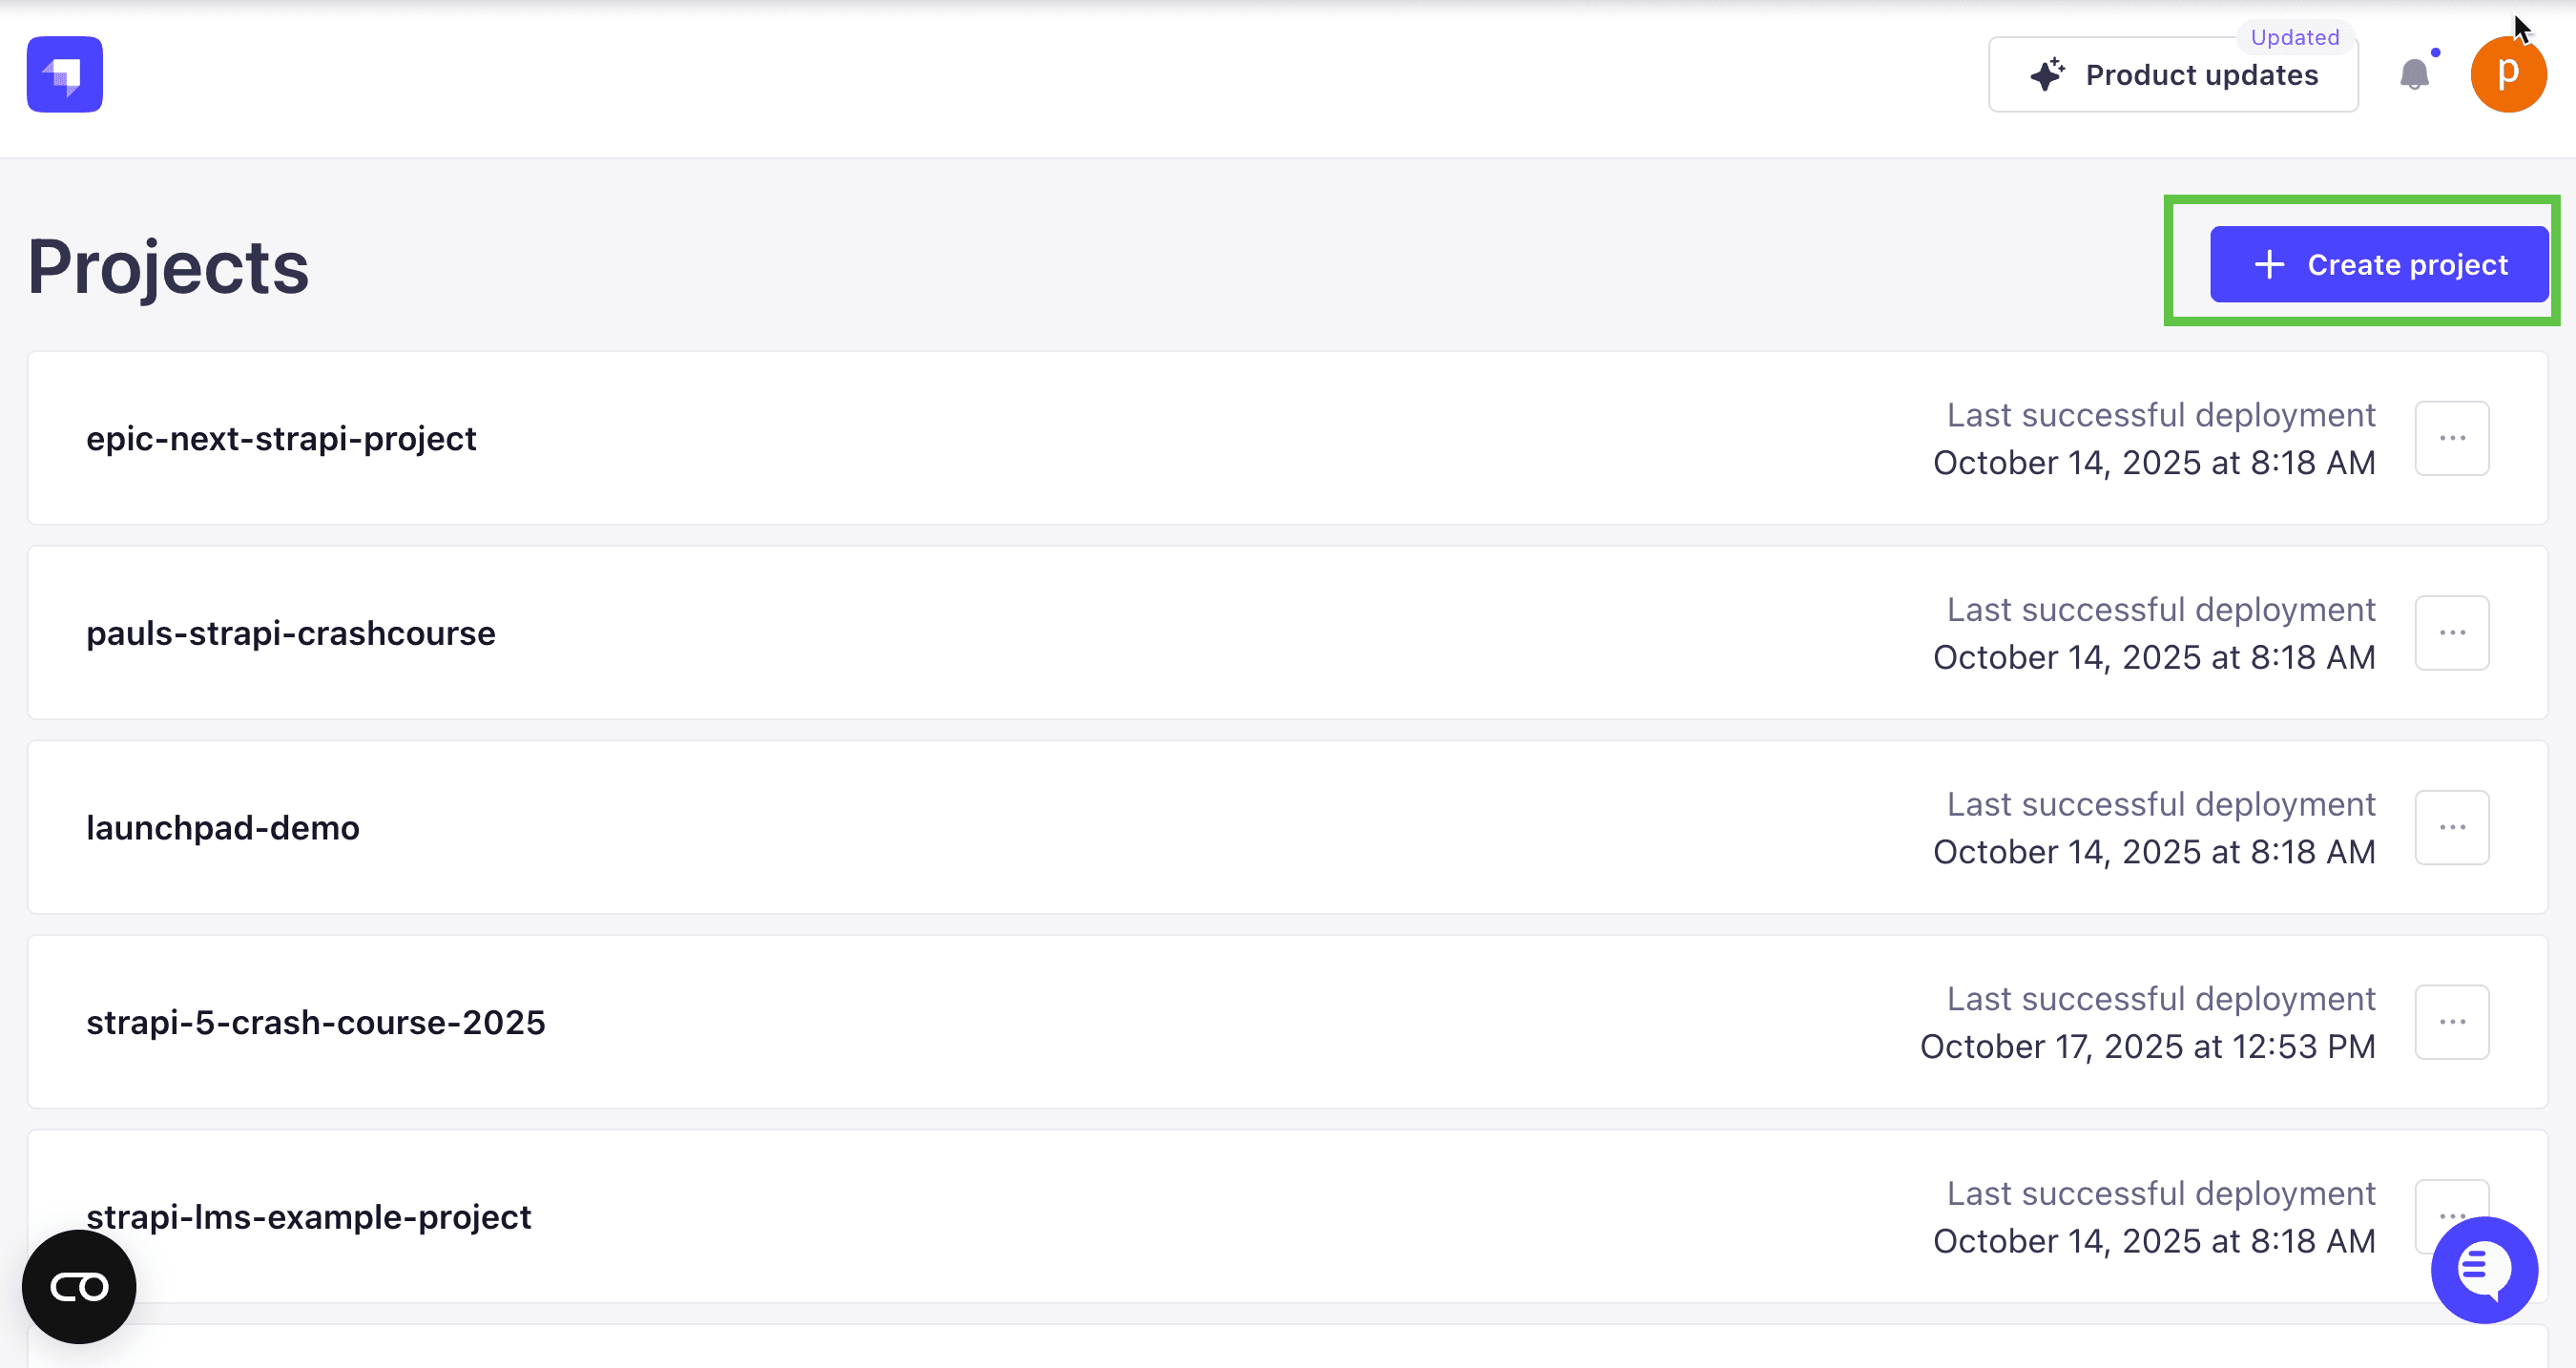
In your dashboard, click the create project button:
Choose the Free Plan:

Select your account and project:
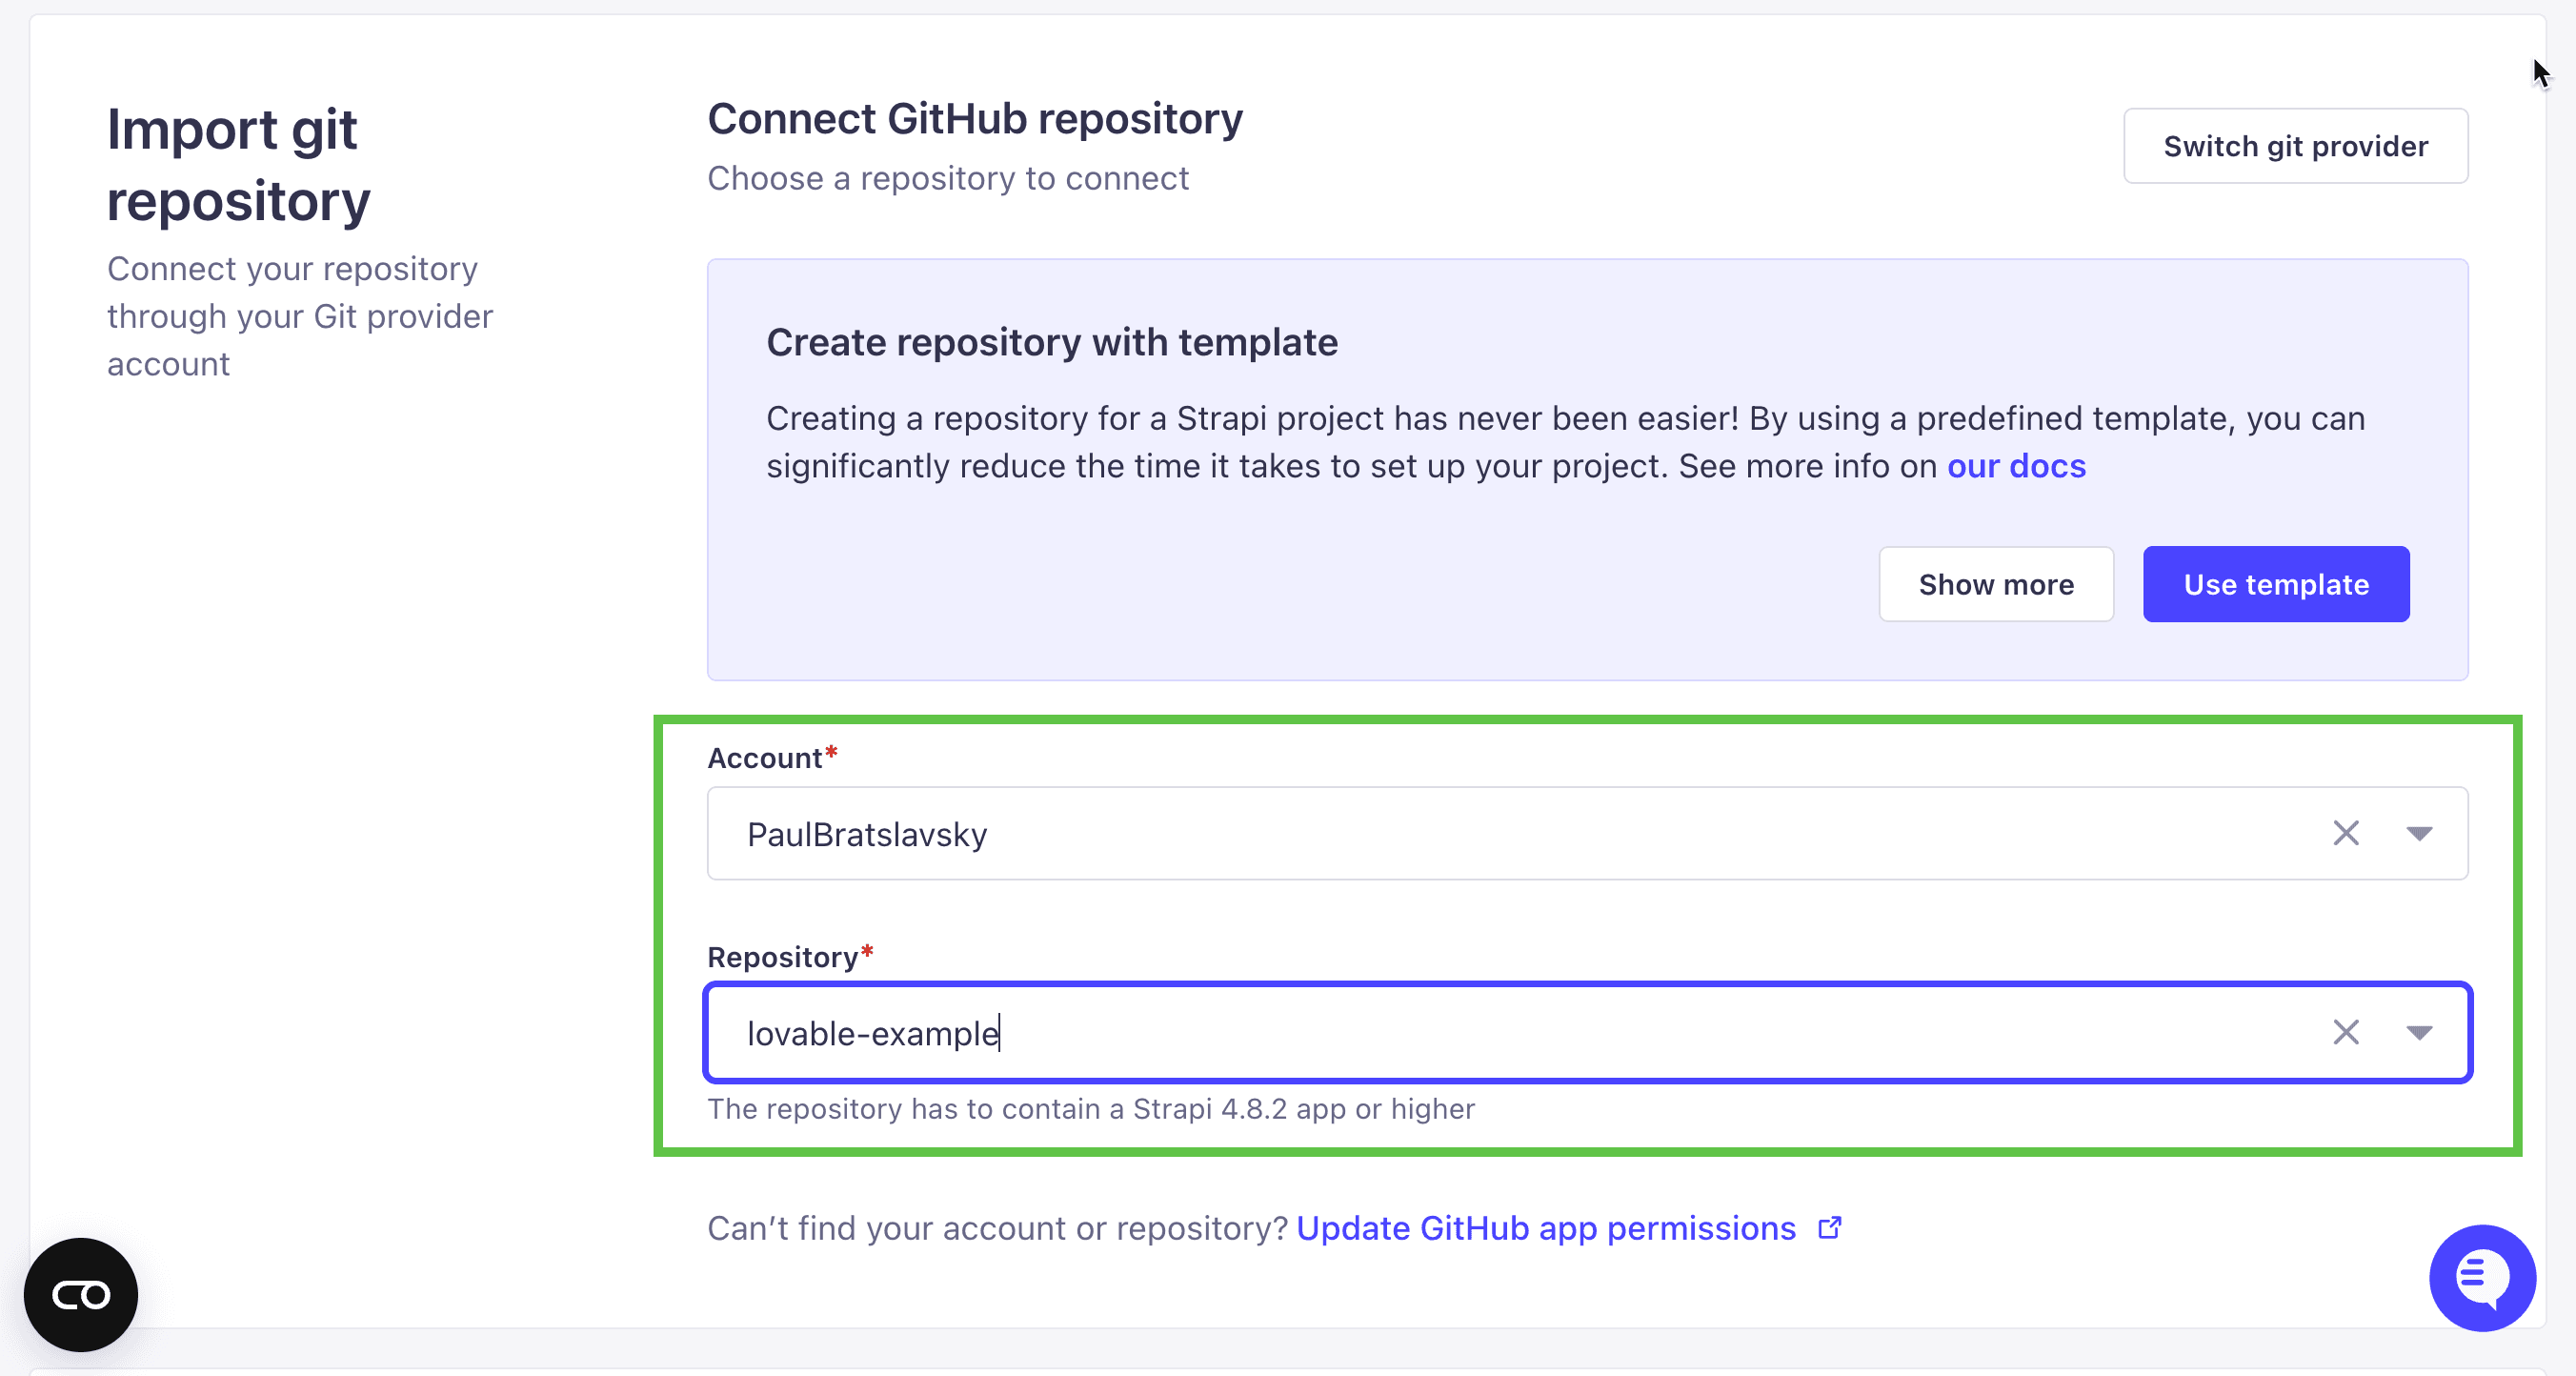
Name your Cloud project and select your region.
I'll call mine lovable-example and pick US East region:
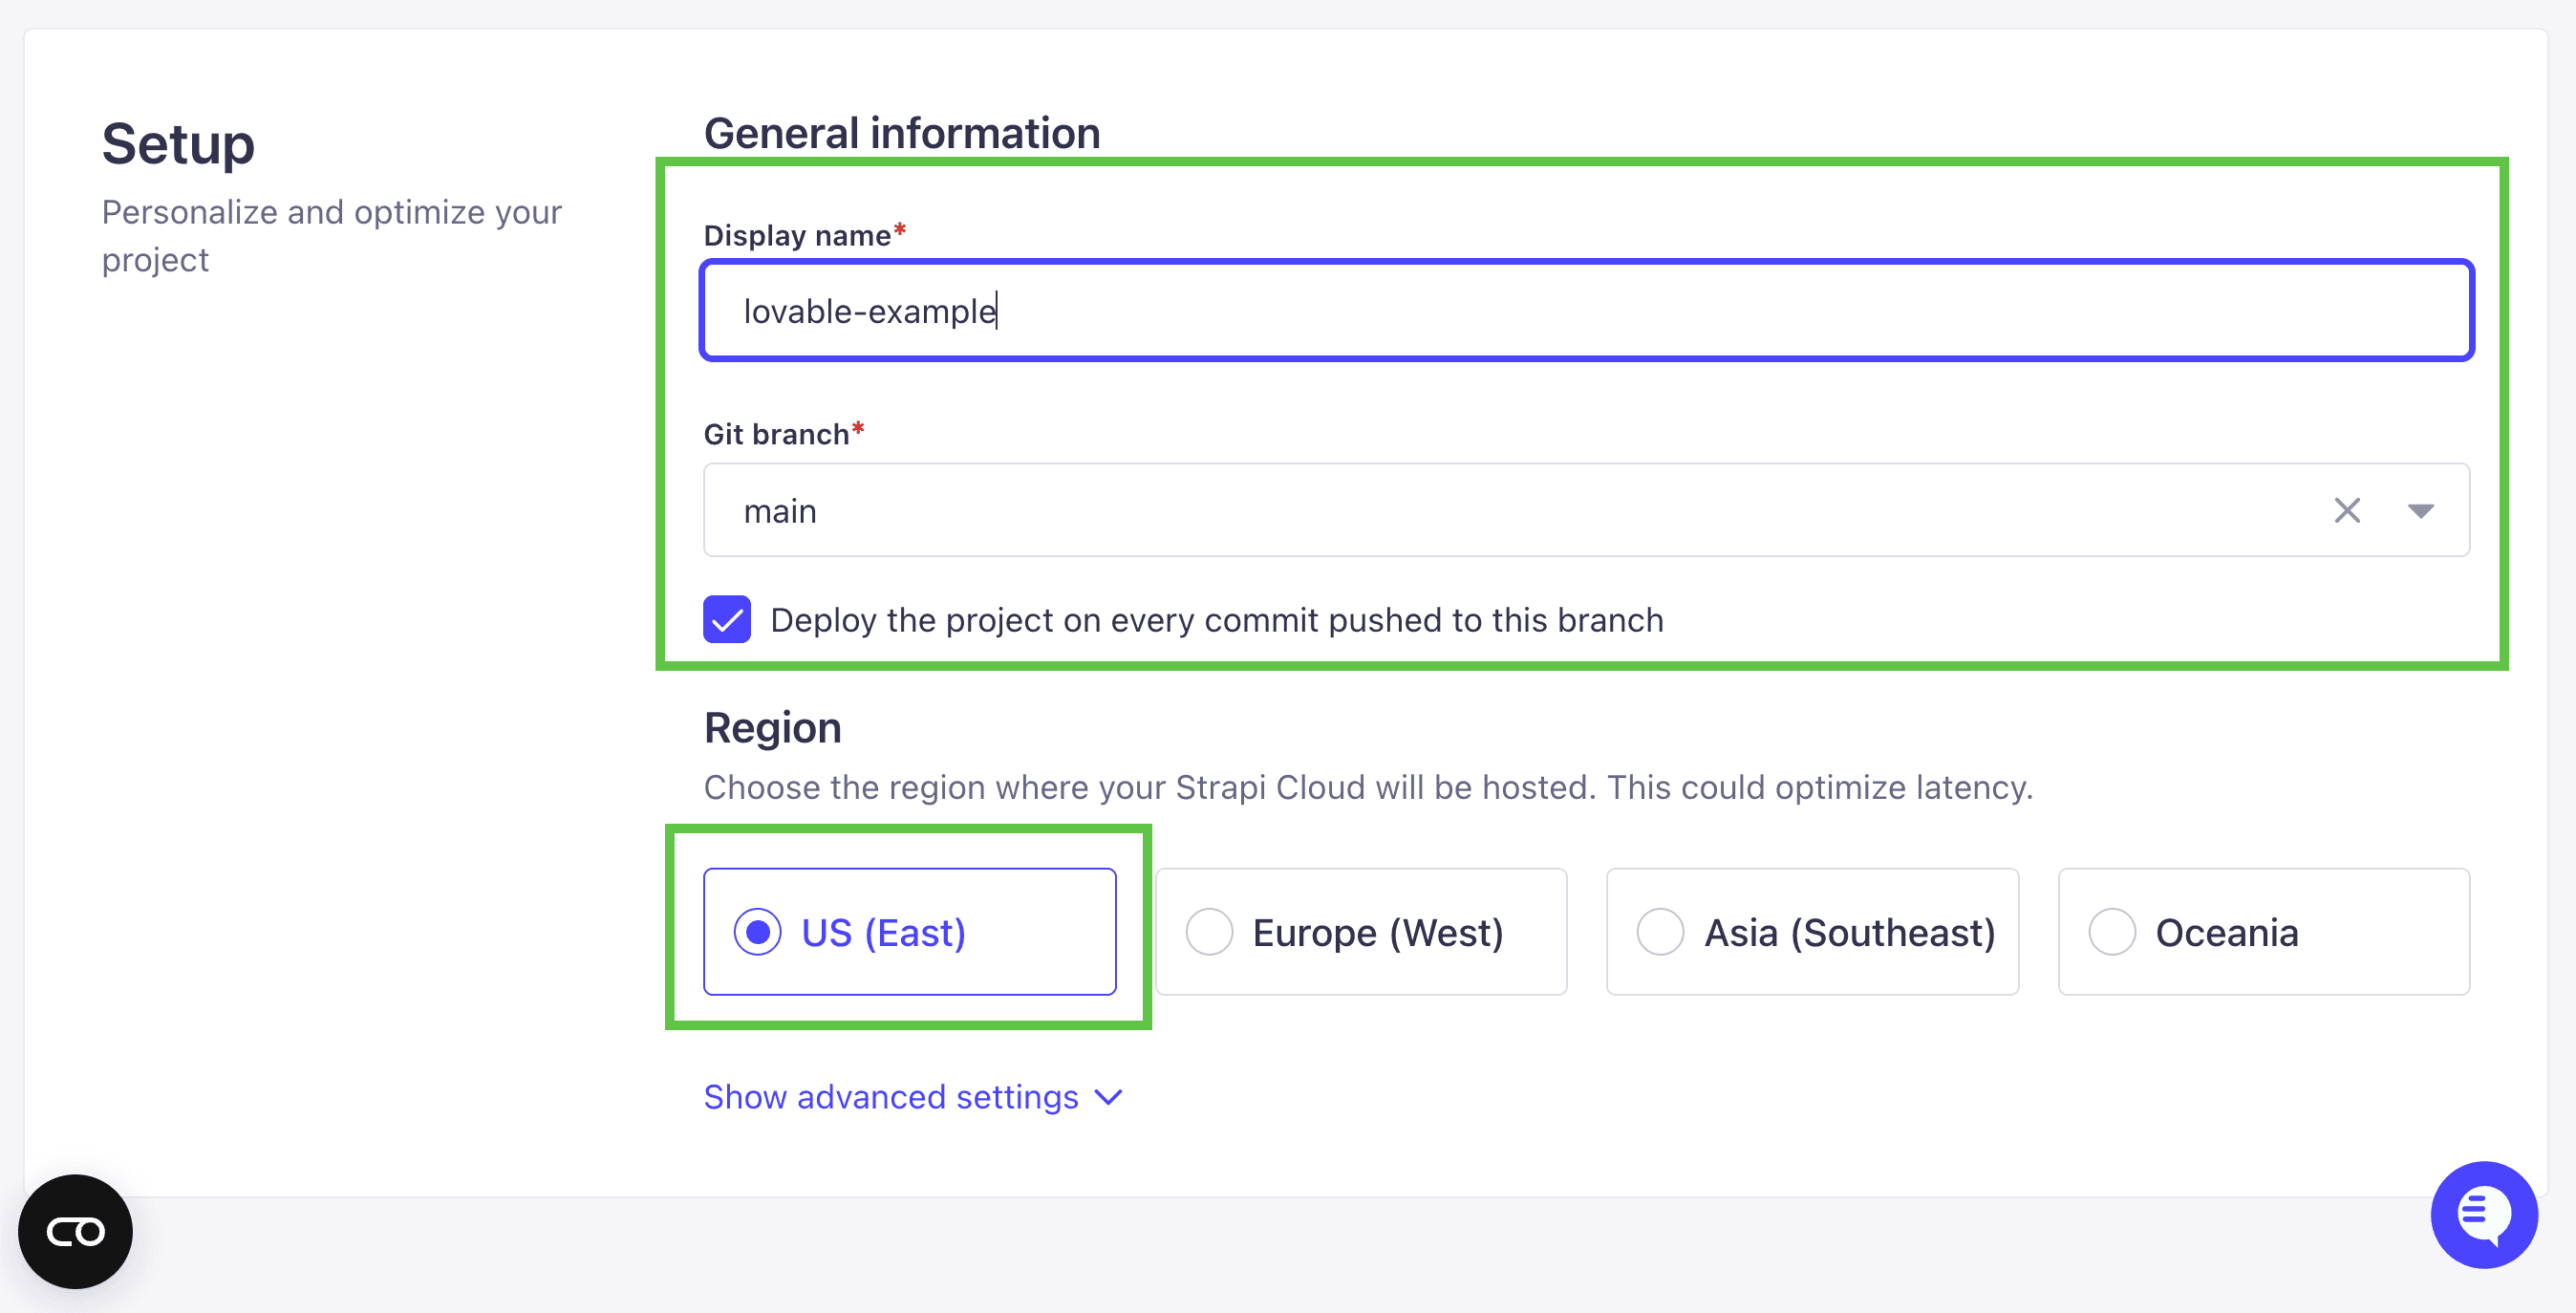
Click Create Project to deploy:
Once deployment finishes, navigate to your Strapi instance and create your first admin user. Notice we don't have any data yet—we'll add it using the transfer command.
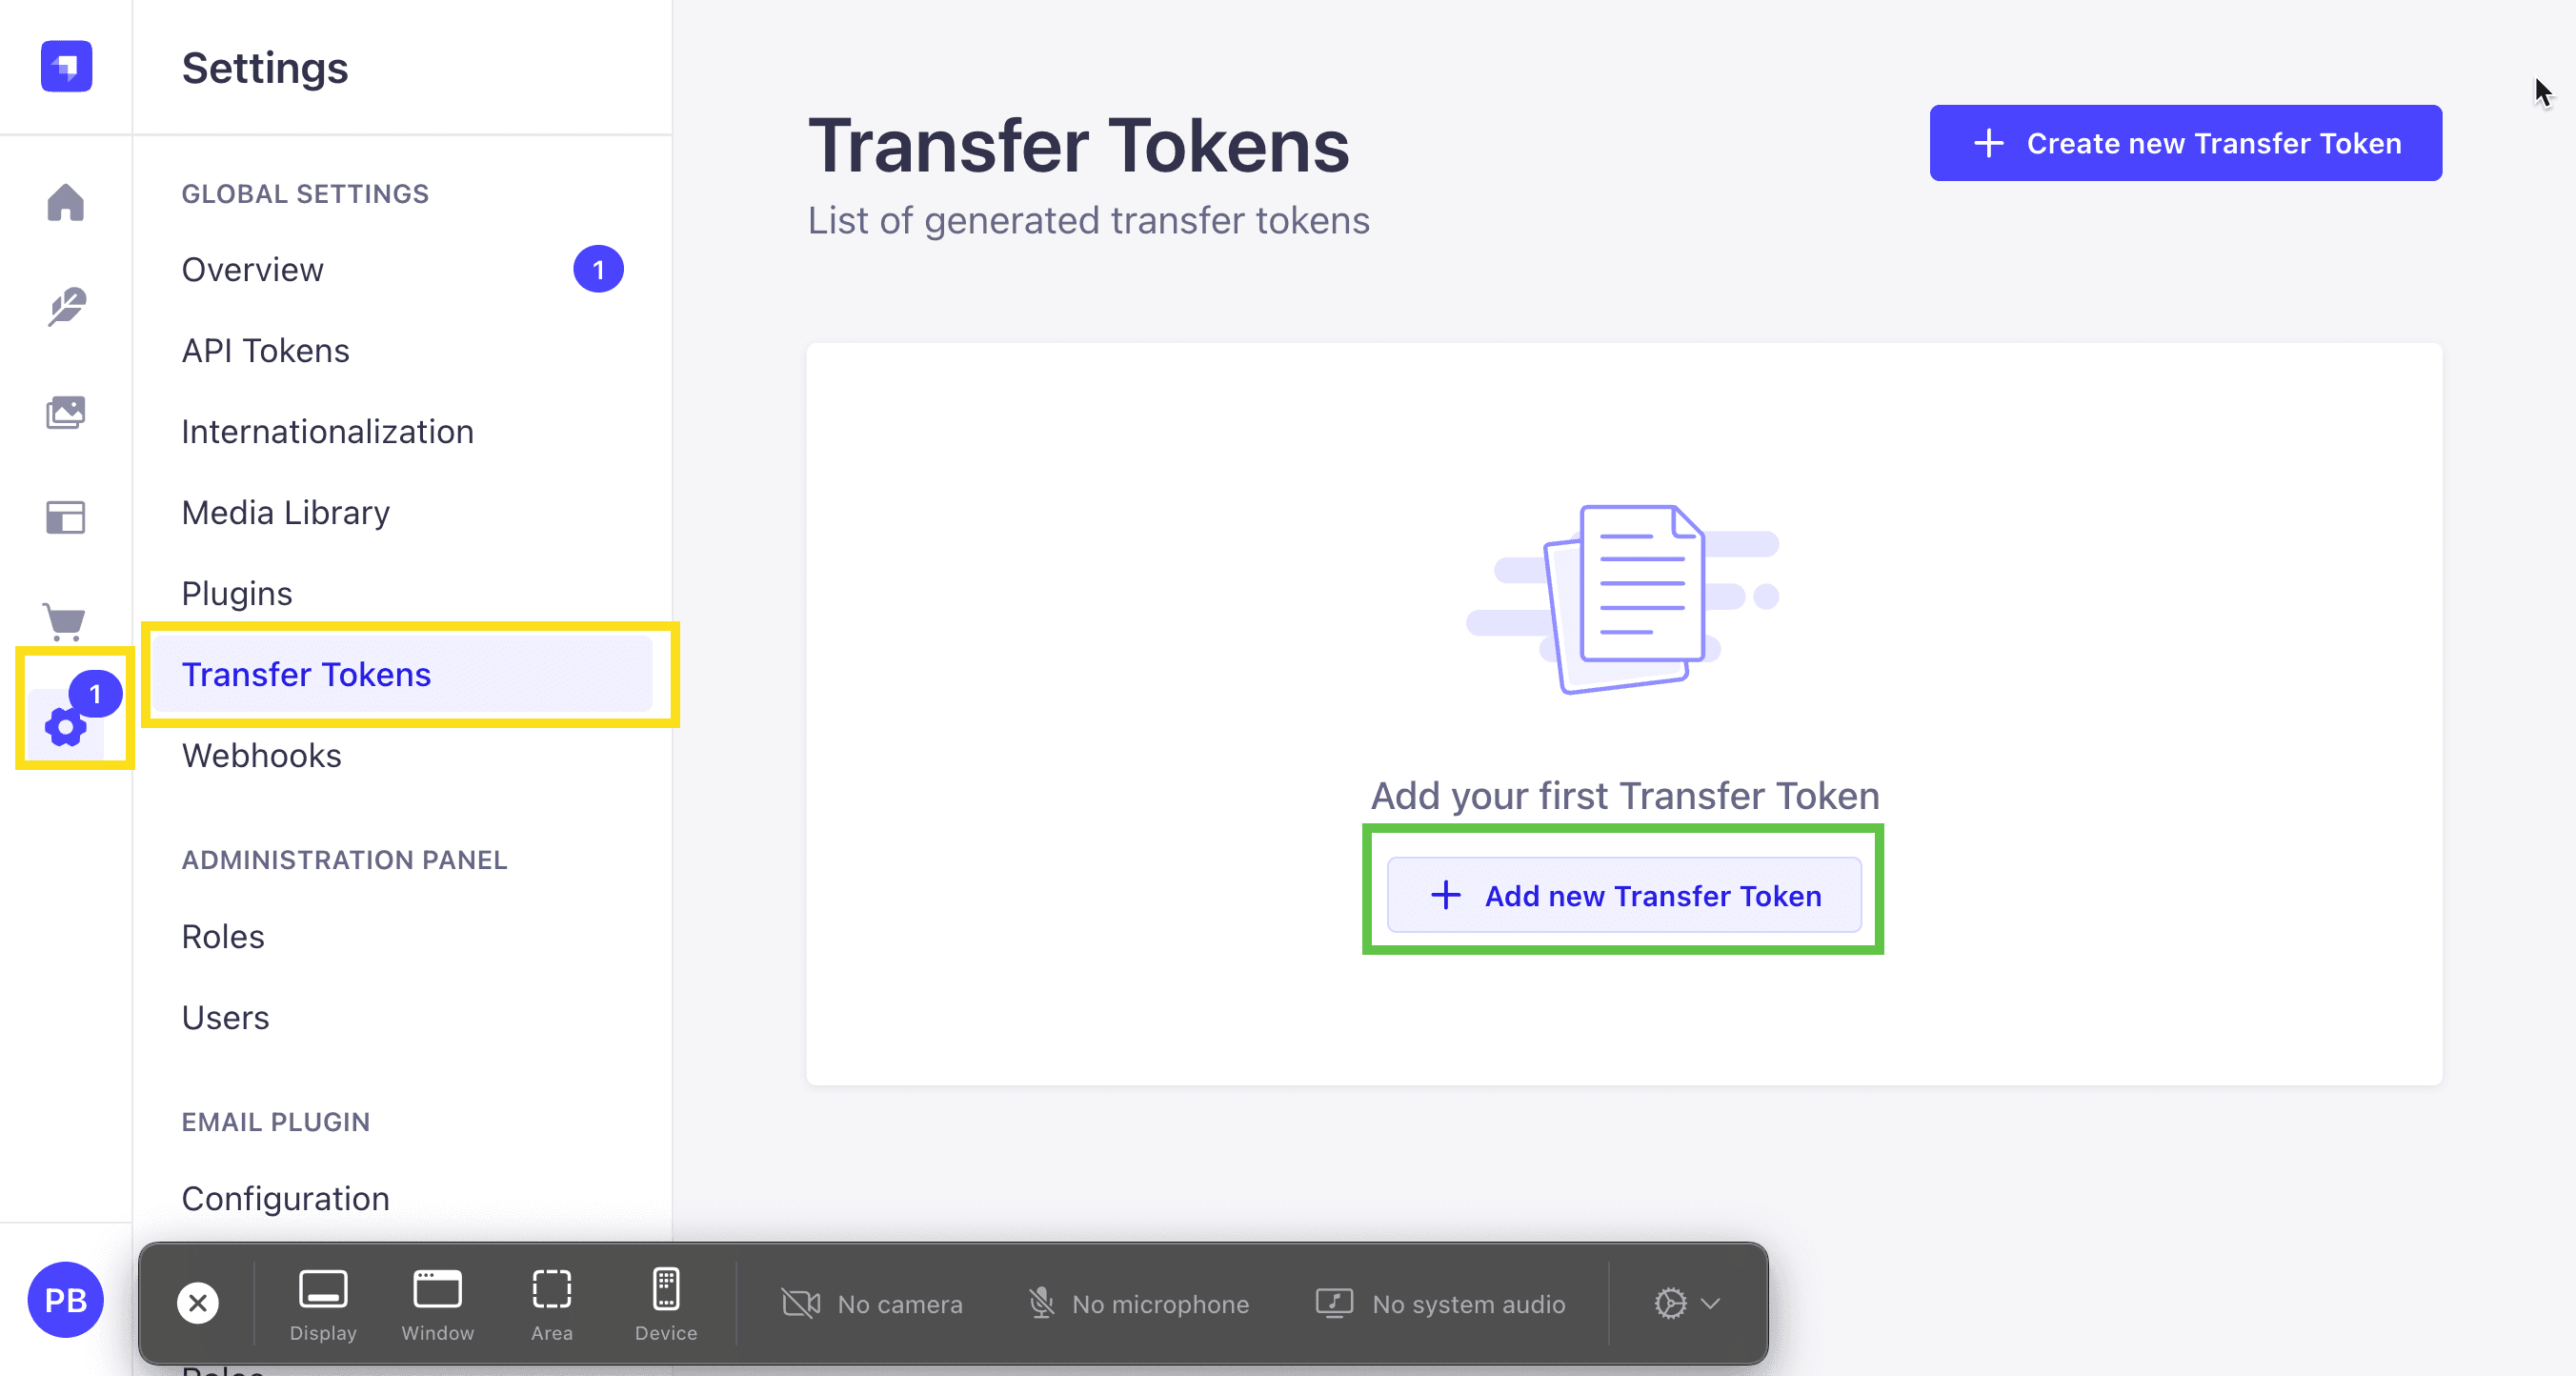
First, create a Transfer Token in Strapi.
Navigate to Setting => Transfer Token and click Add new transfer token:
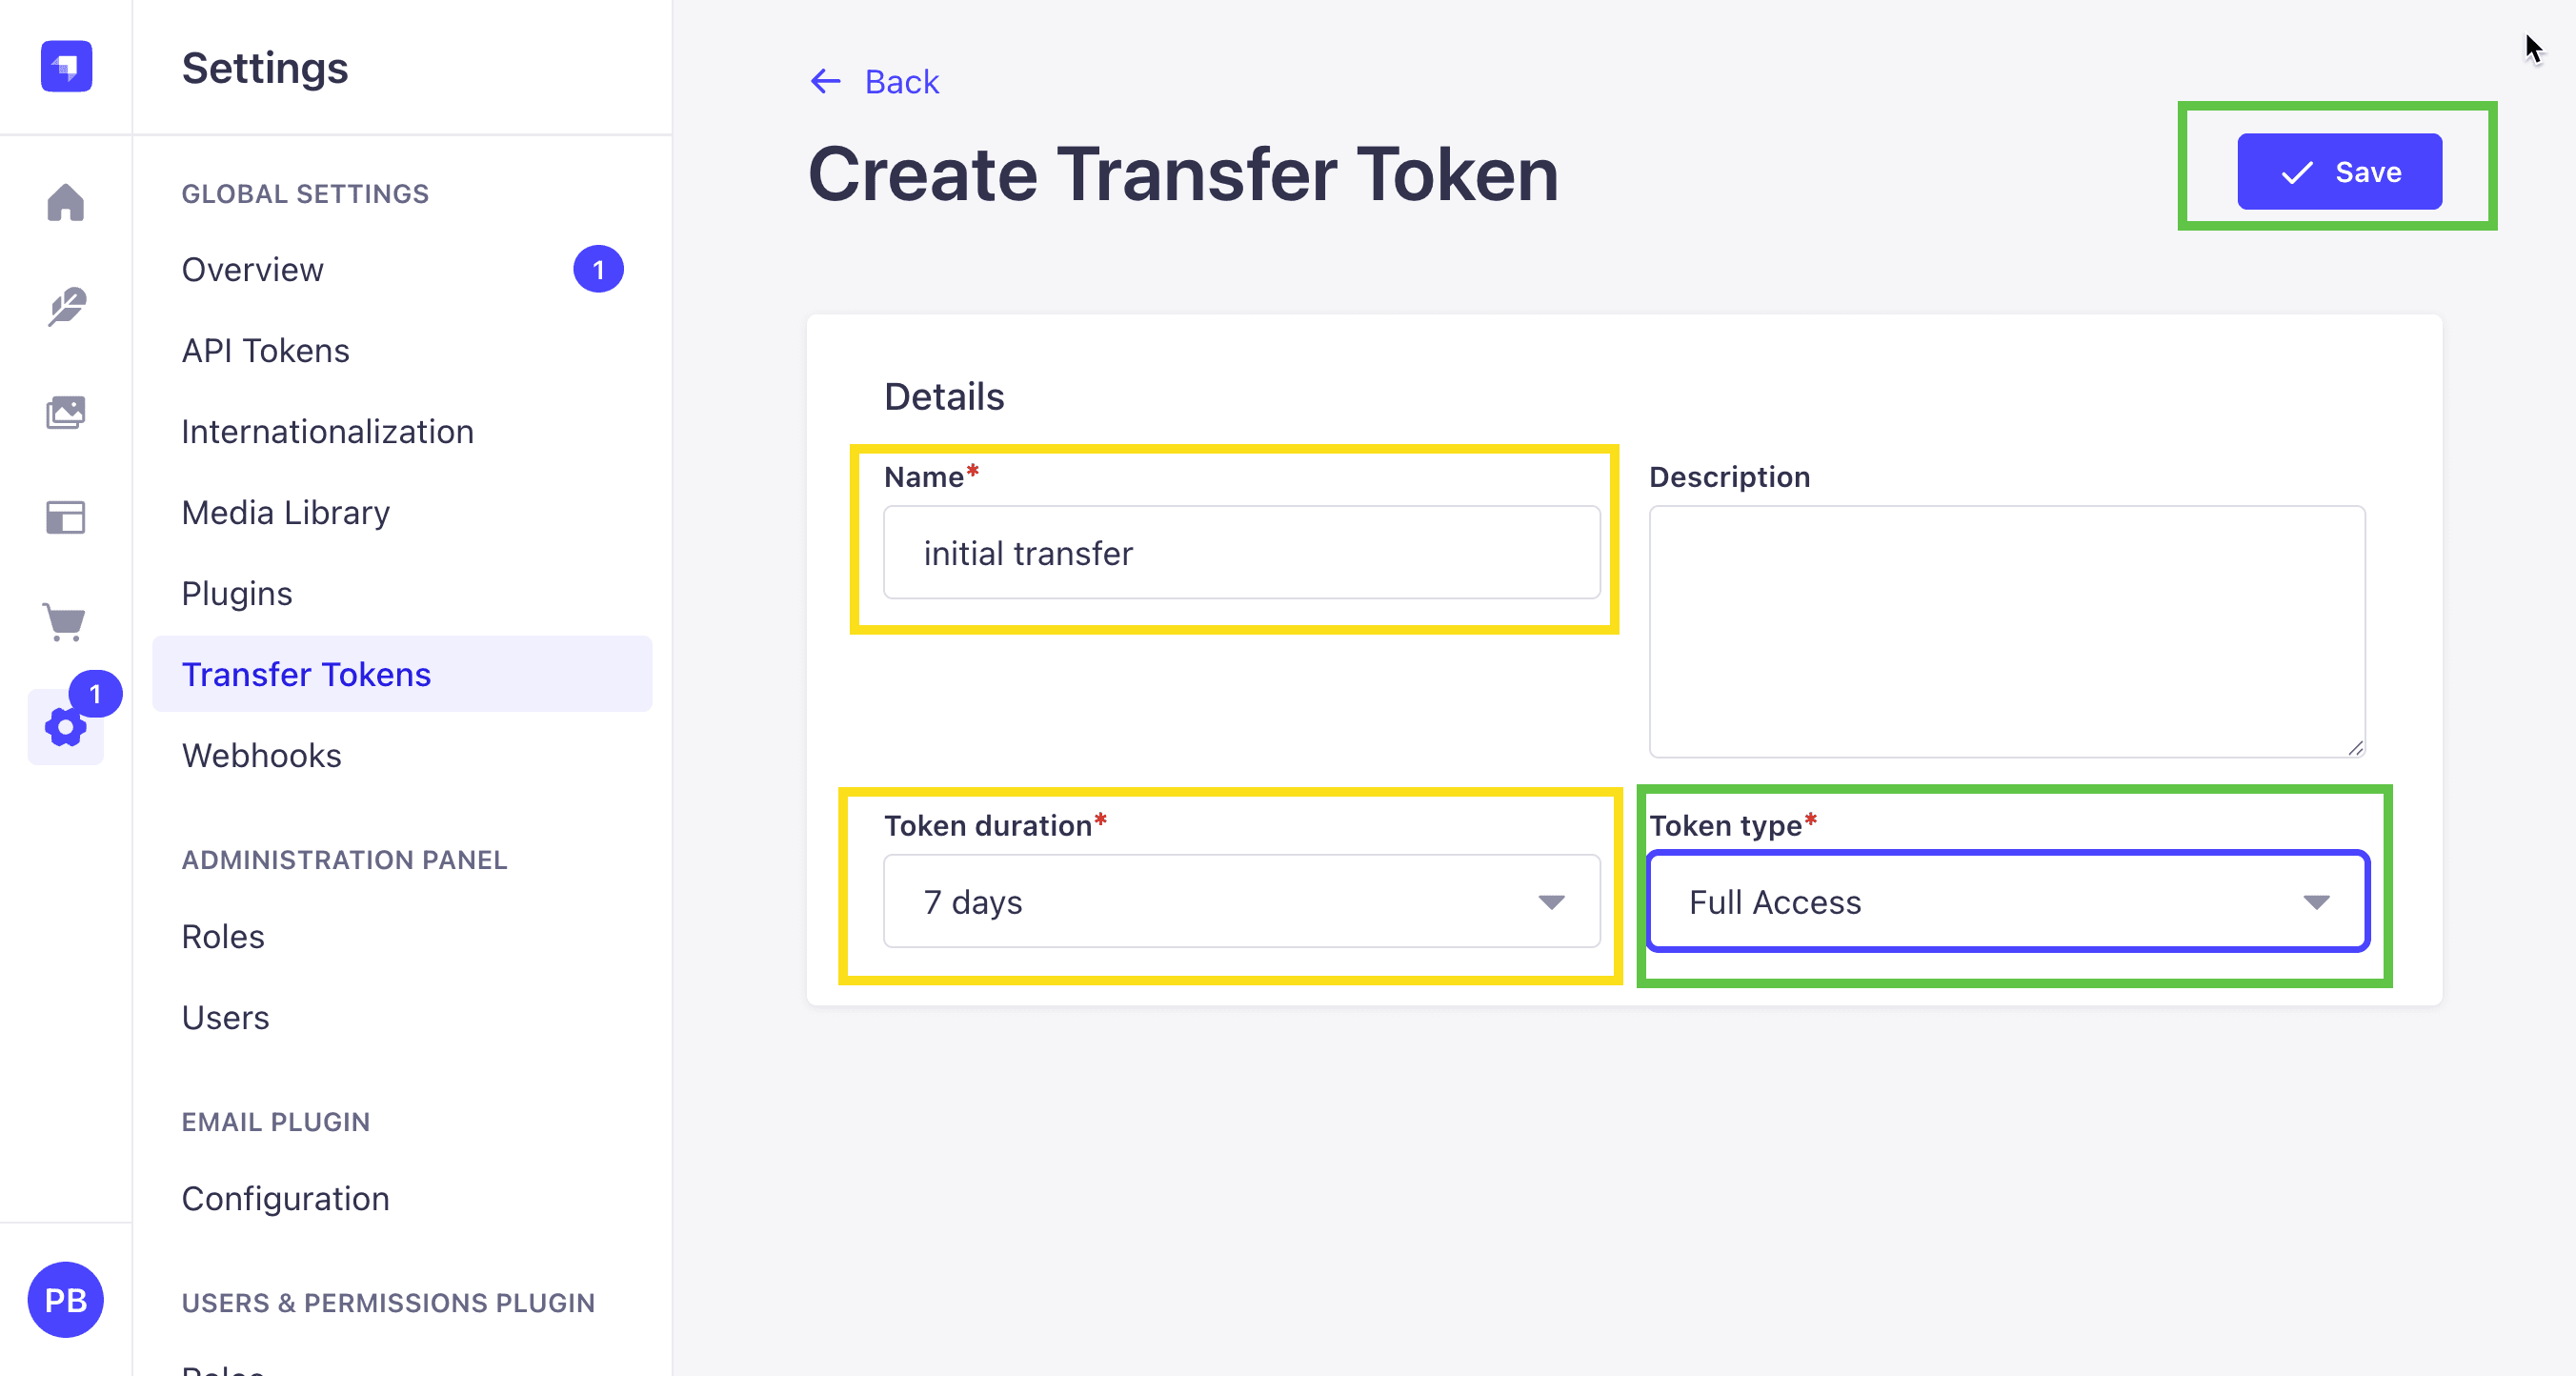
Create your token:
- Name: initial transfer
- Token duration: 7 days
- Token type: full access
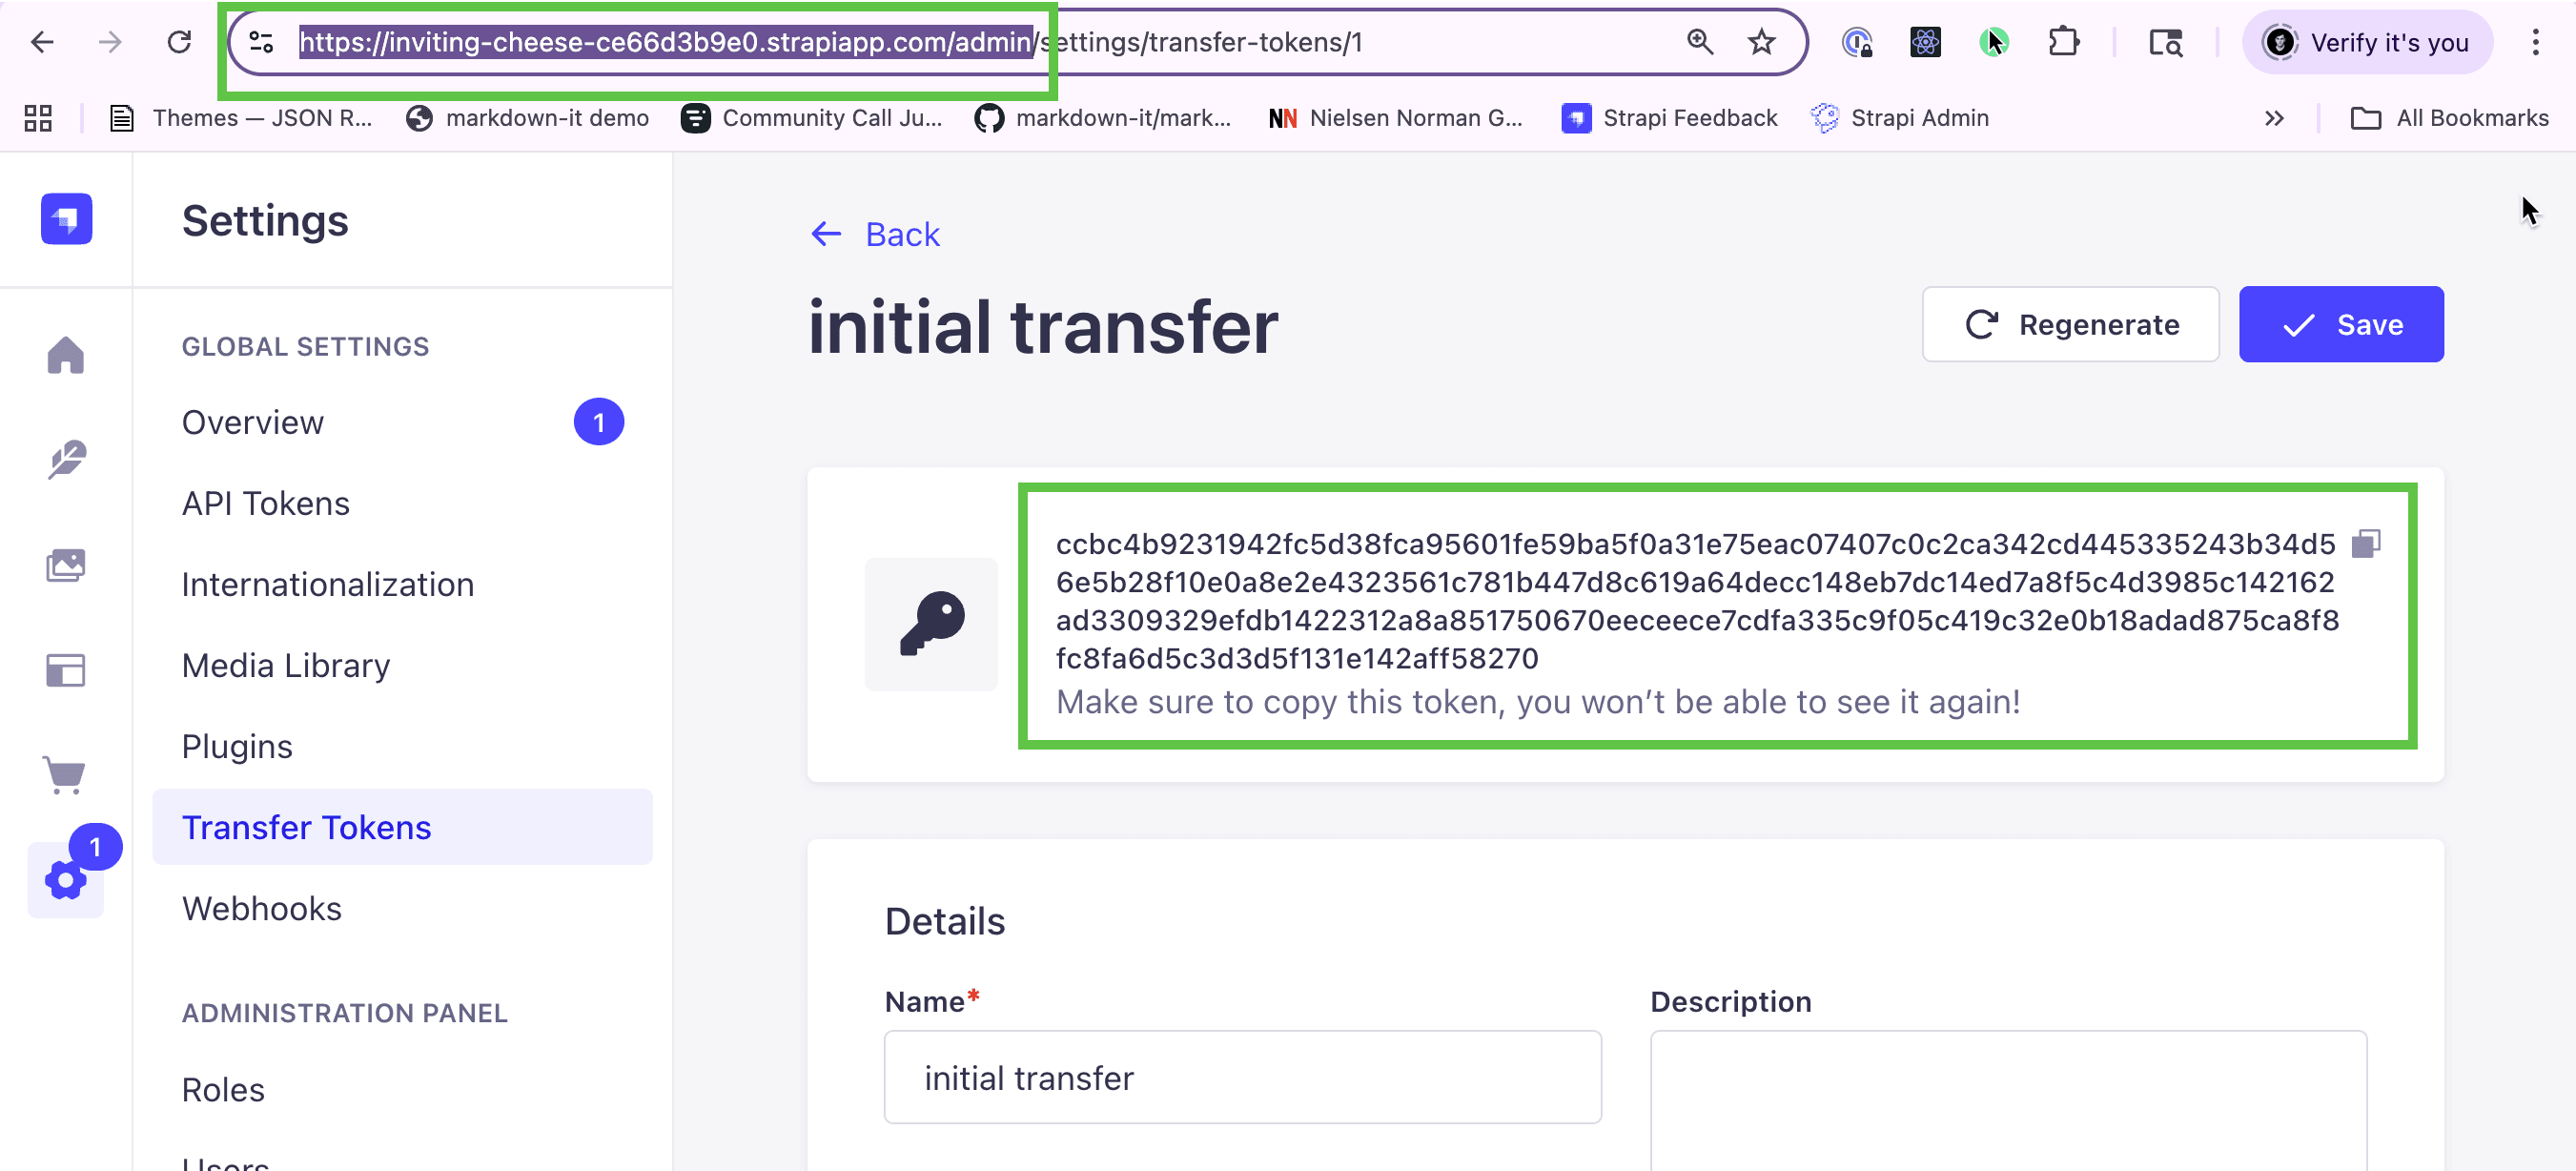
Now use the CLI to transfer your data to Strapi Cloud.
Run this command in your local server directory:
yarn strapi transferWhen prompted, enter your project URL (in my case it was https://inviting-cheese-ce66d3b9e0.strapiapp.com/admin). Make sure to include the /admin path.
Enter your transfer token, then type y to confirm:
➜  server git:(main) yarn strapi transfer
yarn run v1.22.22
$ strapi transfer
ℹ️  Data transfer documentation: https://docs.strapi.io/dev-docs/data-management/transfer
ℹ️  No transfer configuration found in environment variables
   → Add STRAPI_TRANSFER_URL and STRAPI_TRANSFER_TOKEN environment variables to make the transfer process faster for future runs
? Choose transfer direction: Push local data to remote Strapi
? Enter the URL of the remote Strapi instance to send data to:
https://inviting-cheese-ce66d3b9e0.strapiapp.com/admin
? Enter the transfer token for the remote Strapi destination:
[hidden]
? The transfer will delete existing data from the remote Strapi! Are
 you sure you want to proceed? Yes
Starting transfer...
✔ entities: 58 transferred (size: 48.1 KB) (elapsed: 4207 ms) (11.4 KB/s)
✔ assets: 8 transferred (size: 300 KB) (elapsed: 1964 ms) (152.7 KB/s)
✔ links: 174 transferred (size: 32.6 KB) (elapsed: 1987 ms) (16.4 KB/s)
✔ configuration: 48 transferred (size: 141.8 KB) (elapsed: 1318 ms) (107.6 KB/s)
┌─────────────────────────────────────────┬───────┬───────────────┐
│ Type                                    │ Count │ Size          │
├─────────────────────────────────────────┼───────┼───────────────┤
│ entities                                │    58 │      48.1 KB  │
├─────────────────────────────────────────┼───────┼───────────────┤
│ -- admin::session                       │     3 │ (     1.4 KB) │
├─────────────────────────────────────────┼───────┼───────────────┤
│ -- api::article.article                 │    12 │ (    22.3 KB) │
├─────────────────────────────────────────┼───────┼───────────────┤
│ -- api::author.author                   │     2 │ (     534 B ) │
├─────────────────────────────────────────┼───────┼───────────────┤
│ -- api::global.global                   │     2 │ (     3.3 KB) │
├─────────────────────────────────────────┼───────┼───────────────┤
│ -- api::landing-page.landing-page       │     2 │ (     7.8 KB) │
├─────────────────────────────────────────┼───────┼───────────────┤
│ -- api::page.page                       │     4 │ (     1.6 KB) │
├─────────────────────────────────────────┼───────┼───────────────┤
│ -- api::tag.tag                         │     3 │ (     820 B ) │
├─────────────────────────────────────────┼───────┼───────────────┤
│ -- plugin::i18n.locale                  │     1 │ (     253 B ) │
├─────────────────────────────────────────┼───────┼───────────────┤
│ -- plugin::upload.file                  │     8 │ (     4.1 KB) │
├─────────────────────────────────────────┼───────┼───────────────┤
│ -- plugin::upload.folder                │     2 │ (     519 B ) │
├─────────────────────────────────────────┼───────┼───────────────┤
│ -- plugin::users-permissions.permission │    16 │ (     4.4 KB) │
├─────────────────────────────────────────┼───────┼───────────────┤
│ -- plugin::users-permissions.role       │     2 │ (     656 B ) │
├─────────────────────────────────────────┼───────┼───────────────┤
│ -- plugin::users-permissions.user       │     1 │ (     464 B ) │
├─────────────────────────────────────────┼───────┼───────────────┤
│ assets                                  │     8 │       300 KB  │
├─────────────────────────────────────────┼───────┼───────────────┤
│ -- .avif                                │     3 │ (   292.1 KB) │
├─────────────────────────────────────────┼───────┼───────────────┤
│ -- .svg                                 │     5 │ (     7.9 KB) │
├─────────────────────────────────────────┼───────┼───────────────┤
│ links                                   │   174 │      32.6 KB  │
├─────────────────────────────────────────┼───────┼───────────────┤
│ configuration                           │    48 │     141.8 KB  │
├─────────────────────────────────────────┼───────┼───────────────┤
│ Total                                   │   288 │     522.5 KB  │
└─────────────────────────────────────────┴───────┴───────────────┘
Transfer process has been completed successfully!
✨  Done in 76.51s.
➜  server git:(main)
Your data should now appear in your Strapi Cloud instance. Navigate to the api/articles endpoint to verify:
Example: https://inviting-cheese-ce66d3b9e0.strapiapp.com/api/articles
Your API is now live and accessible! Whether you used ngrok or Strapi Cloud, you're ready to build the frontend.
Why did we set up the backend first? Because now Lovable can build your frontend based on real API responses and actual data structures. This means more accurate code and fewer errors.
Understanding Prompting Strategies for Lovable
I'm not a prompting expert, and each platform has its own best practices. Mostly, you should experiment to see what gives you the best results.
While building my project, I tried different prompts—some worked better than others. I'll discuss this more later.
Here's a great guide from Lovable.
Part 1: One-Shot Attempt
You might think: stick all the requirements into one prompt—done!
But unlike a human who can read between the lines, AI can't. You need to provide lots of context, and even then it may not be enough.
I tried one-shot prompting but don't recommend it. We'll still try it for learning purposes, but none of my one-shot attempts produced a working version without follow-up prompts.
However, the better your initial prompt, the fewer follow-ups you'll need.
Why do people try the one-shot approach?
Because it's tempting:
- ✅ Fast initial output (looks productive immediately)
- ✅ All requirements in one place
- ✅ Feels efficient
But in reality, it creates more problems than it solves:
- ❌ Generates 30+ files at once (impossible to review thoroughly)
- ❌ AI loses track of requirements and makes assumptions
- ❌ Field-name errors get buried in large codebases
- ❌ Hard to test incrementally—bugs compound
- ❌ Difficult to isolate what went wrong
- ❌ Large commits make version control messy
- ❌ Debugging takes longer than building incrementally
We'll walk through BOTH approaches so you can try them yourself.
Part 2: Iterative Approach (Recommended)
After experiencing the limitations of one-shot prompting, I tried building with small, focused prompts:
- Start Small - Project setup → API layer → One feature at a time
- Use Knowledge Files - Set context once, reference forever
- Test After Each Step - Validate before moving forward
- Build Incrementally - Layout → Landing page → Articles → Search → Polish
- Review and Test - Check each change, test and refine before continuing
Why Iterative Prompting Wins:
- Review code as it's created (catch errors early)
- Easy to spot which prompt caused issues
- Test each feature independently
- Give targeted feedback
- Roll back single features, not entire projects
- Cleaner code that's easier to maintain
- Better version control with focused commits
For a proof-of-concept to show stakeholders, one-shot might work. But for production or anything substantial, incremental prompting is the way to go.
For this post, I want to use the Strapi Client SDK. Since Lovable isn't familiar with it, we'll pass as much context as possible directly in the prompt.
We can also create a knowledge file with that context—we'll try that later with incremental prompting.
Understanding the Strapi Client SDK
Before we write our prompt, let's discuss the @strapi/client SDK—an official package that simplifies working with Strapi APIs.
It provides clean methods for API requests, filtering, pagination, and loading related content.
We'll include this SDK in our Lovable prompt for an important reason: it's relatively new.
Since Lovable's AI may not be familiar with its syntax and implementation patterns, we need to provide complete context.
This is a perfect example of when to be explicit in your prompts—give the AI concrete code examples for tools it might not know well, rather than letting it guess or hallucinate the API.
Basic setup example:
import { strapi } from '@strapi/client';

// Initialize the Strapi client
const client = strapi({
  baseURL: 'https://inviting-cheese-ce66d3b9e0.strapiapp.com',
  // No authentication needed for public endpoints
});

// 1. Fetch Global settings (single type)
const globalData = await client.single('global').find();
// Returns: { data: { id, documentId, attributes: { title, description, banner, header, footer } } }

// 2. Fetch Landing Page (single type)
const landingPage = await client.single('landing-page').find();
// Returns: { data: { id, documentId, attributes: { title, description, blocks: [...] } } }

// 3. Fetch all Articles with pagination
const articles = await client.collection('articles').find({
  pagination: { page: 1, pageSize: 6 }
});
// Returns: { data: [...], meta: { pagination: { page, pageSize, pageCount, total } } }

// 4. Search articles by title using filters (case-insensitive)
const searchResults = await client.collection('articles').find({
  filters: {
    title: { $containsi: 'javascript' }
  },
// Common Strapi v5 filter operators:
// $eq: equals
// $ne: not equals
// $containsi: contains (case-insensitive)
// $startsWith: starts with
// $endsWith: ends with

// 5. Fetch single article by slug
const article = await client.collection('articles').find({
  filters: {
    slug: {
      $eq: 'why-java-script-is-still-the-most-popular-programming-language'
    }
  }
});
// Returns: { data: [{ id, documentId, attributes: {...} }], meta: {} }
// Note: Returns array with single item - extract first item: article.data[0]
Important Note About Population:
In our Strapi backend, we're already populating all content via a route middleware, so you don't need to add populate parameters in your frontend API calls. The only additional params you'll need are:
- filter - To filter articles by slug or other fields
- pagination - To implement pagination
Example of our route middleware:
Here's how we configured the articles route to automatically populate all relations:
// server/src/api/article/routes/article.ts
import { factories } from "@strapi/strapi";

export default factories.createCoreRouter("api::article.article", {
  config: {
    find: {
      middlewares: ["api::article.article-populate"],
    },
  },
});
The populate middleware:
// server/src/api/article/middlewares/article-populate.ts
import type { Core } from "@strapi/strapi";

const populate = {
  featuredImage: {
    fields: ["url", "alternativeText"],
  },
  author: {
    populate: {
      image: {
        fields: ["url", "alternativeText"],
      },
      articles: {
        fields: ["documentId", "title"],
      },
    },
  },
  contentTags: true,
  blocks: {
    on: {
      "blocks.hero": {
        populate: {
          links: true,
          image: { fields: ["alternativeText", "url"] },
        },
      },
      "blocks.section-heading": true,
      "blocks.card-grid": { populate: { cards: true } },
      "blocks.content-with-image": {
        populate: { link: true, image: { fields: ["alternativeText", "url"] } },
      },
      "blocks.markdown": true,
      "blocks.person-card": {
        populate: { image: { fields: ["alternativeText", "url"] } },
      },
      "blocks.faqs": { populate: { faq: true } },
      "blocks.newsletter": true,
    },
  },
  relatedArticles: {
    populate: {
      featuredImage: { fields: ["alternativeText", "url"] },
      author: true,
    },
  },
};

export default (config, { strapi }: { strapi: Core.Strapi }) => {
  return async (ctx, next) => {
    ctx.query.populate = populate;
    await next();
  };
};
This means when you call /api/articles, all relations, images, and dynamic zone blocks are automatically populated—you don't need to add ?populate=deep or specify individual fields.
While we'll include this SDK in our prompt to Lovable, you could also use a simple fetch wrapper or libraries like Axios. The SDK is recommended but not required.
The Complete Lovable Prompt
Here is the complete prompt you can paste into Lovable.
I was able to generate this whole project with one prompt. but it took few tries.
But in general you would use incrimental prompting when building your project.
It's massive, but my goal was to give as much context to Lovable as possible using the one-shot approach.
Why This Prompt Ended Up Working Best For Me
After multiple iterations and testing different approaches, this prompt structure worked best. Here's how each section contributed:
Opening Line (Role Definition)
You are a senior frontend developer experienced with TypeScript, React, and building dynamic content-driven websites that consume Strapi RESTful APIs.Sets the expertise level and domain.
Task
Single, clear objective: "Build a blog platform frontend that consumes a Strapi v5 backend API."
The "v5" specification matters—it prevents the AI from using outdated Strapi v3/v4 patterns.
Critical Rule: Type-First Development
This became the most important section. The three-step rule forces the AI to:
- Review actual API response examples first
- Generate TypeScript interfaces matching EXACT field names
- NOT assume or guess anything
By being explicit with "MUST" and "DO NOT assume," I tried to eliminate guesswork, but it didn't eliminate it completely. Since LLMs generate statistically likely responses, they're not deterministic by nature.
Backend Configuration
Provides the exact API URL and Strapi v5 response format. The note about "Direct field access (no .attributes nesting)" is crucial—Strapi v5 changed this from v3/v4.
Tech Stack
Lists every library explicitly. No room for the AI to substitute alternatives or use outdated versions.
API Endpoints & Real Response Examples
This is where I went all-in on context. I included 5 complete JSON responses from actual API calls:
- Global Settings (155 lines)
- Landing Page with 9 block types (160 lines)
- Articles (62 lines)
- Paginated Articles (50 lines)
- Single Page by Slug (38 lines)
Not sanitized examples—the real data with IDs, timestamps, nulls, nested objects, everything.
Why this mattered: Instead of the AI guessing field names like fullName vs name or image.url vs featuredImage.url, it could see the exact structure. This alone eliminated most potential errors.
Implementation Requirements
Six subsections covering Setup, API Layer, Hooks, Types, Pages, and Development Standards.
The key decision: I provided complete SDK code for @strapi/client because it's new and AI doesn't know it well. But I only provided requirements for React Query because that's standard and AI already knows it.
This balance lets the AI use its strengths while constraining its weaknesses with unfamiliar tools.
Project Structure
A visual file tree showing exactly where code should go. This prevents the AI from creating utils/api/strapi/client.ts when you wanted lib/strapi.ts.
Key Implementation Notes
Shows exact data access patterns:
article.title
article.featuredImage.url
article.author.fullName
Specifications & Acceptance Criteria
Five features with clear "done" criteria and checkboxes. Not vague like "build an articles page" but specific like "articles must display in 3/2/1 column grid, search must debounce 300ms, pagination must update URL."
Each criterion is testable and objective.
Implementation TODO Checklist
47 tasks broken down across 8 sequential phases: Foundation → API Layer → Hooks → Layout → Components → Pages → Routing → Polish.
Each task is specific and actionable (like "Create components/Header.tsx" rather than "build the header").
Verification Checkpoints
Checkpoints after phases 1-3, 4, 5, 6-7, and final verification. Encourages incremental testing—catch errors early before they compound.
Important Reminders
Seven key points repeated at the end (Strapi v5 patterns, exact field names, no populate needed, etc.).
Repetition matters because AI context windows can "forget" early instructions. Repeating critical constraints at the end keeps them active.
What Made This Work for Me
Here's what I learned through trial and error:
The Human-Readable Principle
I wrote the prompt as if I were handing it to another developer, not just an AI. This meant:
- Clear, sequential instructions
- Specific examples instead of vague descriptions
- Visual structures (file trees, JSON responses)
- Testable criteria ("should display in 3-column grid" not "make it look good")
The Checklist Experiment
Adding the TODO checklist was an experiment. I wasn't sure if or how Lovable would use it.
But I included it for a few reasons:
- It forced me to think through the build order (what depends on what?)
- If I handed this to a developer, they'd have a clear roadmap
- Even if the AI didn't check boxes, the structure might still guide the sequence
- If debugging was needed, I'd know which phase broke
Did it work? Hard to say definitively, but the code did appear in a logical order—foundation first, then data layer, then UI components, then pages. The incremental build felt more organized than previous attempts.
Finding the Balance
After trying prompts that were too vague ("build a blog"), too detailed (specifying every line), and everything in between, this version hit a workable middle ground:
- Detailed where it matters (real API responses, unfamiliar SDKs)
- General where AI excels (standard React patterns, component structure)
- Specific about constraints (Strapi v5 patterns, field names)
- Flexible on implementation details (let AI handle styling, component organization)
Your Mileage May Vary
This structure worked well for my project, but it's not gospel. Depending on your backend complexity, team preferences, and what you're building, you might need more or less detail. The key insight: show the AI your actual data structure, and be specific about constraints that prevent common mistakes.
The Context Problem with AI Tools
AI tools like Lovable are powerful, but they have one big limitation: they don't know anything about YOUR specific project unless you tell them.
What the AI knows:
- ✅ General React patterns
- ✅ Standard TypeScript
- ✅ Popular libraries like TanStack Query
- ✅ How REST APIs usually work
What the AI doesn't know:
- ❌ Your Strapi backend's URL
- ❌ Your custom data formatting
- ❌ Your exact content structure
- ❌ That you're using Strapi Client SDK
- ❌ Your specific filter syntax
What Happens Without Good Context
Say "build a blog with Strapi" without details, and the AI will:
- Make up endpoints - Creates
/api/postswhen yours is/api/articles - Access data wrong - Tries
article.attributes.titlewhen yours isarticle.title - Use wrong syntax - Tries unsupported search parameters
- Miss features - Doesn't know about your dynamic blocks
- Create fake data - Builds a UI that looks good but doesn't connect to your real backend
This leads to additional debugging and prompting to fix what the AI guessed wrong. Remember, you're paying for each prompt you make.
The Strapi SDK: Why We Gave You the Code
Notice how we provided complete SDK code but not React Query code? Here's why:
Strapi-Specific (AI needs this):
// This is Strapi-specific - AI needs the exact syntax
const client = strapiClient({
  baseURL: "https://your-strapi.strapiapp.com",
});

// How to use client.single() vs client.collection()
const response = await client.single("global").find();
const articles = await client.collection("articles").find({
  filters: { slug: { $eq: slug } },
});
Standard React (AI knows this):
// This is standard React Query - AI knows this pattern
const { data, isLoading } = useQuery({
  queryKey: ["articles"],
  queryFn: getArticles,
});
Why we provided the Strapi code:
- Library-specific - AI needs to know exactly how
@strapi/clientworks - Unusual syntax - Filter operators like
$containsiaren't obvious - Your backend is unique - Your URL, endpoints, and data structure are specific to you
- Custom formatting - Your middleware formats data differently than standard Strapi
Finding the Right Balance
Our prompt balances specific details with general instructions:
Be Specific About (Strapi stuff):
- ✅ Complete SDK code
- ✅ Your actual API URLs
- ✅ Real response examples
- ✅ Filter syntax rules
- ✅ Content type structure
- ✅ Component names
Be General About (React stuff):
- ✅ "Create React Query hooks" (let AI decide how)
- ✅ "Responsive grid" (AI knows Tailwind)
- ✅ "Loading skeletons" (AI knows patterns)
- ✅ "Debounced search" (AI knows how)
This gives the AI:
- Facts about your unique backend
- Freedom to use React best practices it already knows
Why Real API Responses Matter
Including real JSON responses from the API was crucial. Even though I shared the endpoints, Lovable didn't consistently call them to fetch the actual data:
{
  "data": [
    {
      "id": 12,
      "title": "Article Title", // ← Strapi v5 structure!
      "author": {
        // ← Direct object (no .attributes)
        "fullName": "Jane Doe"
      },
      "featuredImage": {
        // ← Direct media object
        "url": "https://..."
      }
    }
  ]
}
This shows Lovable:
- Exact field names -
fullNamenotname,featuredImagenotcoverImage - Data structure - Strapi v5 format, not old v3/v4
data.attributes.titlenesting - Null handling - Which fields might be null (like
alternativeText) - Array structures - How relations like
contentTagsare returned
Without these examples, the AI might generate code for older Strapi versions (v3/v4 with nested .attributes), which wouldn't work with Strapi v5.
The Cost of Vague Prompts
Let's compare:
Vague Prompt:
"Build a blog frontend for my Strapi backend"
Result:
- Generic blog with fake data
- Wrong API structure assumptions
- Hours of manual debugging
- Frustration and re-work
Specific Prompt (What We Created):
Includes: Backend URL, SDK code, filter syntax, real responses, content types, block components, Strapi v5 data structure
Result:
- Working blog connected to real Strapi
- Correct data access patterns
- Minimal debugging needed
- Fast iteration on features
Limitations of the One-Shot Approach
While our checkpoint-based one-shot prompt seemed better than traditional one-shot prompting, I still don't think it's the best approach.
Issue #1: Overwhelming Scope Asking the AI to build an entire blog platform in one go led to:
- Over 30 files created at once
- Difficult to review all the code generated
- Hard to spot subtle bugs buried in large commits
- Challenging to provide focused feedback
Issue #2: Context Overload The comprehensive prompt, while detailed, tried to cover:
- 9 different block components
- 3 major pages
- API utilities and hooks
- Global layout and navigation
- All in a single conversation thread
This caused the AI to sometimes lose track of specific requirements or make assumptions despite our safeguards.
Issue #3: Testing Bottlenecks When everything is generated at once:
- You can't test incrementally
- Bugs compound on top of each other
- Rolling back means losing hours of work
- Hard to isolate which prompt caused which issue
Issue #4: Knowledge File Not Utilized In this one-shot approach we didn't leverage Lovable's Knowledge file feature, which means:
- Context isn't persisted across sessions
- Every new prompt may require full context again
- AI memory limitations become problematic
- Can't build on previous validated work effectively
The Iterative Approach
We tried one-shot prompting, now let's try the iterative approach.
Here's what Lovable recommends (and what we should have done from the start):
Lovable Best Practices for Building Production Apps
1. Start with a Knowledge File
Why it matters: The Knowledge file is your project's brain. It gets sent with every prompt and helps the AI understand the full context without repeating yourself.
What to include:
# Project Knowledge File

## Product Vision

{{One-sentence goal}} - Build a blog platform that consumes Strapi v5 CMS

## Core Features

- Dynamic landing page with 9 block types
- Articles listing with search and pagination
- Single article view with related articles
- Responsive navigation and footer

## Tech Stack

- React 18 + TypeScript (strict mode)
- Tailwind CSS + shadcn/ui
- React Router v6
- TanStack Query v5
- Strapi Client SDK (@strapi/client)

## Backend Context

- Strapi v5 backend at: https://inviting-cheese-ce66d3b9e0.strapiapp.com
- Direct field access (NO .attributes nesting)
- Auto-populated relations via middleware
- Filter syntax: { filters: { field: { $eq: value } } }

## Data Model

[Include your actual API field names from Phase 1 discovery]

- Article: title, description, slug, content, featuredImage, author, contentTags, blocks, relatedArticles
- Author: fullName (NOT name), bio, image
- Landing Page Blocks: section-heading (heading, text NOT subheading), content-with-image (links NOT buttons, reversed NOT imagePosition), etc.

## Design System

- Mobile-first responsive
- Tailwind config: [colors, fonts, spacing]
- shadcn/ui components: Button, Card, Input, etc.

## Coding Standards

- TypeScript strict mode
- ESLint + Prettier
- Component pattern: function components with hooks
- File structure: /components, /pages, /hooks, /lib, /types

## Non-Goals (This Version)

- User authentication
- Comments system
- Article editing (read-only frontend)
You can auto-generate a Knowledge file by asking:
Generate a knowledge file for my project based on the features already implemented.2. Break Work into Small, Testable Chunks
Instead of "build everything," break your project into milestones:
Milestone 0: Foundation
- Project setup and dependencies
- API utilities and types (verified against actual API)
Milestone 1: Core Data Layer
- Strapi client configuration
- React Query hooks for each endpoint
- TypeScript interfaces (with verification)
Milestone 2: Layout & Navigation
- Global layout component
- Header with navigation
- Footer
- Mobile menu
Milestone 3: Landing Page
- BlockRenderer infrastructure
- Implement 2-3 block components
- Test rendering
Milestone 4: Articles Listing
- Article card component
- Grid layout
- Basic pagination
Milestone 5: Article Detail
- Single article page
- Markdown rendering
- Related articles
Milestone 6: Search & Filters
- Search with debouncing
- Pagination controls
- Loading states
Milestone 7: Polish
- Error boundaries
- 404 pages
- Accessibility audit
- Performance optimization
3. Use Chat Mode for Planning (60-70% of Your Time)
When to use Chat Mode:
- After 2-3 failed "Try to Fix" attempts
- When debugging complex logic
- When planning new features
- BEFORE implementing anything complex
Chat Mode Workflow:
You: "I need to implement search functionality for articles.
     What's the best approach using React Query and the Strapi Client SDK?"

AI: [Suggests 3 approaches]

You: "I like option 2. Can you create a detailed implementation plan
     with file structure and key code snippets?"

AI: [Creates plan]

You: "This looks good. Implement the plan."
Pro tip: Use Chat Mode to investigate without writing code:
"Investigate but don't write code yet. Show me what needs to change."4. Write Clear, Scoped Prompts
Bad Prompt (too broad):
Build the articles page with search, pagination, and filters.Good Prompt (specific and scoped):
On page /articles, implement article listing with these requirements:

SCOPE:
- Display articles in a responsive grid (3 cols desktop, 2 tablet, 1 mobile)
- Use the useArticles() hook from /hooks/useStrapi.ts
- Each article card shows: title, description, featuredImage, author.fullName, contentTags

CONSTRAINTS:
- Do not modify /lib/strapi.ts or /hooks/useStrapi.ts
- Use ArticleCard component (to be created in /components/ArticleCard.tsx)
- Follow Tailwind spacing from design system
- Use loading skeleton, not spinner

ACCEPTANCE TESTS:
- Articles load and display correctly
- Grid is responsive across breakpoints
- Loading state shows skeleton cards
- Error state shows user-friendly message

DELIVERABLES:
- /pages/ArticlesPage.tsx
- /components/ArticleCard.tsx
- Update /App.tsx routing if needed
5. Add Guardrails to Every Prompt
Tell the AI what NOT to touch:
CONSTRAINTS:
- Do not modify /lib/strapi.ts (API layer is stable)
- Do not change /types/strapi.ts (types are verified)
- Do not edit /components/Layout.tsx (working correctly)
- Keep existing ArticleCard API - only modify internals
6. Define Roles Clearly (If Applicable)
If your app has multiple user roles, always specify:
As an Admin, I want to see an "Edit" button on each article card.
As a Guest, I should only see the "Read More" link.

Please isolate this feature and add role-based conditional rendering.
7. The Power of Repetition
Important note: The AI's memory can be limited. Don't assume it remembers your Knowledge file perfectly.
Repeat critical instructions in prompts:
Reminder: We're using Strapi v5 with direct field access (article.title, NOT article.attributes.title).
Reminder: author field is "fullName" not "name"
Reminder: blocks.section-heading uses "text" not "subheading"
8. Validate After Each Step
After the AI generates code:
- Review the changes - Use Lovable's diff view
- Test in preview - Does it work?
- Check console - Any errors?
- Pin the version if it works
If something breaks:
- Switch to Chat Mode
- Paste error screenshot
- Say: "Investigate without breaking other features. If needed, revert to last working version."
9. Use Visual Edit for Quick Tweaks
For simple changes (text, colors, spacing), use Visual Edit instead of prompts:
- It's free (no credits)
- Instant changes
- Easy to undo
- Perfect for minor UI adjustments
10. Pin Stable Versions
After every working feature:
- Pin it in version history
- This creates a fallback point
- Easy to compare: "What changed between T-5 and T-0?"
The Modular Multi-Prompt Strategy
Based on Lovable's best practices, here's the recommended approach for building the Strapi blog:
Phase 0: Foundation & Discovery
Prompt 0.1: Generate Knowledge File
Generate a knowledge file for a blog platform project that:
- Consumes Strapi v5 backend at https://inviting-cheese-ce66d3b9e0.strapiapp.com
- Uses React, TypeScript, Tailwind CSS, React Router, TanStack Query
- Has landing page, articles listing, and article detail pages
- Implements 9 dynamic zone block components

Include: product vision, tech stack, data model, coding standards, and non-goals.
Prompt 0.2: Setup Project & Dependencies
CONTEXT: Starting a new Vite + React + TypeScript project

TASK: Initialize project with these dependencies:
- @strapi/client
- @tanstack/react-query
- react-router-dom
- tailwindcss
- Include shadcn/ui setup

DELIVERABLES:
- package.json with correct versions
- vite.config.ts
- tailwind.config.js
- tsconfig.json with strict mode
- Basic folder structure: /components, /pages, /hooks, /lib, /types

Do not create any components yet.
Phase 1: API Discovery & Type Definition
Prompt 1.1: Fetch & Document API Structure
ROLE: You are a senior TypeScript developer

TASK: API Discovery for Strapi v5 backend

STEP 1: Fetch these endpoints and save responses:
- https://inviting-cheese-ce66d3b9e0.strapiapp.com/api/global
- https://inviting-cheese-ce66d3b9e0.strapiapp.com/api/landing-page
- https://inviting-cheese-ce66d3b9e0.strapiapp.com/api/articles?pagination[page]=1&pagination[pageSize]=6

STEP 2: Create a field name reference document listing:
- All field names by content type
- Nested object structures
- Note any common naming pitfalls (e.g., "text" not "subheading", "fullName" not "name")

STEP 3: Present findings and WAIT for confirmation

DO NOT create TypeScript interfaces yet.
Prompt 1.2: Create Verified TypeScript Types
CONTEXT: Field names verified in previous step

TASK: Create TypeScript interfaces in /types/strapi.ts

REQUIREMENTS:
- Use EXACT field names from API responses
- Add JSDoc comments with field source
- Include: Article, Author, Tag, Global, LandingPage, and all 9 block type interfaces
- Create verification table for each interface

DELIVERABLES:
- /types/strapi.ts
- Verification tables for all interfaces

WAIT for confirmation before proceeding.
Phase 2: API Layer
Prompt 2.1: Strapi Client Configuration
TASK: Setup Strapi Client SDK in /lib/strapi.ts

SPEC:
- Import strapiClient from '@strapi/client'
- Configure baseURL: https://inviting-cheese-ce66d3b9e0.strapiapp.com
- Create utility functions:
  - getGlobal() - fetch global settings
  - getLandingPage() - fetch landing page
  - getArticles(params?) - fetch articles with optional search, page, pageSize
  - getArticleBySlug(slug) - fetch single article

CONSTRAINTS:
- Do not add populate params (auto-populated by backend)
- Use Strapi v5 filter syntax: { filters: { field: { $eq: value } } }
- Return clean data (unwrap response.data)

DELIVERABLES:
- /lib/strapi.ts with 4 functions
- Include inline comments explaining filter syntax
Prompt 2.2: React Query Hooks
TASK: Create React Query hooks in /hooks/useStrapi.ts

REQUIREMENTS:
- Wrap each /lib/strapi.ts function with useQuery or useMutation
- Use appropriate query keys
- Handle loading, error, and success states
- Enable proper caching

FUNCTIONS TO CREATE:
- useGlobal()
- useLandingPage()
- useArticles(search?, page?)
- useArticle(slug)

CONSTRAINTS:
- Do not modify /lib/strapi.ts
- Do not modify /types/strapi.ts

DELIVERABLES:
- /hooks/useStrapi.ts
- Setup QueryClientProvider in /App.tsx if not already done
Phase 3: Layout & Navigation
Prompt 3.1: Global Layout Structure
TASK: Create global layout in /components/Layout.tsx

SCOPE:
- Use useGlobal() hook to fetch header and footer data
- Create Header component with navigation
- Create Footer component
- Add mobile hamburger menu

CONSTRAINTS:
- Do not implement banner yet (next prompt)
- Use shadcn/ui components where appropriate
- Mobile-first responsive design

DELIVERABLES:
- /components/Layout.tsx
- /components/Header.tsx
- /components/Footer.tsx

ACCEPTANCE TESTS:
- Header renders navigation links from API
- Footer renders footer data from API
- Mobile menu toggles correctly
- Layout wraps all pages
Prompt 3.2: Add Dismissible Banner
TASK: Add dismissible banner to /components/Layout.tsx

REQUIREMENTS:
- Render global.banner data
- Add dismiss functionality (localStorage)
- Show banner only if not dismissed
- Style with Tailwind (top of page, full width)

CONSTRAINTS:
- Do not modify Header or Footer components
- Use existing Layout structure

ACCEPTANCE TEST:
- Banner shows on first visit
- Dismiss button hides banner
- Banner stays hidden after refresh
Phase 4: Landing Page (Iterative Block Implementation)
Prompt 4.1: Landing Page Foundation
TASK: Create landing page structure at /pages/LandingPage.tsx

REQUIREMENTS:
- Use useLandingPage() hook
- Render page title and description
- Create BlockRenderer component skeleton
- Map __component to block components

CONSTRAINTS:
- Do not implement actual block components yet
- Create placeholder components for each block type
- Focus on the rendering infrastructure

DELIVERABLES:
- /pages/LandingPage.tsx
- /components/BlockRenderer.tsx (with placeholders)
Prompt 4.2: Implement Hero Block
TASK: Implement HeroBlock component at /components/blocks/HeroBlock.tsx

SPEC (from API response):
- heading: string
- text: string
- links: array of {label, url, variant}
- image: {url, alternativeText}

DESIGN:
- Full-width hero section
- Background image with overlay
- Centered content
- CTA buttons in flex row

CONSTRAINTS:
- Do not modify other block components
- Use verified TypeScript interface from /types/strapi.ts
- Reference API field names in comments

ACCEPTANCE TEST:
- Hero renders with actual data from landing page
- Image loads with correct alt text
- CTA buttons link to correct URLs
Prompt 4.3: Implement Section Heading Block
TASK: Implement SectionHeadingBlock at /components/blocks/SectionHeadingBlock.tsx

CRITICAL: Use exact API field names:
- block.heading (NOT block.title)
- block.text (NOT block.subheading)

DESIGN:
- Centered text section
- Large heading + smaller descriptive text
- Responsive typography

CONSTRAINTS:
- Do not modify other components
- Use Tailwind typography classes

DELIVERABLES:
- /components/blocks/SectionHeadingBlock.tsx

VERIFICATION:
Confirm you're using block.heading and block.text (not title/subheading)
Continue this pattern for remaining blocks: CardGrid, ContentWithImage, Markdown, PersonCard, FAQs, Newsletter, FeaturedArticles
Phase 5: Articles Listing
Prompt 5.1: Article Card Component
TASK: Create reusable ArticleCard component

SPEC:
- Props: article (Article type)
- Display: featuredImage, title, description, author.fullName, contentTags
- Click navigates to /articles/:slug

DESIGN:
- Card with image on top
- Hover effect
- Tag pills
- Author attribution

CONSTRAINTS:
- Do not create ArticlesPage yet
- Use verified Article interface
- Add "Read More" link

DELIVERABLES:
- /components/ArticleCard.tsx
Prompt 5.2: Articles Listing Page
TASK: Create /pages/ArticlesPage.tsx

REQUIREMENTS:
- Use useArticles() hook
- Render ArticleCard grid (3 cols desktop, 2 tablet, 1 mobile)
- Add loading skeleton
- Add empty state

CONSTRAINTS:
- Do not add search or pagination yet (next prompts)
- Use ArticleCard component (don't modify it)

DELIVERABLES:
- /pages/ArticlesPage.tsx
- Update /App.tsx routing
Prompt 5.3: Add Search Functionality
TASK: Add search to /pages/ArticlesPage.tsx

REQUIREMENTS:
- Search input with 300ms debounce
- Pass search query to useArticles hook
- Show "No results" state
- Clear search button

CONSTRAINTS:
- Do not modify ArticleCard component
- Do not modify useArticles hook (it already supports search param)

ACCEPTANCE TESTS:
- Typing searches articles by title/description
- Debouncing prevents excessive API calls
- Results update correctly
Prompt 5.4: Add Pagination Controls
TASK: Add pagination to /pages/ArticlesPage.tsx

REQUIREMENTS:
- Show current page, total pages
- Previous/Next buttons
- Jump to page input
- Update URL query params: ?page=2

CONSTRAINTS:
- Do not modify useArticles hook
- Pagination data comes from meta.pagination in API response

ACCEPTANCE TESTS:
- Pagination controls work correctly
- URL updates with page number
- Direct URL navigation works (/articles?page=3)
Phase 6: Single Article Page
Prompt 6.1: Article Detail Foundation
TASK: Create /pages/ArticlePage.tsx

REQUIREMENTS:
- Get slug from URL params
- Use useArticle(slug) hook
- Display: featuredImage, title, description, author (with image), contentTags
- Render markdown content
- Show 404 if article not found

CONSTRAINTS:
- Do not render blocks yet (next prompt)
- Do not render related articles yet (next prompt)

DELIVERABLES:
- /pages/ArticlePage.tsx
- Update /App.tsx routing: /articles/:slug
Prompt 6.2: Render Article Blocks
TASK: Add block rendering to /pages/ArticlePage.tsx

REQUIREMENTS:
- Reuse BlockRenderer component from landing page
- Render article.blocks array
- Use same block components

CONSTRAINTS:
- Do not modify block components
- Do not modify BlockRenderer

ACCEPTANCE TEST:
- Article blocks render correctly
- All block types display properly
Prompt 6.3: Add Related Articles
TASK: Add related articles section to /pages/ArticlePage.tsx

REQUIREMENTS:
- Render article.relatedArticles array
- Use ArticleCard component in grid
- "Related Articles" heading
- Show only if relatedArticles exist

CONSTRAINTS:
- Do not modify ArticleCard

ACCEPTANCE TEST:
- Related articles display at bottom of page
- Cards link to correct articles
Phase 7: Polish & Optimization
Prompt 7.1: Error Boundaries
TASK: Add error boundaries

REQUIREMENTS:
- Create ErrorBoundary component
- Wrap each page with error boundary
- User-friendly error messages
- "Try again" button

DELIVERABLES:
- /components/ErrorBoundary.tsx
- Update page wrappers
Prompt 7.2: Accessibility Audit
TASK: Accessibility improvements

REQUIREMENTS:
- Add proper ARIA labels
- Ensure keyboard navigation works
- Check color contrast
- Add skip links
- Alt text on all images

ACCEPTANCE:
- Lighthouse accessibility score > 95
Prompt 7.3: Performance Optimization
TASK: Performance optimization

REQUIREMENTS:
- Lazy load images
- Code splitting for routes
- Optimize bundle size
- Add meta tags for SEO

ACCEPTANCE:
- Lighthouse performance score > 90
Comparison: One-Shot vs. Iterative Approach
| Aspect | One-Shot (Even with Checkpoints) | Iterative Multi-Prompt |
|---|---|---|
| Initial Time | Fast first output | Slower start |
| Total Time | Often slower (more debugging) | Faster to working product |
| Code Quality | Variable, hard to review | Consistently higher |
| Testing | Test everything at once | Test each piece |
| Debugging | Hard to isolate issues | Easy to pinpoint problems |
| AI Context | Context overload | Focused context |
| Knowledge Reuse | Limited | Knowledge file persists |
| Flexibility | Rigid structure | Adaptable as you learn |
| Learning Curve | Steep (all at once) | Gradual |
| Version Control | Large commits | Small, focused commits |
| Rollback | Lose all work | Rollback single feature |
Key Takeaways
- Start Small - Bootstrap the project → Add features one by one
- Use Knowledge Files - Set context once, reference forever
- Chat Mode is Your Friend - Plan in chat, implement when ready
- Test After Each Prompt - Don't stack unverified changes
- Pin Working Versions - Create safety nets
- Be Specific - Scoped prompts = predictable output
- Add Guardrails - Tell AI what not to touch
- Repeat Important Info - Don't assume AI remembers everything
When to Use Which Approach
Use Checkpoint One-Shot When:
- You're creating a proof-of-concept
- You have a very clear, simple spec
- You're experienced and can review large codebases quickly
- You're just exploring what's possible
Use Iterative Multi-Prompt When:
- You're building for production
- You're learning the tech stack
- The project has multiple complex features
- Code quality and maintainability matter
- You want to minimize debugging time
For our Strapi blog project, the iterative approach is strongly recommended.
Key Takeaway: Context is Everything
When using AI coding tools:
- Share what only you know - Your backend details, API structure, custom setup
- Let AI use what it knows - Standard React, UI components, popular libraries
- Show, don't just tell - Include real API responses, not just descriptions
- Point out customizations - If you've changed how Strapi works, say so clearly
The more accurate details you give about your Strapi backend, the better code you'll get.
Step 6: Build with Lovable
- Create a new project in Lovable
- Copy the complete prompt above (the entire ```txt block)
- Paste the sample API responses into the placeholders:
- Get actual responses from your Strapi endpoints
- Replace
[Paste actual response from /api/global...]with real JSON - Do this for global, landing-page, articles, and single article
- Paste the OpenAPI spec (optional but recommended)
- Run
yarn strapi openapi generatein your server - Copy contents of
specification.json - Paste into the
<openapi-spec>section
- Run
- Submit the prompt to Lovable
- Let Lovable generate your entire frontend - It will create all files, components, hooks, and pages
- Iterate with focused prompts if needed:
- "Add infinite scroll instead of pagination"
- "Improve mobile navigation UX"
- "Add article reading time estimate"
Step 7: Test and Refine
As Lovable builds your application:
- Test API connectivity - Ensure CORS is properly configured in Strapi
- Verify data rendering - Check that all fields display correctly
- Test error handling - Try invalid slugs, network failures, etc.
- Check responsive design - Test on mobile, tablet, and desktop viewports
- Optimize performance - Look for unnecessary re-renders or API calls
Step 8: Deploy Your Frontend
Lovable provides integrated deployment options:
- Click the Deploy button in Lovable
- Configure environment variables (your Strapi API URL)
- Deploy to production - Lovable typically uses Vercel or similar platforms
Best Practices for AI-Powered Development with Strapi
1. Always Include Real API Responses
Don't just provide the OpenAPI spec—include actual API responses from your endpoints. This ensures the AI understands your specific data structure (especially if you've customized it with middleware).
Fetch real responses:
# Get actual responses from your deployed Strapi
curl https://your-strapi.strapiapp.com/api/global
curl https://your-strapi.strapiapp.com/api/articles
2. Be Clear About Your Strapi Version
Specify you're using Strapi v5 in your prompt. Strapi v5 changed the data structure from v4—it no longer uses nested data.attributes, which makes your frontend code much cleaner.
3. Update Your Spec When Content Types Change
Whenever you modify Strapi content types:
yarn strapi openapi generateThen update your Lovable prompt with the new spec.
4. Document Your Custom Middleware
If your Strapi has custom middleware (like our auto-populate middleware), document this clearly. In our case:
- Middleware auto-populates all relations and media
- This means you don't need populate params in your frontend API calls
- All related data comes back automatically
5. Test with Real Data Early
Don't wait until the frontend is "done" to test with real Strapi data:
- Get Lovable to generate the basic structure
- Test API connectivity immediately
- Verify data rendering with actual content
- Iterate on styling and features once data flow works
Common Pitfalls and How to Avoid Them
Pitfall 1: Vague Prompts Lead to Generic Code
Problem: Asking Lovable to "build a blog" without context results in generic code that doesn't match your API.
Solution: Provide OpenAPI spec, real API responses, and specific requirements about data structure and features.
Pitfall 2: Mixing Strapi Versions
Problem: AI generates code for older Strapi versions (v3/v4) with nested data.attributes structure when you're using Strapi v5's simpler structure.
Solution: Clearly specify you're using Strapi v5 in your prompt. Include actual API responses showing the v5 structure. Give examples of correct data access: article.title not article.attributes.title.
Pitfall 3: Over-fetching or Under-fetching Data
Problem: Not populating relations results in missing data, or populating everything causes performance issues.
Solution: Be specific about which relations to populate:
For article listing: populate=coverImage,category,author
For article detail: populate=*
Pitfall 4: Runaway API Calls
Problem: AI-generated code may create infinite loops or excessive API calls.
Solution: Implement debouncing, proper dependency arrays in useEffect, and rate limiting on your API:
// Add to your prompt:
"Implement search with 300ms debounce to prevent excessive API calls.
Ensure useEffect hooks have proper dependency arrays to avoid infinite loops.
Add request caching where appropriate."
Conclusion
AI tools like Lovable aren't replacing developers. They're making us faster and more creative. But you still need to understand your data, your API, and your app's structure to use them well.
Start with a clear Strapi backend, create your OpenAPI spec, write a detailed prompt, and let Lovable speed up your work. Just remember: the AI is your coding partner, not your replacement.
Want to learn more? Join me Mon-Fri at 12:30 PM CST for Strapi's open office hours on Discord, or find me @codingthirty on X.
Resources: