Introduction
Imagine having an AI assistant listen in on your video calls, write down everything being said, and then offer suggestions, answers, and analysis in real time. This series will show you how to build your very own transcription app that does just that.
You can find the outline for the upcoming series here.
- **Part 1: Implement Audio Recording and User Interface. **
- Part 2: Implement Strapi backend and connect API
- Part 3: Implement connection to chatGPT and deploy to Strapi cloud
By the end of this tutorial series, you will be proficient in using Next.js, Strapi, ChatGPT, and Whisper to create interesting full-stack apps that incorporate cutting-edge AI technology to enhance functionality.
Below is a demo of what we will be building:
Prerequisites
To follow this tutorial, you will need the following:
- An OpenAI (ChatGPT) account and API key.
- Package manager (yarn or npm).
- Node.js (v16 or v18).
- Code editor (Visual Studio code, Sublime).
- Basic knowledge of Javascript.
- Basic knowledge of Strapi
Why is Transcription Important?
Transcription apps are helping people communicate more effectively. Imagine environments with lots of noise or where there may be language barriers and how AI-assisted audio conversion into text might help. Or imagine how this might help you participate more in conversations if you have a hearing impairment.
AI-powered transcription apps offer a unique advantage in understanding and analyzing meetings. By providing a comprehensive record of conversations and responses, these apps, like ours, leverage technologies such as ChatGPT to enhance clarity and provide valuable insights.
Technology Overview
Let's briefly discuss the technology and tools we will be using and their role in helping this app come together.
What is Strapi?
Strapi or Strapi CMS is an open-source headless content management system allowing us to quickly create APIs. We will use Strapi CMS to build our custom API, which will access ChatGPT, and we will use Strapi CMS to store data about the transcriptions, such as conversation history.
What is Next.js?
Next.js is a React framework that simplifies the development of complex and high-performance web applications. It offers many built-in features, such as server-side rendering, automatic code splitting, image optimization, and API routes.
What is Whisper?
Created by OpenAI, Whisper is a machine-learning transcription and speech recognition model. We will use the OpenAI API to connect with Whisper for speech recognition and transcription.
What is ChatGPT?
OpenAI also created ChatGPT, an AI chatbot that can respond to questions and produce various results, such as articles, essays, code, or emails. We will connect to ChatGPT to explain and analyze our transcribed text.
Strapi Cloud
Strapi Cloud is a cloud platform that makes it simple for developers to create, launch, and maintain online apps and services; this is where we will host the Strapi backend for the app (We will use Vercel or Netlify for the frontend). Visit Strapi Cloud to learn more about Strapi Cloud pricing and more.
How to Setup Next.js
Let's create our frontend directory. Navigate to the main folder, which we will call transcribe-tutorial, and enter the following command in the terminal.
npx create-next-app transcribe-frontendNavigate to this newly created directory and run the following.
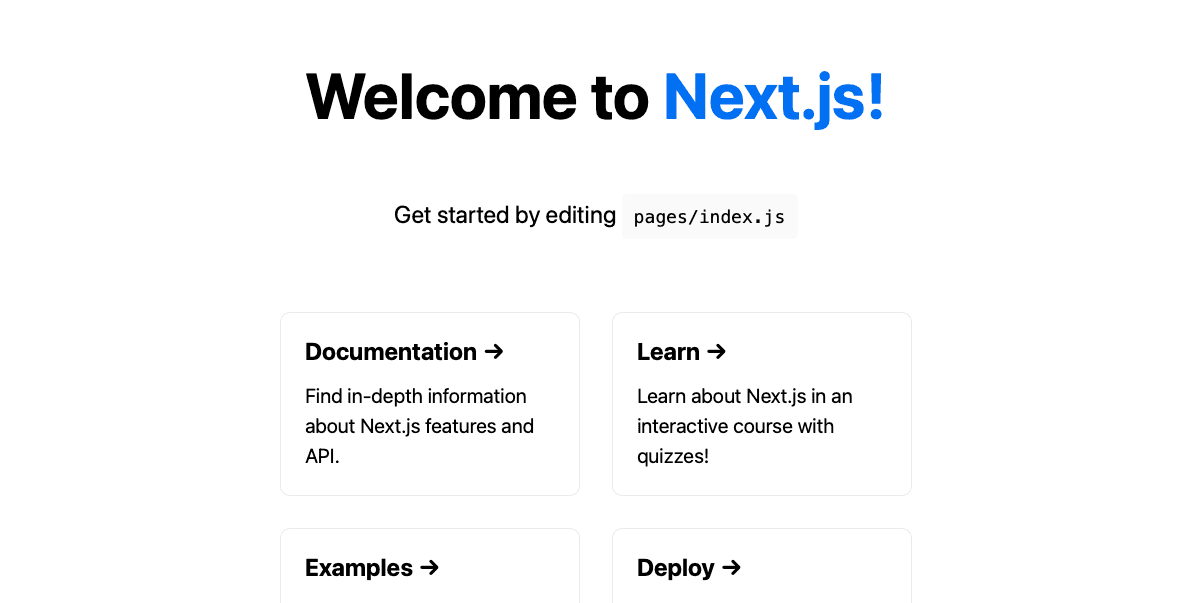
yarn devThis should start and run the project in http://localhost:3000, when accessed through the web browser, we should be able to see the image below:
Let's do a bit of preliminary setup here; in transcribe-frontend, navigate to pages/index.js. This will be the entry point to our application; delete everything inside this file and paste the following:
import Head from 'next/head';
import styles from '../styles/Home.module.css';

export default function Home() {
  return (
    <div className={styles.container}>
      <Head>
        <title>Strapi Transcribe</title>
        <meta name="description" content="Generated by create next app" />
        <link rel="icon" href="/favicon.ico" />
      </Head>

      <main className={styles.main}>
        <h1 className={styles.title}>
          Welcome to <a target="_blank" href="https://strapi.io">Strapi Transcribe!</a>
        </h1>
      </main>

      <footer className={styles.footer}>Powered by Strapi</footer>
    </div>
  );
}
Let's install some of the libraries we will use on the frontend. First, we need recordrtc, which will handle the recording process and give us access to raw data captured from the device's microphone. Next, we will use lamejs, which will help us process the data to encode it into MP3 format. We will also need axios to make network calls to OpenAI whisper, so run the following command in the terminal to install these libraries.
yarn add recordrtc @breezystack/lamejs axiosSet Up Environment Variable for OpenAI
Create a .env.local file in the root directory and then add the below environment variable with your OpenAI API key:
NEXT_PUBLIC_OPENAI_API_KEY="Paste your API key here"Next.js Project structure
We will be using the container/presentational pattern to structure the application. This will separate the logic from the presentation (UI rendering). This makes the components easier to understand, helps reusability, and is more testable. The layout for our file structure is below: TranscribeContainer will host all of our state and logic. Then, we have the components directory, which will be presentational, and the utils directory to handle the recording and transcription.
components/
  RecordingControls.js
  TranscriptionDisplay.js
containers/
  TranscribeContainer.js
pages/
  _app.js
  index.js
hooks/
  useAudioRecorder.js
utils/
  transcriptionService.js
How to Capture Audio with recordrtc
First of all, let's learn how we can capture audio. We will use recordrtc, a Javascript library that uses the Web Real-Time Communication (WebRTC) API to capture media streams from the systems microphone. WebRTC provides an easy-to-use interface for handling recordings.
Create Custom Hooks for Audio Capture
Create a directory named hooks and then a file inside called useAudioRecorder.js. We will keep all of the logic and state for recording audio in this hook; if the application grows in size, this will allow us to use the logic elsewhere in the app without having to repeat ourselves.
Our custom hook will have five functions. Let's go over the code for each one:
const handleStartRecording = async () => {
    try {
      setTranscribed('');

      if (!stream.current) {
        await onStartStreaming();
      }
      if (stream.current) {
        if (!recorder.current) {
          const {
            default: { RecordRTCPromisesHandler, StereoAudioRecorder },
          } = await import('recordrtc');
          const recorderConfig = {
            mimeType: 'audio/wav',
            numberOfAudioChannels: 1,
            recorderType: StereoAudioRecorder,
            sampleRate: 44100,
            timeSlice: streaming ? timeSlice : undefined,
            type: 'audio',
            ondataavailable: streaming ? onDataAvailable : undefined,
          };
          recorder.current = new RecordRTCPromisesHandler(
            stream.current,
            recorderConfig
          );
        }
        if (!encoder.current) {
          const { Mp3Encoder } = await import('@breezystack/lamejs');
          encoder.current = new Mp3Encoder(1, 44100, 96);
        }
        const recordState = await recorder.current.getState();
        if (recordState === 'inactive' || recordState === 'stopped') {
          await recorder.current.startRecording();
        }

        setRecording(true);
      }
    } catch (err) {
      console.error(err);
    }
};handleStartRecordingHook: This function is asynchronous because we will be making network calls, which we will have to wait for. First, we set the last transcribed text to an empty string to make way for the newly transcribed data; then we check if there's a current audio stream; if there isn't, then we start it with theonStartStreamingfunction:
const onStartStreaming = async () => {
    try {
      if (stream.current) {
        stream.current.getTracks().forEach((track) => track.stop());
      }
      stream.current = await navigator.mediaDevices.getUserMedia({
        audio: true,
      });
    } catch (err) {
      console.error(err);
    }
};onStartStreamingHook: This function checks if we have a current stream of audio from our speakers; if so, then it stops it; if not, then it uses thenavigator.mediaDevices.getUserMediamethod, which prompts the user for permission to use a media input that produces a MediaStream. We're requesting audio here,{ audio: true}, then we save it to a streamRef, which we will initialise at the start of the hook and pass this audio stream torecordrtc.
Next, we check that the stream started and that there's not already a recorder so we can start the initialization object and save it to our recorder Ref.
Set up Recorder Configuration
Now that we have the stream up and running and it has passed some initial checks, we dynamically import recordrtc (dynamically importing will save space and make our program run faster), then we destructure the RecordRTCPromiseHandler and StereoAudioRecorder, and set up the configuration object.
The most important parts of the configuration object are:
recorderType, where we pass in theStereoAudioRecorder, which is a class fromrecordrtcdesigned to record audio;timeslice: which determines how often data is sent back to the application; it will callonDataAvailablein the interval we have specified withtimeSlice;onDataAvailablealso checks if we are streaming; if so, it will call the function we passed to it, which isonDataAvailable; Once we have that configured, we assign a new instance of theRecordRTCPromiseHandlerto the recorderRef, passing in the audio streamRefand therecorderConfig.
Set up Audio Encoder
So our recorder has been initialized, and now we set up our encoder. We dynamically import lamejs and assign our encoder to the encoder Ref.
Lastly, we check the recorder's state to see if it's inactive or stopped, and then we start recording.
const onDataAvailable = async (data) => {
    try {
      if (streaming && recorder.current) {
        if (encoder.current) {
          const buffer = await data.arrayBuffer();
          const mp3chunk = encoder.current.encodeBuffer(new Int16Array(buffer));
          const mp3blob = new Blob([mp3chunk], { type: 'audio/mpeg' });
          chunks.current.push(mp3blob);
        }
        const recorderState = await recorder.current.getState();
        if (recorderState === 'recording') {
          const blob = new Blob(chunks.current, { type: 'audio/mpeg' });
          const file = new File([blob], 'speech.mp3', { type: 'audio/mpeg' });
          const text = await transcriptionService(
            file,
            apiKey,
            whisperApiEndpoint,
            'transcriptions'
          );
          setTranscribed(text);
        }
      }
    } catch (err) {
      console.error(err);
    }
  };
So, as discussed, when we are recording, recordrtc will call onDataAvailable periodically with chunks of audio data.
onDataAvailableHook: This checks if we are streaming audio and have a current recorder to avoid errors. This is where we will encode our audio to MP3. First, it checks if an encoder is available; if it is, it converts the received audio data into an array buffer, encodes this buffer into MP3 format, and then pushes it to our chunksRef.
Next, it gets the recorder state to check if we are still recording, then concatenates the MP3 chunks into a single blob, which it packages into a File object. Now we have our audio file, which we send to whisper to transcribe with transcriptionService. This is just a util function, which I will explain later, and then we set the transcribed text in state to be displayed in the UI.
The other functions we have are handleStopRecording and onStopStreaming:
 const handleStopRecording = async () => {
    try {
      if (recorder.current) {
        const recordState = await recorder.current.getState();
        if (recordState === 'recording' || recordState === 'paused') {
          await recorder.current.stopRecording();
        }

        onStopStreaming();
        setRecording(false);

        await recorder.current.destroy();
        chunks.current = [];
        if (encoder.current) {
          encoder.current.flush();
          encoder.current = undefined;
        }
        recorder.current = undefined;
      }
    } catch (err) {
      console.error(err);
    }
};handleStopRecordingHook: This gets the current state to make sure we are actually recording and then makes a call to stop it; it also calls theonStopStreamingfunction.onStopStreamingHook: This checks if we have a current audio stream and stop it if so:
const onStopStreaming = () => {
    if (stream.current) {
      stream.current.getTracks().forEach((track) => track.stop());
      stream.current = undefined;
    }
  };
Implementing The Audio Recording Feature
It is time to implement the recording feature of this app to allow users transcribe from their system's mic input.
Paste the entire code into your useAudioRecorder.js file:
import { useState, useRef, useEffect } from 'react';
import { transcriptionService } from '../utils/transcriptionService';

export const useAudioRecorder = (
  streaming,
  timeSlice,
  apiKey,
  whisperApiEndpoint
) => {
  const chunks = useRef([]);
  const encoder = useRef();
  const recorder = useRef();
  const stream = useRef();
  const [recording, setRecording] = useState(false);
  const [transcribed, setTranscribed] = useState('');

  useEffect(() => {
    return () => {
      if (chunks.current) {
        chunks.current = [];
      }
      if (encoder.current) {
        encoder.current.flush();
        encoder.current = undefined;
      }
      if (recorder.current) {
        recorder.current.destroy();
        recorder.current = undefined;
      }

      if (stream.current) {
        stream.current.getTracks().forEach((track) => track.stop());
        stream.current = undefined;
      }
    };
  }, []);

  const onStartStreaming = async () => {
    try {
      if (stream.current) {
        stream.current.getTracks().forEach((track) => track.stop());
      }
      stream.current = await navigator.mediaDevices.getUserMedia({
        audio: true,
      });
    } catch (err) {
      console.error(err);
    }
  };

  const onStopStreaming = () => {
    if (stream.current) {
      stream.current.getTracks().forEach((track) => track.stop());
      stream.current = undefined;
    }
  };

  const handleStartRecording = async () => {
    try {
      setTranscribed('');

      if (!stream.current) {
        await onStartStreaming();
      }
      if (stream.current) {
        if (!recorder.current) {
          const {
            default: { RecordRTCPromisesHandler, StereoAudioRecorder },
          } = await import('recordrtc');
          const recorderConfig = {
            mimeType: 'audio/wav',
            numberOfAudioChannels: 1,
            recorderType: StereoAudioRecorder,
            sampleRate: 44100,
            timeSlice: streaming ? timeSlice : undefined,
            type: 'audio',
            ondataavailable: streaming ? onDataAvailable : undefined,
          };
          recorder.current = new RecordRTCPromisesHandler(
            stream.current,
            recorderConfig
          );
        }
        if (!encoder.current) {
          const { Mp3Encoder } = await import('@breezystack/lamejs');
          encoder.current = new Mp3Encoder(1, 44100, 96);
        }
        const recordState = await recorder.current.getState();
        if (recordState === 'inactive' || recordState === 'stopped') {
          await recorder.current.startRecording();
        }

        setRecording(true);
      }
    } catch (err) {
      console.error(err);
    }
  };

  const handleStopRecording = async () => {
    try {
      if (recorder.current) {
        const recordState = await recorder.current.getState();
        if (recordState === 'recording' || recordState === 'paused') {
          await recorder.current.stopRecording();
        }

        onStopStreaming();
        setRecording(false);

        await recorder.current.destroy();
        chunks.current = [];
        if (encoder.current) {
          encoder.current.flush();
          encoder.current = undefined;
        }
        recorder.current = undefined;
      }
    } catch (err) {
      console.error(err);
    }
  };

  const onDataAvailable = async (data) => {
    try {
      if (streaming && recorder.current) {
        if (encoder.current) {
          const buffer = await data.arrayBuffer();
          const mp3chunk = encoder.current.encodeBuffer(new Int16Array(buffer));
          const mp3blob = new Blob([mp3chunk], { type: 'audio/mpeg' });
          chunks.current.push(mp3blob);
        }
        const recorderState = await recorder.current.getState();
        if (recorderState === 'recording') {
          const blob = new Blob(chunks.current, { type: 'audio/mpeg' });
          const file = new File([blob], 'speech.mp3', { type: 'audio/mpeg' });
          const text = await transcriptionService(
            file,
            apiKey,
            whisperApiEndpoint,
            'transcriptions'
          );
          setTranscribed(text);
        }
      }
    } catch (err) {
      console.error(err);
    }
  };

  return {
    recording,
    transcribed,
    handleStartRecording,
    handleStopRecording,
    setTranscribed,
  };
};
In the code above, you may notice that we have a useEffect cleanup hook. This is just to ensure that any allocated resources are cleaned up when the component using this hook unmounts.
Make API Calls to Whisper using Axios
The transcriptionService of our hook will call the Whisper API using Axios. We append our audio file to the body, which is created using the built-in Javascript function FormData().
Create a util directory in the root of the application and then create a file named transcriptionService.js and paste in the following code:
import axios from 'axios';

export const transcriptionService = async (
  file,
  apiKey,
  whisperApiEndpoint,
  mode
) => {
  const body = new FormData();
  body.append('file', file);
  body.append('model', 'whisper-1');
  body.append('language', 'en');

  const headers = {};
  headers['Content-Type'] = 'multipart/form-data';

  if (apiKey) {
    headers['Authorization'] = `Bearer ${apiKey}`;
  }

  const response = await axios.post(`${whisperApiEndpoint}${mode}`, body, {
    headers,
  });

  return response.data.text;
};
That's all the code we need to transcribe from our system's mic input.
Building out the Next.js UI
Let's look at building the UI so we can reason visually about where to connect the API later. We will need to create a dashboard that shows our saved meetings and allows us to start new ones, and then a view to show the transcriptions; let's finish off the transcription view and then build the dashboard.
Create Custom CSS Code
First, delete everything in the globals.css file in the styles directory and replace it with the following core styles:
html,
body {
  padding: 0;
  margin: 0;
  font-family: -apple-system, BlinkMacSystemFont, Segoe UI, Roboto, Oxygen,
    Ubuntu, Cantarell, Fira Sans, Droid Sans, Helvetica Neue, sans-serif;
}

:root {
  --primary: #4945ff;
  --primaryLight: #7572ff;
  --secondary: #8c4bff;
  --secondaryLight: #a47fff;
  --headerColor: #1a1a1a;
  --bodyTextColor: #4e4b66;
  --bodyTextColorWhite: #fafbfc;
  /* 13px - 16px */
  --topperFontSize: clamp(0.8125rem, 1.6vw, 1rem);
  /* 31px - 49px */
  --headerFontSize: clamp(1.9375rem, 3.9vw, 3.0625rem);
  --bodyFontSize: 1rem;
  /* 60px - 100px top and bottom */
  --sectionPadding: clamp(3.75rem, 7.82vw, 6.25rem) 1rem;
}

*,
*:before,
*:after {
  /* prevents padding from affecting height and width */
  box-sizing: border-box;
}
Create Component for Transcription Display
Create the container directory in the application's root and then create a file named TranscribeContainer.js. This is where we can use our recording hook to capture and display the transcriptions. Paste the following code into the newly created file:
import React, { useState } from 'react';
import styles from '../styles/Transcribe.module.css';
import { useAudioRecorder } from '../hooks/useAudioRecorder';
import RecordingControls from '../components/transcription/RecordingControls';
import TranscribedText from '../components/transcription/TranscribedText';

const mockAnswer =
  'Example answer to transcription here: Lorem ipsum dolor sit amet consectetur adipisicing elit. Velit distinctio quas asperiores reiciendis! Facilis quia recusandae velfacere delect corrupti!';
const mockAnalysis =
  'Example analysis to transcription here: Lorem ipsum dolor sit amet consectetur adipisicing elit. Velit distinctio quas asperiores reiciendis! Facilis quia recusandae velfacere delect corrupti!';

const TranscribeContainer = ({ streaming = true, timeSlice = 1000 }) => {
  const [analysis, setAnalysis] = useState('');
  const [answer, setAnswer] = useState('');
  const apiKey = process.env.NEXT_PUBLIC_OPENAI_API_KEY;
  const whisperApiEndpoint = 'https://api.openai.com/v1/audio/';
  const { recording, transcribed, handleStartRecording, handleStopRecording, setTranscribed } =
    useAudioRecorder(streaming, timeSlice, apiKey, whisperApiEndpoint);

  const handleGetAnalysis = () => {
    setAnalysis(mockAnalysis);
  };

  const handleGetAnswer = () => {
    setAnswer(mockAnswer);
  };

  const handleStopMeeting = () => {};

  return (
    <div style={{ margin: '20px' }}>
      <button
        className={styles['end-meeting-button']}
        onClick={handleStopMeeting}
      >
        End Meeting
      </button>
      <input
        type="text"
        placeholder="Meeting title here..."
        className={styles['custom-input']}
      />
      <div>
        <RecordingControls
          handleStartRecording={handleStartRecording}
          handleStopRecording={handleStopRecording}
        />
        {recording ? (
          <p className={styles['primary-text']}>Recording</p>
        ) : (
          <p>Not recording</p>
        )}
        <TranscribedText
          transcribed={transcribed}
          answer={answer}
          analysis={analysis}
          handleGetAnalysis={handleGetAnalysis}
          handleGetAnswer={handleGetAnswer}
        />
      </div>
    </div>
  );
};

export default TranscribeContainer;
Here, we import the useAudioRecorder hook, initialize it with the required variables, and structure the values we need from it. We also have an end meeting button and an input where users can name their meeting.
There are some display components: RecordingControls, which will just be a component to keep our control buttons, and TranscribeText, which will be used to display our transcriptions and any analysis we get from chatGPT. As you can see from the code above, we are passing the text props to it and a couple of functions, which will just be mocked for now.
Create Other Display Components
- Create Recording Controls Component
Let's create these components! Create a
componentsdirectory, and inside that, create atranscriptiondirectory. Create a file namedRecordingControls.jsand paste the following code:
import styles from '../../styles/Transcribe.module.css';

function RecordingControls({ handleStartRecording, handleStopRecording }) {
  return (
    <div className={styles['control-container']}>
      <button
        className={styles['primary-button']}
        onClick={handleStartRecording}
      >
        Start Recording
      </button>
      <button
        className={styles['secondary-button']}
        onClick={handleStopRecording}
      >
        Stop Recording
      </button>
    </div>
  );
}

export default RecordingControls;
This is just a simple flex container with a couple of buttons.
- Create Component for Transcribed Text
Now create a file named
TranscribedText.jsand paste the following code inside:
import styles from '../../styles/Transcribe.module.css';

function TranscribedText({
  transcribed,
  answer,
  analysis,
  handleGetAnalysis,
  handleGetAnswer,
}) {
  return (
    <div className={styles['transcribed-text-container']}>
      <div className={styles['speech-bubble-container']}>
        {transcribed && (
          <div className={styles['speech-bubble']}>
            <div className={styles['speech-pointer']}></div>
            <div className={styles['speech-text-question']}>{transcribed}</div>
            <div className={styles['button-container']}>
              <button
                className={styles['primary-button-analysis']}
                onClick={handleGetAnalysis}
              >
                Get analysis
              </button>
              <button
                className={styles['primary-button-answer']}
                onClick={handleGetAnswer}
              >
                Get answer
              </button>
            </div>
          </div>
        )}
      </div>
      <div>
        <div className={styles['speech-bubble-container']}>
          {analysis && (
            <div className={styles['analysis-bubble']}>
              <div className={styles['analysis-pointer']}></div>
              <p style={{ margin: 0 }}>Analysis</p>
              <div className={styles['speech-text-answer']}>{analysis}</div>
            </div>
          )}
        </div>
        <div className={styles['speech-bubble-container']}>
          {answer && (
            <div className={styles['speech-bubble-right']}>
              <div className={styles['speech-pointer-right']}></div>
              <p style={{ margin: 0 }}>Answer</p>
              <div className={styles['speech-text-answer']}>{answer}</div>
            </div>
          )}
        </div>
      </div>
    </div>
  );
}

export default TranscribedText;
This is just to display each transcribed chunk of text with its corresponding information.
We need to create the CSS module files so our components display correctly. In the styles directory, create a file named Transcribe.modules.css and paste in the following CSS code:
.control-container {
  margin: 0 auto;
  width: 380px;
}

.button-container {
  display: flex;
  justify-content: flex-end;
  margin: 10px;
}

.primary-text {
  color: var(--primaryLight);
}

.primary-button {
  background-color: var(--primary);
  color: white;
  border: none;
  border-radius: 5px;
  padding: 10px 20px;
  font-size: 16px;
  cursor: pointer;
  margin: 10px;
}

.primary-button:hover {
  background-color: var(--primaryLight);
}

.primary-button-analysis {
  background-color: var(--secondaryLight);
  color: black;
  border: none;
  border-radius: 5px;
  padding: 10px 20px;
  font-size: 16px;
  cursor: pointer;
  margin: 10px;
}

.primary-button-answer {
  background-color: #c8e6c9;
  color: black;
  border: none;
  border-radius: 5px;
  padding: 10px 20px;
  font-size: 16px;
  cursor: pointer;
  margin: 10px;
}

.primary-button-answer:hover {
  background-color: var(--primaryLight);
}
.primary-button-analysis:hover {
  background-color: var(--primaryLight);
}

.secondary-button {
  background-color: #d3d3d3;
  color: black;
  border: none;
  border-radius: 5px;
  padding: 10px 20px;
  font-size: 16px;
  cursor: pointer;
}

.secondary-button:hover {
  background-color: #b0b0b0;
}

.end-meeting-button {
  background-color: red;
  color: white;
  border: none;
  border-radius: 5px;
  padding: 10px 20px;
  font-size: 16px;
  cursor: pointer;
}

.end-meeting-button {
  position: absolute;
  top: 0;
  right: 0;
  padding: 10px 20px;
  background-color: red;
  color: white;
  border: none;
  border-radius: 5px;
  cursor: pointer;
  margin: 20px;
}

.end-meeting-button:hover {
  background-color: darkred;
}

.transcribed-text-container {
  position: relative;
  display: flex;
  flex-direction: row;
  align-items: center;
  justify-content: space-between;
}

.speech-bubble-container {
  width: 80%;
  margin: 20px;
}

.speech-bubble {
  position: relative;
  background-color: var(--primaryLight);
  border: 2px solid var(--primaryLight);
  border-radius: 8px;
  padding: 10px;
}

.speech-pointer {
  position: absolute;
  top: 0;
  left: -19px;
  width: 0;
  height: 0;
  border-style: solid;
  border-width: 0 0 20px 20px;
  border-color: transparent transparent var(--primaryLight) transparent;
}

.speech-text-question {
  margin: 0;
  font-size: 16px;
  line-height: 16px;
  letter-spacing: 1.4px;
  font-family: 'Gill Sans', 'Gill Sans MT', Calibri, 'Trebuchet MS', sans-serif;
  color: white;
}

.speech-bubble-right {
  position: relative;
  background-color: #c8e6c9;
  border: 2px solid #c8e6c9;
  border-radius: 8px;
  padding: 10px;
}

.speech-pointer-right {
  position: absolute;
  top: -2px;
  right: -17px;
  width: 0;
  height: 0;
  border-style: solid;
  border-width: 0 0 20px 20px;
  border-color: transparent transparent transparent #c8e6c9;
}

.speech-text-answer {
  margin: 0;
  font-size: 14px;
  line-height: 21px;
  letter-spacing: 1.8px;
  font-family: 'Gill Sans', 'Gill Sans MT', Calibri, 'Trebuchet MS', sans-serif;
  color: black;
}

.analysis-bubble {
  position: relative;
  background-color: var(--secondaryLight);
  border: 2px solid var(--secondaryLight);
  border-radius: 8px;
  padding: 10px;
}

.analysis-pointer {
  position: absolute;
  top: -2px;
  right: -17px;
  width: 0;
  height: 0;
  border-style: solid;
  border-width: 0 0 20px 20px;
  border-color: transparent transparent transparent var(--secondaryLight);
}

.transcribed-text-container {
  position: relative;
  display: flex;
  flex-direction: row;
  align-items: center;
  justify-content: space-between;
}

.custom-input {
  border: none;
  border-bottom: 2px solid #000;
  padding: 5px 0;
  width: 100%;
  box-sizing: border-box;
  margin: 20px;
  line-height: 1.15;
  font-size: 4rem;
}

.custom-input:focus {
  outline: none;
  border-bottom: 2px solid var(--primary);
  margin: 20px;
}

.title {
  margin: 20px;
  line-height: 1.15;
  font-size: 4rem;
}

.goBackButton {
  margin-right: 10px;
  padding: 5px 10px;
  background-color: #0070f3;
  color: white;
  border: none;
  border-radius: 5px;
  cursor: pointer;
}

.goBackButton:hover {
  background-color: #005bb5;
}

@media (max-width: 700px) {
  .transcribed-text-container {
    flex-direction: column;
    align-items: flex-start;
  }

  .button-container {
    width: 100%;
  }

  .primary-button {
    width: 100%;
    margin: 5px 0;
  }
}
- Create Transcription Page
Because our
TranscribeContainerwill be accessed from the meeting dashboard, we must use the Next.js in-built router. To do that, we can just create a file in thepagesdirectory, so go ahead and createtranscription.jsin thepagesdirectory and paste the following code in:
import React from 'react';
import styles from '../styles/Home.module.css';
import TranscribeContainer from '../containers/TranscribeContainer';

const Transcription = () => {

  return (
    <div className={styles.container}>
      <main className={styles.main}>
        <TranscribeContainer />
      </main>
    </div>
  );
};

export default Transcription;
Please add the following styles to the Home.module.css file:
.header {
  display: flex;
  align-items: center;
  margin-top: 20px;
}

.goBackButton {
  margin-right: 10px;
  padding: 5px 10px;
  background-color: #0070f3;
  color: white;
  border: none;
  border-radius: 5px;
  cursor: pointer;
}

.goBackButton:hover {
  background-color: #005bb5;
}- Create Meeting Dashboard Container
Now our transcription page is all set; we just need a way to access it, so let's start by creating a
MeetingDashboardContainer.jsfile in thecontainersdirectory:
import React from 'react';
import styles from '../styles/Meeting.module.css';
import MeetingCard from '../components/meeting/MeetingCard';
import Link from 'next/link';

const meeting = [
  {
    overview:
      'Overview of the meeting here Lorem ipsum dolor sit amet consectetur adipisicing elit. Velit distinctio quas asperiores reiciendis! Facilis quia recusandae velfacere delect corrupti!',
    title: 'Example title 1',
  },
  {
    overview:
      'Overview of the meeting here Lorem ipsum dolor sit amet consectetur adipisicing elit. Velit distinctio quas asperiores reiciendis! Facilis quia recusandae velfacere delect corrupti!',
    title: 'Example title 2',
  },
  {
    overview:
      'Overview of the meeting here Lorem ipsum dolor sit amet consectetur adipisicing elit. Velit distinctio quas asperiores reiciendis! Facilis quia recusandae velfacere delect corrupti!',
    title: 'Example title 3',
  },
];

const MeetingDashboardContainer = () => {
  return (
    <div id={styles['meeting-container']}>
      <div class={styles['cs-container']}>
        <div class={styles['cs-content']}>
          <div class={styles['cs-content-flex']}>
            <span class={styles['cs-topper']}>Meeting dashboard</span>
            <h2 class={styles['cs-title']}>Start a new meeting!</h2>
          </div>
          <Link href="/transcription" class={styles['cs-button-solid']}>
            New meeting
          </Link>
        </div>
        <ul class={styles['cs-card-group']}>
          {meeting.map((val, i) => {
            return (
              <MeetingCard key={i} title={val.title} overview={overview.split(' ').slice(0, 30).join(' ') + '...'} />
            );
          })}
        </ul>
      </div>
    </div>
  );
};

export default MeetingDashboardContainer;
This is where the user will first land in our application; it's just a page to welcome the user, show a history of saved meetings, and allow them to start a new one.
For now, we are mocking the data, which we will later get from our API with the const called meeting. We are mapping out the contents of that and displaying it with a component called MeetingCard. Notice we are truncating the overview parameter passed to MeetingCard as this will likely be a long paragraph, and we only want to display a preview in the card. Let's create the MeetingCard component now.
- Create Meeting Card Component
Create a directory called
meetingin thecomponentsdirectory and a file calledMeetingCard.jswith the following:
import styles from '../../styles/Meeting.module.css';

const MeetingCard = ({ title, overview }) => {
  return (
    <li class={styles['cs-item']}>
      <div class={styles['cs-flex']}>
        <h3 class={styles['cs-h3']}>{title}</h3>
        <p class={styles['cs-item-text']}>{overview}</p>
        <a href="" class={styles['cs-link']}>
          Open meeting
          <img
            class={styles['cs-arrow']}
            loading="lazy"
            decoding="async"
            src="https://csimg.nyc3.cdn.digitaloceanspaces.com/Icons/event-chevron.svg"
            alt="icon"
            width="20"
            height="20"
            aria-hidden="true"
          />
        </a>
      </div>
    </li>
  );
};

export default MeetingCard;
Now, let's create the styles for the Meeting dashboard. Create a file called Meeting.module.css in the styles directory with the following CSS:
@media only screen and (min-width: 0rem) {
  #meeting-container {
    padding: var(--sectionPadding);
    position: relative;
    z-index: 1;
    min-height: 100vh;
  }
  #meeting-container .cs-container {
    width: 100%;
    max-width: 49rem;
    margin: auto;
    display: flex;
    flex-direction: column;
    align-items: center;
    gap: clamp(3rem, 6vw, 4rem);
    min-height: 100vh;
  }
  #meeting-container .cs-content {
    text-align: left;
    width: 100%;
    display: flex;
    flex-direction: column;
    align-items: flex-start;
  }

  #meeting-container .cs-title {
    max-width: 20ch;
  }
  #meeting-container .cs-button-solid {
    font-size: 1rem;
    line-height: clamp(2.875rem, 5.5vw, 3.5rem);
    text-decoration: none;
    font-weight: 700;
    text-align: center;
    margin: 0;
    color: white;
    min-width: 12.5rem;
    padding: 0 1.5rem;
    background-color: var(--secondary);
    border-radius: 0.5rem;
    display: inline-block;
    position: relative;
    z-index: 1;
    box-sizing: border-box;
    transition: color 0.3s;
    cursor: pointer;
  }
  #meeting-container .cs-button-solid:before {
    content: '';
    position: absolute;
    height: 100%;
    width: 0%;
    background: #000;
    opacity: 1;
    top: 0;
    left: 0;
    z-index: -1;
    border-radius: 0.5rem;
    transition: width 0.3s;
  }
  #meeting-container .cs-button-solid:hover {
    color: #fff;
  }
  #meeting-container .cs-button-solid:hover:before {
    width: 100%;
  }
  #meeting-container .cs-card-group {
    width: 100%;
    padding: 0;
    margin: 0;
    display: grid;
    grid-template-columns: repeat(12, 1fr);
    gap: 1.25rem;
  }
  #meeting-container .cs-item {
    text-align: left;
    list-style: none;
    border-radius: 1rem;
    overflow: hidden;
    background-color: #f7f7f7;
    border: 1px solid #e8e8e8;
    grid-column: span 12;
    display: flex;
    flex-direction: column;
    justify-content: space-between;
    position: relative;
    z-index: 1;
    transition: box-shadow 0.3s, transform 0.3s;
  }
  #meeting-container .cs-item:hover {
    box-shadow: rgba(149, 157, 165, 0.2) 0px 8px 24px;
  }
  #meeting-container .cs-item:hover .cs-picture img {
    opacity: 0.3;
    transform: scale(1.1);
  }
  #meeting-container .cs-flex {
    height: 100%;
    padding: 1.5rem;
    /* prevents padding and border from affecting height and width */
    box-sizing: border-box;
    display: flex;
    flex-direction: column;
    align-items: flex-start;
    position: relative;
    z-index: 2;
  }
  #meeting-container .cs-h3 {
    font-size: 1.25rem;
    text-align: inherit;
    line-height: 1.2em;
    font-weight: 700;
    color: var(--headerColor);
    margin: 0 0 0.75rem 0;
    transition: color 0.3s;
  }
  #meeting-container .cs-item-text {
    /* 14px - 16px */
    font-size: clamp(0.875rem, 1.5vw, 1rem);
    line-height: 1.5em;
    text-align: inherit;
    margin: 0 0 1.25rem;
    color: var(--bodyTextColor);
  }
  #meeting-container .cs-link {
    font-size: 1rem;
    line-height: 1.2em;
    font-weight: 700;
    text-decoration: none;
    margin-top: auto;
    color: var(--primary);
    display: flex;
    align-items: center;
    justify-content: center;
    cursor: pointer;
  }
  #meeting-container .cs-link:hover .cs-arrow {
    transform: translateX(0.25rem);
  }
  #meeting-container .cs-arrow {
    width: 1.25rem;
    height: auto;
    transition: transform 0.3s;
  }
}
/* Tablet - 768px */
@media only screen and (min-width: 48rem) {
  #meeting-container .cs-container {
    max-width: 80rem;
  }
  #meeting-container .cs-content {
    text-align: left;
    flex-direction: row;
    justify-content: space-between;
    align-items: flex-end;
  }
  #meeting-container .cs-title {
    margin: 0;
  }
  #meeting-container .cs-item {
    grid-column: span 4;
  }
}

.cs-topper {
  font-size: var(--topperFontSize);
  line-height: 1.2em;
  text-transform: uppercase;
  text-align: inherit;
  letter-spacing: 0.1em;
  font-weight: 700;
  color: var(--primary);
  margin-bottom: 0.25rem;
  display: block;
}

.cs-title {
  font-size: var(--headerFontSize);
  font-weight: 900;
  line-height: 1.2em;
  text-align: inherit;
  max-width: 43.75rem;
  margin: 0 0 1rem 0;
  color: var(--headerColor);
  position: relative;
}

.cs-text {
  font-size: var(--bodyFontSize);
  line-height: 1.5em;
  text-align: inherit;
  width: 100%;
  max-width: 40.625rem;
  margin: 0;
  color: var(--bodyTextColor);
}
Render the UI
Lastly, import MeetingDashboardContainer into index.js:
import Head from 'next/head';
import styles from '../styles/Home.module.css';
import TranscribeContainer from '../containers/TranscribeContainer';

export default function Home() {
  return (
    <div className={styles.container}>
      <Head>
        <title>Strapi Transcribe</title>
        <meta name="description" content="Generated by create next app" />
        <link rel="icon" href="/favicon.ico" />
      </Head>

      <main className={styles.main}>
        <h1 className={styles.title}>
          Welcome to{' '}
          <a target="_blank" href="https://strapi.io">
            Strapi Transcribe!
          </a>
        </h1>
        <MeetingDashboardContainer />
      </main>

      <footer className={styles.footer}>Powered by Strapi</footer>
    </div>
  );
}
Now that we have our dashboard UI and transcription view set up, we can test the code.
Open up your terminal, navigate to the frontend, and run the below command:
yarn devNow navigate to http://localhost:3000 in your browser, and you should be able to see the following interface:
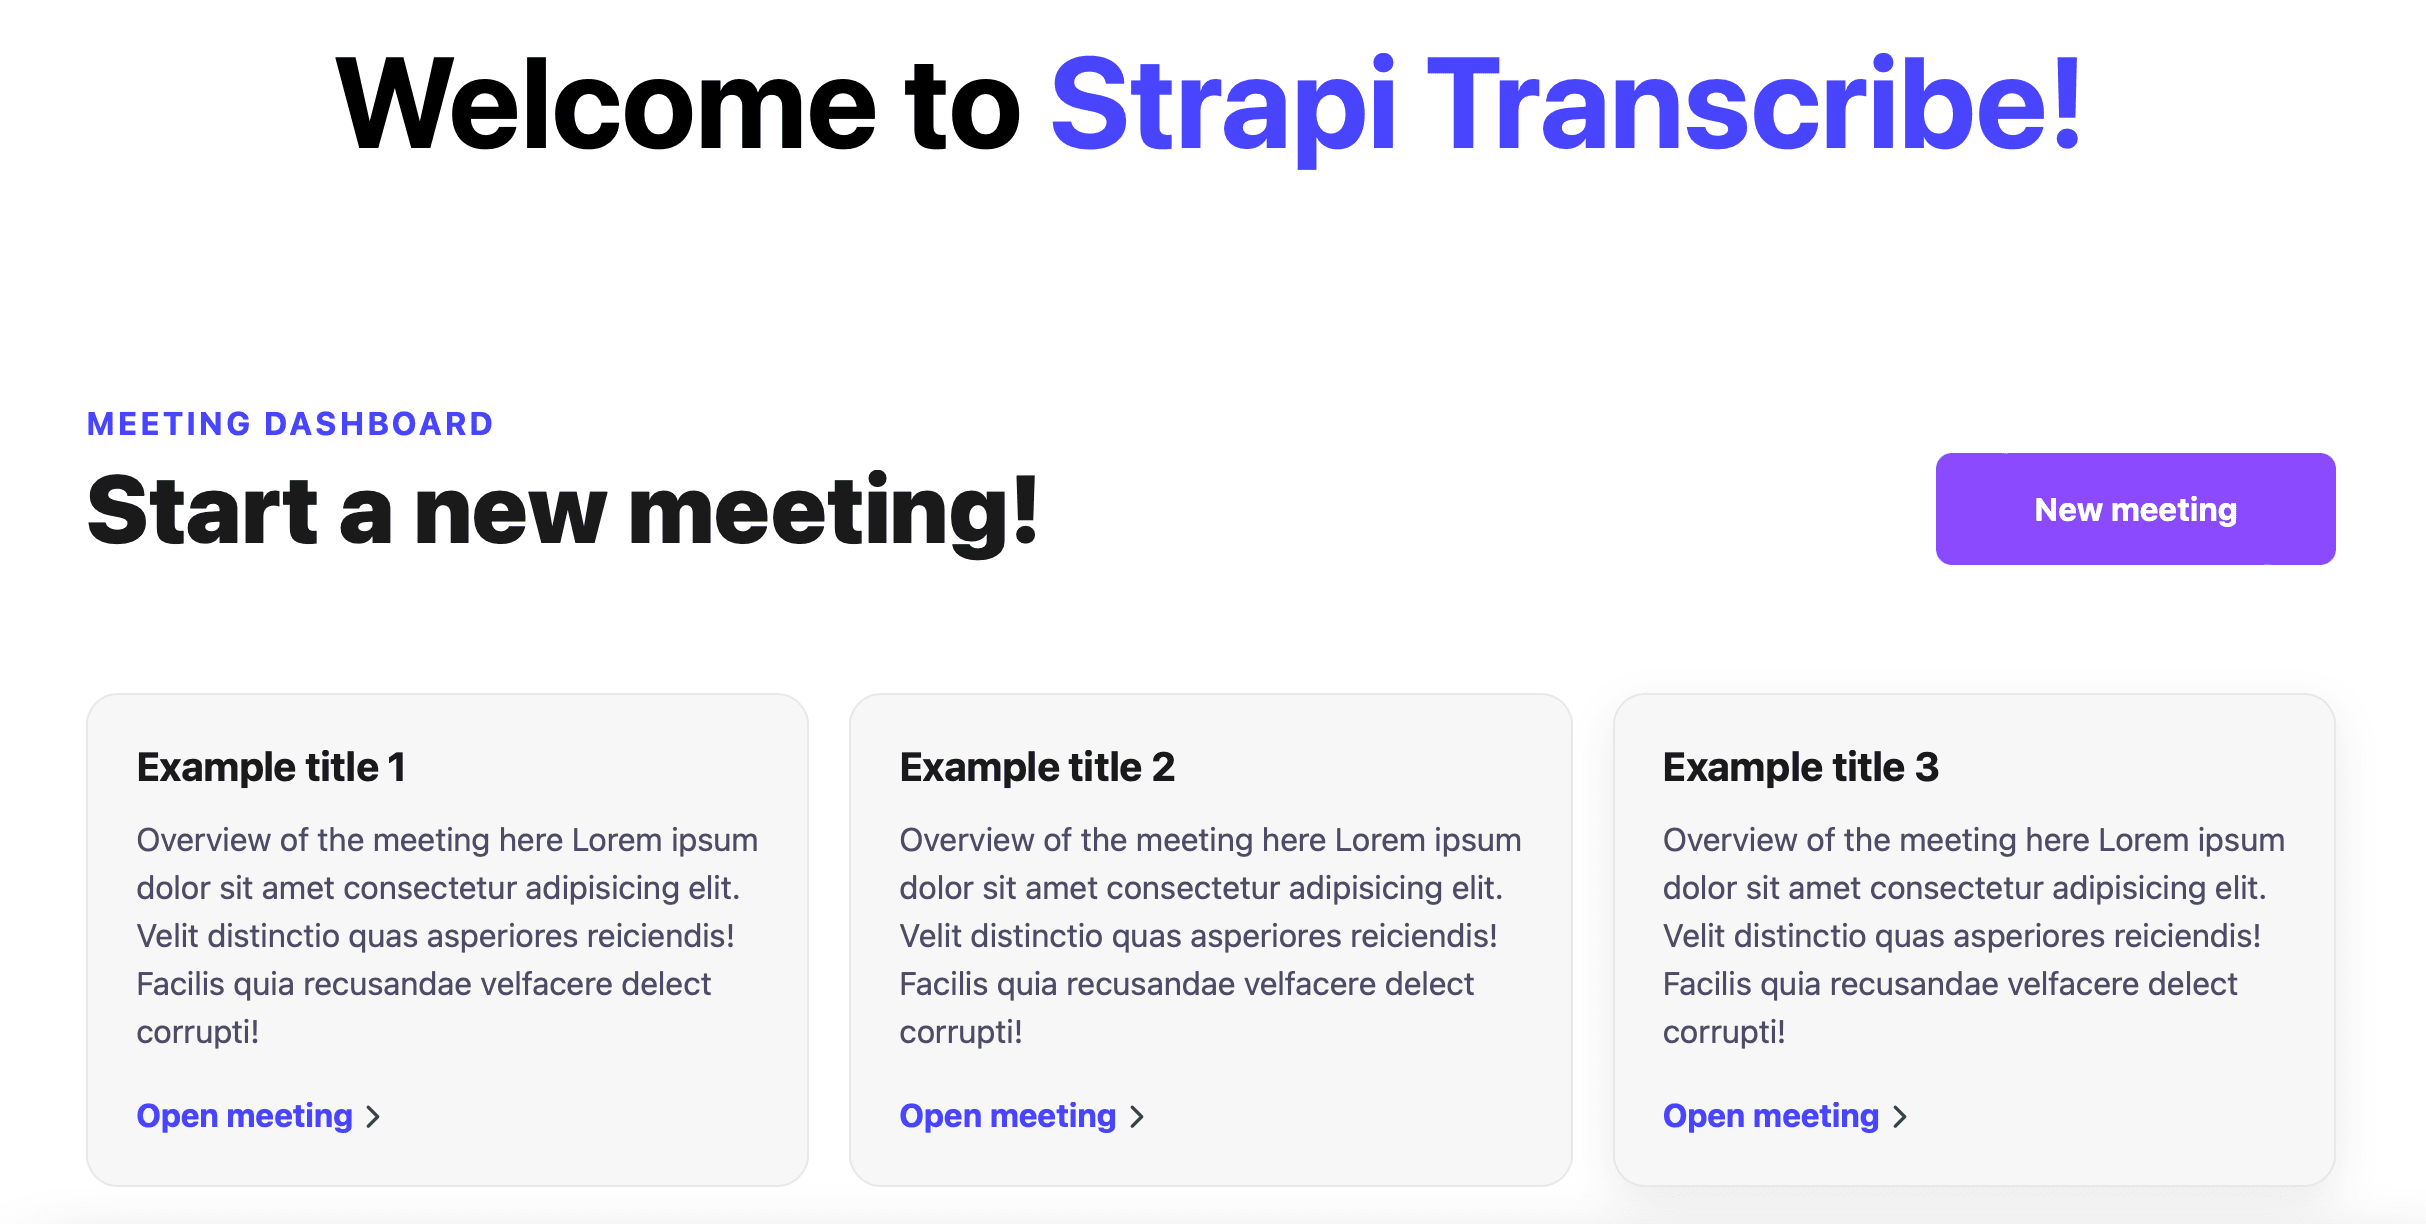
To start transcribing, first, click on "New meeting" and then just click "Start recording." Then, talk into your computer's microphone (be aware that this will cost you OpenAI credits, so don't leave it running for too long). You can click stop recording to stop the transcription.
Recording Demo!
Test your app by clicking on the "New Meeting" button as shown in the GIF below:
For a more real-world use case, you can open your desktop meeting app (Slack or Teams) and then send yourself a meeting invite and join from your mobile phone. If you hit record, you can then speak through your phone from another room (to avoid feedback). You will see that the app picks up and transcribes what you're saying through the laptop's speakers using the mic, successfully simulating a transcription of a virtual meeting.
Stay tuned for part two
In part two of this series, we will set up our backend with Strapi. Stay tuned to see how we will structure our data to save meetings and transcriptions programmatically with the API and how we will link this to our Next.js app.
Additional Resources
- Github link to the complete code.