Welcome back to our Epic Next.js tutorial series!
We're in the home stretch! In this tutorial, we'll add the final touches to our video summary app by implementing search and pagination features. These are essential features that make our app truly user-friendly when dealing with lots of content.
Previous Tutorials:
- Part 1: Learn Next.js by building a website
- Part 2: Building Out The Hero Section of the homepage
- Part 3: Finishup up the homepage Features Section, TopNavigation and Footer
- Part 4: How to handle login and Authentification in Next.js
- Part 5: Building out the Dashboard page and upload file using NextJS server actions
- Part 6: Get Video Transcript with AI SDK
- Part 7: Strapi CRUD permissions
- Part 8: Search & pagination in Nextjs
- Part 9: Backend deployment to Strapi Cloud
- Part 10: Frontend deployment to Vercel
Why Search and Pagination Matter
Imagine you've been using our app for months and have created dozens or even hundreds of video summaries. Finding that one specific summary about machine learning from three weeks ago becomes like finding a needle in a haystack without search functionality.
Similarly, loading hundreds of summaries at once would make your page slow and overwhelming. Pagination breaks content into manageable chunks, making the app faster and easier to navigate.
Let's build these features step by step.
Building Smart Search in Next.js
We'll create a search component that updates the URL as you type, making searches shareable and bookmarkable. The search will be "smart" - it won't make API requests on every keystroke, thanks to debouncing.
First, let's create our search component. Create a new file at src/components/custom/search.tsx:
"use client";
import { usePathname, useRouter, useSearchParams } from "next/navigation";
import { useDebouncedCallback } from "use-debounce";
import { Input } from "@/components/ui/input";
import { cn } from "@/lib/utils";

interface ISearchProps {
  className?: string;
}

export function Search({ className }: ISearchProps) {
  const searchParams = useSearchParams();
  const { replace } = useRouter();
  const pathname = usePathname();

  const handleSearch = useDebouncedCallback((term: string) => {
    console.log(`Searching... ${term}`);
    const params = new URLSearchParams(searchParams);
    params.set("page", "1");

    if (term) {
      params.set("query", term);
    } else {
      params.delete("query");
    }

    replace(`${pathname}?${params.toString()}`);
  }, 300);

  return (
    <Input
      type="text"
      placeholder="Search"
      onChange={(e) => handleSearch(e.target.value)}
      defaultValue={searchParams.get("query")?.toString()}
      className={cn("", className)}
    />
  );
}
Understanding the Search Component
Let's break down what's happening here:
Key Next.js Hooks:
useSearchParams: Reads the current URL's query parameters (like?query=machine+learning)useRouter: Gives us thereplacemethod to update the URL without adding to browser historyusePathname: Gets the current page path so we can build the new URL correctly
The Magic of Debouncing:
useDebouncedCallback: Waits 300ms after the user stops typing before actually performing the search- This prevents overwhelming the server with requests while the user is still typing
How the Flow Works:
- User types in the search box
- After 300ms of no typing,
handleSearchruns - We create new URL parameters with the search term
- We reset the page to 1 (since search results start fresh)
- The URL updates, which triggers a new data fetch
Before we can use this component, we need to install the debounce library:
yarn add use-debounceNow let's add our search component to the summaries page. Navigate to src/app/(protected)/dashboard/summaries/page.tsx and update it:
import { loaders } from "@/data/loaders";
import { SummariesGrid } from "@/components/custom/summaries-grid";
import { validateApiResponse } from "@/lib/error-handler";

import { Search } from "@/components/custom/search";

import { SearchParams } from "@/types";

interface ISummariesRouteProps {
  searchParams: SearchParams;
}

export default async function SummariesRoute({
  searchParams,
}: ISummariesRouteProps) {
  const resolvedSearchParams = await searchParams;
  const query = resolvedSearchParams?.query as string;

  const data = await loaders.getSummaries();
  const summaries = validateApiResponse(data, "summaries");

  return (
    <div className="flex flex-col min-h-[calc(100vh-80px)] p-4 gap-6">
      <Search className="flex-shrink-0" />
      <SummariesGrid summaries={summaries} className="flex-grow" />
    </div>
  );
}
Great! Now we have a search box, but it doesn't actually search anything yet. Let's fix that.
Making Search Actually Work
Now we need to update our data loader to handle search queries. We'll search through both the title and content of summaries, and we'll make the search case-insensitive for better user experience.
Navigate to src/data/loaders.ts and find the getSummaries function. Currently it looks like this:
async function getSummaries(): Promise<TStrapiResponse<TSummary[]>> {
  const authToken = await actions.auth.getAuthTokenAction();
  if (!authToken) throw new Error("You are not authorized");

  const query = qs.stringify({
    sort: ["createdAt:desc"],
  });

  const url = new URL("/api/summaries", baseUrl);
  url.search = query;
  return api.get<TSummary[]>(url.href, { authToken });
}
Let's update it to handle search queries:
async function getSummaries(queryString: string): Promise<TStrapiResponse<TSummary[]>> {
  const authToken = await actions.auth.getAuthTokenAction();
  if (!authToken) throw new Error("You are not authorized");

  const query = qs.stringify({
    sort: ["createdAt:desc"],
    ...(queryString && {
      filters: {
        $or: [
          { title: { $containsi: queryString } },
          { content: { $containsi: queryString } },
        ],
      },
    }),
  });

  const url = new URL("/api/summaries", baseUrl);
  url.search = query;
  return api.get<TSummary[]>(url.href, { authToken });
}
Understanding the Search Logic
Here's what's happening in our updated function:
sort: ["createdAt:desc"]: Always show newest summaries first$or: This is Strapi's "OR" operator - it means "match if EITHER condition is true"$containsi: Case-insensitive search that matches partial text- Conditional filtering: We only add filters when there's actually a search query
The search will now find summaries where the query appears in either the title OR the content (or both).
Now we need to update our page to pass the search query to our loader. Back in src/app/(protected)/dashboard/summaries/page.tsx, update this line:
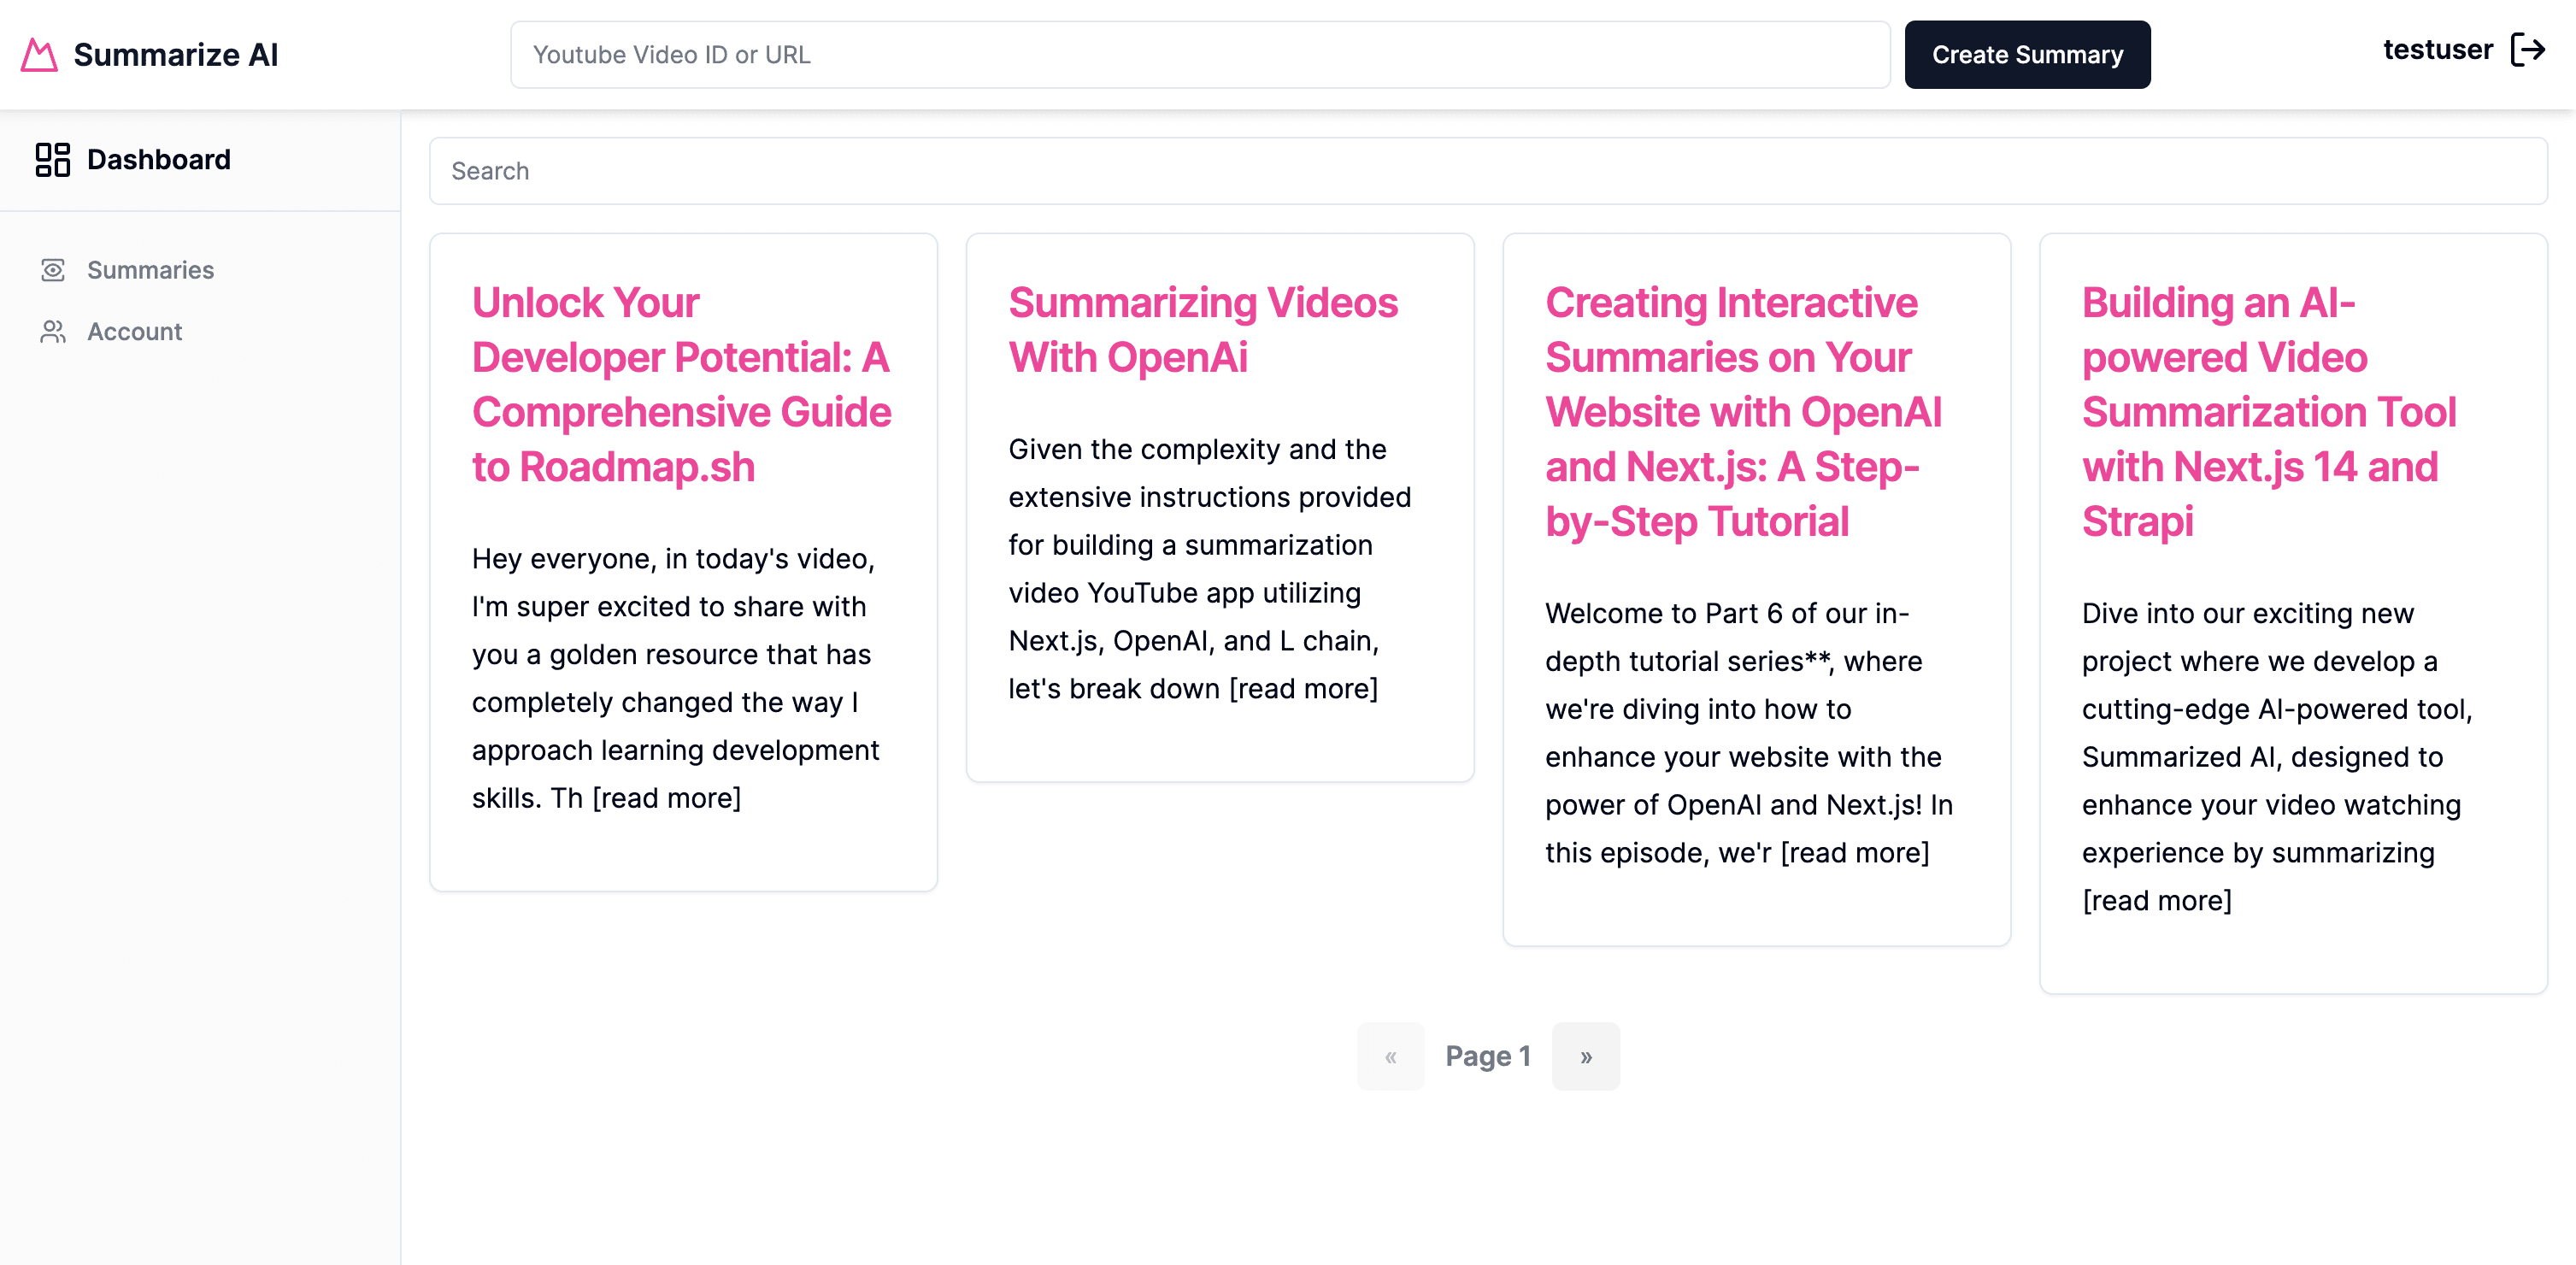
const data = await loaders.getSummaries(query);Let's test our search functionality:
Perfect! Our search is working beautifully. Now let's add pagination to handle large numbers of summaries.
Implementing Smart Pagination
When you have hundreds of summaries, loading them all at once becomes a performance nightmare. Pagination solves this by breaking content into manageable pages.
Understanding Pagination Benefits
- Better Performance: Load only what users need to see
- Improved User Experience: Easier to browse through organized chunks
- Reduced Server Load: Fewer resources used per request
- Faster Page Loading: Smaller data transfers mean quicker loading
Let's start by installing the pagination component from Shadcn UI:
npx shadcn@latest add paginationNow create our custom pagination component at src/components/custom/pagination-component.tsx:
"use client";
import { FC } from "react";
import { usePathname, useSearchParams, useRouter } from "next/navigation";

import {
  Pagination,
  PaginationContent,
  PaginationItem,
} from "@/components/ui/pagination";

import { Button } from "@/components/ui/button";
import { cn } from "@/lib/utils";

interface PaginationProps {
  pageCount: number;
  className?: string;
}

interface PaginationArrowProps {
  direction: "left" | "right";
  href: string;
  isDisabled: boolean;
}

const PaginationArrow: FC<PaginationArrowProps> = ({
  direction,
  href,
  isDisabled,
}) => {
  const router = useRouter();
  const isLeft = direction === "left";
  const disabledClassName = isDisabled ? "opacity-50 cursor-not-allowed" : "";

  // Make next button (right arrow) more visible with pink styling
  const buttonClassName = isLeft
    ? `bg-gray-100 text-gray-500 hover:bg-gray-200 ${disabledClassName}`
    : `bg-pink-500 text-white hover:bg-pink-600 ${disabledClassName}`;

  return (
    <Button
      onClick={() => router.push(href)}
      className={buttonClassName}
      aria-disabled={isDisabled}
      disabled={isDisabled}
    >
      {isLeft ? "«" : "»"}
    </Button>
  );
};

export function PaginationComponent({
  pageCount,
  className,
}: Readonly<PaginationProps>) {
  const pathname = usePathname();
  const searchParams = useSearchParams();
  const currentPage = Number(searchParams.get("page")) || 1;

  const createPageURL = (pageNumber: number | string) => {
    const params = new URLSearchParams(searchParams);
    params.set("page", pageNumber.toString());
    return `${pathname}?${params.toString()}`;
  };

  return (
    <Pagination className={cn("", className)}>
      <PaginationContent>
        <PaginationItem>
          <PaginationArrow
            direction="left"
            href={createPageURL(currentPage - 1)}
            isDisabled={currentPage <= 1}
          />
        </PaginationItem>
        <PaginationItem>
          <span className="p-2 font-semibold text-pink-500">
            Page {currentPage}
          </span>
        </PaginationItem>
        <PaginationItem>
          <PaginationArrow
            direction="right"
            href={createPageURL(currentPage + 1)}
            isDisabled={currentPage >= pageCount}
          />
        </PaginationItem>
      </PaginationContent>
    </Pagination>
  );
}
How Our Pagination Works
This component is smart about preserving search queries and other URL parameters:
- URL Preservation: When you go to the next page, it keeps your search query intact
- Disabled States: Previous button is disabled on page 1, next button is disabled on the last page
- Visual Feedback: Current page is clearly displayed, and the next button is highlighted in pink
Now let's update our summaries page to use pagination. In src/app/(protected)/dashboard/summaries/page.tsx, add the pagination import and extract the current page:
import { PaginationComponent } from "@/components/custom/pagination-component";Add this line to get the current page from URL parameters:
const currentPage = Number(resolvedSearchParams?.page) || 1;And update the data fetching to include the current page:
const data = await loaders.getSummaries(query, currentPage);Now we need to update our getSummaries function to handle pagination. Back in src/data/loaders.ts, update the function:
async function getSummaries(
  queryString: string,
  page: number = 1
): Promise<TStrapiResponse<TSummary[]>> {
  const authToken = await actions.auth.getAuthTokenAction();
  if (!authToken) throw new Error("You are not authorized");

  const query = qs.stringify({
    sort: ["createdAt:desc"],
    ...(queryString && {
      filters: {
        $or: [
          { title: { $containsi: queryString } },
          { content: { $containsi: queryString } },
        ],
      },
    }),
    pagination: {
      page: page,
      pageSize: process.env.PAGE_SIZE || 4,
    },
  });

  const url = new URL("/api/summaries", baseUrl);
  url.search = query;
  return api.get<TSummary[]>(url.href, { authToken });
}
Understanding Strapi Pagination
Strapi makes pagination easy with built-in parameters:
page: Which page to retrieve (starting from 1)pageSize: How many items per page (we're using 4 for testing, but you might want 10-20 in production)
Strapi also returns helpful metadata in the response:
{ pagination: { page: 1, pageSize: 4, pageCount: 3, total: 12 } }We use pageCount to know how many pages are available for our pagination component.
Back in our page component, let's extract the page count and add our pagination component. Here's the complete updated src/app/(protected)/dashboard/summaries/page.tsx:
import { loaders } from "@/data/loaders";
import { SummariesGrid } from "@/components/custom/summaries-grid";
import { validateApiResponse } from "@/lib/error-handler";
import { Search } from "@/components/custom/search";
import { PaginationComponent } from "@/components/custom/pagination-component";
import { SearchParams } from "@/types";
interface ISummariesRouteProps {
searchParams: SearchParams;
}
export default async function SummariesRoute({
searchParams,
}: ISummariesRouteProps) {
const resolvedSearchParams = await searchParams;
const query = resolvedSearchParams?.query as string;
const currentPage = Number(resolvedSearchParams?.page) || 1;
const data = await loaders.getSummaries(query, currentPage);
const summaries = validateApiResponse(data, "summaries");
const pageCount = data?.meta?.pagination?.pageCount || 1;
return (
<div className="flex flex-col min-h-[calc(100vh-80px)] p-4 gap-6">
<Search className="flex-shrink-0" />
<SummariesGrid summaries={summaries} className="flex-grow" />
<PaginationComponent pageCount={pageCount} />
</div>
);
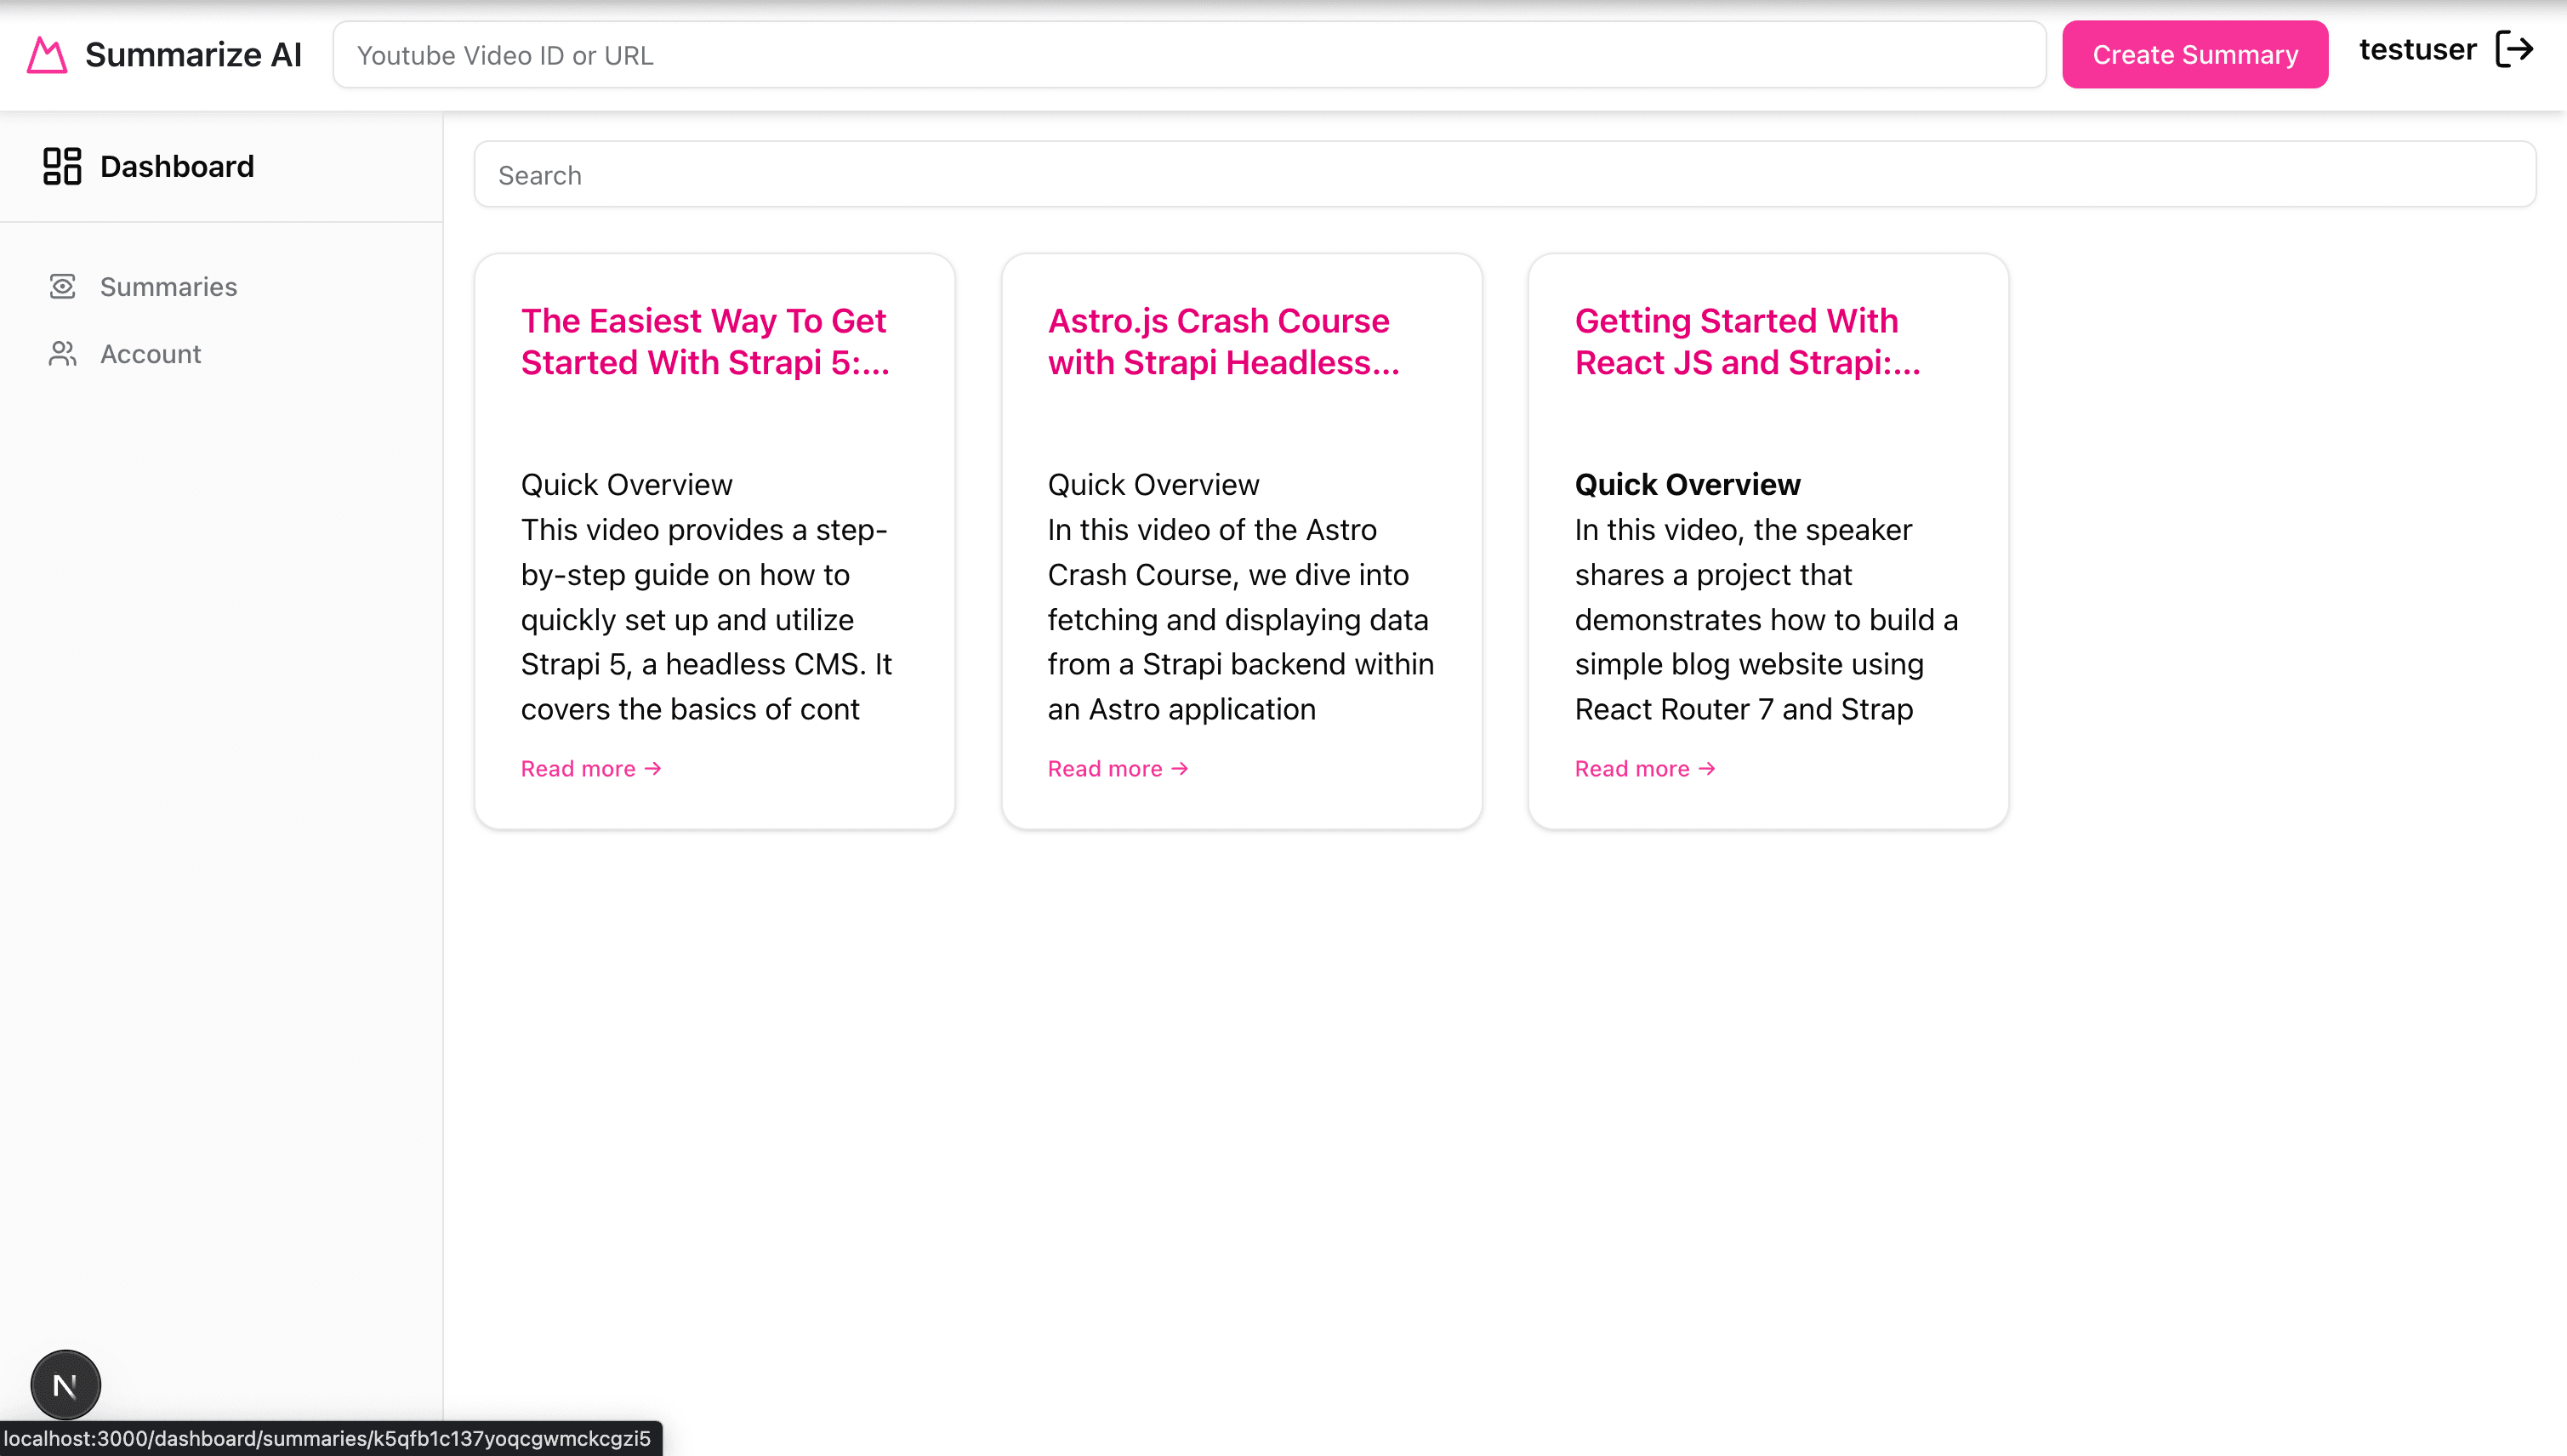
}Let's test our pagination! Make sure you have at least 5 summaries since our page size is set to 4:
Excellent! Both search and pagination are working perfectly together.
Adding a Professional Loading Experience
Let's add one final touch - a loading screen that shows while data is being fetched. This gives users immediate feedback that something is happening.
Create a new file at src/app/(protected)/dashboard/summaries/loading.tsx:
import { Skeleton } from "@/components/ui/skeleton";
import { Card, CardContent, CardHeader } from "@/components/ui/card";

const styles = {
  container: "grid grid-cols-1 gap-4 p-4",
  grid: "grid grid-cols-1 sm:grid-cols-2 md:grid-cols-3 lg:grid-cols-4 gap-6",
  card: "border border-gray-200",
  cardHeader: "pb-3",
  cardContent: "pt-0 space-y-2",
  skeleton: "animate-pulse",
  title: "h-6 w-3/4",
  line: "h-3 w-full",
  shortLine: "h-3 w-2/3",
  readMore: "h-3 w-16",
};

function SummaryCardSkeleton() {
  return (
    <Card className={styles.card}>
      <CardHeader className={styles.cardHeader}>
        <Skeleton className={`${styles.skeleton} ${styles.title}`} />
      </CardHeader>
      <CardContent className={styles.cardContent}>
        <Skeleton className={`${styles.skeleton} ${styles.line}`} />
        <Skeleton className={`${styles.skeleton} ${styles.line}`} />
        <Skeleton className={`${styles.skeleton} ${styles.shortLine}`} />
        <div className="mt-3">
          <Skeleton className={`${styles.skeleton} ${styles.readMore}`} />
        </div>
      </CardContent>
    </Card>
  );
}

export default function SummariesLoading() {
  return (
    <div className={styles.container}>
      <div className={styles.grid}>
        {Array.from({ length: 8 }).map((_, index) => (
          <SummaryCardSkeleton key={index} />
        ))}
      </div>
    </div>
  );
}
This loading component creates skeleton versions of our summary cards that pulse gently while data loads. It's a small detail that makes a big difference in perceived performance.
Let's see our loading screen in action:
Perfect! Now our app feels polished and professional.
What We've Accomplished
Congratulations! We've built a comprehensive search and pagination system that includes:
Search Features
- Real-time URL updates: Search queries are reflected in the URL
- Debounced requests: Smart waiting prevents server overload
- Multi-field search: Searches both title and content
- Case-insensitive matching: User-friendly search behavior
Pagination Features
- Efficient data loading: Only loads what users need to see
- URL-based navigation: Pages can be bookmarked and shared
- Search preservation: Moving between pages keeps search active
- Smart button states: Clear visual feedback for navigation
User Experience Enhancements
- Professional loading states: Skeleton screens during data fetching
- Responsive design: Works great on all device sizes
- Intuitive navigation: Clear previous/next buttons with visual distinction
Looking Ahead
Our video summary application is now feature-complete! Users can:
- Create summaries from YouTube videos
- Search through their content easily
- Navigate large collections efficiently
- Update and delete their own summaries securely
In our next tutorials, we'll deploy this application to production using Strapi Cloud for the backend and Vercel for the frontend.
You now have a solid foundation for building search and pagination in any Next.js application. These patterns can be applied to blogs, e-commerce sites, dashboards, or any app that deals with lists of content.
Note about this project
This project has been updated to use Next.js 15 and Strapi 5.
If you have any questions, feel free to stop by at our Discord Community for our daily "open office hours" from 12:30 PM CST to 1:30 PM CST.
If you have a suggestion or find a mistake in the post, please open an issue on the GitHub repository.
You can also find the blog post content in the Strapi Blog.
Feel free to make PRs to fix any issues you find in the project, or let me know if you have any questions.
Happy coding!
Paul