
In the previous tutorial, we completed our authentication system with Sign In and Sign Up functionality. Now we'll focus on building out our Dashboard and Profile Page with file upload capabilities using Next.js server actions.
- Part 1: Learn Next.js by building a website
- Part 2: Building Out The Hero Section of the homepage
- Part 3: Finishup up the homepage Features Section, TopNavigation and Footer
- Part 4: How to handle login and Authentification in Next.js
- Part 5: Building out the Dashboard page and upload file using NextJS server actions
- Part 6: Get Video Transcript with AI SDK
- Part 7: Strapi CRUD permissions
- Part 8: Search & pagination in Nextjs
- Part 9: Backend deployment to Strapi Cloud
- Part 10: Frontend deployment to Vercel
Welcome to Part 5 of our Epic Next.js tutorial series! In the previous tutorial, we implemented authentication using HTTPOnly cookies and protected our routes with Next.js middleware.
In this section, we'll complete our Dashboard and Profile Page by implementing file upload functionality using Next.js server actions. By the end of this tutorial, you'll have a solid understanding of handling file uploads, forms, and server actions in Next.js 15.
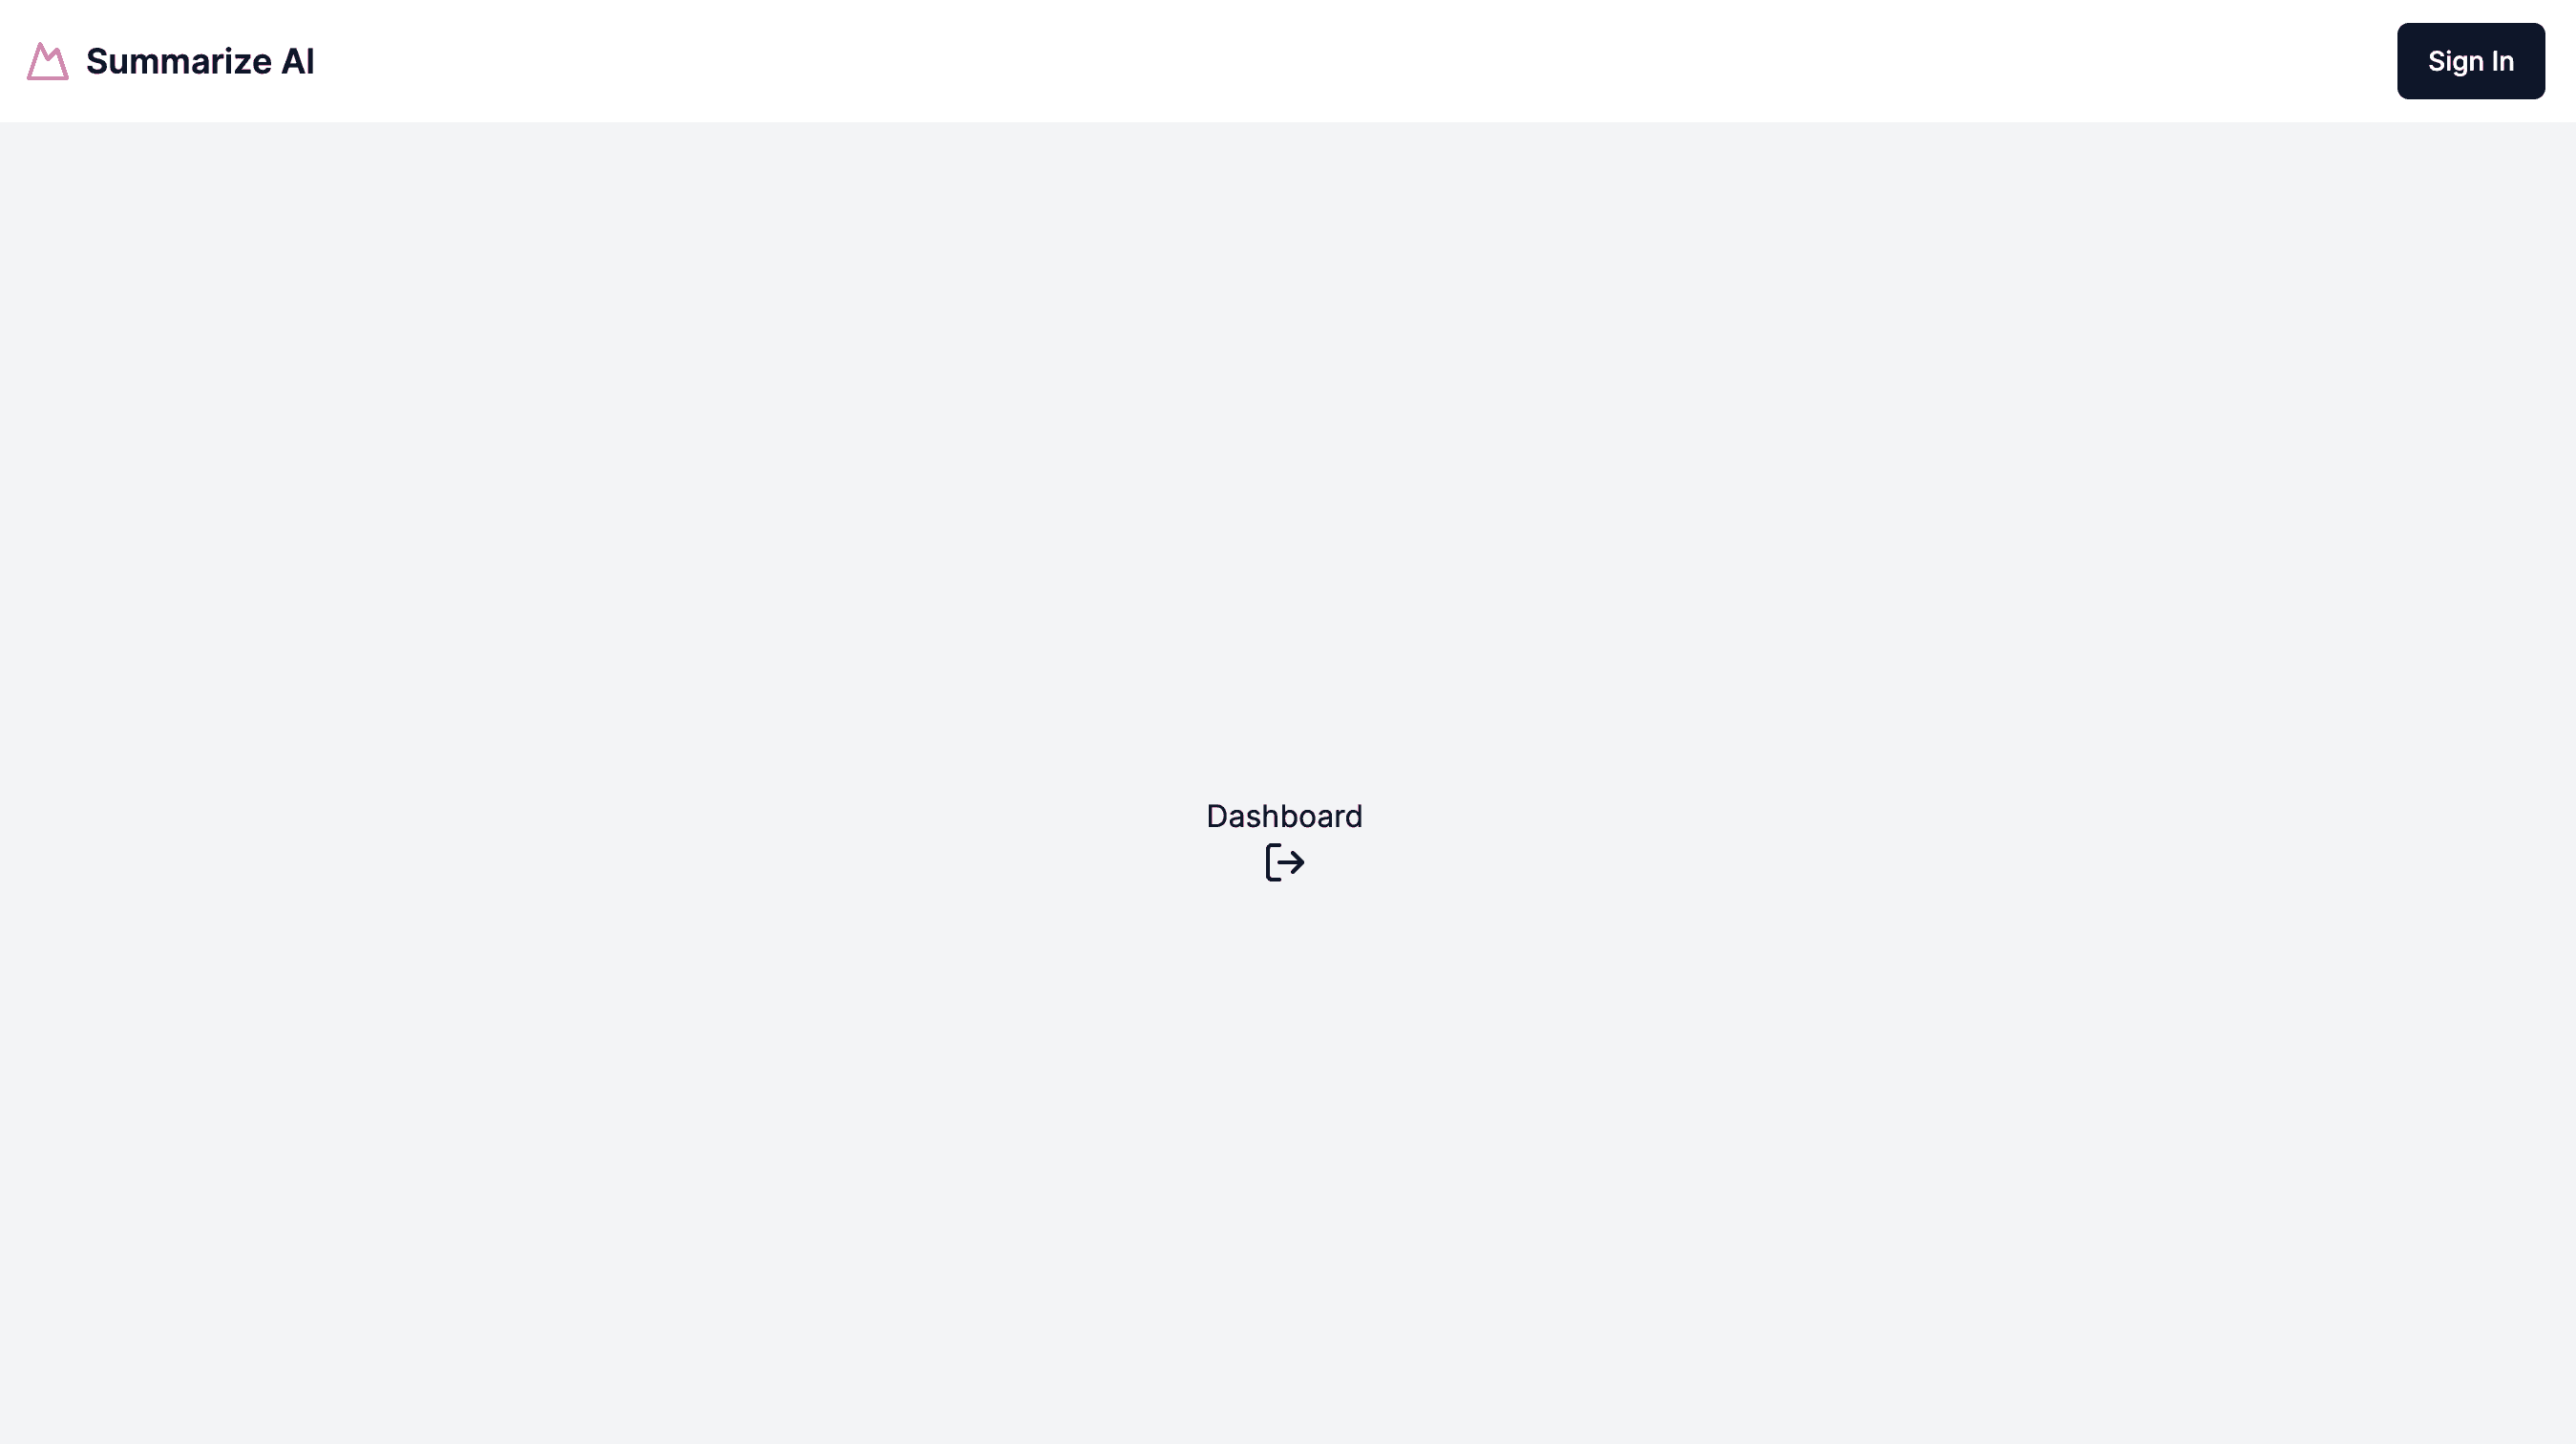
Currently, our Dashboard Page looks like the following.
Let's start by creating a proper dashboard layout. Navigate to src/app/(protected)dashboard, create a file called layout.tsx, and add the following code:
import Link from "next/link";
import { SVGProps } from "react";
const styles = {
layout: "h-screen grid grid-cols-[240px_1fr]",
sidebar: "border-r bg-gray-100/40 dark:bg-gray-800/40",
sidebarContent: "flex h-full max-h-screen flex-col gap-2",
header: "flex h-[60px] items-center border-b px-6",
headerLink: "flex items-center gap-2 font-semibold",
headerIcon: "h-6 w-6",
headerText: "",
navigation: "flex-1 overflow-auto py-2",
navGrid: "grid items-start px-4 text-sm font-medium",
navLink:
"flex items-center gap-3 rounded-lg px-3 py-2 text-gray-500 transition-all hover:text-gray-900 dark:text-gray-400 dark:hover:text-gray-50",
navIcon: "h-4 w-4",
main: "flex flex-col overflow-scroll",
};
export default function DashboardLayout({
children,
}: {
readonly children: React.ReactNode;
}) {
return (
<div className={styles.layout}>
<nav className={styles.sidebar}>
<div className={styles.sidebarContent}>
<div className={styles.header}>
<Link className={styles.headerLink} href="/dashboard">
<LayoutDashboardIcon className={styles.headerIcon} />
<span className={styles.headerText}>Dashboard</span>
</Link>
</div>
<div className={styles.navigation}>
<nav className={styles.navGrid}>
<Link className={styles.navLink} href="/dashboard/summaries">
<ViewIcon className={styles.navIcon} />
Summaries
</Link>
<Link className={styles.navLink} href="/dashboard/account">
<UsersIcon className={styles.navIcon} />
Account
</Link>
</nav>
</div>
</div>
</nav>
<main className={styles.main}>{children}</main>
</div>
);
}
function LayoutDashboardIcon(props: SVGProps<SVGSVGElement>) {
return (
<svg
{...props}
xmlns="http://www.w3.org/2000/svg"
width="24"
height="24"
viewBox="0 0 24 24"
fill="none"
stroke="currentColor"
strokeWidth="2"
strokeLinecap="round"
strokeLinejoin="round"
>
<rect width="7" height="9" x="3" y="3" rx="1" />
<rect width="7" height="5" x="14" y="3" rx="1" />
<rect width="7" height="9" x="14" y="12" rx="1" />
<rect width="7" height="5" x="3" y="16" rx="1" />
</svg>
);
}
function PieChartIcon(props: SVGProps<SVGSVGElement>) {
return (
<svg
{...props}
xmlns="http://www.w3.org/2000/svg"
width="24"
height="24"
viewBox="0 0 24 24"
fill="none"
stroke="currentColor"
strokeWidth="2"
strokeLinecap="round"
strokeLinejoin="round"
>
<path d="M21.21 15.89A10 10 0 1 1 8 2.83" />
<path d="M22 12A10 10 0 0 0 12 2v10z" />
</svg>
);
}
function UsersIcon(props: SVGProps<SVGSVGElement>) {
return (
<svg
{...props}
xmlns="http://www.w3.org/2000/svg"
width="24"
height="24"
viewBox="0 0 24 24"
fill="none"
stroke="currentColor"
strokeWidth="2"
strokeLinecap="round"
strokeLinejoin="round"
>
<path d="M16 21v-2a4 4 0 0 0-4-4H6a4 4 0 0 0-4 4v2" />
<circle cx="9" cy="7" r="4" />
<path d="M22 21v-2a4 4 0 0 0-3-3.87" />
<path d="M16 3.13a4 4 0 0 1 0 7.75" />
</svg>
);
}
function ViewIcon(props: SVGProps<SVGSVGElement>) {
return (
<svg
{...props}
xmlns="http://www.w3.org/2000/svg"
width="24"
height="24"
viewBox="0 0 24 24"
fill="none"
stroke="currentColor"
strokeWidth="2"
strokeLinecap="round"
strokeLinejoin="round"
>
<path d="M5 12s2.545-5 7-5c4.454 0 7 5 7 5s-2.546 5-7 5c-4.455 0-7-5-7-5z" />
<path d="M12 13a1 1 0 1 0 0-2 1 1 0 0 0 0 2z" />
<path d="M21 17v2a2 2 0 0 1-2 2H5a2 2 0 0 1-2-2v-2" />
<path d="M21 7V5a2 2 0 0 0-2-2H5a2 2 0 0 0-2 2v2" />
</svg>
);
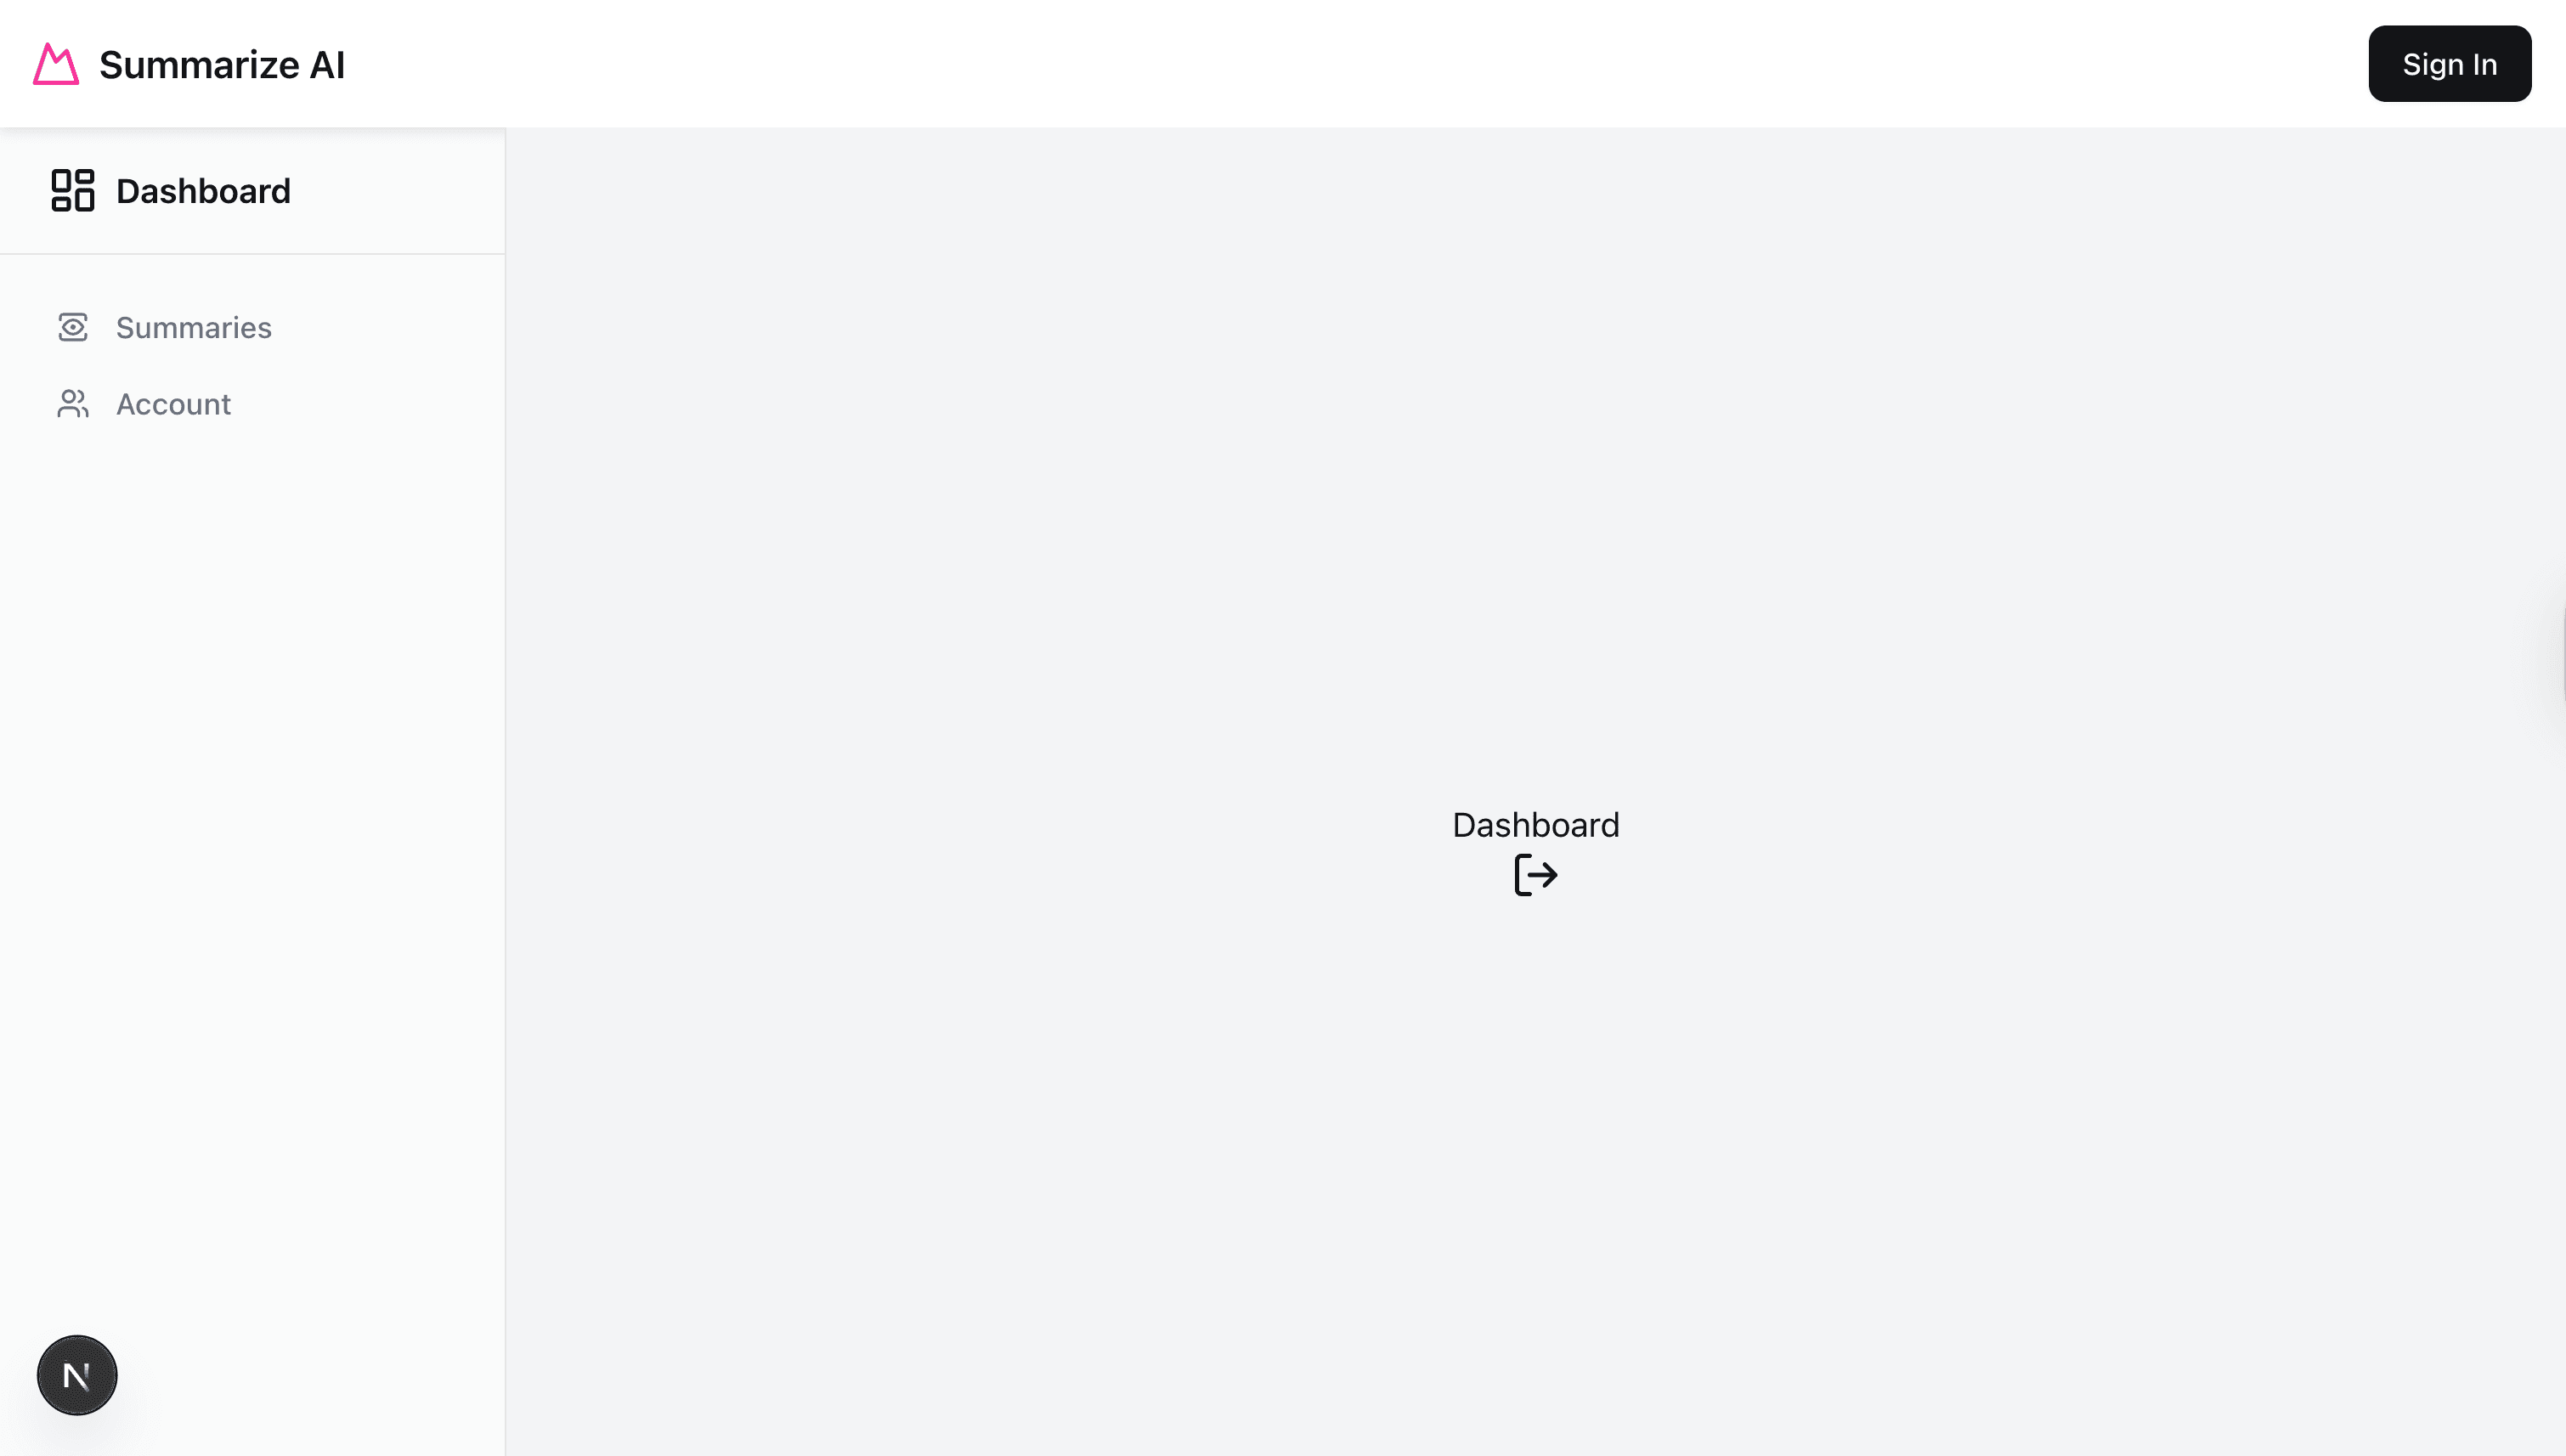
}After adding this layout, your dashboard UI should look like the following:
Updating Top Header To Include Username and Logout Button
Currently, our Top Header doesn't display information about the logged-in user. Let's update it to show the username and provide a logout option.
Navigate to src/components/custom/header.tsx and make the following changes.
First, let's import our authentication service that we created in the previous tutorial to retrieve the logged-in user's data:
import { services } from "@/data/services";Next, let's call this service inside our Header component:
const user = await services.auth.getUserMeService();
console.log(user);
If you're logged in, you should see your user data in the console:
{
  success: true,
  data: {
    id: 7,
    documentId: 'wq9a4sm2kmw6l9n1tn8mav8t',
    username: 'testuser',
    email: 'testuser@email.com',
    provider: 'local',
    confirmed: true,
    blocked: false,
    createdAt: '2025-08-15T19:40:58.276Z',
    updatedAt: '2025-08-15T19:40:58.276Z',
    publishedAt: '2025-08-15T19:40:58.284Z'
  },
  error: undefined,
  status: 200
}
We can use the success key to conditionally render either our Sign Up button or the user's name and logout button.
Let's create a LoggedInUser component to handle the logged-in user display. Create a new file src/components/custom/logged-in-user.tsx:
import Link from "next/link";
import { LogoutButton } from "./logout-button";

interface ILoggedInUserProps {
  username: string;
  email: string;
}

export function LoggedInUser({
  userData,
}: {
  readonly userData: ILoggedInUserProps;
}) {
  return (
    <div className="flex gap-2">
      <Link
        href="/dashboard/account"
        className="font-semibold hover:text-primary"
      >
        {userData.username}
      </Link>
      <LogoutButton />
    </div>
  );
}
Now, let's update our header.tsx file. Find this section:
<div className={styles.actions}>
  <Link href={ctaButton.href}>
    <Button>{ctaButton.label}</Button>
  </Link>
</div>
Replace it with the conditional rendering logic:
<div className={styles.actions}>
  {user.status ? (
    <LoggedInUser userData={user.data!} />
  ) : (
    <Link href={ctaButton.href}>
      <Button>{ctaButton.label}</Button>
    </Link>
  )}
</div>
Don't forget to import LoggedInUser.
import { LoggedInUser } from "@/components/custom/logged-in-user";The completed code in our header.tsx file should look like the following.
import Link from "next/link";
import type { THeader } from "@/types";

import { services } from "@/data/services";

import { Logo } from "@/components/custom/logo";
import { Button } from "@/components/ui/button";
import { LoggedInUser } from "@/components/custom/logged-in-user";

const styles = {
  header:
    "flex  items-center justify-between px-4 py-3 bg-white shadow-md dark:bg-gray-800",
  actions: "flex items-center gap-4",
  summaryContainer: "flex-1 flex justify-center max-w-2xl mx-auto",
};

interface IHeaderProps {
  data?: THeader | null;
}

export async function Header({ data }: IHeaderProps) {
  if (!data) return null;

  const user = await services.auth.getUserMeService();
  const { logoText, ctaButton } = data;
  return (
    <div className={styles.header}>
      <Logo text={logoText.label} />
      <div className={styles.actions}>
        {user.success && user.data ? (
          <LoggedInUser userData={user.data} />
        ) : (
          <Link href={ctaButton.href}>
            <Button>{ctaButton.label}</Button>
          </Link>
        )}
      </div>
    </div>
  );
}
Perfect! Now when you're logged in, you should see the username and logout button in the header:

Let's make one more improvement to our hero-section.tsx file in the src/components/custom folder.
One of the great features of React Server Components is that they can handle their own data fetching. Let's update the hero section so that logged-in users see a "Dashboard" button instead of the default call-to-action.
Here's the updated hero section code:
import Link from "next/link";
import { services } from "@/data/services";
import type { TImage, TLink } from "@/types";

import { StrapiImage } from "./strapi-image";

export interface IHeroSectionProps {
  id: number;
  documentId: string;
  __component: string;
  heading: string;
  subHeading: string;
  image: TImage;
  link: TLink;
}

const styles = {
  header: "relative h-[600px] overflow-hidden",
  backgroundImage: "absolute inset-0 object-cover w-full h-full",
  overlay:
    "relative z-10 flex flex-col items-center justify-center h-full text-center text-white bg-black/50",
  heading: "text-4xl font-bold md:text-5xl lg:text-6xl",
  subheading: "mt-4 text-lg md:text-xl lg:text-2xl",
  button:
    "mt-8 inline-flex items-center justify-center px-6 py-3 text-base font-medium text-black bg-white rounded-md shadow hover:bg-gray-100 transition-colors",
};

export async function HeroSection({ data }: { data: IHeroSectionProps }) {
  if (!data) return null;
  const user = await services.auth.getUserMeService();
  const userLoggedIn = user.success;

  const { heading, subHeading, image, link } = data;
  return (
    <header className={styles.header}>
      <StrapiImage
        alt={image.alternativeText ?? "no alternative text"}
        className="absolute inset-0 object-cover w-full h-full aspect/16:9"
        src={image.url}
        height={1080}
        width={1920}
      />
      <div className={styles.overlay}>
        <h1 className={styles.heading}>{heading}</h1>
        <p className={styles.subheading}>{subHeading}</p>
        <Link
          className={styles.button}
          href={userLoggedIn ? "/dashboard" : link.href}
        >
          {userLoggedIn ? "Dashboard" : link.label}
        </Link>
      </div>
    </header>
  );
}
Now when a user is logged in, the Hero Section will display a "Dashboard" button:

Now let's build our Account page where users can manage their profile information.
Creating Our User Profile Page (Account Page)
Let's create the account page structure. Navigate to the dashboard folder and create an account folder with a page.tsx file inside.
Add the following code to create a basic account page structure:
import { services } from "@/data/services";
import { validateApiResponse } from "@/lib/error-handler";
// import { ProfileForm } from "@/components/forms/profile-form";
// import { ProfileImageForm } from "@/components/forms/profile-image-form";

export default async function AccountRoute() {
  const user = await services.auth.getUserMeService();
  const userData = validateApiResponse(user, "user profile");
  const userImage = userData?.image;

  return (
    <div className="grid grid-cols-1 lg:grid-cols-5 gap-4 p-4">
      {/* <ProfileForm user={userData} className="col-span-3" /> */}
      {/* <ProfileImageForm image={userImage} className="col-span-2" /> */}
    </div>
  );
}
I've commented out the components we haven't created yet so the app can render without errors. Next, we'll build the ProfileForm and ProfileImageForm components.
Create a Form To Update User's Details
Navigate to src/components/forms and create a profile-form.tsx file.
Add the following code to create our profile form component:
"use client";
import React from "react";
import { cn } from "@/lib/utils";

import type { TAuthUser } from "@/types";

import { SubmitButton } from "@/components/custom/submit-button";
import { Input } from "@/components/ui/input";
import { Textarea } from "@/components/ui/textarea";

interface IProfileFormProps {
  user?: TAuthUser | null;
}

const styles = {
  form: "space-y-4",
  container: "space-y-4 grid",
  topRow: "grid grid-cols-3 gap-4",
  nameRow: "grid grid-cols-2 gap-4",
  fieldGroup: "space-y-2",
  textarea: "resize-none border rounded-md w-full h-[224px] p-2",
  buttonContainer: "flex justify-end",
  countBox:
    "flex items-center justify-center h-9 w-full rounded-md border border-input bg-transparent px-3 py-1 text-sm shadow-sm transition-colors file:border-0 file:bg-transparent file:text-sm file:font-medium placeholder:text-muted-foreground focus-visible:outline-none",
  creditText: "font-bold text-md mx-1",
};

export function ProfileForm({
  user,
  className,
}: IProfileFormProps & {
  readonly className?: string;
}) {
  if (!user) {
    return (
      <div className={cn(styles.form, className)}>
        <p>Unable to load profile data</p>
      </div>
    );
  }

  return (
    <form className={cn(styles.form, className)}>
      <div className={styles.container}>
        <div className={styles.topRow}>
          <Input
            id="username"
            name="username"
            placeholder="Username"
            defaultValue={user.username || ""}
            disabled
          />
          <Input
            id="email"
            name="email"
            placeholder="Email"
            defaultValue={user.email || ""}
            disabled
          />
          <CountBox text={user.credits || 0} />
        </div>

        <div className={styles.nameRow}>
          <div className={styles.fieldGroup}>
            <Input
              id="firstName"
              name="firstName"
              placeholder="First Name"
              defaultValue={user.firstName || ""}
            />
          </div>
          <div className={styles.fieldGroup}>
            <Input
              id="lastName"
              name="lastName"
              placeholder="Last Name"
              defaultValue={user.lastName || ""}
            />
          </div>
        </div>
        <div className={styles.fieldGroup}>
          <Textarea
            id="bio"
            name="bio"
            placeholder="Write your bio here..."
            className={styles.textarea}
            defaultValue={user.bio || ""}
          />
        </div>
      </div>
      <div className={styles.buttonContainer}>
        <SubmitButton text="Update Profile" loadingText="Saving Profile" />
      </div>
    </form>
  );
}

function CountBox({ text }: { text: number }) {
  const color = text > 0 ? "text-primary" : "text-red-500";
  return (
    <div className={styles.countBox}>
      You have<span className={cn(styles.creditText, color)}>{text}</span>
      credit(s)
    </div>
  );
}
Since we're using a new Shadcn UI component (Textarea), let's install it:
npx shadcn@latest add textareaLet's uncomment our ProfileForm in our dashboard/account/page.tsx file.
import { services } from "@/data/services";
import { validateApiResponse } from "@/lib/error-handler";
import { ProfileForm } from "@/components/forms/profile-form";
// import { ProfileImageForm } from "@/components/forms/profile-image-form";
export default async function AccountRoute() {
const user = await services.auth.getUserMeService();
const userData = validateApiResponse(user, "user profile");
const userImage = userData?.image;
return (
<div className="grid grid-cols-1 lg:grid-cols-5 gap-4 p-4">
<ProfileForm user={userData} className="col-span-3" />
{/* <ProfileImageForm image={userImage} className="col-span-2" /> */}
</div>
);
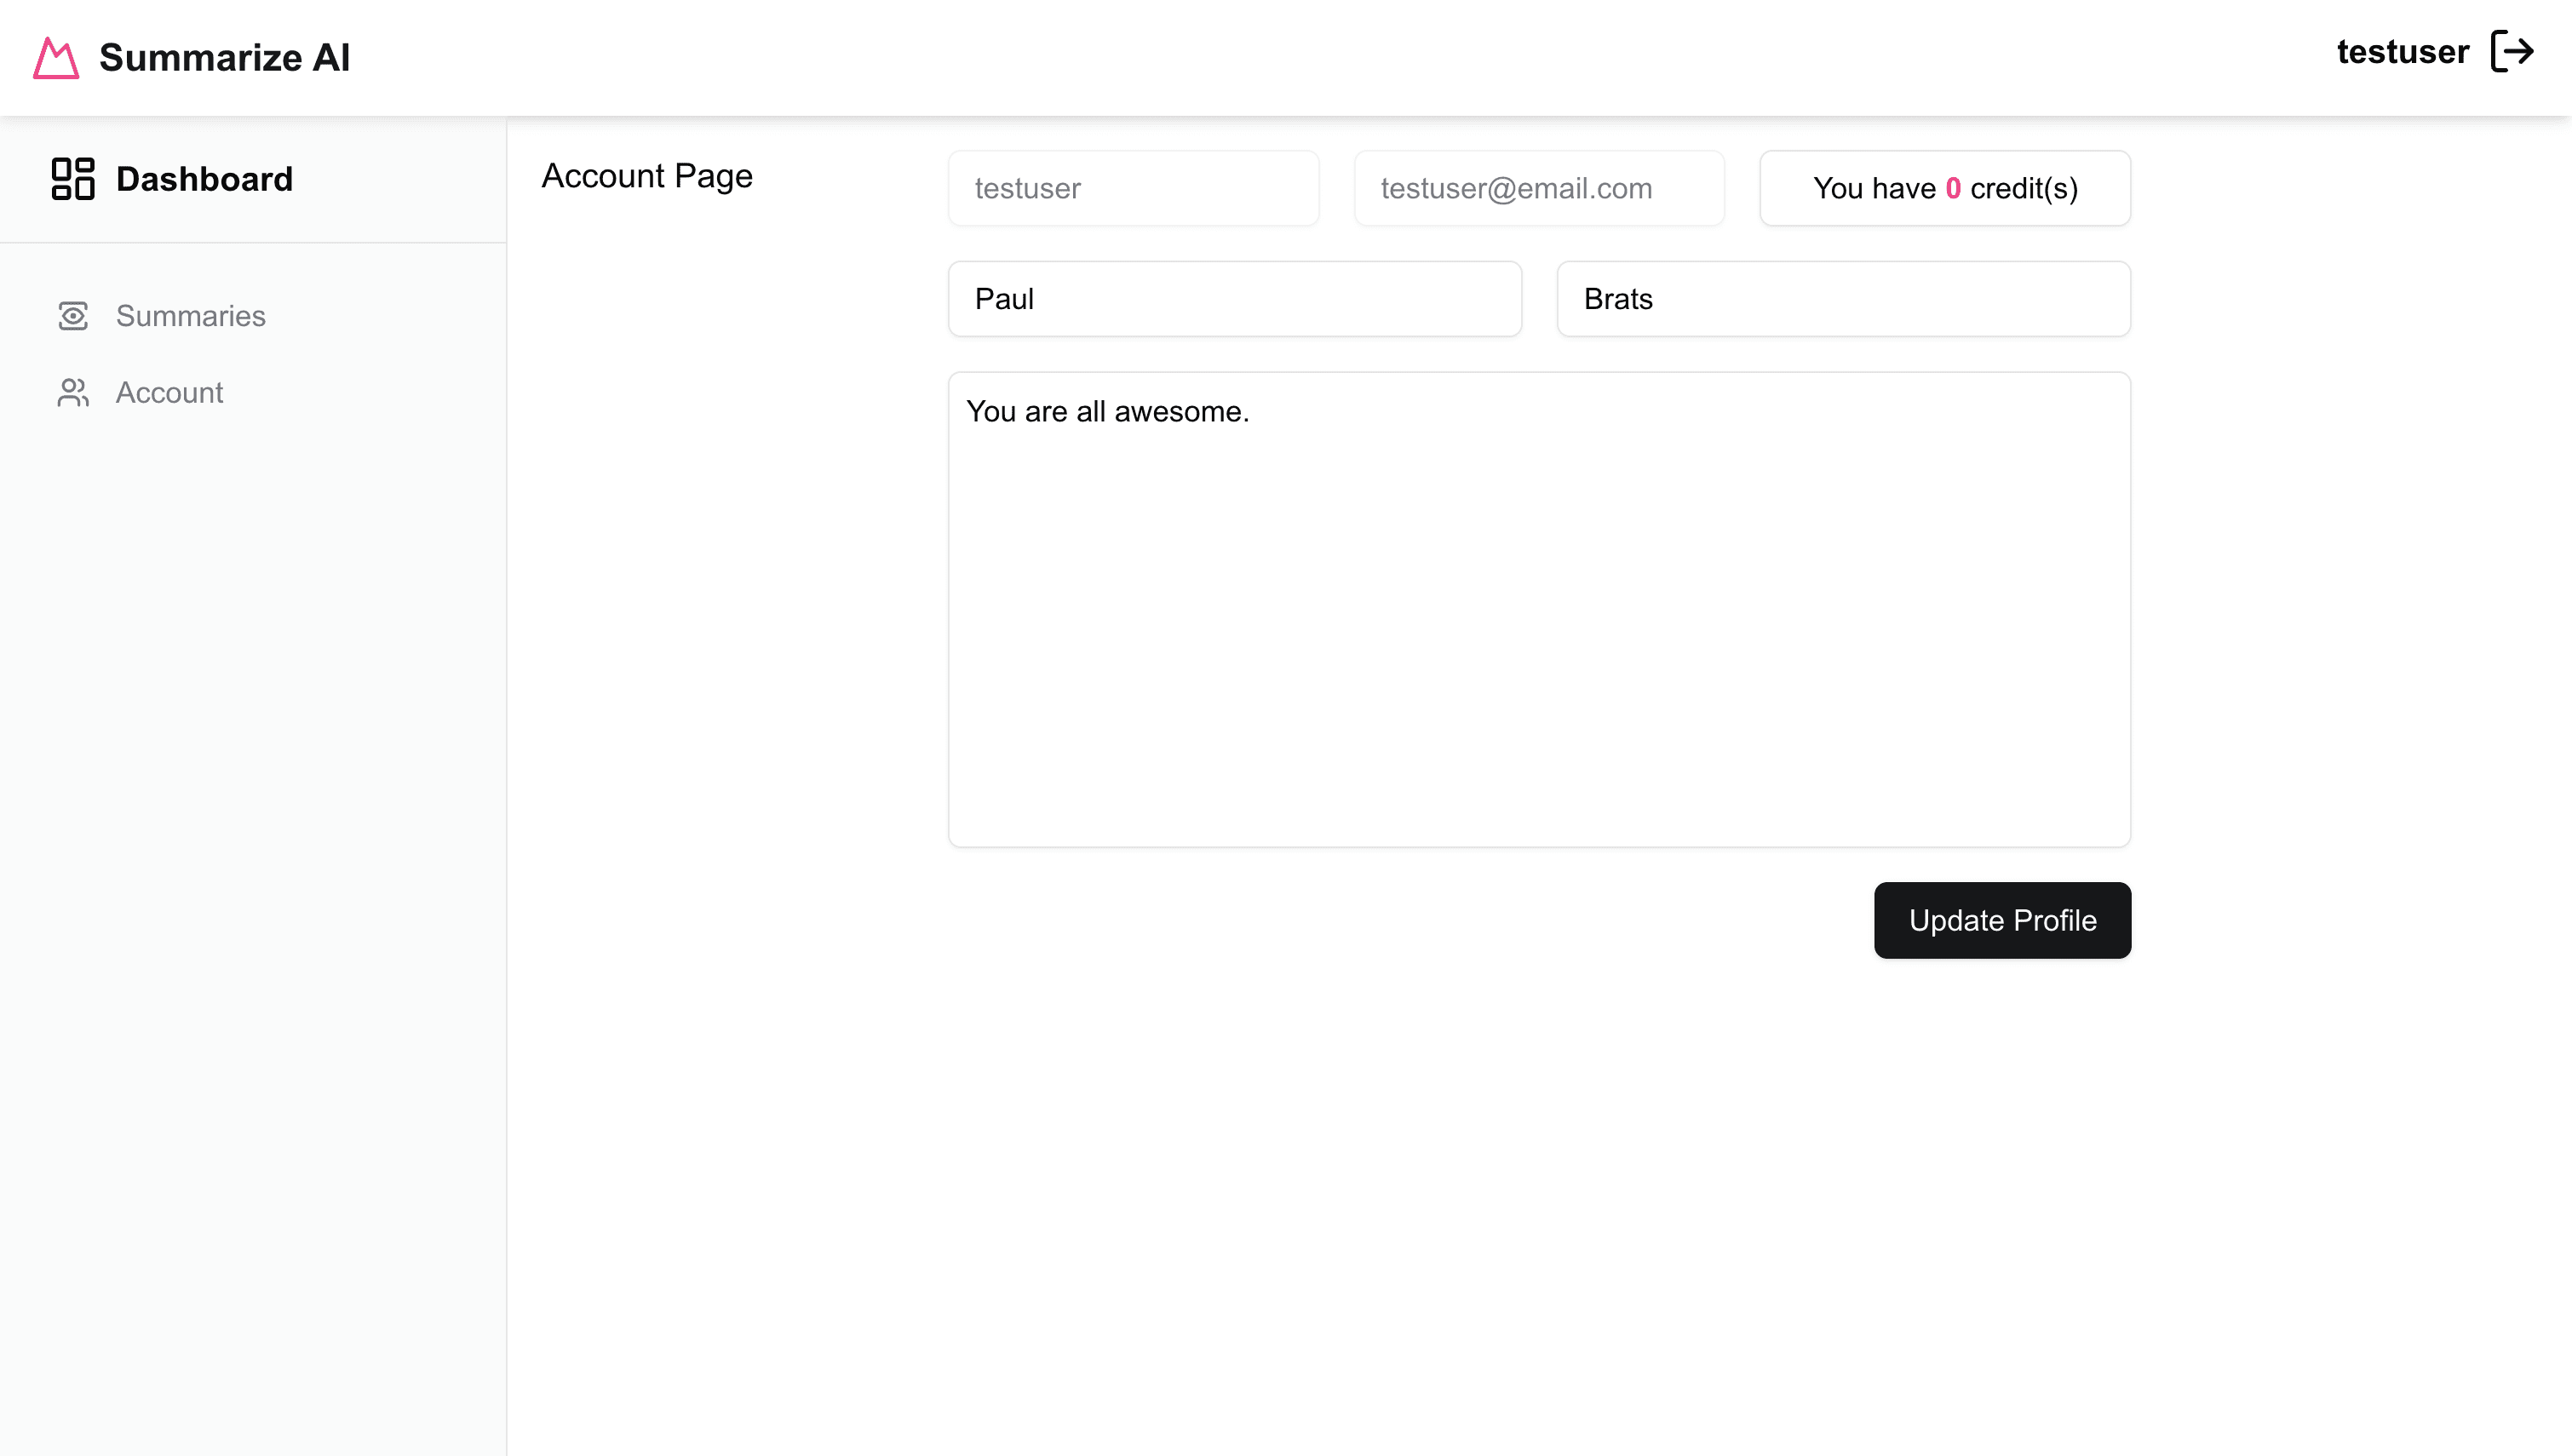
}Restart your Next.js development server, and you should see the following:
You'll notice two issues with the current form:
-
We're not displaying the user's First Name, Last Name, Bio, or Credits because these fields don't exist in our Strapi user schema yet.
-
The form can't be submitted because we haven't implemented the server action logic yet.
Let's address the first issue by updating our user schema in Strapi, then we'll implement the server action functionality.
Updating User Data Schema In Our Backend
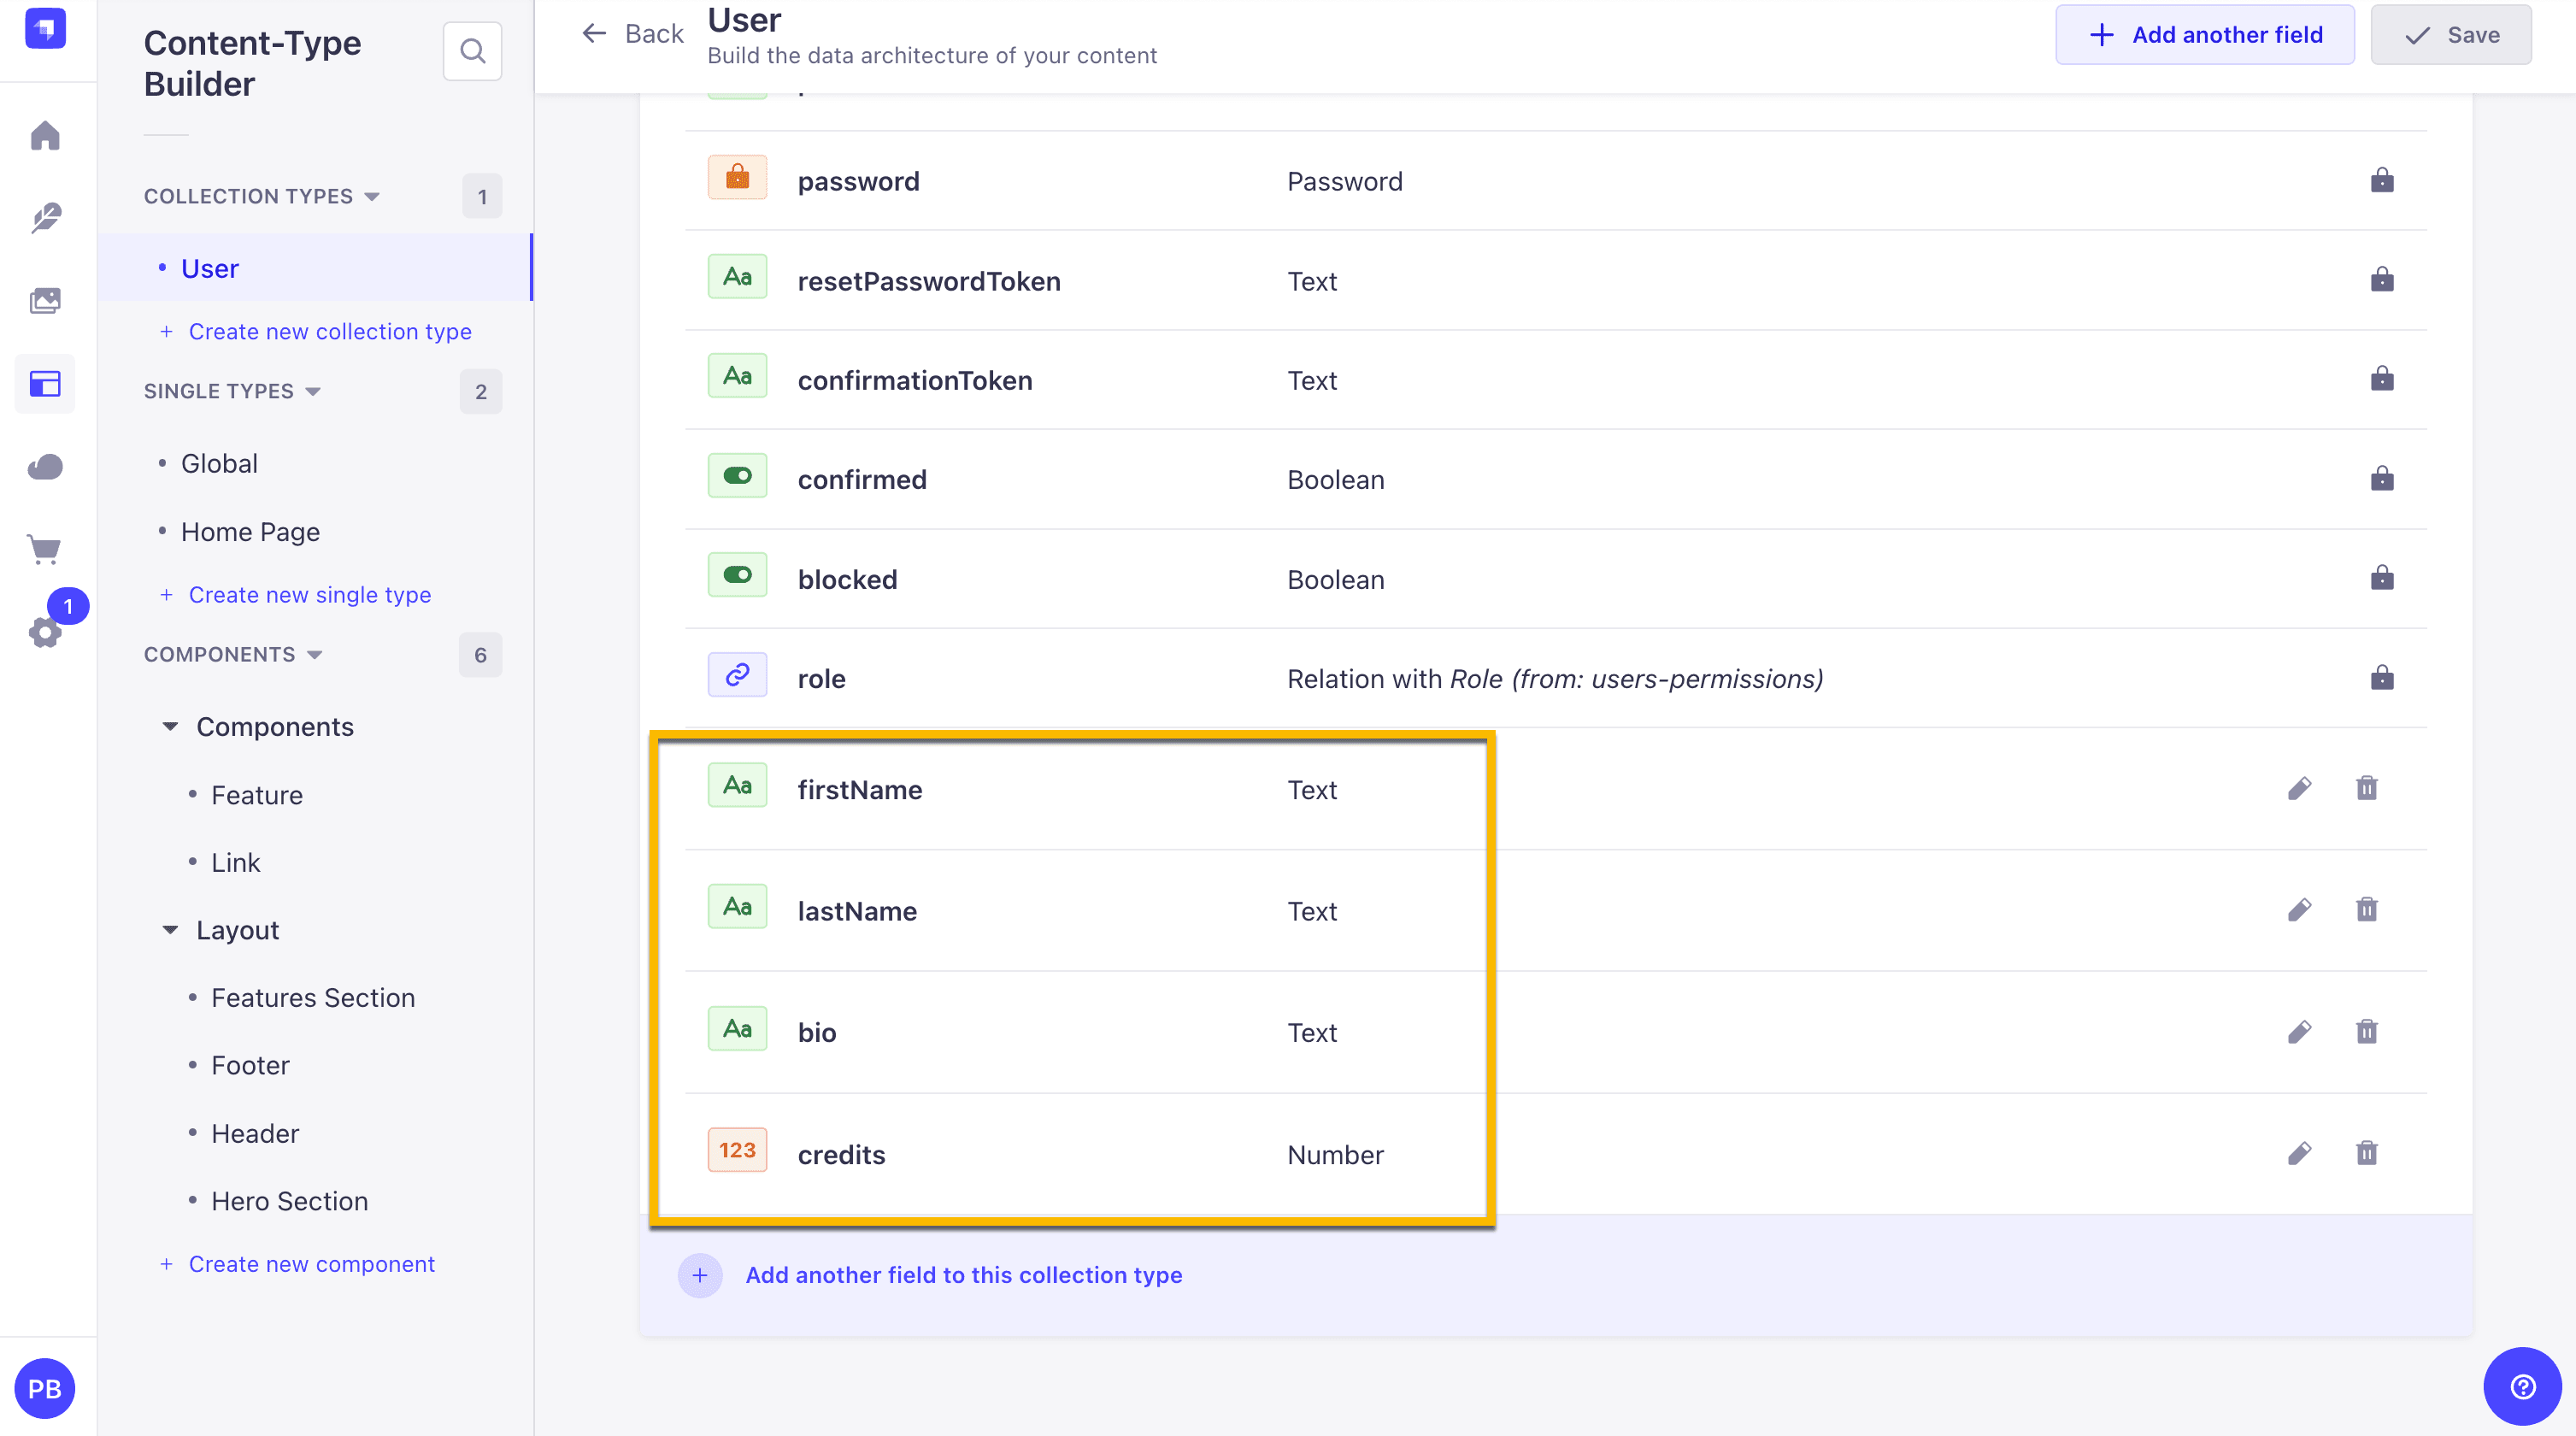
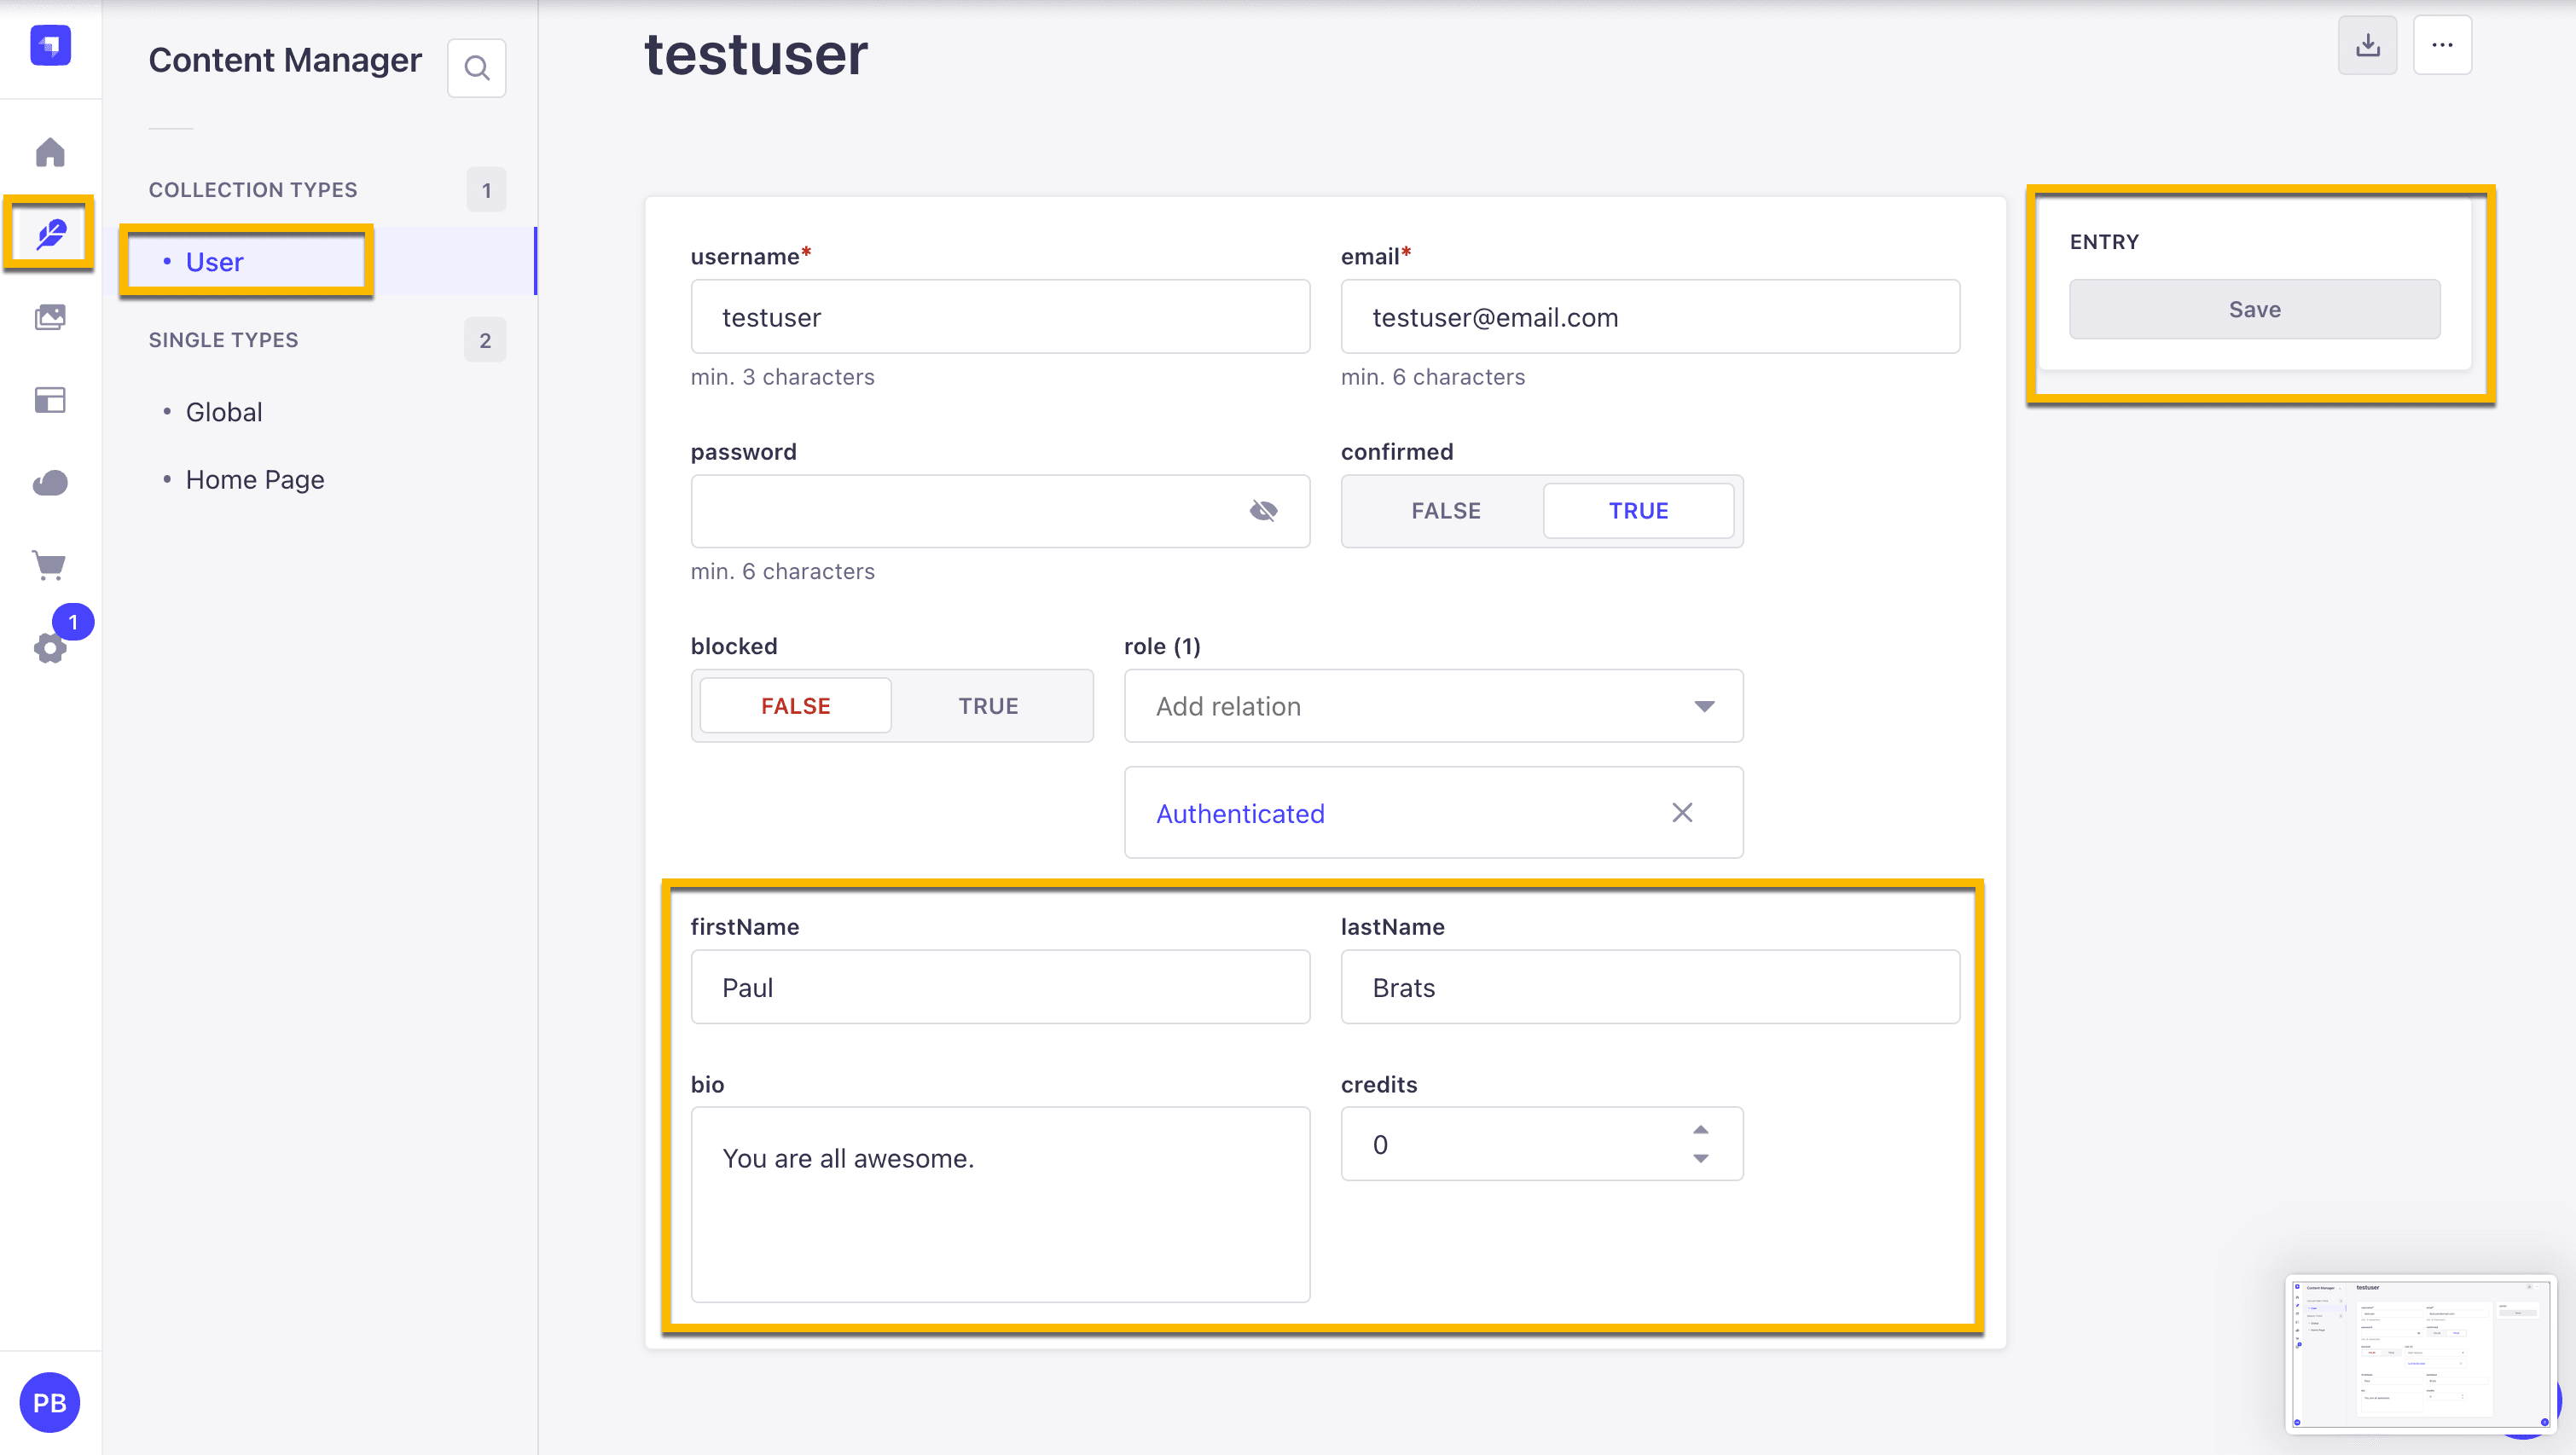
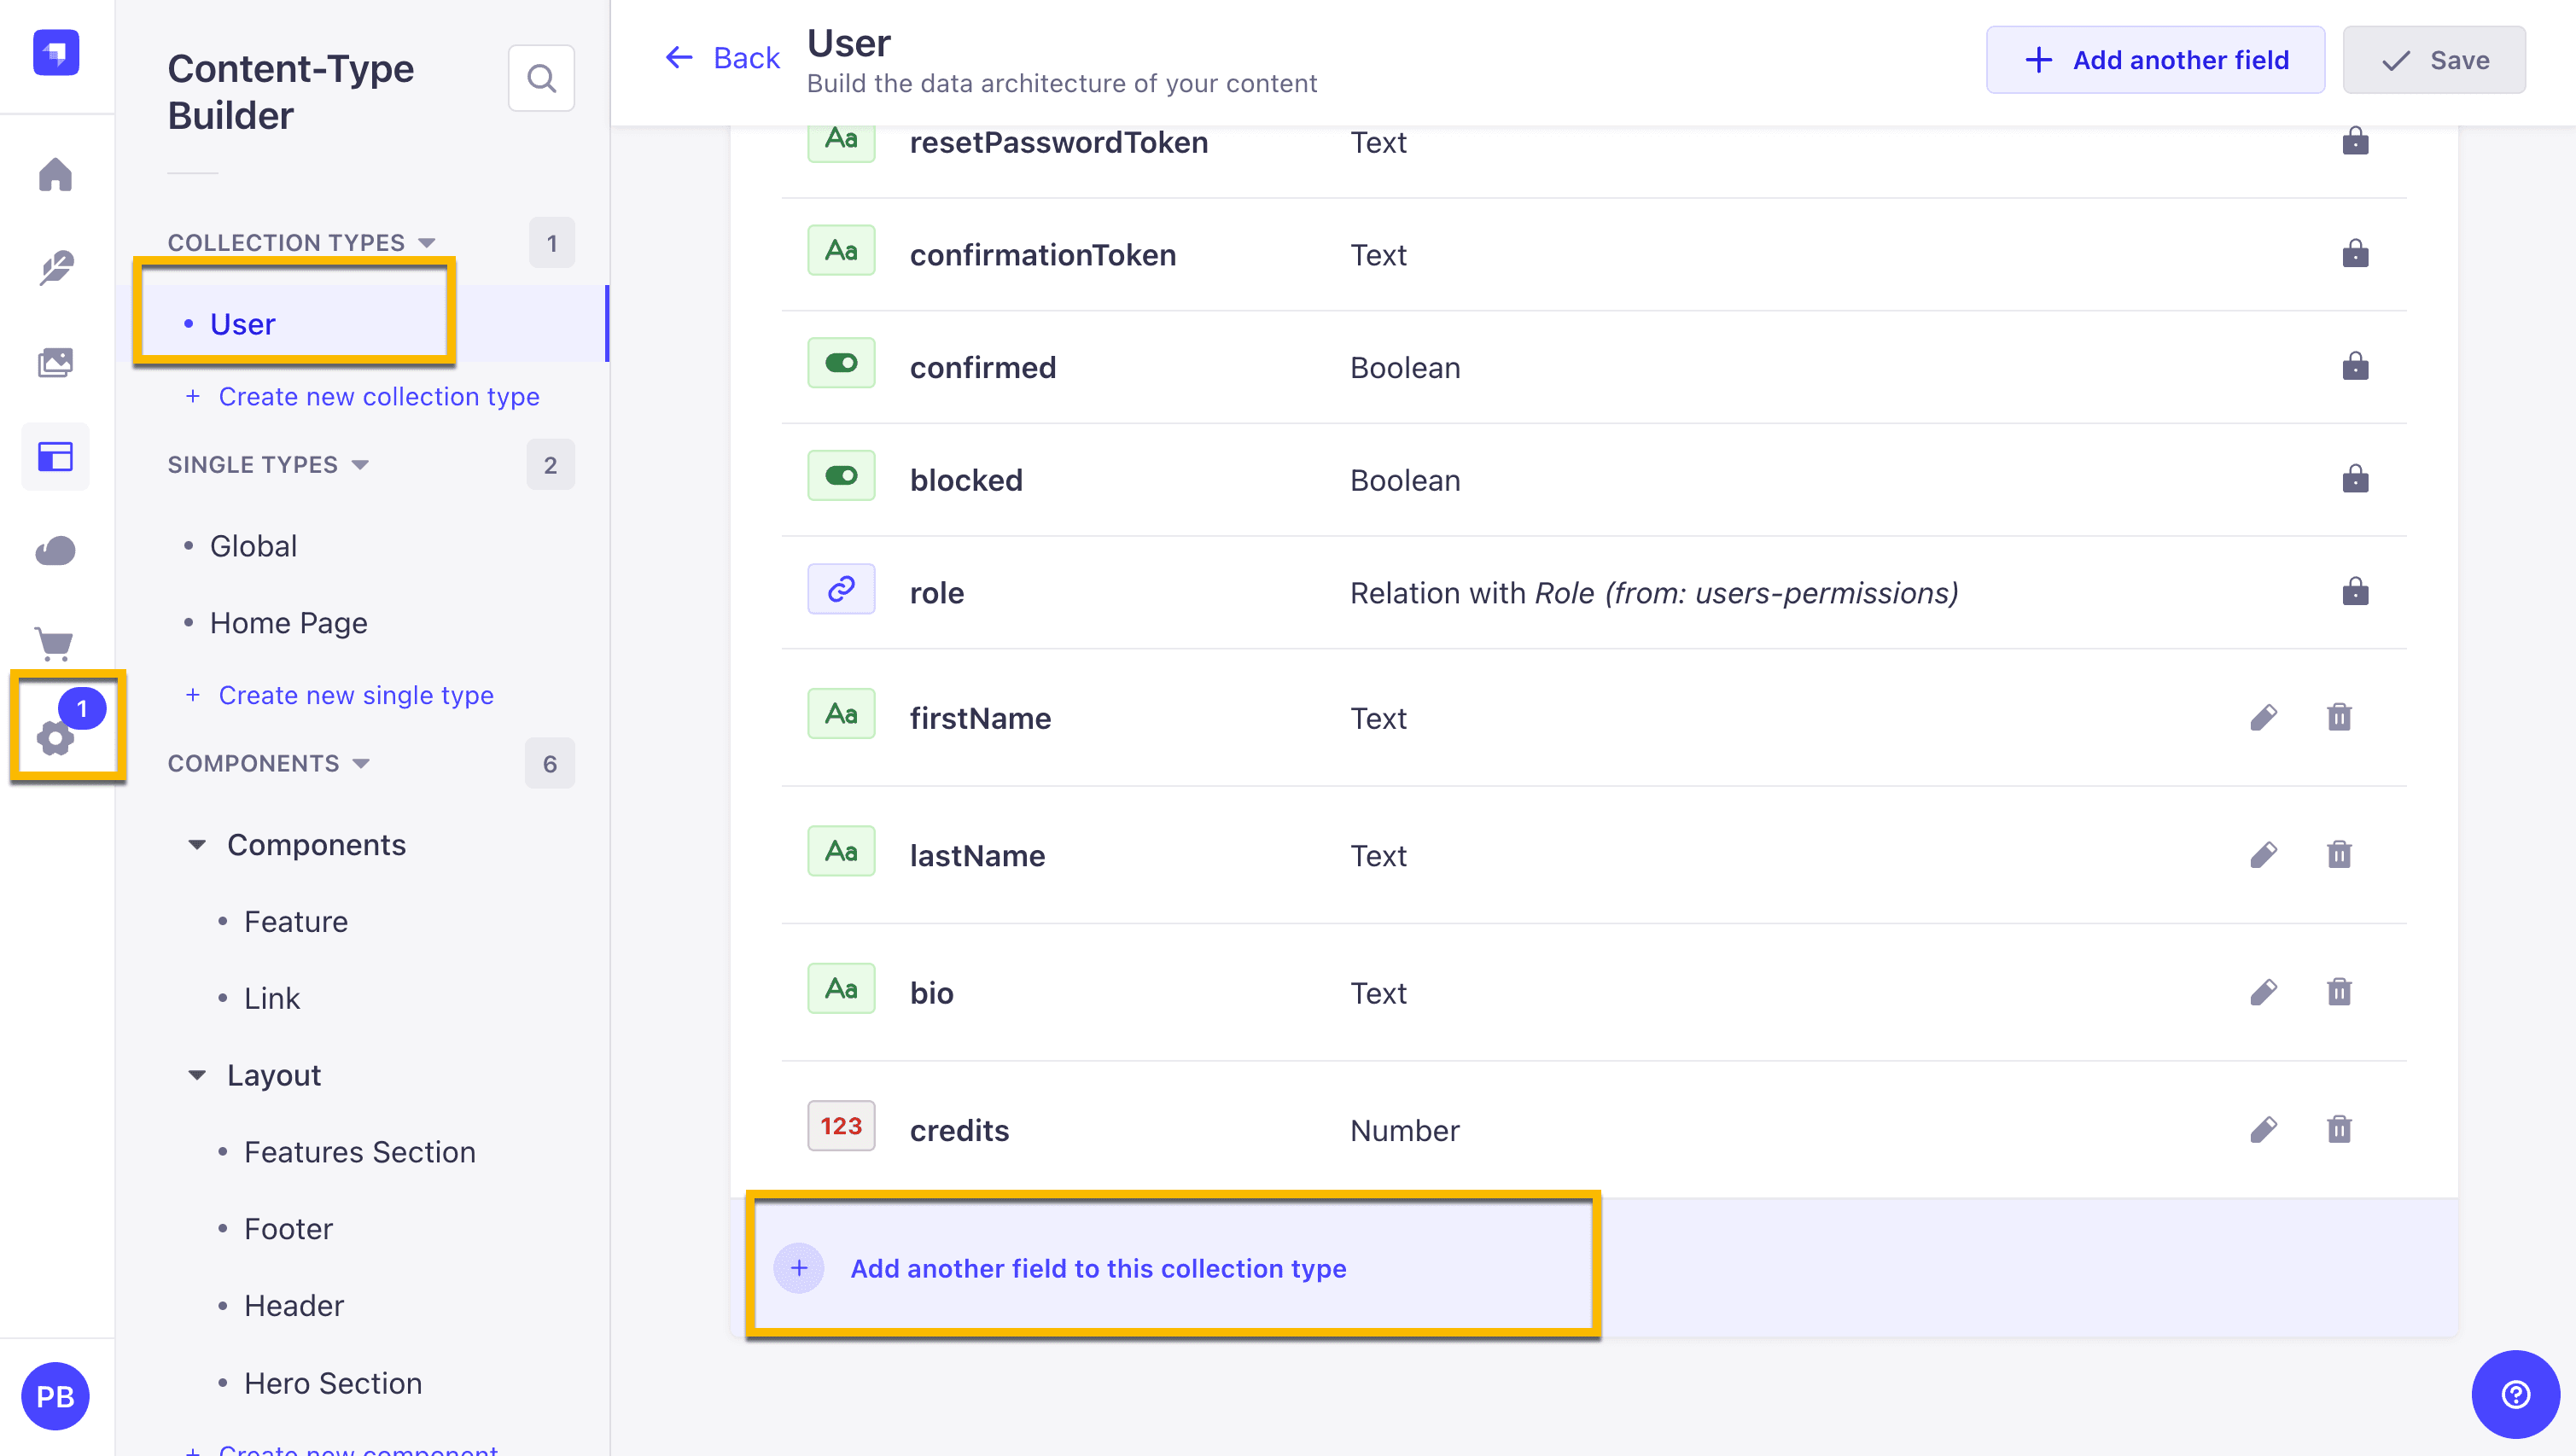
In your Strapi Admin area, navigate to the Content-Type Builder and select the User collection type:

Add the following fields to extend the User collection type:
| Name | Field | Type | Advanced Settings |
|---|---|---|---|
| firstName | Text | Short Text | |
| lastName | Text | Short Text | |
| bio | Text | Long Text | |
| credits | Number | Integer | Set default value to be 0 |
For the credits field, we'll set a default value of 0 that new users will start with. You can configure this by clicking the advanced settings button and filling in the default value field.
Once you've added all the fields, your User collection type should look like this:
Now let's manually update our user's information in Strapi to test if the data appears correctly in our frontend:
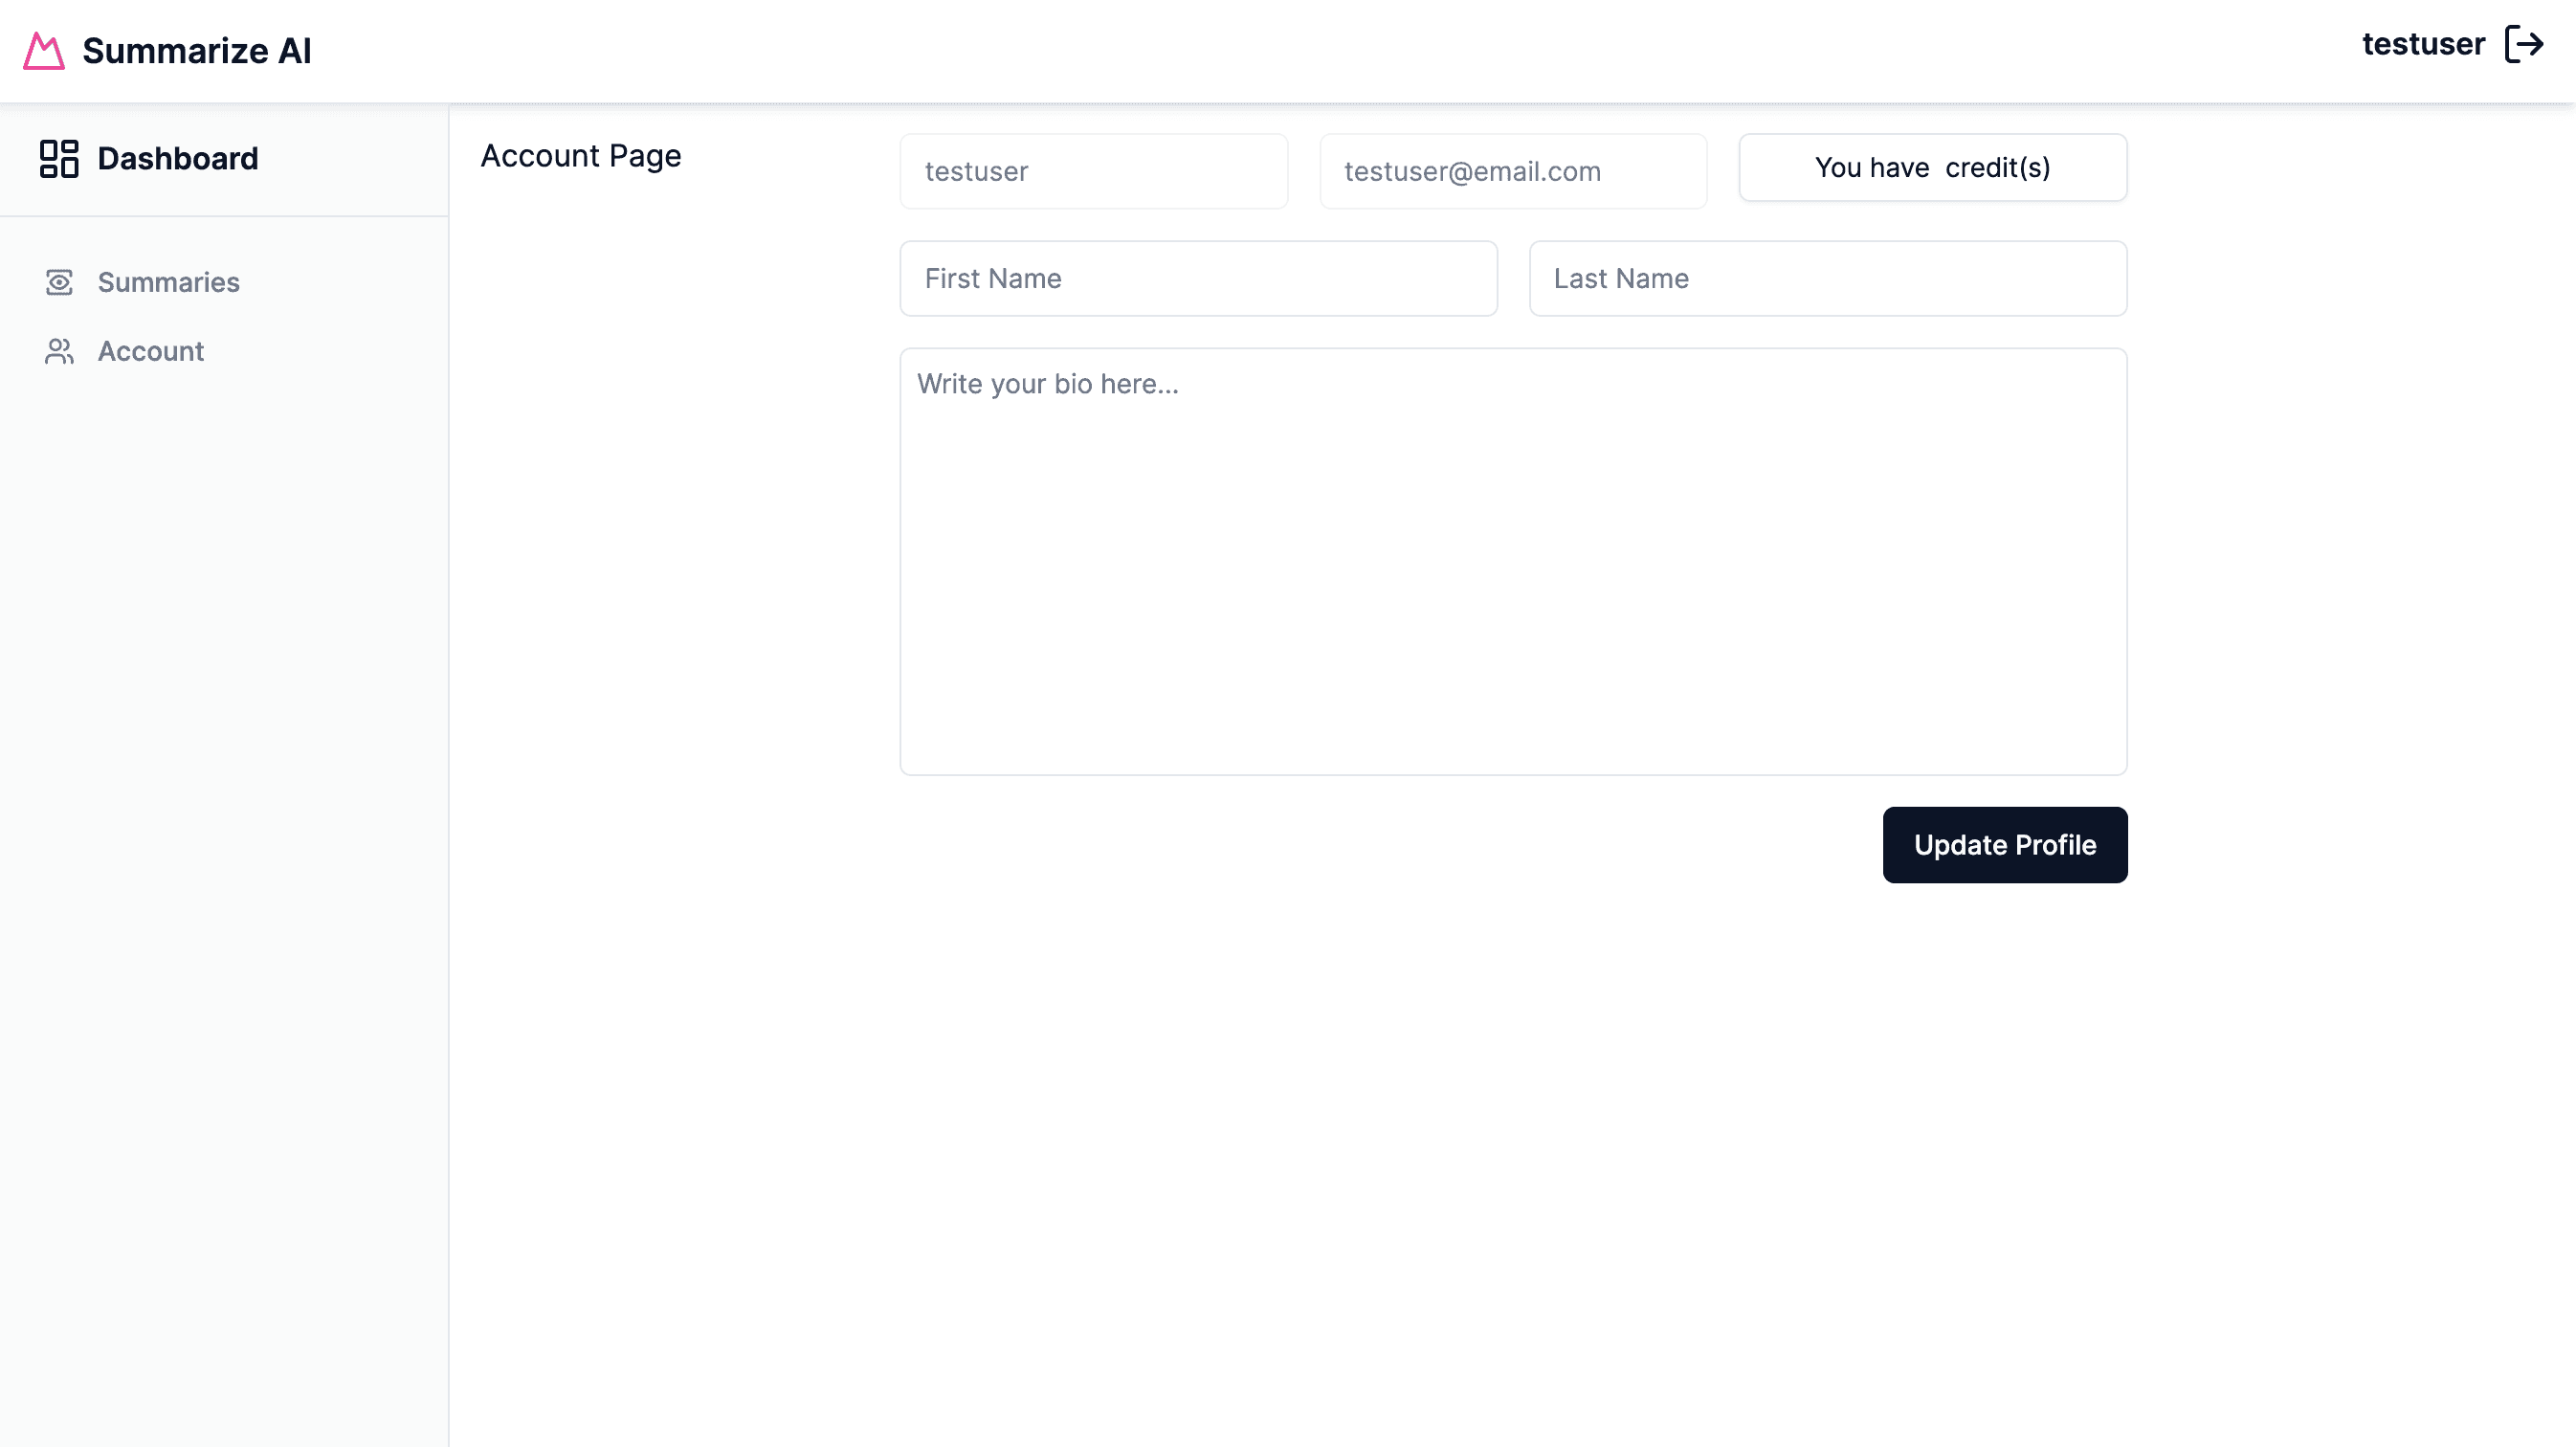
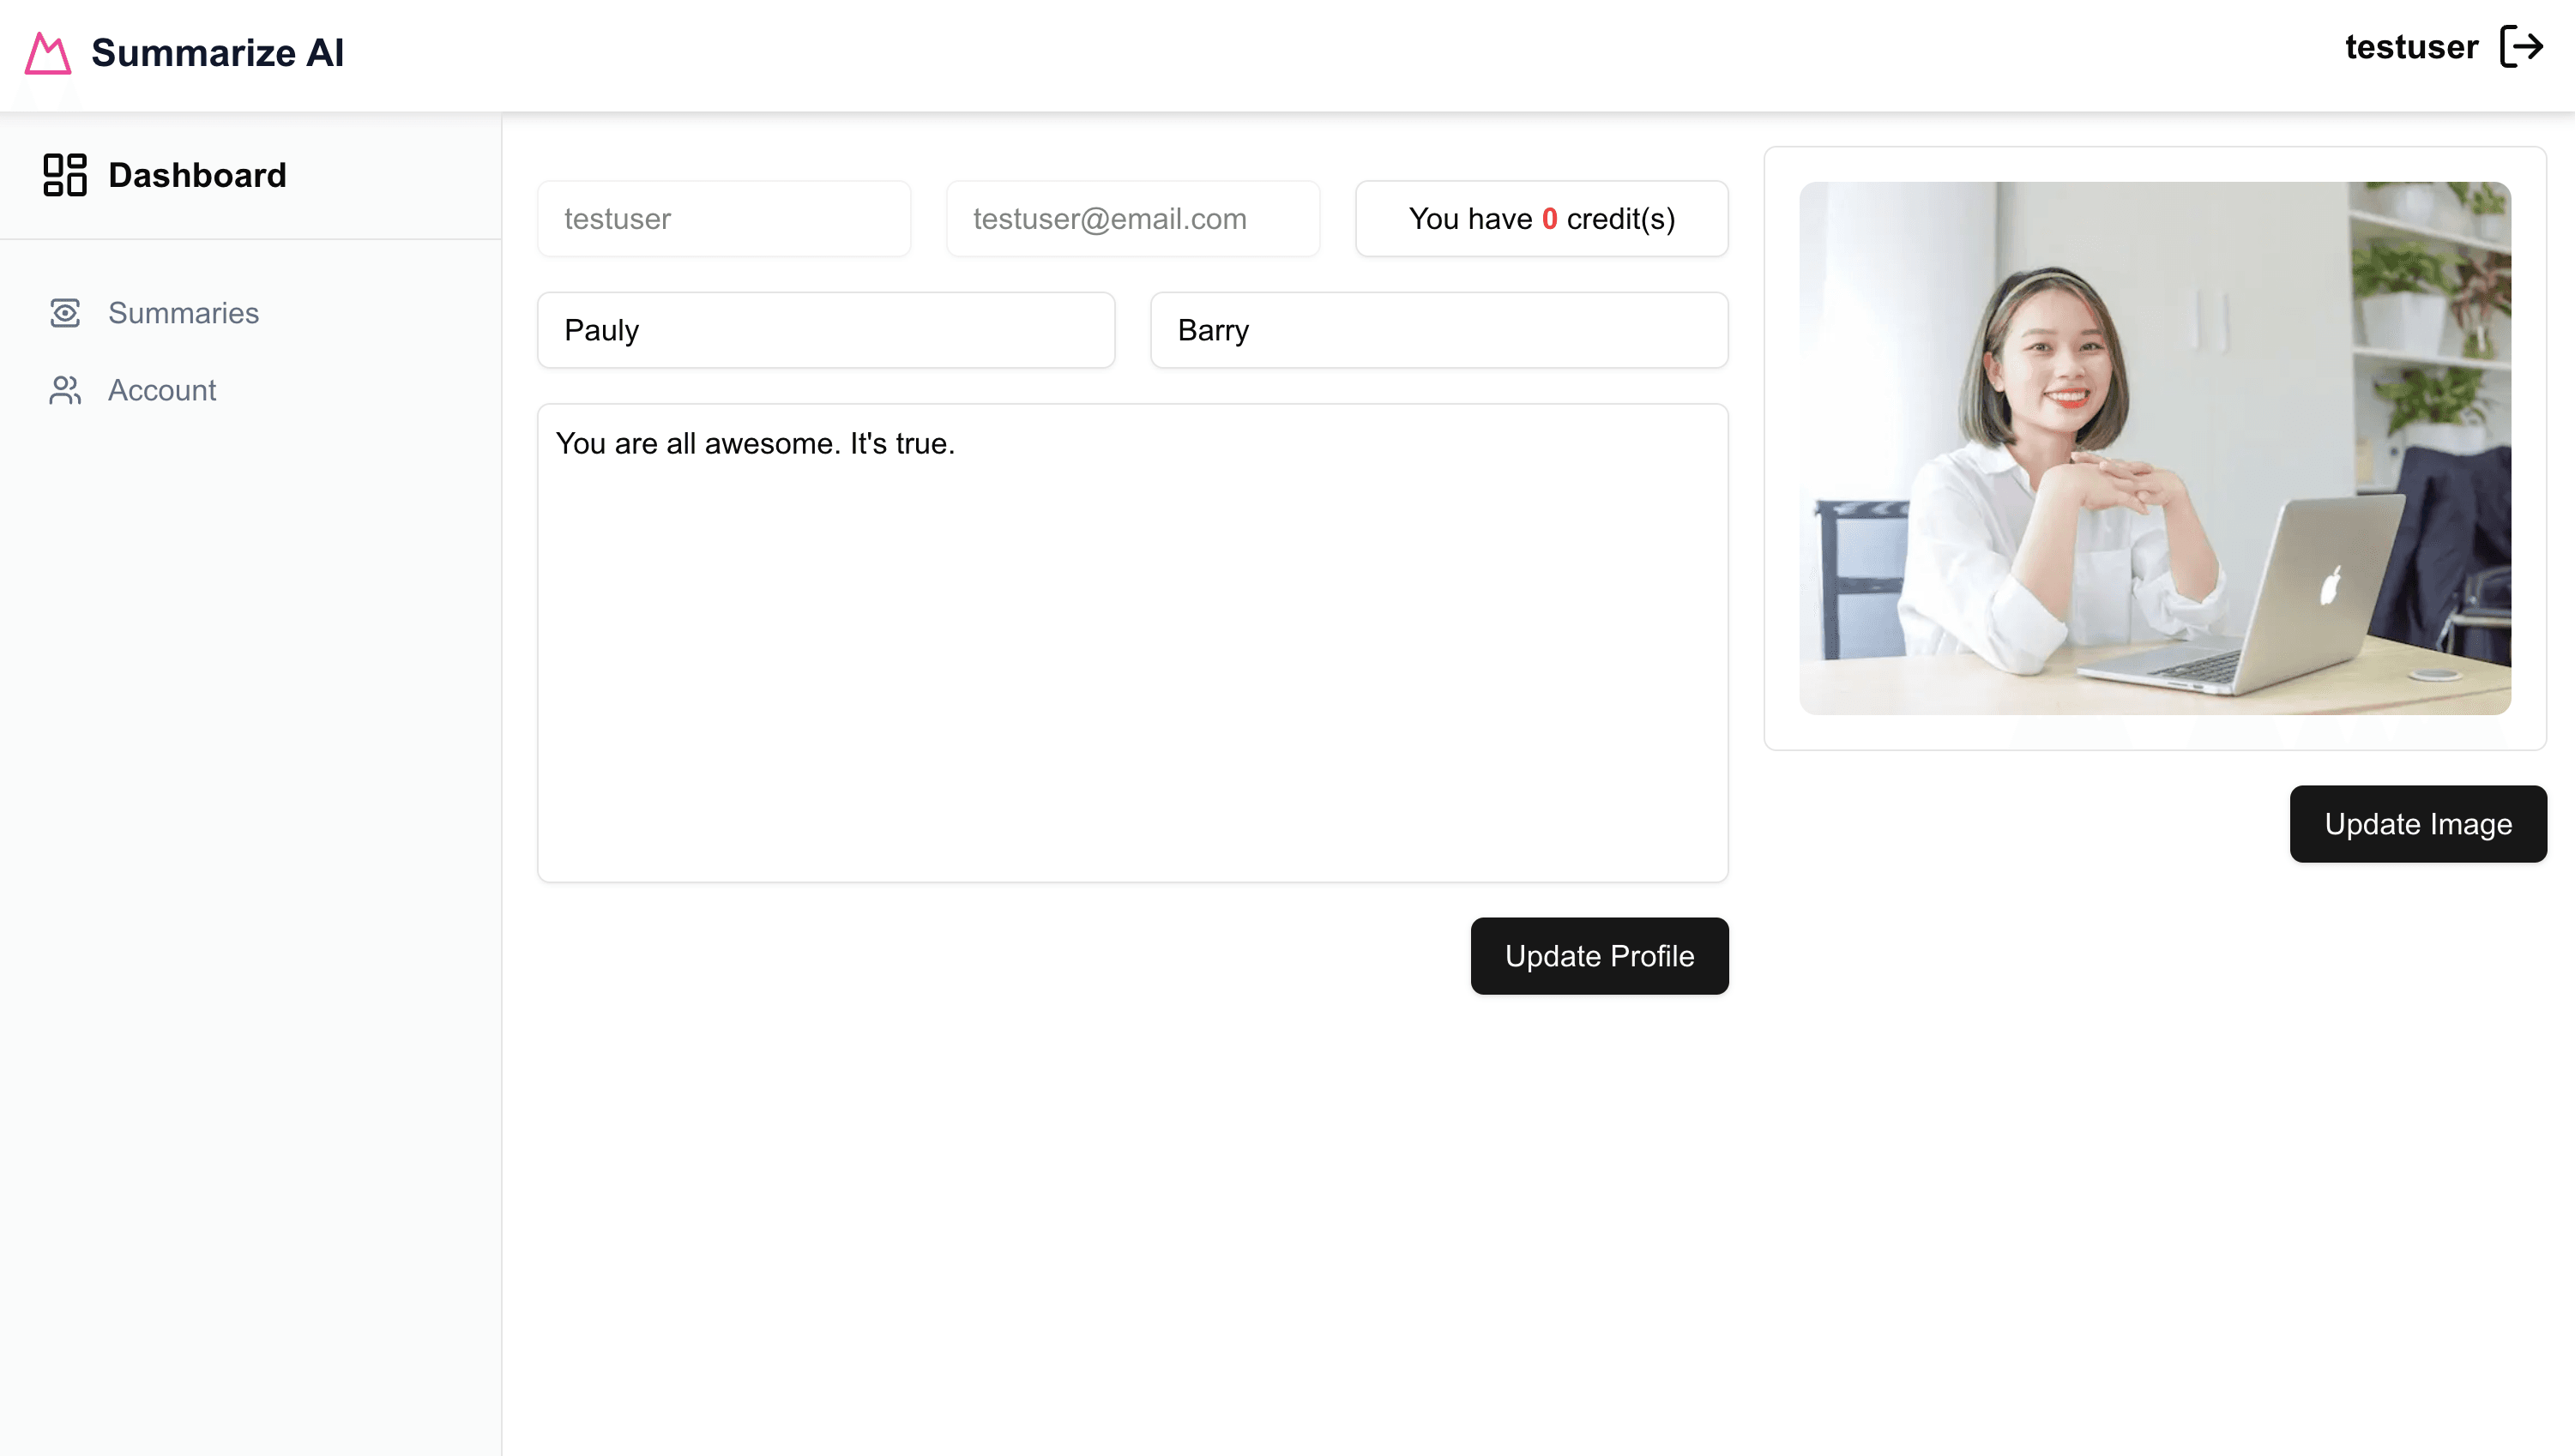
After updating the user data, navigate to your Account page in the frontend. You should now see the updated information:
Now let's implement the form update functionality using server actions.
Updating User Data With Server Actions
First, let's create the updateProfileAction that will handle our form submission.
Navigate to src/data/actions, create a new file called profile.ts, and add the following code:
"use server";
import { z } from "zod";

import { services } from "@/data/services";

import {
  ProfileFormSchema,
  type ProfileFormState,
} from "@/data/validation/profile";

export async function updateProfileAction(
  prevState: ProfileFormState,
  formData: FormData
): Promise<ProfileFormState> {
  console.log("Hello From Login User Action");

  const fields = Object.fromEntries(formData);

  console.dir(fields);

  const validatedFields = ProfileFormSchema.safeParse(fields);

  if (!validatedFields.success) {
    const flattenedErrors = z.flattenError(validatedFields.error);
    console.log("Validation failed:", flattenedErrors.fieldErrors);
    return {
      success: false,
      message: "Validation failed",
      strapiErrors: null,
      zodErrors: flattenedErrors.fieldErrors,
      data: {
        ...prevState.data,
        ...fields,
      },
    };
  }

  console.log("Validation successful:", validatedFields.data);

  const responseData = await services.profile.updateProfileService(
    validatedFields.data
  );

  if (!responseData) {
    return {
      success: false,
      message: "Ops! Something went wrong. Please try again.",
      strapiErrors: null,
      zodErrors: null,
      data: {
        ...prevState.data,
        ...fields,
      },
    };
  }

  if (responseData.error) {
    return {
      success: false,
      message: "Failed to Login.",
      strapiErrors: responseData.error,
      zodErrors: null,
      data: {
        ...prevState.data,
        ...fields,
      },
    };
  }

  console.log("#############");
  console.log("User Login Successfully", responseData);
  console.log("#############");

  return {
    success: false,
    message: "Successfully updated form",
    strapiErrors: null,
    zodErrors: null,
    data: {
      ...prevState.data,
      ...fields,
    },
  };
}
And don't forget to export it from our index.ts file:
import {
  registerUserAction,
  loginUserAction,
  logoutUserAction,
  getAuthTokenAction,
} from "./auth";
import { updateProfileAction } from "./profile";

export const actions = {
  auth: {
    registerUserAction,
    loginUserAction,
    logoutUserAction,
    getAuthTokenAction,
  },
  profile: {
    updateProfileAction,
  },
};
We've created similar actions before, so this pattern should be familiar. The action expects three things we need to create:
updateProfileService- handles the API call to StrapiProfileFormSchema- Zod schema for validationProfileFormStatetype - TypeScript type for form state
Let's start with the Zod validation schema, which will ensure data integrity before sending it to our backend.
Create a profile.ts file inside the validation folder and add the following validation schemas:
import { z } from "zod";

export const ProfileFormSchema = z.object({
  firstName: z
    .string()
    .min(1, "First name is required")
    .max(50, "First name must be less than 50 characters"),
  lastName: z
    .string()
    .min(1, "Last name is required")
    .max(50, "Last name must be less than 50 characters"),
  bio: z
    .string()
    .min(10, "Bio must be at least 10 characters")
    .max(500, "Bio must be less than 500 characters"),
});

export type ProfileFormValues = z.infer<typeof ProfileFormSchema>;

export type ProfileFormState = {
  success?: boolean;
  message?: string;
  data?: {
    firstName?: string;
    lastName?: string;
    bio?: string;
  };
  strapiErrors?: {
    status: number;
    name: string;
    message: string;
    details?: Record<string, string[]>;
  } | null;
  zodErrors?: {
    firstName?: string[];
    lastName?: string[];
    bio?: string[];
  } | null;
};

export const ProfileImageFormSchema = z.object({
  image: z
    .instanceof(File)
    .refine((file) => file.size > 0, "Image is required")
    .refine((file) => file.size <= 5000000, "Image must be less than 5MB")
    .refine(
      (file) => ["image/jpeg", "image/png", "image/webp"].includes(file.type),
      "Image must be JPEG, PNG, or WebP format"
    ),
});

export type ProfileImageFormValues = z.infer<typeof ProfileImageFormSchema>;

export type ProfileImageFormState = {
  success?: boolean;
  message?: string;
  data?: {
    image?: File;
  };
  strapiErrors?: {
    status: number;
    name: string;
    message: string;
    details?: Record<string, string[]>;
  } | null;
  zodErrors?: {
    image?: string[];
  } | null;
};
Now let's create the updateProfileService method. In the services folder, create a file named profile.ts and add the following code:
import { getStrapiURL } from "@/lib/utils";
import type { TStrapiResponse, TAuthUser } from "@/types";
import { services } from "@/data/services";
import { actions } from "@/data/actions";
import { api } from "@/data/data-api";

type TUpdateProfile = {
  firstName: string;
  lastName: string;
  bio: string;
};

const baseUrl = getStrapiURL();

export async function updateProfileService(
  profileData: TUpdateProfile
): Promise<TStrapiResponse<TAuthUser>> {
  const userId = (await services.auth.getUserMeService()).data?.id;
  if (!userId) throw new Error("User Id is required");

  const authToken = await actions.auth.getAuthTokenAction();
  if (!authToken) throw new Error("You are not authorized");

  const url = new URL("/api/users/" + userId, baseUrl);
  const result = await api.put<TAuthUser, TUpdateProfile>(
    url.href,
    profileData,
    { authToken }
  );

  console.log("######### actual profile update response");
  console.dir(result, { depth: null });

  return result;
}
And finally let's add it to our export in the index.ts file so we can use it:
import {
  registerUserService,
  loginUserService,
  getUserMeService,
} from "./auth";

import { updateProfileService } from "./profile";

export const services = {
  auth: {
    registerUserService,
    loginUserService,
    getUserMeService,
  },
  profile: {
    updateProfileService,
  },
};
Perfect! Now we have all the pieces needed to implement the profile update functionality.
Let's update our profile-form.tsx file to connect it with our server action:
First import action, useActionState and our ProfileFormState:
import { actions } from "@/data/actions";
import { useActionState } from "react";
import type { ProfileFormState } from "@/data/validation/profile";
Next, let's import our ZodErrors and StrapiErrors components so we can use them in our form:
import { ZodErrors } from "@/components/custom/zod-errors";
import { StrapiErrors } from "@/components/custom/strapi-errors";
Now, let's define our initial form state:
const INITIAL_STATE: ProfileFormState = {
  success: false,
  message: undefined,
  strapiErrors: null,
  zodErrors: null,
};
Once we have that, we can now define our action state:
const [formState, formAction] = useActionState(
  actions.profile.updateProfileAction,
  INITIAL_STATE
);
Now that we have our action we will update our form tag with the following.
<form action={formAction} className={cn(styles.form, className)}>Then we will add our ZodError for the fields that we are going to update.
<div className={styles.nameRow}>
  <div className={styles.fieldGroup}>
    <Input
      id="firstName"
      name="firstName"
      placeholder="First Name"
      defaultValue={formState?.data?.firstName || user.firstName || ""}
    />
    <ZodErrors error={formState?.zodErrors?.firstName} />
  </div>
  <div className={styles.fieldGroup}>
    <Input
      id="lastName"
      name="lastName"
      placeholder="Last Name"
      defaultValue={formState?.data?.lastName || user.lastName || ""}
    />
    <ZodErrors error={formState?.zodErrors?.lastName} />
  </div>
</div>
  <div className={styles.fieldGroup}>
    <Textarea
      id="bio"
      name="bio"
      placeholder="Write your bio here..."
      className={styles.textarea}
      defaultValue={formState?.data?.bio || user.bio || ""}
    />
    <ZodErrors error={formState?.zodErrors?.bio} />
  </div>
Notice we are also updating our defaultValue to use our formState data.
Finally we will add our Strapi Errors component:
<div className={styles.buttonContainer}>
  <SubmitButton text="Update Profile" loadingText="Saving Profile" />
  <StrapiErrors error={formState?.strapiErrors} />
</div>
The final code should look like the following inside your profile-form.tsx file.
"use client";
import React from "react";
import { cn } from "@/lib/utils";

import { actions } from "@/data/actions";
import { useActionState } from "react";
import type { ProfileFormState } from "@/data/validation/profile";

import type { TAuthUser } from "@/types";

import { SubmitButton } from "@/components/custom/submit-button";
import { Input } from "@/components/ui/input";
import { Textarea } from "@/components/ui/textarea";

import { ZodErrors } from "@/components/custom/zod-errors";
import { StrapiErrors } from "@/components/custom/strapi-errors";

const styles = {
  form: "space-y-4",
  container: "space-y-4 grid",
  topRow: "grid grid-cols-3 gap-4",
  nameRow: "grid grid-cols-2 gap-4",
  fieldGroup: "space-y-2",
  textarea: "resize-none border rounded-md w-full h-[224px] p-2",
  buttonContainer: "flex justify-end",
  countBox:
    "flex items-center justify-center h-9 w-full rounded-md border border-input bg-transparent px-3 py-1 text-sm shadow-sm transition-colors file:border-0 file:bg-transparent file:text-sm file:font-medium placeholder:text-muted-foreground focus-visible:outline-none",
  creditText: "font-bold text-md mx-1",
};

interface IProfileFormProps {
  user?: TAuthUser | null;
}

const INITIAL_STATE: ProfileFormState = {
  success: false,
  message: undefined,
  strapiErrors: null,
  zodErrors: null,
};

export function ProfileForm({
  user,
  className,
}: IProfileFormProps & {
  readonly className?: string;
}) {
  const [formState, formAction] = useActionState(
    actions.profile.updateProfileAction,
    INITIAL_STATE
  );
  if (!user) {
    return (
      <div className={cn(styles.form, className)}>
        <p>Unable to load profile data</p>
      </div>
    );
  }

  return (
    <form action={formAction} className={cn(styles.form, className)}>
      <div className={styles.container}>
        <div className={styles.topRow}>
          <Input
            id="username"
            name="username"
            placeholder="Username"
            defaultValue={user.username || ""}
            disabled
          />
          <Input
            id="email"
            name="email"
            placeholder="Email"
            defaultValue={user.email || ""}
            disabled
          />
          <CountBox text={user.credits || 0} />
        </div>

        <div className={styles.nameRow}>
          <div className={styles.fieldGroup}>
            <Input
              id="firstName"
              name="firstName"
              placeholder="First Name"
              defaultValue={formState?.data?.firstName || user.firstName || ""}
            />
            <ZodErrors error={formState?.zodErrors?.firstName} />
          </div>
          <div className={styles.fieldGroup}>
            <Input
              id="lastName"
              name="lastName"
              placeholder="Last Name"
              defaultValue={formState?.data?.lastName || user.lastName || ""}
            />
            <ZodErrors error={formState?.zodErrors?.lastName} />
          </div>
        </div>
        <div className={styles.fieldGroup}>
          <Textarea
            id="bio"
            name="bio"
            placeholder="Write your bio here..."
            className={styles.textarea}
            defaultValue={formState?.data?.bio || user.bio || ""}
          />
          <ZodErrors error={formState?.zodErrors?.bio} />
        </div>
      </div>
      <div className={styles.buttonContainer}>
        <SubmitButton text="Update Profile" loadingText="Saving Profile" />
      </div>
      <StrapiErrors error={formState?.strapiErrors} />
    </form>
  );
}

function CountBox({ text }: { text: number }) {
  const color = text > 0 ? "text-primary" : "text-red-500";
  return (
    <div className={styles.countBox}>
      You have<span className={cn(styles.creditText, color)}>{text}</span>
      credit(s)
    </div>
  );
}
You might be wondering: "How does the system know which user to update?"
Looking at our updateProfileService, you'll see how we handle this:
export async function updateProfileService(
  profileData: TUpdateProfile
): Promise<TStrapiResponse<TAuthUser>> {
  const userId = (await services.auth.getUserMeService()).data?.id;
  if (!userId) throw new Error("User Id is required");

  const authToken = await actions.auth.getAuthTokenAction();
  if (!authToken) throw new Error("You are not authorized");

  const url = new URL("/api/users/" + userId, baseUrl);
  const result = await api.put<TAuthUser, TUpdateProfile>(
    url.href,
    profileData,
    { authToken }
  );

  console.log("######### actual profile update response");
  console.dir(result, { depth: null });

  return result;
}
You will see that we are getting our logged in user from Strapi and checking if they exists.
const userId = (await services.auth.getUserMeService()).data?.id;
if (!userId) throw new Error("User Id is required");
Now let's test our Profile Form. Before it works, we need to configure the proper permissions in Strapi.
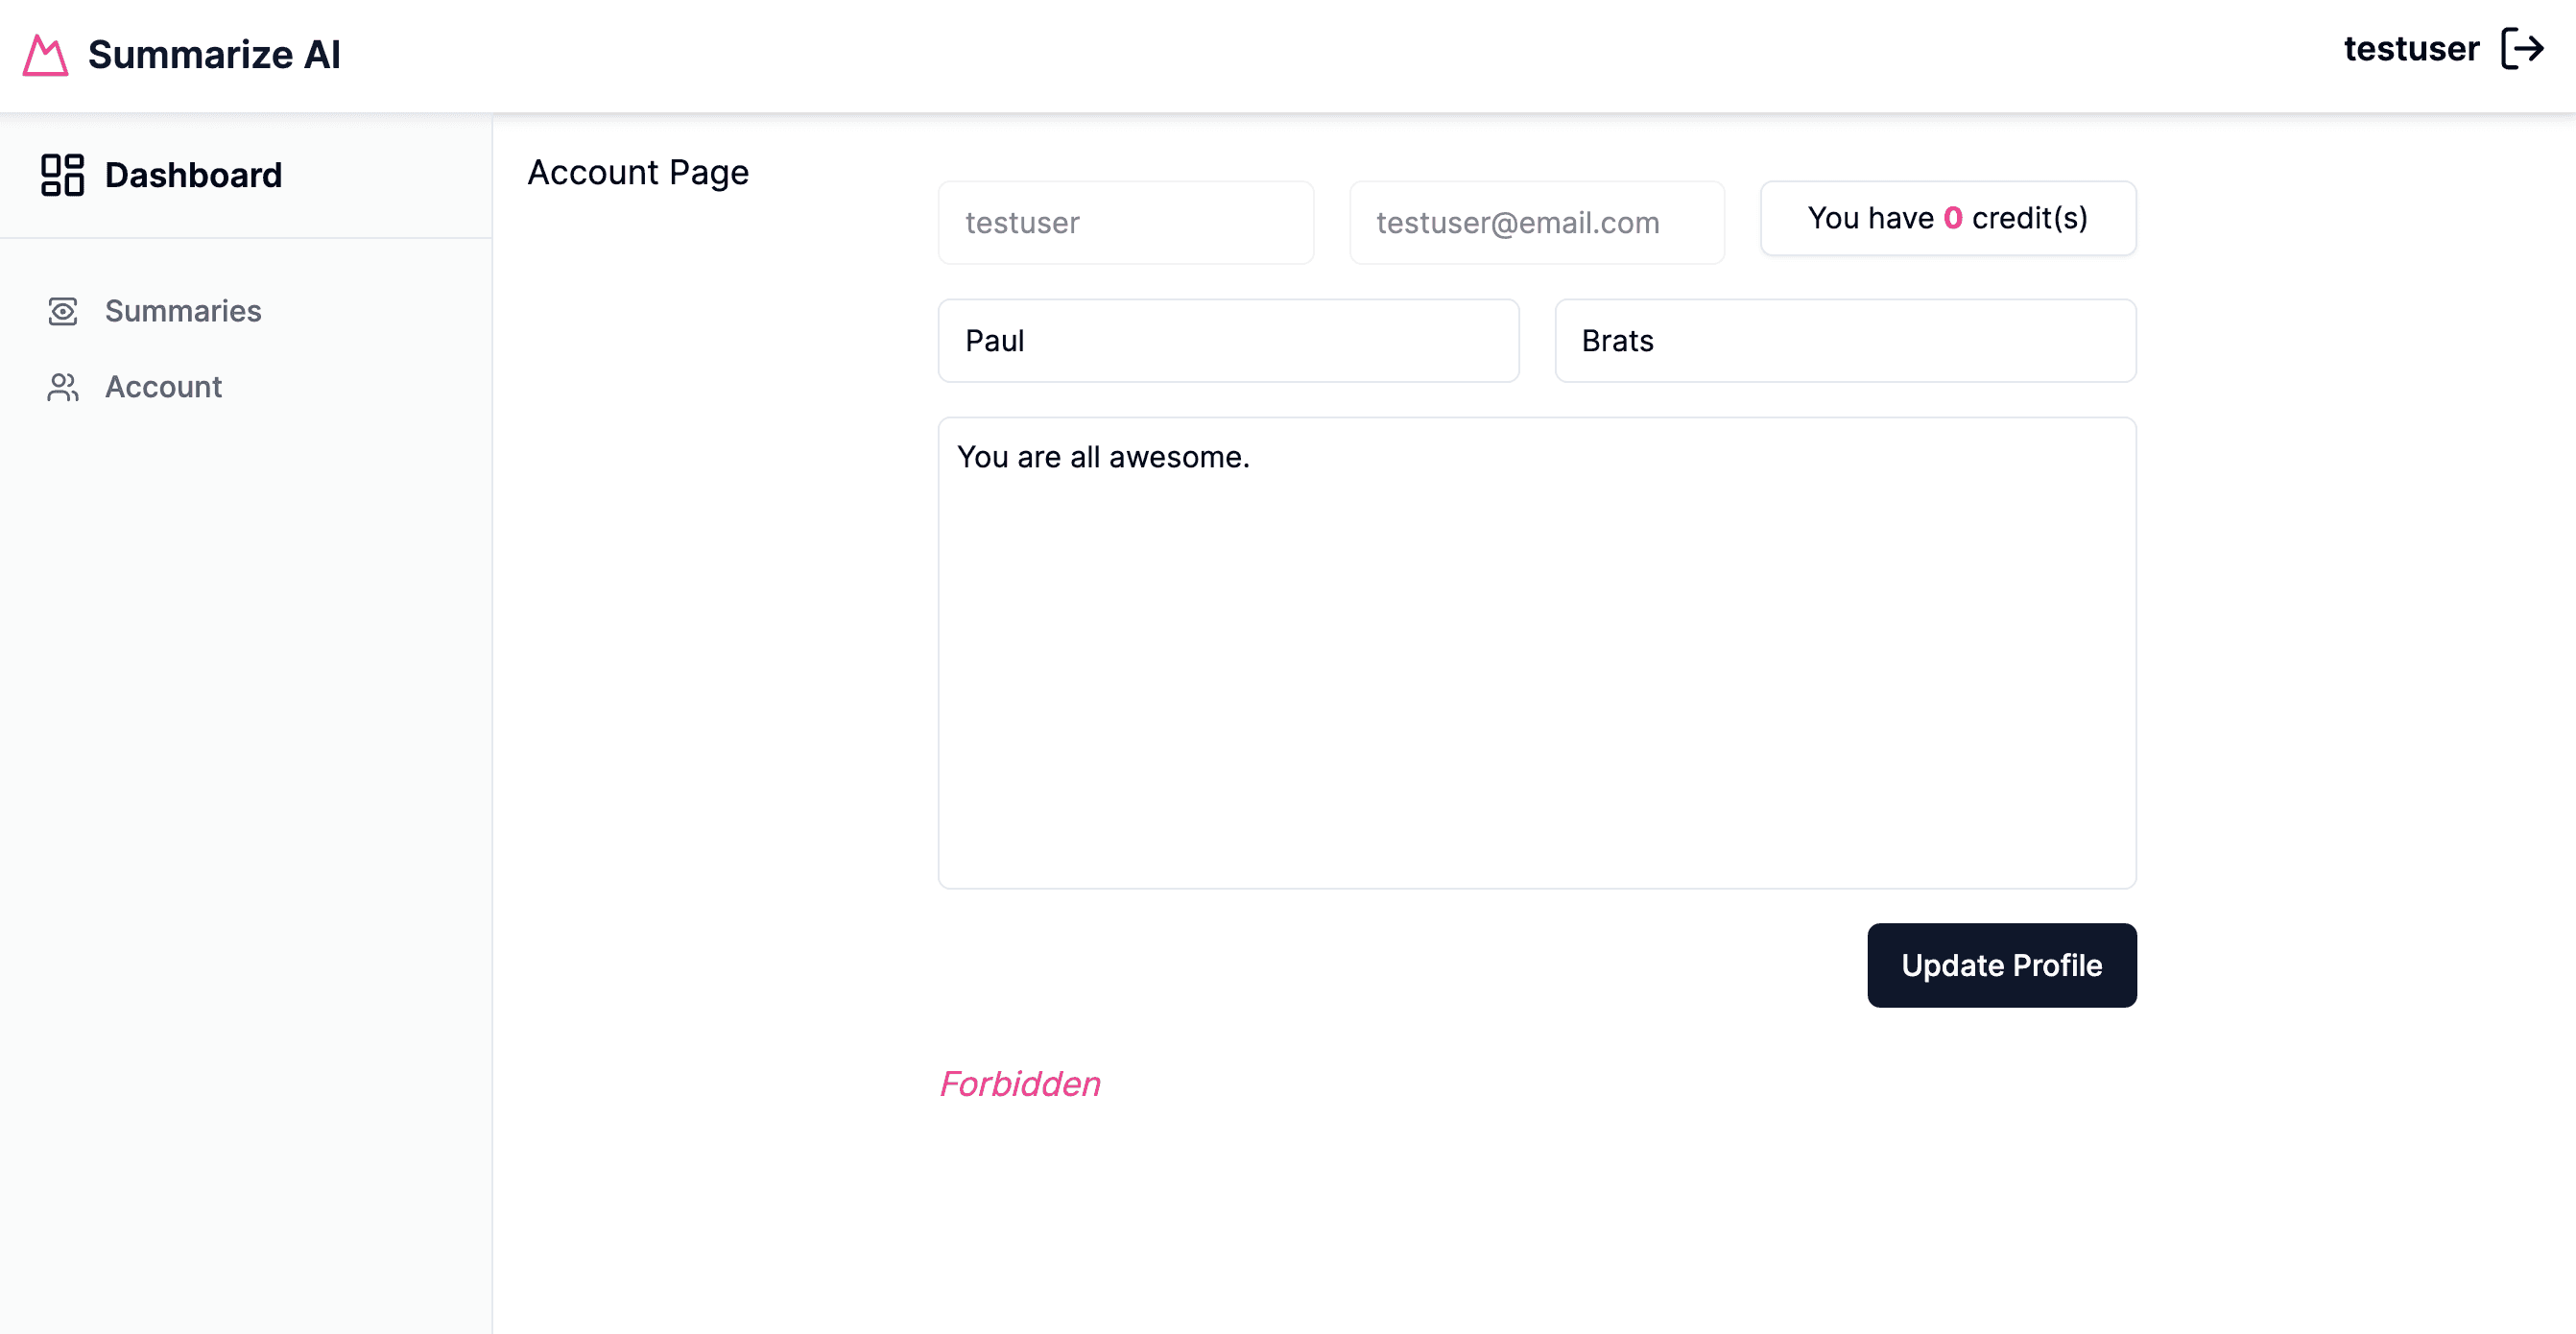
To allow authenticated users to update their profiles, we need to grant the appropriate permissions in Strapi's admin panel:
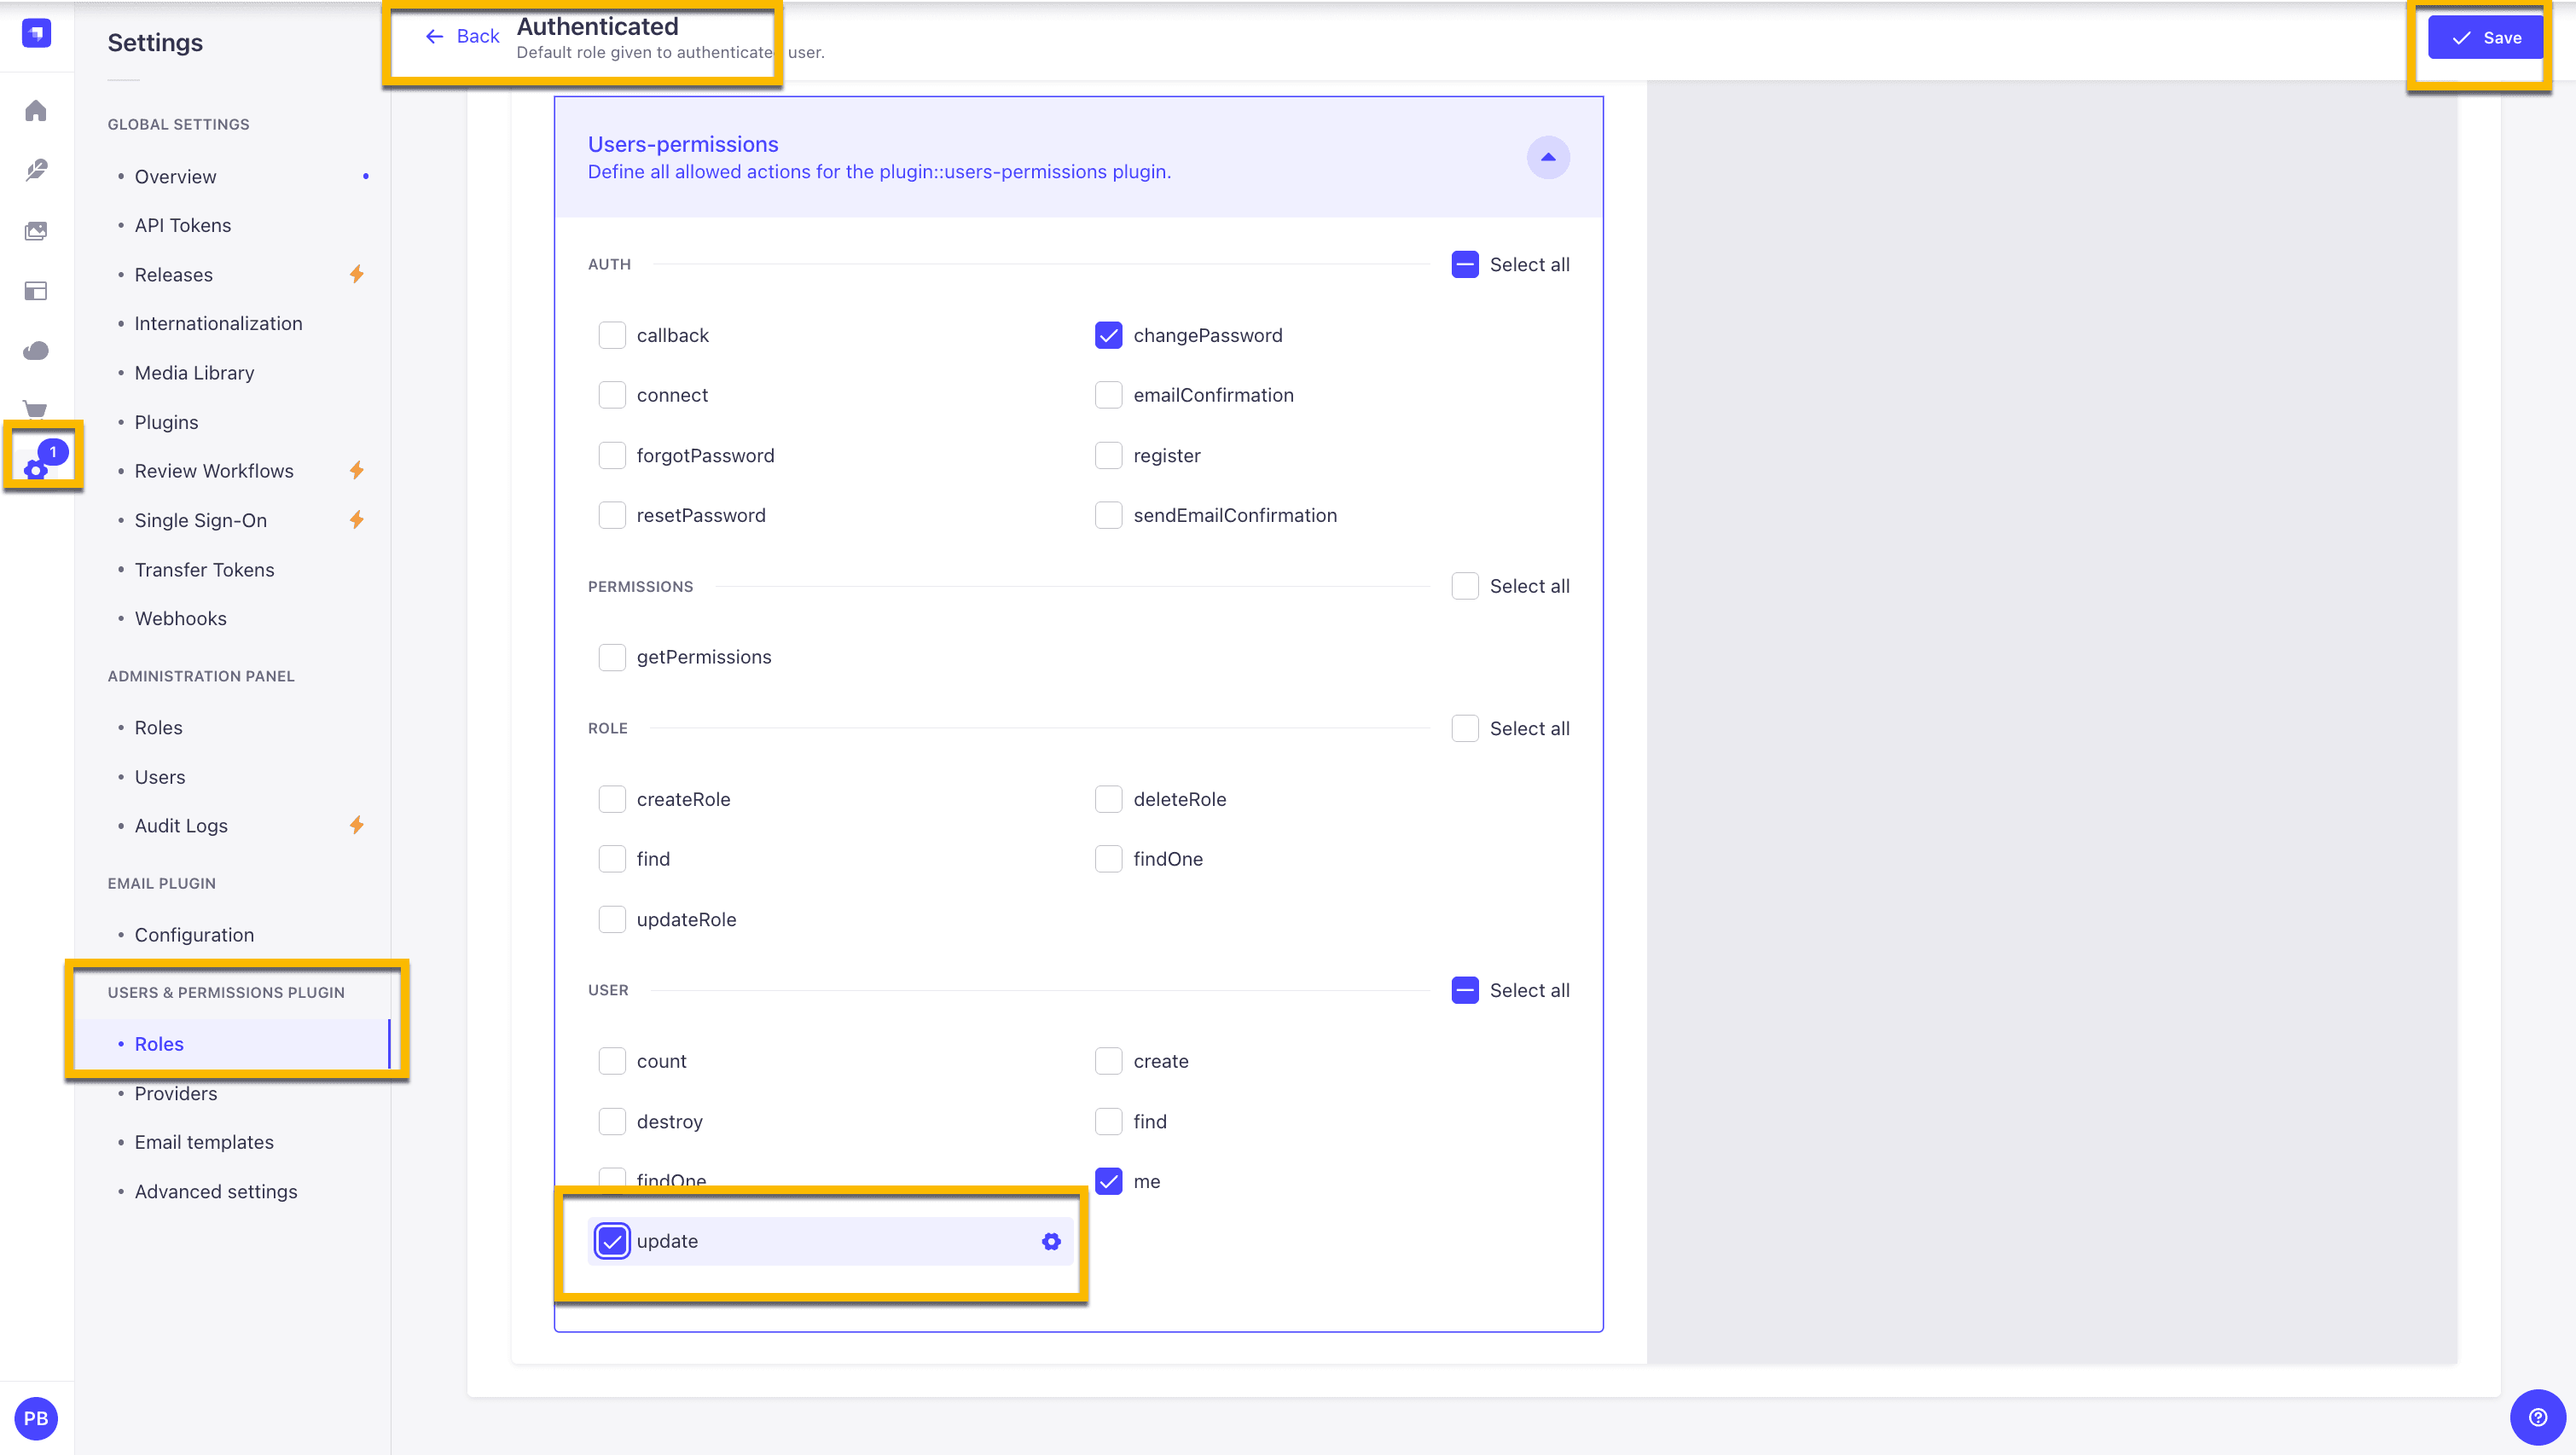
Important Security Note: In a production application, you should implement additional policies to ensure users can only update their own profile data. We'll cover advanced security patterns in a future tutorial.
Let's try to update our profile and see if it works.
Excellent! Now that we can update profile information, let's implement file upload functionality.
Implementing File Upload with Next.js Server Actions
File upload is an important part of every applications. Let's build a user-friendly image picker component first.
Navigate to src/components/custom, create a file called image-picker.tsx, and add the following code:
"use client";
import React, { useState, useRef } from "react";
import { StrapiImage } from "./strapi-image";

import { Input } from "@/components/ui/input";
import { Label } from "@/components/ui/label";

interface ImagePickerProps {
  id: string;
  name: string;
  label: string;
  showCard?: boolean;
  defaultValue?: string;
  onChange?: (event: React.ChangeEvent<HTMLInputElement>) => void;
}

function generateDataUrl(file: File, callback: (imageUrl: string) => void) {
  const reader = new FileReader();
  reader.onload = () => callback(reader.result as string);
  reader.readAsDataURL(file);
}

function ImagePreview({ dataUrl }: { readonly dataUrl: string }) {
  return (
    <StrapiImage
      src={dataUrl}
      alt="preview"
      height={200}
      width={200}
      className="rounded-lg w-full object-cover"
    />
  );
}

function ImageCard({
  dataUrl,
  fileInput,
}: {
  readonly dataUrl: string;
  readonly fileInput: React.RefObject<HTMLInputElement | null>;
}) {
  const imagePreview = dataUrl ? (
    <ImagePreview dataUrl={dataUrl} />
  ) : (
    <p>No image selected</p>
  );

  return (
    <div className="w-full relative">
      <div className=" flex items-center space-x-4 rounded-md border p-4">
        {imagePreview}
      </div>
      <button
        onClick={() => fileInput.current?.click()}
        className="w-full absolute inset-0"
        type="button"
      ></button>
    </div>
  );
}

export default function ImagePicker({
  id,
  name,
  label,
  defaultValue,
}: Readonly<ImagePickerProps>) {
  const fileInput = useRef<HTMLInputElement>(null);
  const [dataUrl, setDataUrl] = useState<string | null>(defaultValue ?? null);

  const handleFileChange = (e: React.ChangeEvent<HTMLInputElement>) => {
    const file = e.target.files?.[0];
    if (file) generateDataUrl(file, setDataUrl);
  };

  return (
    <React.Fragment>
      <div className="hidden">
        <Label htmlFor={name}>{label}</Label>
        <Input
          type="file"
          id={id}
          name={name}
          onChange={handleFileChange}
          ref={fileInput}
          accept="image/*"
        />
      </div>
      <ImageCard dataUrl={dataUrl ?? ""} fileInput={fileInput} />
    </React.Fragment>
  );
}
This component provides a clean interface for users to select and preview images before uploading.
Now let's create the ProfileImageForm component that uses our ImagePicker.
Navigate to src/components/forms, create a file called profile-image-form.tsx, and add the following code:
"use client";
import React from "react";
import { useActionState } from "react";
import { cn } from "@/lib/utils";
import { actions } from "@/data/actions";
import { type ProfileImageFormState } from "@/data/validation/profile";
import { TImage } from "@/types";

import { SubmitButton } from "@/components/custom/submit-button";
import ImagePicker from "@/components/custom/image-picker";
import { ZodErrors } from "@/components/custom/zod-errors";
import { StrapiErrors } from "@/components/custom/strapi-errors";

interface IProfileImageFormProps {
  image?: TImage | null;
}

const INITIAL_STATE: ProfileImageFormState = {
  success: false,
  message: undefined,
  strapiErrors: null,
  zodErrors: null,
};

export function ProfileImageForm({
  image,
  className,
}: IProfileImageFormProps & {
  className?: string;
}) {
  const [formState, formAction] = useActionState(
    actions.profile.updateProfileImageAction,
    INITIAL_STATE
  );

  return (
    <form action={formAction} className={cn("space-y-4", className)}>
      <div className="space-y-2">
        <input
          hidden
          id="id"
          name="id"
          defaultValue={image?.documentId || ""}
        />
        <ImagePicker
          id="image"
          name="image"
          label="Profile Image"
          defaultValue={image?.url || ""}
        />
        <ZodErrors error={formState?.zodErrors?.image} />
        <StrapiErrors error={formState?.strapiErrors} />
      </div>
      <div className="flex justify-end">
        <SubmitButton text="Update Image" loadingText="Saving Image" />
      </div>
    </form>
  );
}
Since we are just repeating our patterns, most of the items here already exist. We just have to add updateProfileImageAction and helper functions to allow us to do this. As well as our updateProfileImageService
Let's start by creating our action. In the actions/profile.ts file let's add the following:
export async function updateProfileImageAction(
  prevState: ProfileImageFormState,
  formData: FormData
): Promise<ProfileImageFormState> {
  console.log("Hello From Update Profile Image Action");

  // Get current user
  const user = await services.auth.getUserMeService();
  if (!user.success || !user.data) {
    return {
      success: false,
      message: "You are not authorized to perform this action.",
      strapiErrors: null,
      zodErrors: null,
      data: prevState.data,
    };
  }

  const currentImageId = user.data.image?.id;

  const image = formData.get("image") as File;

  if (!image || image.size === 0) {
    return {
      success: false,
      message: "No image provided",
      strapiErrors: null,
      zodErrors: { image: ["Image is required"] },
      data: prevState.data,
    };
  }

  const validatedFields = ProfileImageFormSchema.safeParse({ image });

  if (!validatedFields.success) {
    const flattenedErrors = z.flattenError(validatedFields.error);
    console.log("Validation failed:", flattenedErrors.fieldErrors);
    return {
      success: false,
      message: "Validation failed",
      strapiErrors: null,
      zodErrors: flattenedErrors.fieldErrors,
      data: prevState.data,
    };
  }

  console.log("Validation successful:", validatedFields.data);
  console.log(currentImageId);
  console.log(currentImageId);

  // Delete previous image if exists
  if (currentImageId) {
    console.log(currentImageId);
    try {
      await services.file.fileDeleteService(currentImageId);
    } catch (error) {
      console.error("Failed to delete previous image:", error);
      // Continue with upload even if delete fails
    }
  }

  // Upload new image to media library
  const fileUploadResponse = await services.file.fileUploadService(
    validatedFields.data.image
  );

  if (!fileUploadResponse.success || !fileUploadResponse.data) {
    return {
      success: false,
      message: "Failed to upload image",
      strapiErrors: fileUploadResponse.error,
      zodErrors: null,
      data: prevState.data,
    };
  }

  const uploadedImageId = fileUploadResponse.data[0].id;

  // Update user profile with new image
  const updateImageResponse = await services.profile.updateProfileImageService(
    userId
  );

  if (!updateImageResponse.success) {
    return {
      success: false,
      message: "Failed to update profile with new image",
      strapiErrors: updateImageResponse.error,
      zodErrors: null,
      data: prevState.data,
    };
  }

  console.log("#############");
  console.log("Profile Image Updated Successfully");
  console.log("#############");

  return {
    success: true,
    message: "Profile image updated successfully",
    strapiErrors: null,
    zodErrors: null,
    data: {
      image: validatedFields.data.image,
    },
  };
}
And don't forget to update your imports:
import {
  ProfileFormSchema,
  ProfileImageFormSchema,
  type ProfileFormState,
  type ProfileImageFormState,
} from "@/data/validation/profile";
You will notice that our code above relies on two new file action that we need to create fileUploadService, fileDeleteService, and updateProfileImageService.
In our services folder let's create a new file called file.ts and add the following code:
import { getStrapiURL } from "@/lib/utils";
import type { TStrapiResponse } from "@/types";
import { actions } from "@/data/actions";

const baseUrl = getStrapiURL();

type TImageFormat = {
  name: string;
  hash: string;
  ext: string;
  mime: string;
  path: string | null;
  width: number;
  height: number;
  size: number;
  sizeInBytes: number;
  url: string;
};

type TFileUploadResponse = {
  id: number;
  documentId: string;
  name: string;
  alternativeText: string | null;
  caption: string | null;
  width: number;
  height: number;
  formats: Record<string, TImageFormat> | null;
  hash: string;
  ext: string;
  mime: string;
  size: number;
  url: string;
  previewUrl: string | null;
  provider: string;
  provider_metadata: Record<string, unknown> | null;
  createdAt: string;
  updatedAt: string;
  publishedAt: string;
};

export async function fileUploadService(
  file: File
): Promise<TStrapiResponse<TFileUploadResponse[]>> {
  const authToken = await actions.auth.getAuthTokenAction();

  if (!authToken) {
    return {
      success: false,
      data: undefined,
      error: {
        status: 401,
        name: "AuthError",
        message: "No auth token found",
      },
      status: 401,
    };
  }

  const url = new URL("/api/upload", baseUrl);
  const formData = new FormData();
  formData.append("files", file);

  try {
    const response = await fetch(url.href, {
      method: "POST",
      headers: {
        Authorization: `Bearer ${authToken}`,
      },
      body: formData,
    });

    const data = await response.json();

    if (!response.ok) {
      console.error("File upload error:", data);
      return {
        success: false,
        data: undefined,
        error: {
          status: response.status,
          name: data?.error?.name ?? "UploadError",
          message: data?.error?.message ?? "Failed to upload file",
        },
        status: response.status,
      };
    }

    return {
      success: true,
      data: data,
      error: undefined,
      status: response.status,
    };
  } catch (error) {
    console.error("File upload service error:", error);
    return {
      success: false,
      data: undefined,
      error: {
        status: 500,
        name: "NetworkError",
        message: error instanceof Error ? error.message : "Upload failed",
      },
      status: 500,
    };
  }
}

export async function fileDeleteService(
  fileId: number
): Promise<TStrapiResponse<boolean>> {
  const authToken = await actions.auth.getAuthTokenAction();

  if (!authToken) {
    return {
      success: false,
      data: undefined,
      error: {
        status: 401,
        name: "AuthError",
        message: "No auth token found",
      },
      status: 401,
    };
  }

  const url = new URL(`/api/upload/files/${fileId}`, baseUrl);

  try {
    const response = await fetch(url.href, {
      method: "DELETE",
      headers: {
        Authorization: `Bearer ${authToken}`,
      },
    });

    if (!response.ok) {
      const data = await response.json();
      console.error("File delete error:", data);
      return {
        success: false,
        data: undefined,
        error: {
          status: response.status,
          name: data?.error?.name ?? "DeleteError",
          message: data?.error?.message ?? "Failed to delete file",
        },
        status: response.status,
      };
    }

    return {
      success: true,
      data: true,
      error: undefined,
      status: response.status,
    };
  } catch (error) {
    console.error("File delete service error:", error);
    return {
      success: false,
      data: undefined,
      error: {
        status: 500,
        name: "NetworkError",
        message: error instanceof Error ? error.message : "Delete failed",
      },
      status: 500,
    };
  }
}
Let's add updateProfileImageService in the services/profile.ts file:
export async function updateProfileImageService(
  imageId: number
): Promise<TStrapiResponse<TAuthUser>> {
  const userId = (await services.auth.getUserMeService()).data?.id;
  if (!userId) throw new Error("User Id is required");

  const authToken = await actions.auth.getAuthTokenAction();
  if (!authToken) throw new Error("You are not authorized");

  const url = new URL("/api/users/" + userId, baseUrl);
  const payload = { image: imageId };

  const result = await api.put<TAuthUser, { image: number }>(
    url.href,
    payload,
    { authToken }
  );

  console.dir(result, { depth: null });

  return result;
}
Don't forget to export both the newly created file services and the updateProfileImageService that we just added in the index.ts file:
import {
  registerUserService,
  loginUserService,
  getUserMeService,
} from "./auth";

import { updateProfileService, updateProfileImageService } from "./profile";
import { fileUploadService, fileDeleteService } from "./file";

export const services = {
  auth: {
    registerUserService,
    loginUserService,
    getUserMeService,
  },
  profile: {
    updateProfileService,
    updateProfileImageService,
  },
  file: {
    fileUploadService,
    fileDeleteService,
  },
};
And finally make sure that you are exporting the updateProfileImageAction in our actions/index.ts file:
import {
  registerUserAction,
  loginUserAction,
  logoutUserAction,
  getAuthTokenAction,
} from "./auth";
import { updateProfileAction, updateProfileImageAction } from "./profile";

export const actions = {
  auth: {
    registerUserAction,
    loginUserAction,
    logoutUserAction,
    getAuthTokenAction,
  },
  profile: {
    updateProfileAction,
    updateProfileImageAction,
  },
};
Nice, now we can uncomment the rest of the code in the app/(protected)/dashboard/account/page.tsx file:
The completed code should look like the following.
import { services } from "@/data/services";
import { validateApiResponse } from "@/lib/error-handler";
import { ProfileForm } from "@/components/forms/profile-form";
import { ProfileImageForm } from "@/components/forms/profile-image-form";

export default async function AccountRoute() {
  const user = await services.auth.getUserMeService();
  const userData = validateApiResponse(user, "user profile");
  const userImage = userData?.image;

  return (
    <div className="grid grid-cols-1 lg:grid-cols-5 gap-4 p-4">
      <ProfileForm user={userData} className="col-span-3" />
      <ProfileImageForm image={userImage} className="col-span-2" />
    </div>
  );
}
Now, let's checkout out our account page and see if we see our image picker?
Now to hook everything up, wee need to add an image field to our user collection type in Strapi Admin.
Navigate to Content Type Builder, click on the User collection type, and click on the Add Another Field to This Collection button.
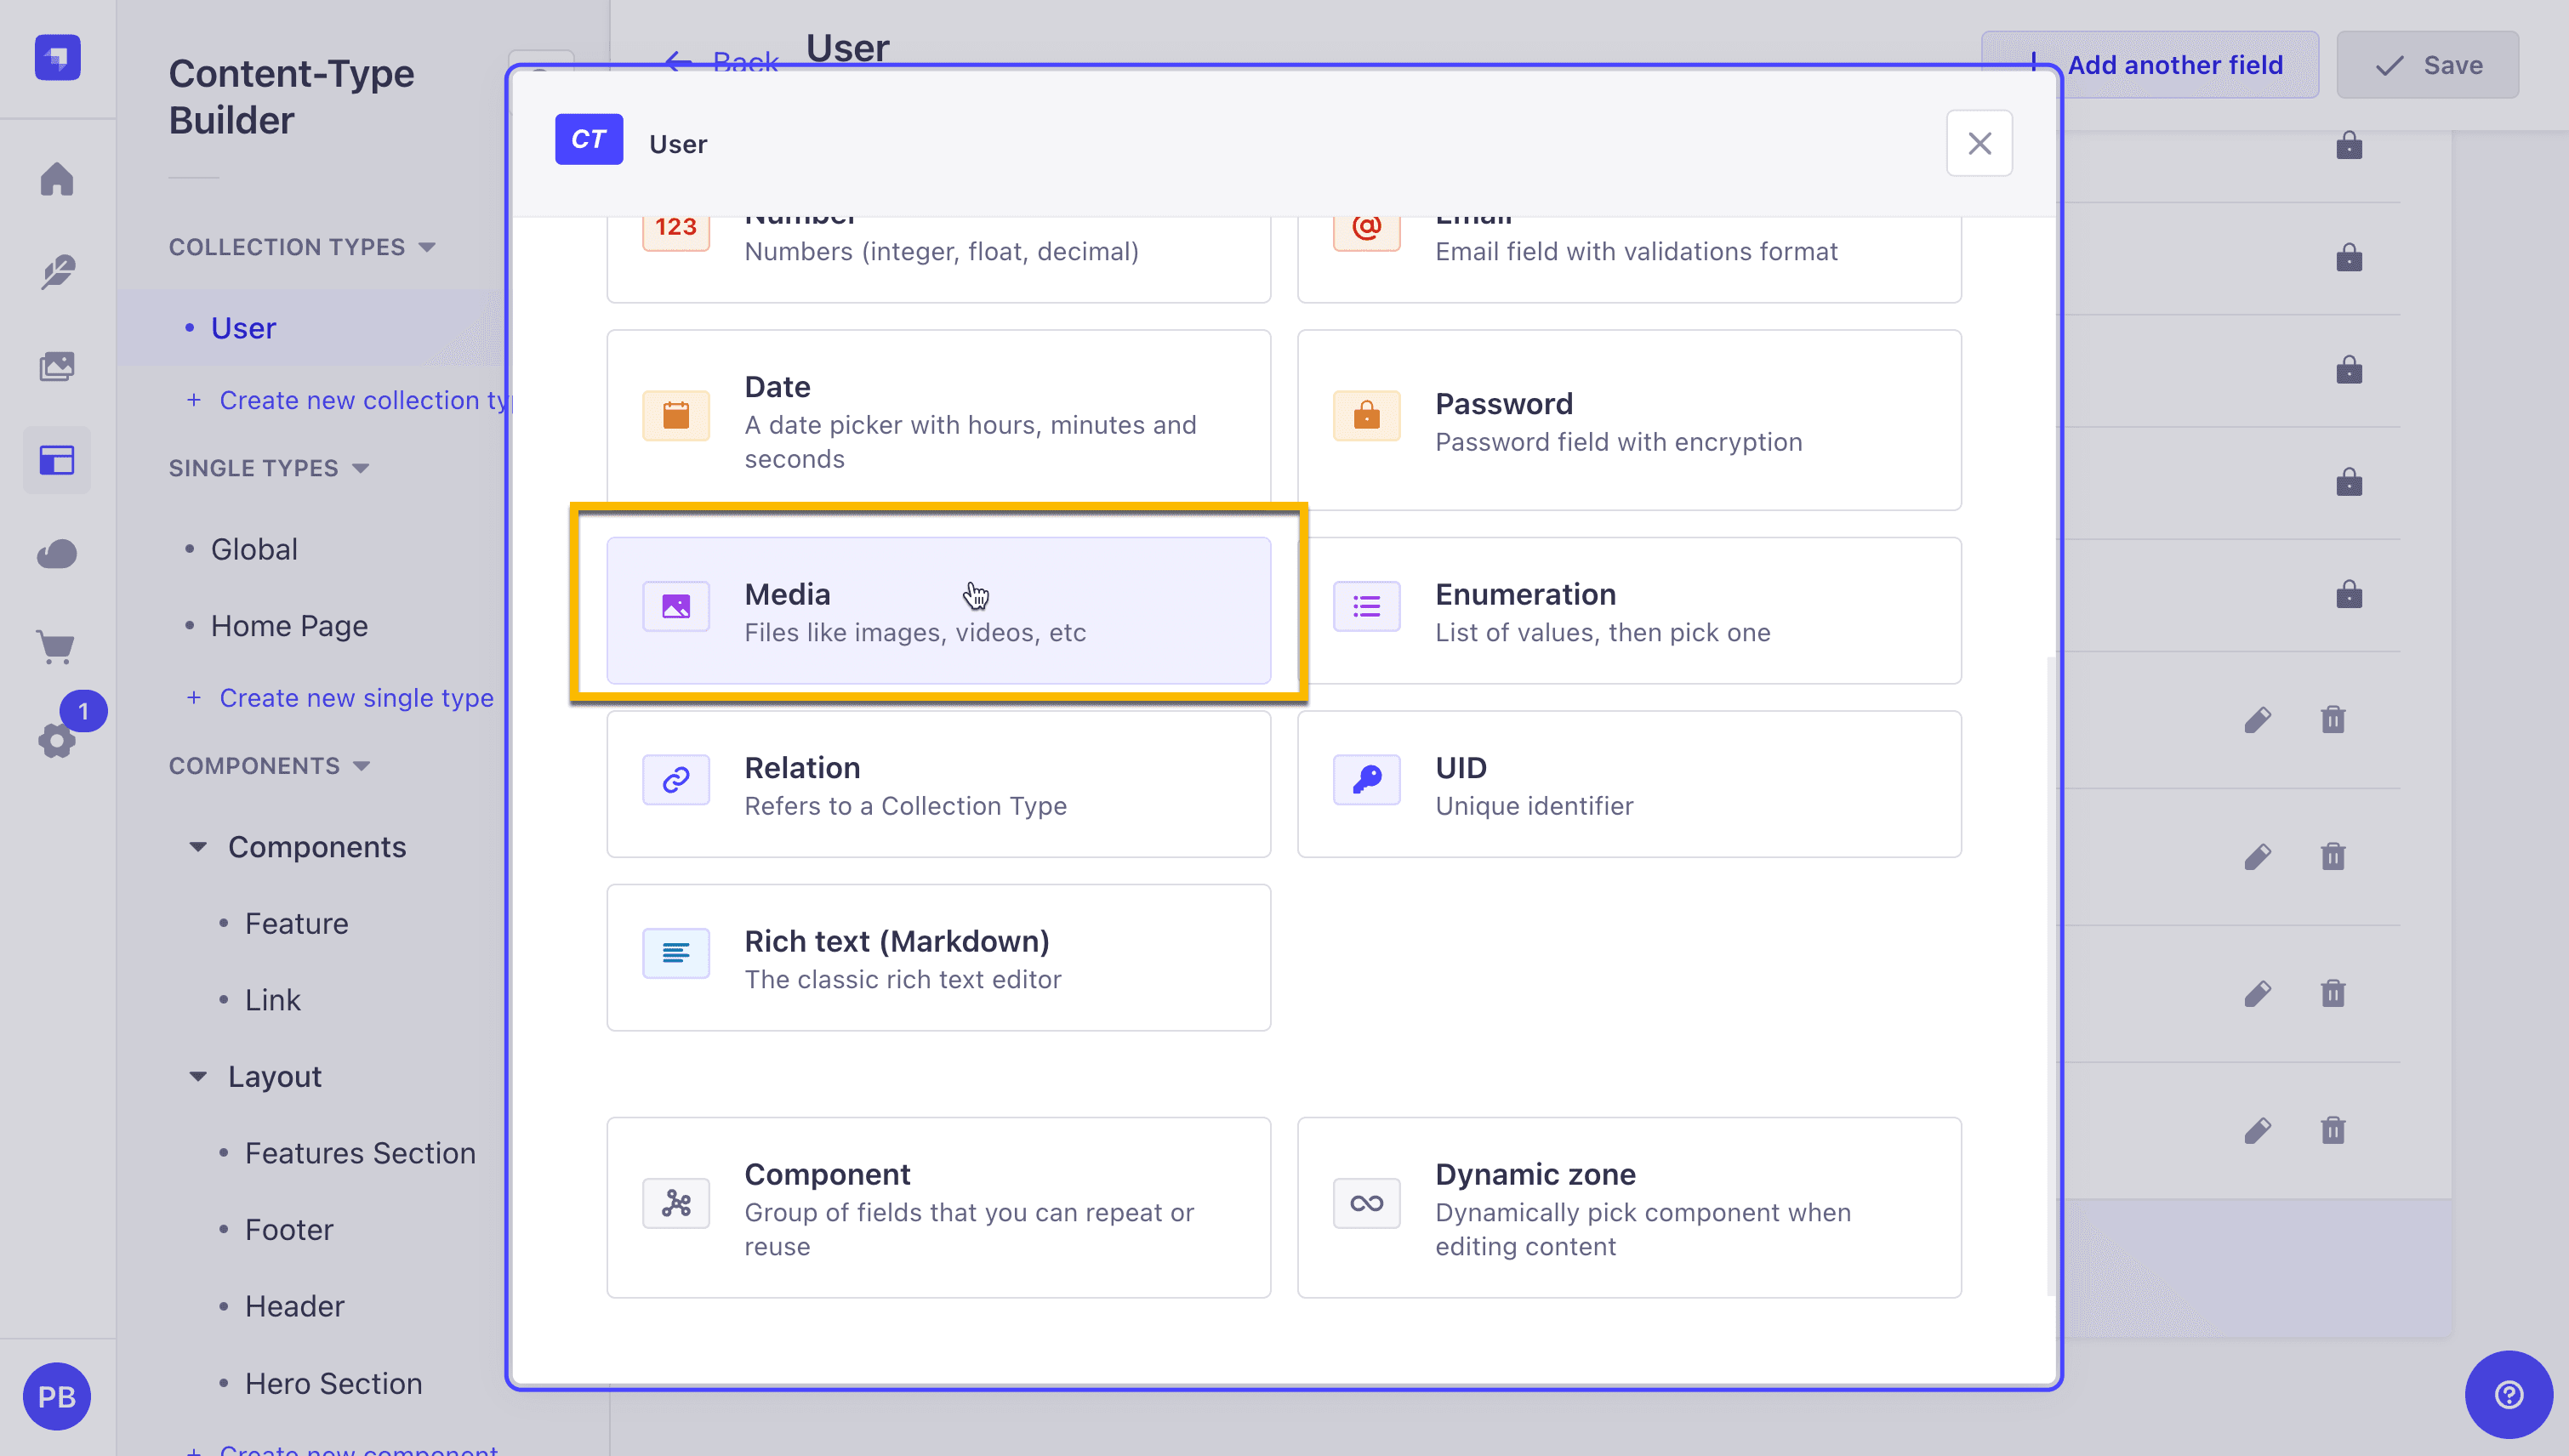
Select the media field.
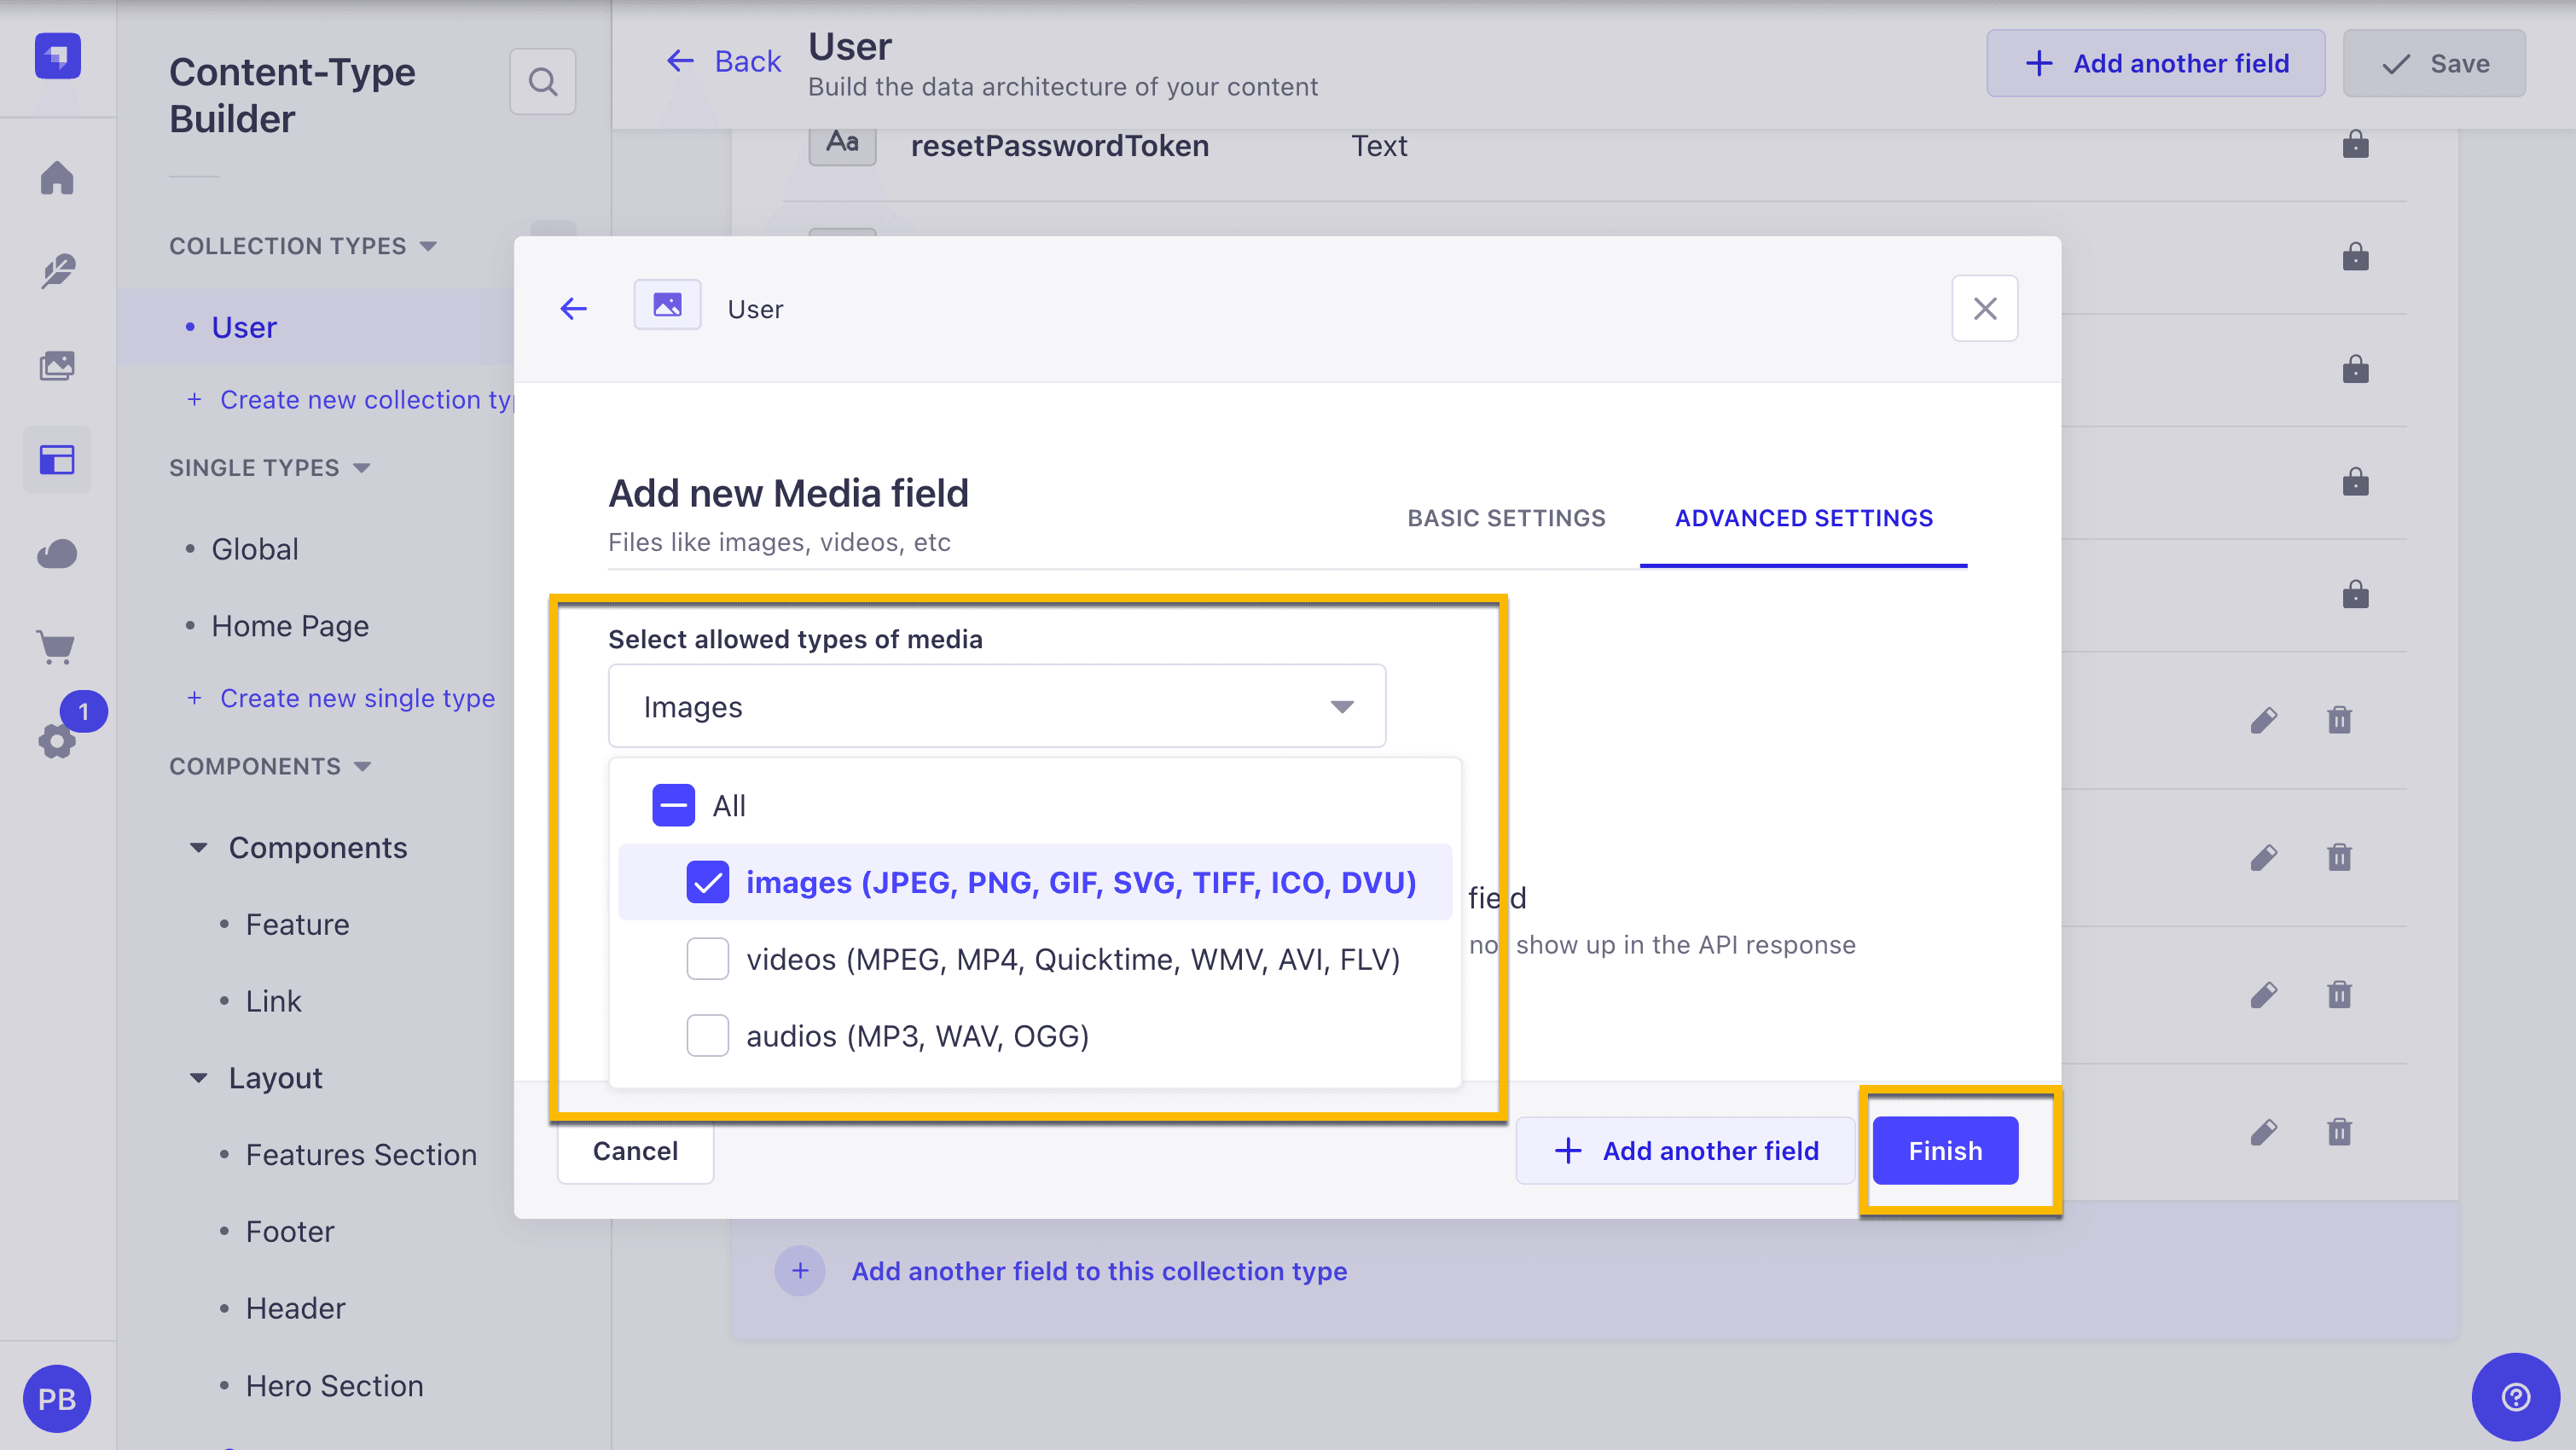
Make sure to name it image, select the Single media option, and then navigate to the Advanced Settings tab.
In the advanced settings tabs, configure allowed file types only to include images. Once you've done this, click the Finish button.
Now, add an image to your user.

Finally, before we move on, we need to update our get-user-me-loader.ts file to include the image field in the populate query.
url.search = qs.stringify({
  populate: {
    image: {
      fields: ["url", "alternativeText"],
    },
  },
});
Final code should look like the following.
export async function getUserMeService(): Promise<TStrapiResponse<TAuthUser>> {
  const authToken = await actions.auth.getAuthTokenAction();

  if (!authToken)
    return { success: false, data: undefined, error: undefined, status: 401 };

  const url = new URL("/api/users/me", baseUrl);

  url.search = qs.stringify({
    populate: {
      image: {
        fields: ["url", "alternativeText"],
      },
    },
  });

  try {
    const response = await fetch(url.href, {
      method: "GET",
      headers: {
        "Content-Type": "application/json",
        Authorization: `Bearer ${authToken}`,
      },
    });
    const data = await response.json();
    if (data.error)
      return {
        success: false,
        data: undefined,
        error: data.error,
        status: response.status,
      };
    return {
      success: true,
      data: data,
      error: undefined,
      status: response.status,
    };
  } catch (error) {
    console.log(error);
    return {
      success: false,
      data: undefined,
      error: {
        status: 500,
        name: "NetworkError",
        message:
          error instanceof Error
            ? error.message
            : "An unexpected error occurred",
        details: {},
      },
      status: 500,
    };
  }
}
Now refresh your frontend application; you should now see your newly added image via Strapi.
Before we can test our file upload functionality, we need to update Next.js configuration to allow larger file uploads. By default, server actions are limited to 1MB.
Update your next.config.ts file to increase the limit:
experimental: {
    serverActions: {
      bodySizeLimit: "5mb", // Increase from default 1mb to 5mb for image uploads
    },
  },
The full file should look like the following:
import type { NextConfig } from "next";

const nextConfig: NextConfig = {
  /* config options here */
  images: {
    remotePatterns: [
      {
        protocol: "http",
        hostname: "localhost",
        port: "1337",
        pathname: "/uploads/**/*",
      },
    ],
  },
  experimental: {
    serverActions: {
      bodySizeLimit: "5mb", // Increase from default 1mb to 5mb for image uploads
    },
  },
};

export default nextConfig;
Finally, we need to configure Strapi permissions to allow file uploads. In the Strapi admin panel, navigate to Users & Permissions plugin → Roles → Authenticated → Media Library and enable both upload and destroy permissions.
This allows authenticated users to upload new images and delete old ones when updating their profile picture.
Now you should be able to test the complete file upload functionality!
File Upload With Server Actions in Next.js Review
Throughout this tutorial, we implemented a comprehensive file upload system using Next.js Server Actions with Zod validation and robust error handling. Here's how our file upload implementation works:
File Validation with Zod
We use Zod to validate uploaded images in our validation/profile.ts file:
export const ProfileImageFormSchema = z.object({
  image: z
    .instanceof(File)
    .refine((file) => file.size > 0, "Image is required")
    .refine((file) => file.size <= 5000000, "Image must be less than 5MB")
    .refine(
      (file) => ["image/jpeg", "image/png", "image/webp"].includes(file.type),
      "Image must be JPEG, PNG, or WebP format"
    ),
});
This schema validates three key aspects:
- File existence: Ensures a file was actually selected
- Size limits: Restricts uploads to 5MB maximum
- File types: Only allows JPEG, PNG, or WebP formats
Server Action File Upload Flow
Our updateProfileImageAction handles the complete upload process:
- Authentication: Verifies user is logged in
- Validation: Uses Zod schema to validate the uploaded file
- Cleanup: Deletes existing profile image if present
- Upload: Sends file to Strapi's media library via
fileUploadService - Update: Links new image to user profile via
updateProfileImageService
File Services Implementation
File Upload Service: Handles multipart form data uploads to Strapi's /api/upload endpoint with proper authentication headers.
File Delete Service: Manages cleanup of old files through DELETE requests to prevent storage bloat.
Profile Update Service: Associates uploaded images with user profiles through Strapi's user API.
This implementation demonstrates how Next.js Server Actions can handle complex file operations while maintaining type safety and providing excellent error handling through our validation schema.
Before you go, let's improve our loader for our Accounts Page.
Better Loading with Skeleton
We currently have a general loading spinner in the root of our project, but did you know you can add additional loaders in your application that are route specific?
Let's do this in our account folder by creating a new loading.tsx file with the following. This will add a nice skeleton view while our account data loads.
import { Skeleton } from "@/components/ui/skeleton";

const styles = {
  container: "grid grid-cols-1 lg:grid-cols-5 gap-4 p-4",
  profileForm: "col-span-3 space-y-4",
  profileImage: "col-span-2 space-y-4",
  skeleton: "animate-pulse",
  title: "h-8 w-1/3",
  input: "h-10 w-full",
  textarea: "h-24 w-full",
  button: "h-10 w-24",
  imageContainer: "h-48 w-full rounded-lg",
};

export default function AccountLoading() {
  return (
    <div className={styles.container}>
      {/* Profile Form Skeleton */}
      <div className={styles.profileForm}>
        <Skeleton className={`${styles.skeleton} ${styles.title}`} />
        <Skeleton className={`${styles.skeleton} ${styles.input}`} />
        <Skeleton className={`${styles.skeleton} ${styles.input}`} />
        <Skeleton className={`${styles.skeleton} ${styles.input}`} />
        <Skeleton className={`${styles.skeleton} ${styles.input}`} />
        <Skeleton className={`${styles.skeleton} ${styles.textarea}`} />
        <Skeleton className={`${styles.skeleton} ${styles.button}`} />
      </div>

      {/* Profile Image Skeleton */}
      <div className={styles.profileImage}>
        <Skeleton className={`${styles.skeleton} ${styles.title}`} />
        <Skeleton className={`${styles.skeleton} ${styles.imageContainer}`} />
        <Skeleton className={`${styles.skeleton} ${styles.button}`} />
      </div>
    </div>
  );
}
We are using ShadCn UI Skeleton component. You can learn more about it here.
So we need to install it since we are using it in our code above.
npx shadcn@latest add skeletonNice! Now reload your account page and the loader should be much nicer.
Conclusion
Excellent. We completed our initial Dashboard layout with an Account section where the user can update their first name, last name, bio, and image.
We covered how to handle file uploads using NextJs server actions. By this point, you should be starting to feel more comfortable working with forms, file upload and server actions in Next.js.
In the next post, we will start working on our main feature, which will allow us to summarize our YouTube videos.
See you in the next one.
Also, if you made it this far, thank you. I really appreciate your support. I did my best to do diligence, but if you find errors, share them in the comments below.
Note about this project
This project has been updated to use Next.js 15 and Strapi 5.
If you have any questions, feel free to stop by at our Discord Community for our daily "open office hours" from 12:30 PM CST to 1:30 PM CST.
If you have a suggestion or find a mistake in the post, please open an issue on the GitHub repository.
Feel free to make PRs to fix any issues you find in the project, or let me know if you have any questions.
Happy coding!
Paul