In this post, we will take a look at how customize Strapi dashboard by building a widget plugin for Strapi.

Strapi Widgets are a way to add custom widgets to the Strapi admin panel. They are a great way to add customize Strapi dashboard for you clients.
Build your own dashboard The Strapi admin homepage is now fully customizable.
With the new Widget API, developers can create dashboard components that display:
- Project stats
- Content overviews
- Links to workflows
- Custom metrics or visualizations
- And more
It’s a new way to surface what matters most for each team.
Let's first take a look at what we will be building, then I will walk you through the steps on how to build it.
What We Will Be Building
We will be building a widget that displays the number of content types in the Strapi application.
Here is what the widget will look like in the admin panel:

This guide is based on Strapi v5 docs. You can find the original docs here.
If you prefer to watch a video, you can check out the following video:
I wanted to make a guide that is more hands on and practical. So I will walk you through the steps of building the widget.
Action Plan
- Create a new Strapi application with sample data
- Create a new Strapi plugin
- Create Frontend Component and register it as a widget
- Create Backend Controller and routes ( Admin and Content API )
- Update Frontend Component to fetch our test data
- Add custom logic to the controller
- Update the component to fetch data from the controller
Step 1: Create a new Strapi application with sample data
This step is very simple. We will use the Strapi CLI to create a new Strapi application with sample data.
npx create-strapi-app@latest my-strapi-appYou will be guided through the process of creating the application.
Need to install the following packages:
create-strapi-app@5.14.0
Ok to proceed? (y) y
You will be asked if you want to log in to Strapi Cloud. BTW, we now offer a free Strapi Cloud account for development purposes. Learn more here.
But I will skip this step for now.
Create your free Strapi Cloud project now!

? Please log in or sign up.
  Login/Sign up
❯ Skip
I will answer Y for all the following questions.
? Please log in or sign up. Skip
? Do you want to use the default database (sqlite) ? Yes
? Start with an example structure & data? Yes
? Start with Typescript? Yes
? Install dependencies with npm? Yes
? Initialize a git repository? Yes
This will create a new Strapi application with sample data. Now, let's start the application by running the following command.
cd my-strapi-app
npm run dev
This will start the Strapi application. You can access the admin panel at http://localhost:1337/admin.
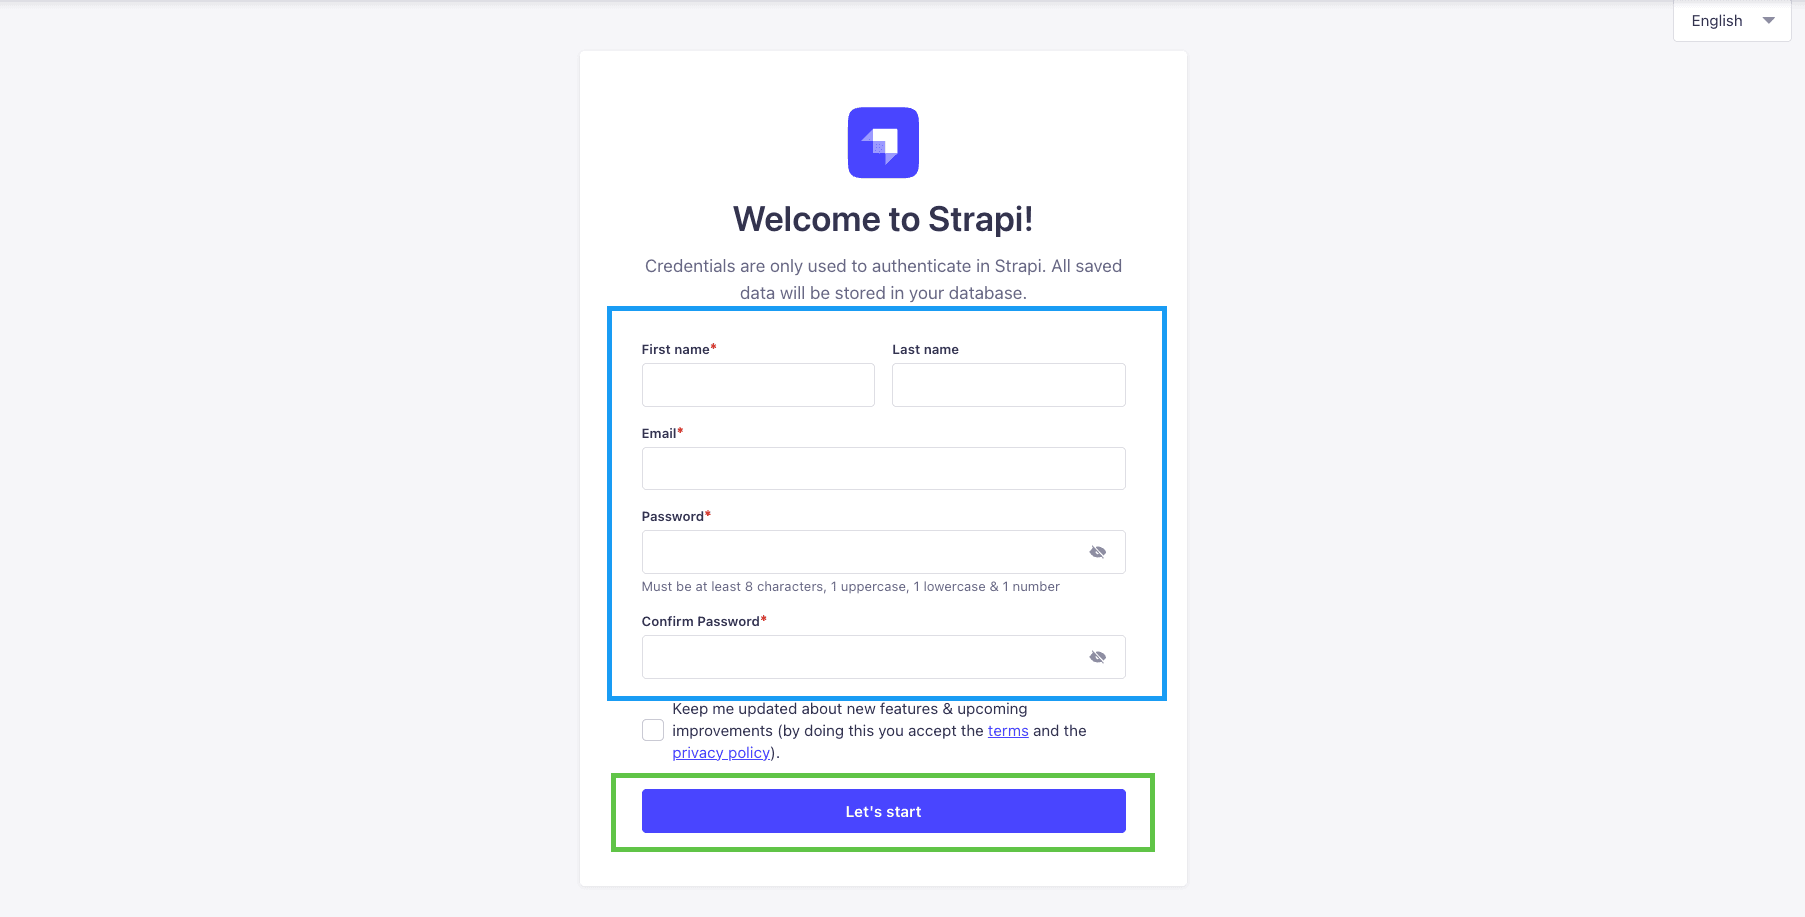
Go ahead and create a new Admin User.
Once logged in, you will be greeted with the following screen.
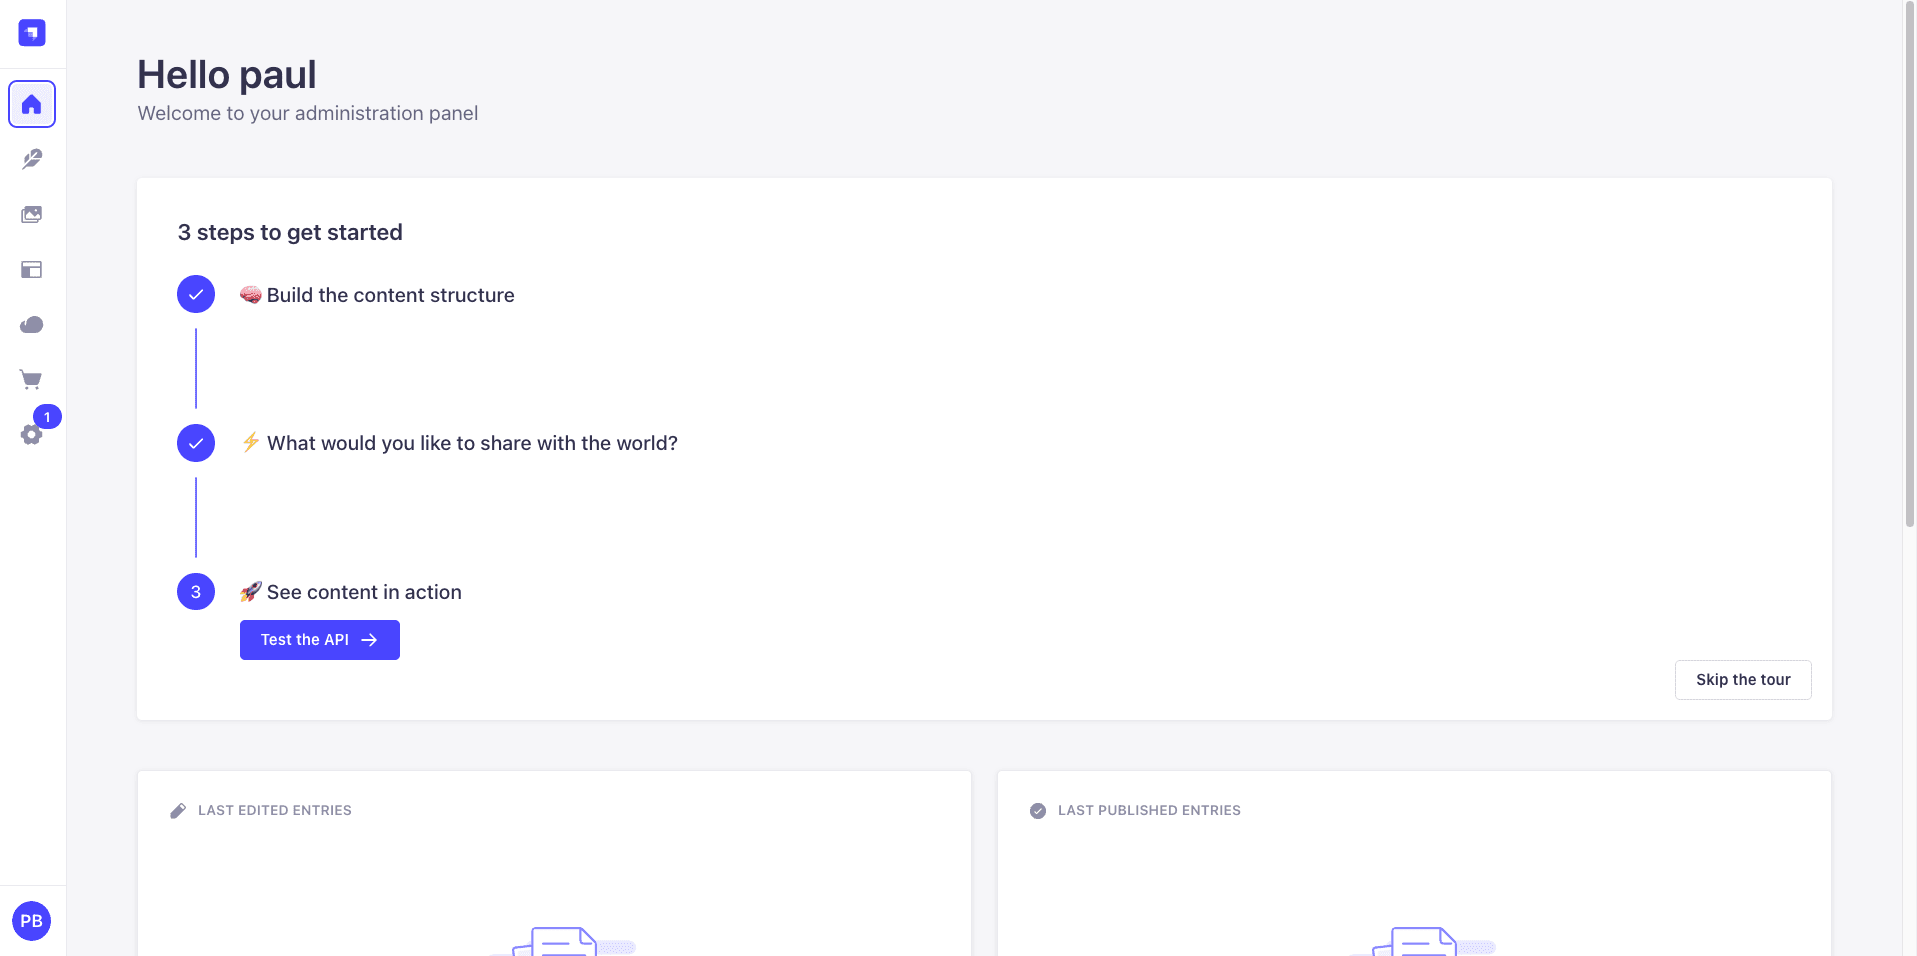
Nice, now we have a Strapi application with sample data. We can start building our widget.
Step 2: Create a new Strapi plugin
To simplify the process of setting up a Strapi plugin, we will use the Strapi Plugin CLI tool to help us accomplish this.
You can learn more about the Strapi Plugin CLI tool here.
We will start with the following command.
npx @strapi/sdk-plugin@latest init my-first-widgetMake sure to run this command in the root of your Strapi application.
This will create a new plugin in the src/plugins directory.
You will be asked the following questions:
[INFO]  Creating a new package at:  src/plugins/my-first-widget
✔ plugin name … my-first-widget
✔ plugin display name … My First Widget
✔ plugin description … Basic Strapi widget example.
✔ plugin author name … paul brats
✔ plugin author email … paul.bratslavsky@strapi.io
✔ git url … ( you can leave this blank for now)
✔ plugin license … MIT
✔ register with the admin panel? … yes
✔ register with the server? … yes
✔ use editorconfig? … yes
✔ use eslint? … yes
✔ use prettier? … yes
✔ use typescript? … yes
note: Make sure to answer yes to register the plugin with both the admin panel and the server.
This will create a new plugin in the src/plugins directory.
Finally, we need to register the plugin in the config/plugins.ts file found in the root Strapi directory.
You can enable your plugin by adding the following:
// config/plugins.ts
────────────────────────────────────────────
export default {
  // ...
  'my-first-widget': {
    enabled: true,
    resolve: './src/plugins/my-first-widget'
  },
  // ...
}
This will enable the plugin and point to the plugin's entry point.
Now to test that everything is working, first in your terminal navigate to the src/plugins/my-first-widget directory and run the following command:
npm run build
npm run watch
This will build the plugin and start the plugin in watch mode with hot reloading.
Now in another terminal navigate to the root of your Strapi application and run the following command:
npm run devThis will start the Strapi application. You should be able to find your plugin in the admin panel in the left sidebar.
Nice, now we have a plugin that is working. Let's create a new widget.
- Create Frontend Component and register it as a widget
First, let's quickly take a look at the plugin structure. We will just focus on the most important items where we will be working in.
src/plugins/my-first-widget
├── admin
├── server
admin - This is the responsible for all of our frontend code. server - This is the responsible for all of our backend code.
Remember earlier I asked you to answer yes to register with the admin panel and the server this will hook everything together.
Taking a look at the admin folder more closely we will see the following:
src/plugins/my-first-widget/admin
├── src |
│   ├── components
│   ├── pages
│   └── index.ts
index.ts - This is the entry point for our plugin. It is responsible for registering and configuring the plugin with the admin panel. components - This is the responsible for all of our frontend components. pages - This is the responsible for all frontend pages and routes.
We will take a look at the server folder more closely later. But for now, let's register a new widget.
We will start by creating a new component in the src/components folder named MetricsWidget.tsx.
src/plugins/my-first-widget/admin/src/components
├── MetricsWidget.tsx
And and the following code:
const MetricsWidget = () => {
  return (
    <div>
      <h1>Hello World from my first widget</h1>
    </div>
  );
};

export default MetricsWidget;
Now that we have a component, we need to register it as a widget.
To do this, let's navigate to the admin/src/index.ts file and start by removing the following code:
app.addMenuLink({
  to: `plugins/${PLUGIN_ID}`,
  icon: PluginIcon,
  intlLabel: {
    id: `${PLUGIN_ID}.plugin.name`,
    defaultMessage: PLUGIN_ID,
  },
  Component: async () => {
    const { App } = await import("./pages/App");
    return App;
  },
});
The above code is responsible for registering our plugin in the admin panel menu, not something we need for this use case.
Next, let's register our widget component that we created earlier by adding the following code:
app.widgets.register({
  icon: Stethoscope,
  title: {
    id: `${PLUGIN_ID}.widget.metrics.title`,
    defaultMessage: "Content Metrics",
  },
  component: async () => {
    const component = await import("./components/MetricsWidget");
    return component.default;
  },
  id: "content-metrics",
  pluginId: PLUGIN_ID,
});
Make sure to import the Stethoscope icon from @strapi/icons-react.
import { Stethoscope } from "@strapi/icons";The completed file should look like this:
import { PLUGIN_ID } from "./pluginId";
import { Initializer } from "./components/Initializer";
import { Stethoscope } from "@strapi/icons";
export default {
register(app: any) {
app.widgets.register({
icon: Stethoscope,
title: {
id: `${PLUGIN_ID}.widget.metrics.title`,
defaultMessage: "Content Metrics",
},
component: async () => {
const component = await import("./components/MetricsWidget");
return component.default;
},
id: "content-metrics",
pluginId: PLUGIN_ID,
});
app.registerPlugin({
id: PLUGIN_ID,
initializer: Initializer,
isReady: false,
name: PLUGIN_ID,
});
},
async registerTrads({ locales }: { locales: string[] }) {
return Promise.all(
locales.map(async (locale) => {
try {
const { default: data } = await import(
`./translations/${locale}.json`
);
return { data, locale };
} catch {
return { data: {}, locale };
}
})
);
},
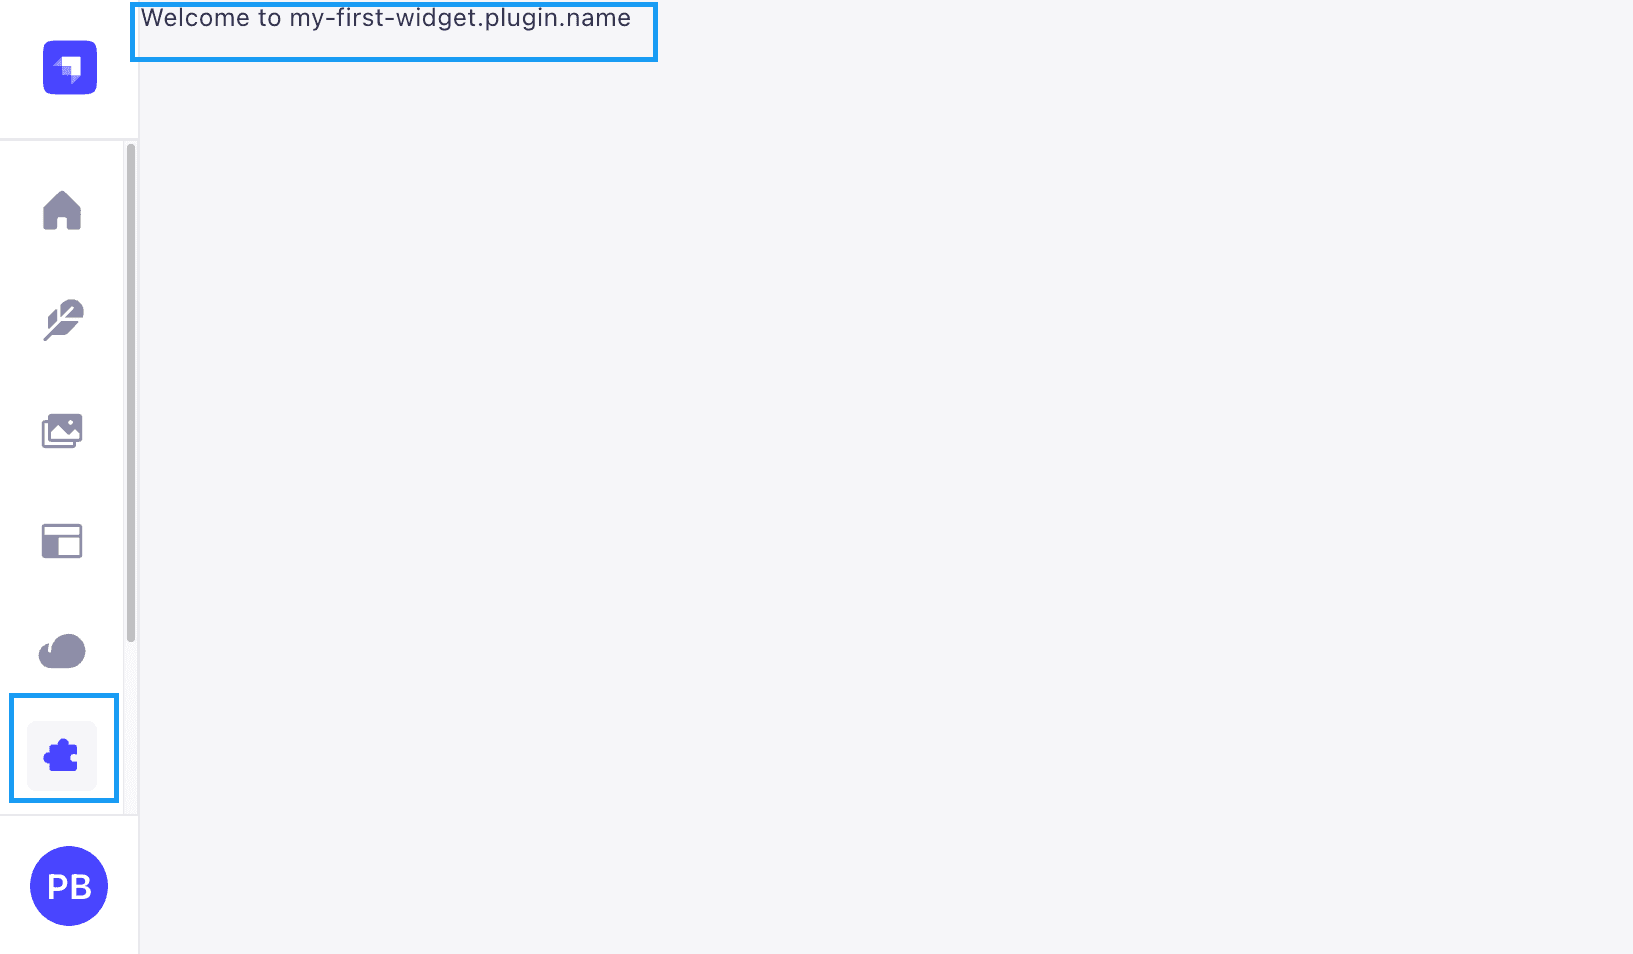
};If your Strapi application is running, you should be able to see the widget in the admin panel.
note: If your application is not running, you can start it by running the following commands:
Navigate to the src/plugins/my-first-widget directory and run the following commands:
npm run build
npm run watch
And in another terminal navigate to the root of your Strapi application and run the following command:
// in the root of your Strapi application
npm run dev
Nice, now we have a widget that is working. Le't take a look how we can crete a custom controller and routes to fetch data for our widget.
Step 4: Create a custom controller and routes
Let's revisit the plugin structure.
src/plugins/my-first-widget
├── admin
├── server
We will be working in the server folder. We should see the following structure:
src/plugins/my-first-widget/server
├── src
│   ├── config
│   ├── content-types
│   ├── controllers
│   ├── middlewares
│   ├── policies
│   ├── routes
│   ├── services
│   ├── bootstrap.ts
│   ├── destroy.ts
│   ├── index.js
│   └── register.ts
For this tutorial, we will be working in the src/controllers and src/routes folders.
You can learn more about Strapi backend customizations here.
Let's start by creating a new controller. You can learn more about Strapi controllers here.
Let's navigate to the src/controllers and make the following changes in the controller.ts file.
import type { Core } from "@strapi/strapi";

const controller = ({ strapi }: { strapi: Core.Strapi }) => ({
  async getContentCounts(ctx) {
    try {
      // TODO: Add custom logic here
      ctx.body = { message: "Hello from the server" };
    } catch (err) {
      ctx.throw(500, err);
    }
  },
});

export default controller;
Now that we have our basic controller, let's update the routes to be able to fetch data from our controller in the "Content API" and "Admin API".
Content API - This is the API that is used to fetch data from the public website.
Admin API - This is the API that is used to fetch data from the admin panel. This is the API that is used to fetch data from the admin panel.
Let's navigate to the src/routes folder and make the following changes:
In the content-api.ts file, let's make the following changes:
const routes = [
  {
    method: "GET",
    path: "/count",
    handler: "controller.getContentCounts",
    config: {
      policies: [],
    },
  },
];

export default routes;
This will create a new route that will be able to fetch data from our controller that we can use to fetch data from an external frontend application.
Let's try it out.
First, in the Admin Panel navigate to the Settings -> Users & Permissions plugin -> Roles -> Public role. You should now see our newly created custom route ( getCustomCounts ) from our plugin that powers our widget.
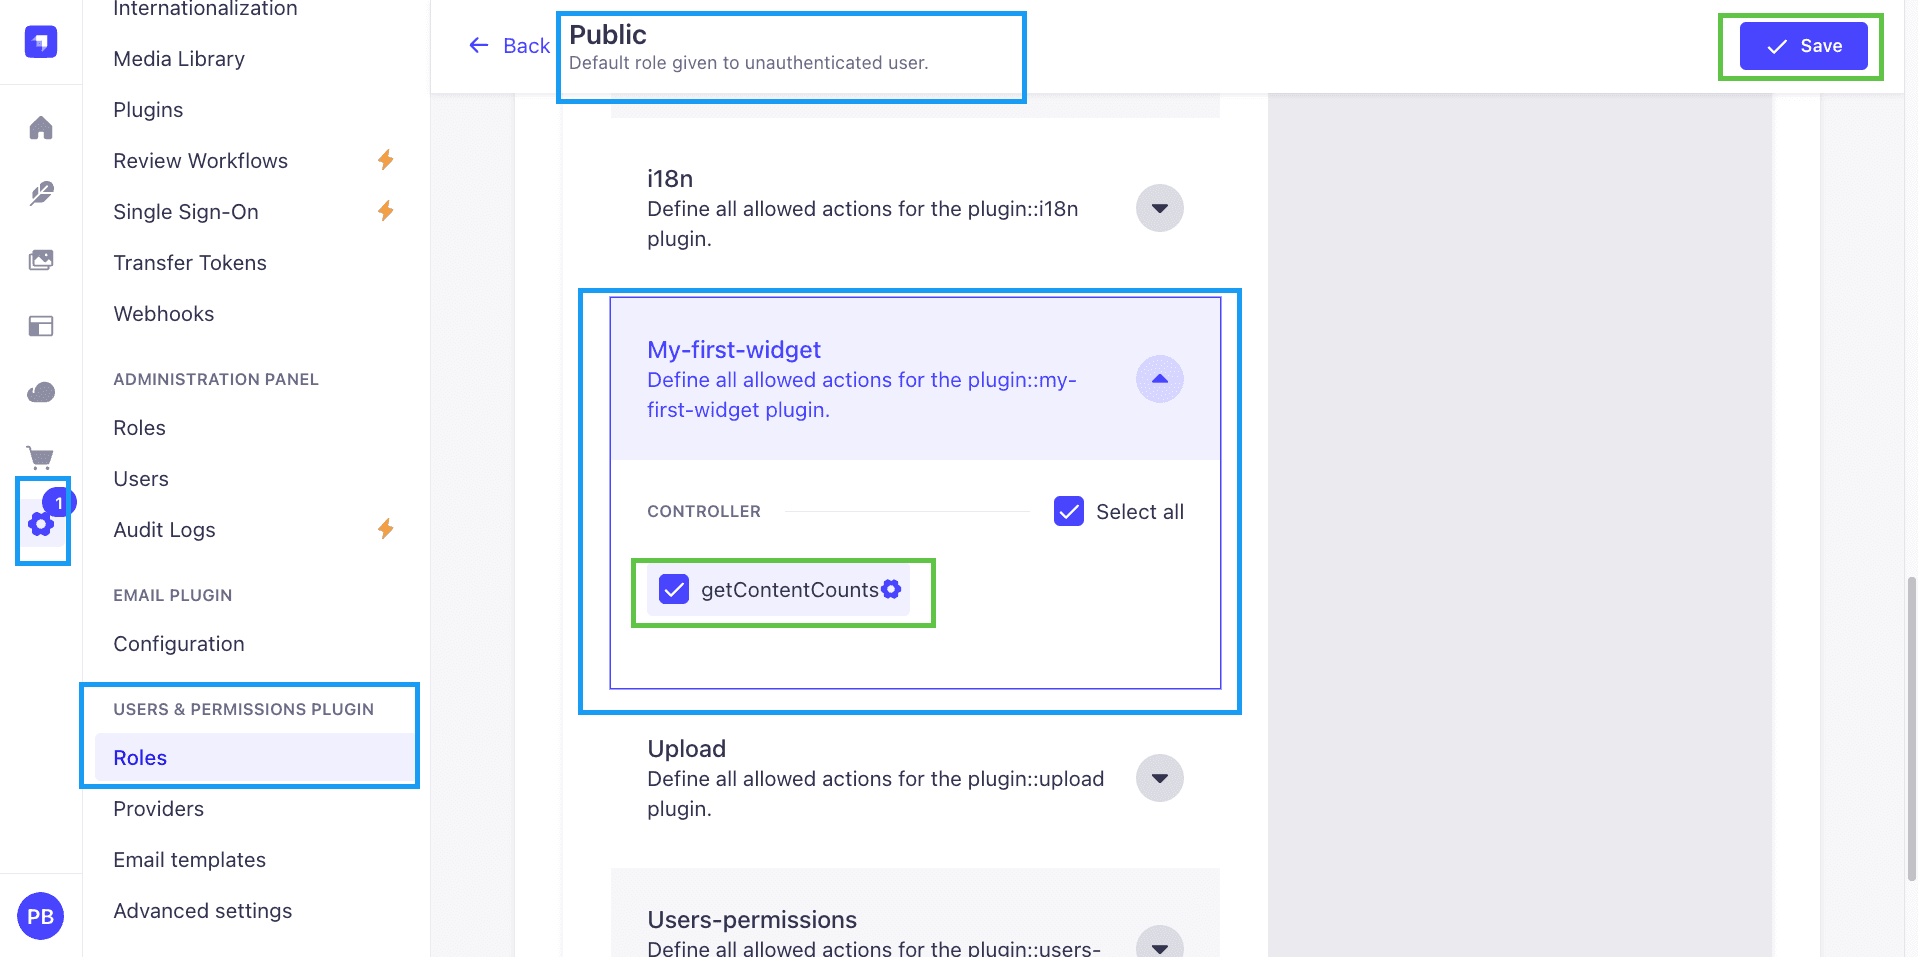
We can test it out in Postman by making a GET request to the following URL:
http://localhost:1337/api/my-first-widget/count
We should see the following response:
{
  "message": "Hello from the server"
}
Now that we have a working Content API route, let's see how we can do the same by creating a Admin API route that will be internal route used by our Strapi Admin Panel.
Let's navigate to the src/routes folder and make the following changes:
First let's create a new file named admin-api.ts and add the following code:
const routes = [
  {
    method: "GET",
    path: "/count",
    handler: "controller.getContentCounts",
    config: {
      policies: [],
    },
  },
];

export default routes;
Now, let's update the index.js file to include our new route.
import adminAPIRoutes from "./admin-api";
import contentAPIRoutes from "./content-api";

const routes = {
  admin: {
    type: "admin",
    routes: adminAPIRoutes,
  },
  "content-api": {
    type: "content-api",
    routes: contentAPIRoutes,
  },
};

export default routes;
Step 5: Update Frontend Component to fetch our test data
And finally, let's update our component in the src/components/MetricsWidget.tsx file to fetch data from our new route.
To accomplish this, we will use the useFetchClient provided by Strapi.
Let's update the MetricsWidget.tsx file with the following code:
import { useState, useEffect } from "react";
import { useFetchClient } from "@strapi/strapi/admin";
import { Widget } from "@strapi/admin/strapi-admin";
import { PLUGIN_ID } from "../pluginId";
const PATH = "/count";
const MetricsWidget = () => {
const { get } = useFetchClient();
const [loading, setLoading] = useState(true);
const [metrics, setMetrics] = useState<Record<
string,
string | number
> | null>(null);
const [error, setError] = useState<string | null>(null);
useEffect(() => {
const fetchMetrics = async () => {
try {
const { data } = await get(PLUGIN_ID + PATH);
console.log("data:", data);
const formattedData = data.message;
setMetrics(formattedData);
setLoading(false);
} catch (err) {
console.error(err);
setError(err instanceof Error ? err.message : "An error occurred");
setLoading(false);
}
};
fetchMetrics();
}, []);
if (loading) {
return <Widget.Loading />;
}
if (error) {
return <Widget.Error />;
}
if (!metrics || Object.keys(metrics).length === 0) {
return <Widget.NoData>No content types found</Widget.NoData>;
}
return (
<div>
<h1>Hello World from my first widget</h1>
<p>{JSON.stringify(metrics)}</p>
</div>
);
};
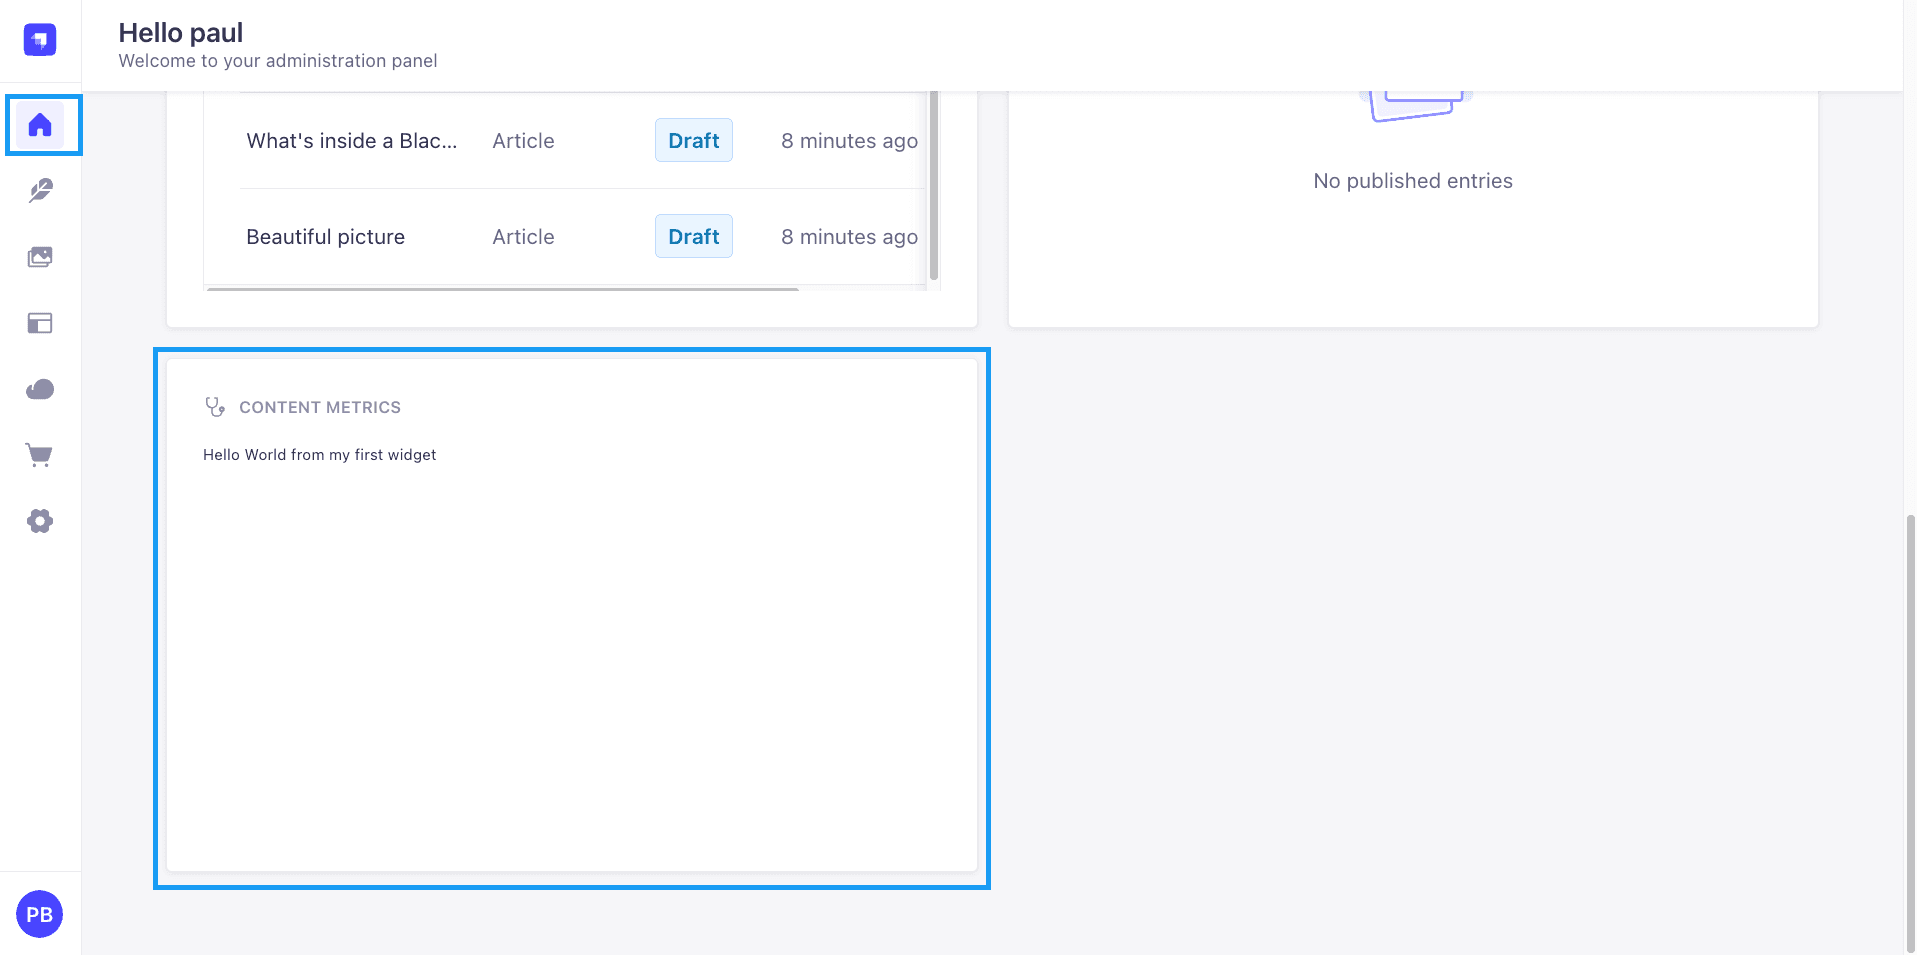
export default MetricsWidget;Now, if you navigate to the Admin Panel you should see the following:
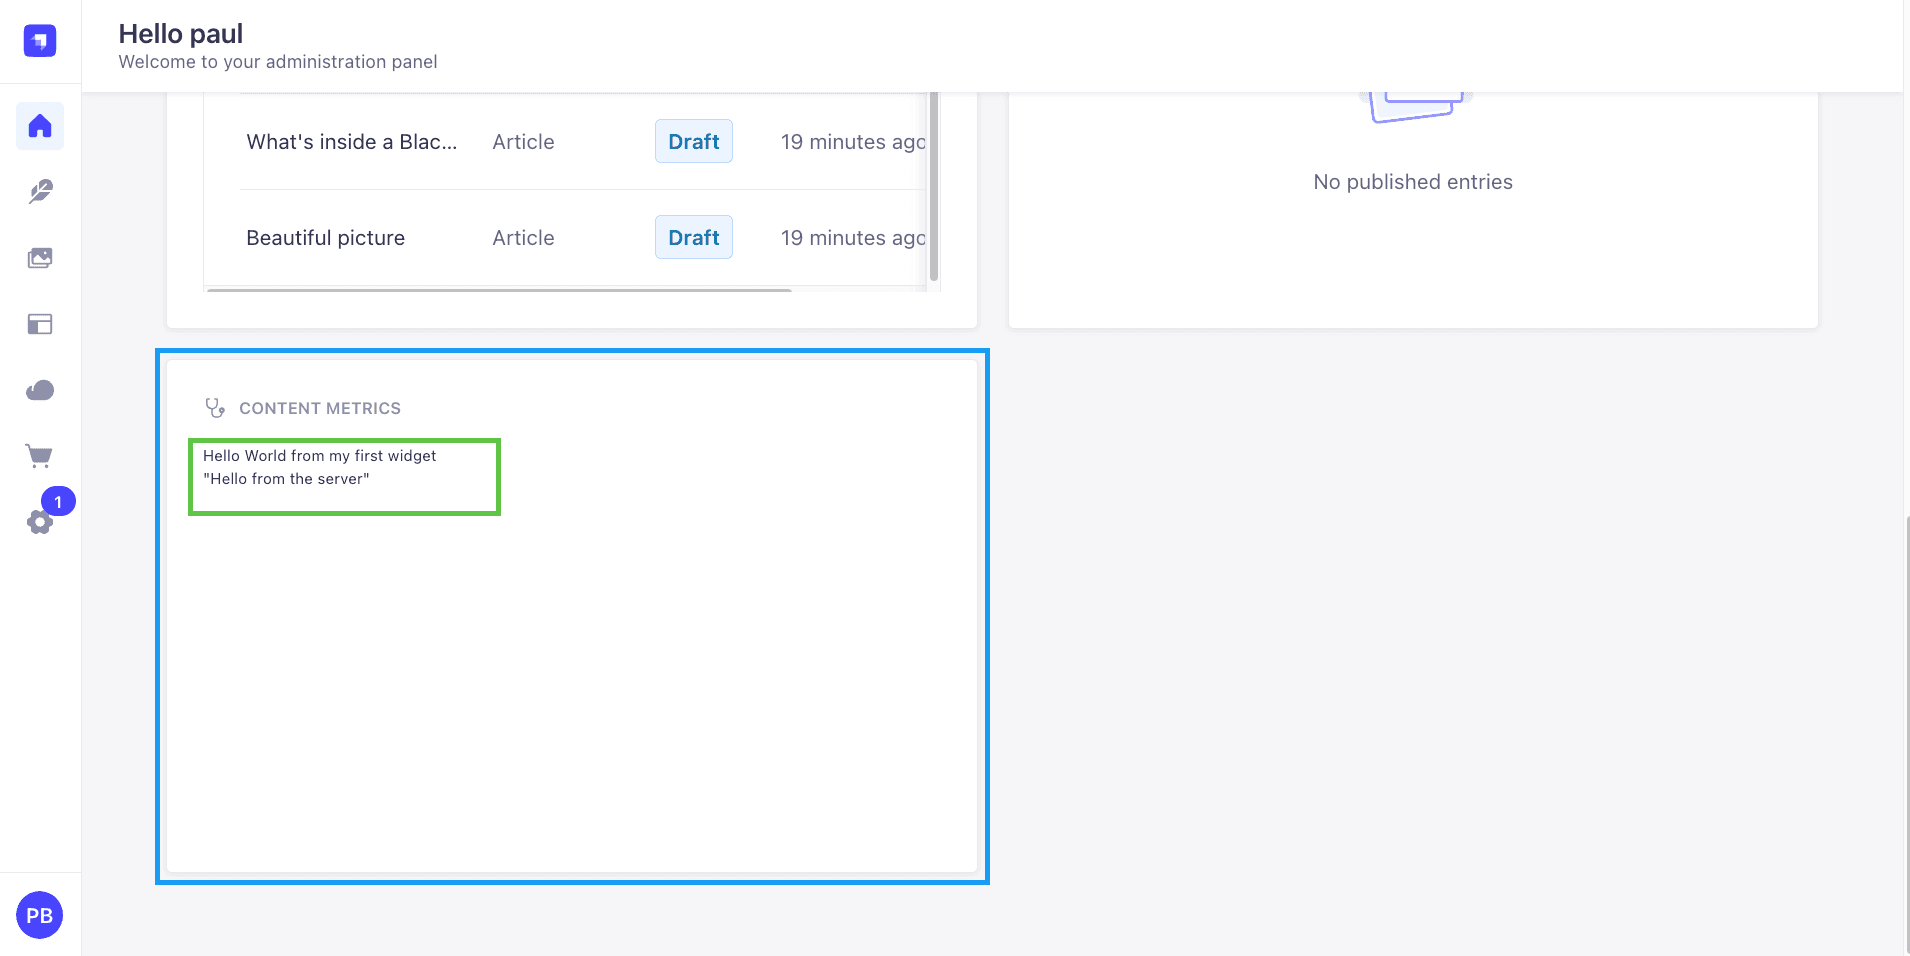
Nice, now we have a widget that is working. Let's add some custom logic to the controller to fetch data from our database.
Step 6: Add custom logic to the controller
Let's navigate to the server/src/controllers folder and make the following changes:
import type { Core } from "@strapi/strapi";
const controller = ({ strapi }: { strapi: Core.Strapi }) => ({
async getContentCounts(ctx) {
try {
//Get all content types
const contentTypes = await Object.keys(strapi.contentTypes)
.filter((uid) => uid.startsWith("api::"))
.reduce((acc, uid) => {
const contentType = strapi.contentTypes[uid];
acc[contentType.info.displayName || uid] = 0;
return acc;
}, {});
// Count entities for each content type using Document Service
for (const [name, _] of Object.entries(contentTypes)) {
const uid = Object.keys(strapi.contentTypes).find(
(key) =>
strapi.contentTypes[key].info.displayName === name || key === name
);
if (uid) {
// Using the count() method from Document Service instead of strapi.db.query
const count = await strapi.documents(uid as any).count({});
contentTypes[name] = count;
}
}
ctx.body = contentTypes;
} catch (err) {
ctx.throw(500, err);
}
},
});
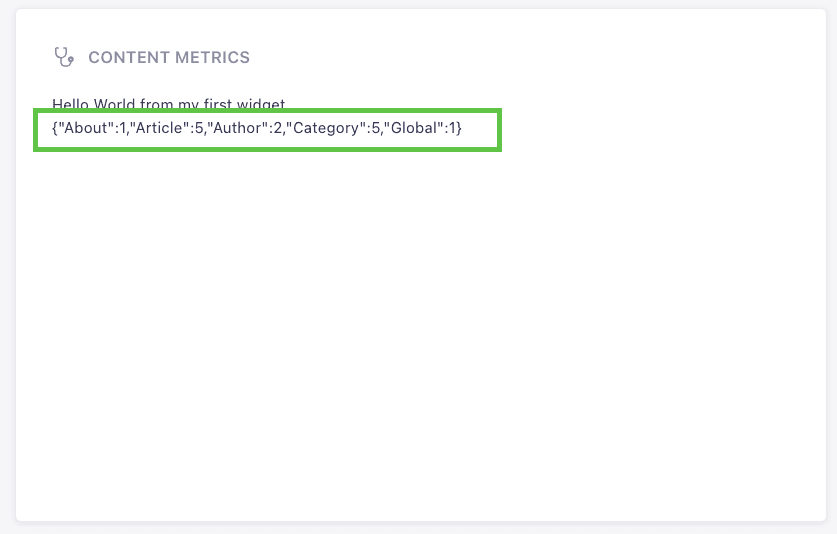
export default controller;In the code above we define a custom Strapi controller that returns a count of entries for each API-defined content type in your project.
Filters content types: It filters all available content types to only include the ones defined under the api:: namespace — that means custom content types you've created in your project (not admin, plugin, or built-in types).
Initializes a contentTypes object: For each content type, it adds an entry with a display name and initializes the count to 0.
Counts entries using the new Document Service: It loops over each content type and uses strapi.documents(uid).count({}) to get the total number of entries in the collection.
💡 This uses the new Document Service introduced in Strapi v5, which is a higher-level abstraction compared to strapi.db.query.
Sets the count for each content type in the final response object.
Step 7: Update the Frontend Component to fetch data from the controller
Let's navigate to the src/components/MetricsWidget.tsx file and make the following changes:
We will update the useEffect hook with the following code:
const formattedData: Record<string, string | number> = {};

if (data && typeof data === "object") {
  await Promise.all(
    Object.entries(data).map(async ([key, value]) => {
      if (typeof value === "function") {
        const result = await value();
        formattedData[key] =
          typeof result === "number" ? result : String(result);
      } else {
        formattedData[key] = typeof value === "number" ? value : String(value);
      }
    })
  );
}
This will fetch the data from the controller and format it to be used in the frontend component.
The updated MetricsWidget.tsx file should look like this:
import { useState, useEffect } from "react";
import { useFetchClient } from "@strapi/strapi/admin";

import { Widget } from "@strapi/admin/strapi-admin";

import { PLUGIN_ID } from "../pluginId";
const PATH = "/count";

const MetricsWidget = () => {
  const { get } = useFetchClient();

  const [loading, setLoading] = useState(true);
  const [metrics, setMetrics] = useState<Record<
    string,
    string | number
  > | null>(null);
  const [error, setError] = useState<string | null>(null);

         const formattedData: Record<string, string | number> = {};

        if (data && typeof data === "object") {
          await Promise.all(
            Object.entries(data).map(async ([key, value]) => {
              if (typeof value === "function") {
                const result = await value();
                formattedData[key] =
                  typeof result === "number" ? result : String(result);
              } else {
                formattedData[key] =
                  typeof value === "number" ? value : String(value);
              }
            })
          );
        }

        setMetrics(formattedData);
        setLoading(false);
      } catch (err) {
        console.error(err);
        setError(err instanceof Error ? err.message : "An error occurred");
        setLoading(false);
      }
    };

    fetchMetrics();
  }, []);

  if (loading) {
    return <Widget.Loading />;
  }

  if (error) {
    return <Widget.Error />;
  }

  if (!metrics || Object.keys(metrics).length === 0) {
    return <Widget.NoData>No content types found</Widget.NoData>;
  }

  return (
 useEffect(() => {
    const fetchMetrics = async () => {
      try {
        const { data } = await get(PLUGIN_ID + PATH);
        console.log("data:", data);

    <div>
      <h1>Hello World from my first widget</h1>
      <p>{JSON.stringify(metrics)}</p>
    </div>
  );
};

export default MetricsWidget;
Now, if you navigate to the Admin Panel you should see the following:
Finally, let's make it prettier by adding a Table component from Strapi Design System.
Let's start by importing the components from Strapi Design System.
import { Table, Tbody, Tr, Td, Typography } from "@strapi/design-system";Now, let's update the MetricsWidget.tsx file to use the Table component. Make the following changes in the return statement:
return (
  <Table>
    <Tbody>
      {Object.entries(metrics).map(([contentType, count], index) => (
        <Tr key={index}>
          <Td>
            <Typography variant="omega">{String(contentType)}</Typography>
          </Td>
          <Td>
            <Typography variant="omega" fontWeight="bold">
              {String(count)}
            </Typography>
          </Td>
        </Tr>
      ))}
    </Tbody>
  </Table>
);
The updated MetricsWidget.tsx file should look like this:
import { useState, useEffect } from 'react';
import { useFetchClient } from '@strapi/strapi/admin';

import { Widget } from '@strapi/admin/strapi-admin';
import { Table, Tbody, Tr, Td, Typography } from "@strapi/design-system";

import { PLUGIN_ID } from '../pluginId';
const PATH = '/count';

const MetricsWidget = () => {
  const { get } = useFetchClient();

  const [loading, setLoading] = useState(true);
  const [metrics, setMetrics] = useState<Record<string, string | number> | null>(null);
  const [error, setError] = useState<string | null>(null);

  useEffect(() => {
    const fetchMetrics = async () => {
      try {
        const { data } = await get(PLUGIN_ID + PATH);
        console.log('data:', data);

        const formattedData: Record<string, string | number> = {};

        if (data && typeof data === 'object') {
          await Promise.all(
            Object.entries(data).map(async ([key, value]) => {
              if (typeof value === 'function') {
                const result = await value();
                formattedData[key] = typeof result === 'number' ? result : String(result);
              } else {
                formattedData[key] = typeof value === 'number' ? value : String(value);
              }
            })
          );
        }

        setMetrics(formattedData);
        setLoading(false);
      } catch (err) {
        console.error(err);
        setError(err instanceof Error ? err.message : 'An error occurred');
        setLoading(false);
      }
    };

    fetchMetrics();
  }, []);

  if (loading) {
    return <Widget.Loading />;
  }

  if (error) {
    return <Widget.Error />;
  }

  if (!metrics || Object.keys(metrics).length === 0) {
    return <Widget.NoData>No content types found</Widget.NoData>;
  }

  return (
    <Table>
      <Tbody>
        {Object.entries(metrics).map(([contentType, count], index) => (
          <Tr key={index}>
            <Td>
              <Typography variant="omega">{String(contentType)}</Typography>
            </Td>
            <Td>
              <Typography variant="omega" fontWeight="bold">
                {String(count)}
              </Typography>
            </Td>
          </Tr>
        ))}
      </Tbody>
    </Table>
  );
};

export default MetricsWidget;
Now, if you navigate to the Admin Panel you should see the final result:

Yay, we have a cool new widget that displays the number of content types in our project.
Now, you can start building your own widgets and share them with the community.
Conclusion
Building a custom widget for Strapi may seem complex at first, but once you go through it step by step, it’s actually pretty straightforward.
You now have a working widget that shows content counts right inside the Strapi admin panel—and it looks great thanks to the built-in Design System.
Widgets like this can be a powerful way to add helpful tools for your team or clients.
🔑 What You Learned
- How to create a plugin using the Strapi Plugin CLI.
- How to build a custom widget and show it on the admin dashboard.
- Where frontend and backend code lives in a plugin.
- How to fetch content data using the new Document Service in Strapi v5.
- How to add custom API routes for both admin and public use.
- How to use Strapi’s Design System to keep your UI clean and consistent.
You can now build your own widgets, pull real data from your backend, and customize the admin panel to better fit your needs.
Now that you know how to customize Strapi dashboard via widget. We would love to see what you will build.
👉 Get the full code here: strapi-widget-example on GitHub.
Join the Strapi community: Come hang out with us during our "Open Office" hours on Discord.
We are there Monday through Friday from 12:30pm CST time.
Stop on by to chat, ask questions, or just say hi!