Strapi 5 introduces a powerful preview feature that lets content editors preview draft content directly on the frontend before publishing.

In this guide, we’ll walk through how to set up the preview feature from scratch using a starter project with Strapi 5 and Next.js 15. We’ll cover both backend and frontend setup so you can enable your content team to view draft content with just one click.
note: Although this guide is for Next.js 15, the same principles apply to other frameworks like React, Nuxt, etc.
Why Use the Preview Feature?
The preview feature lets you view draft content on your site without publishing it.
This is perfect for editorial workflows where content needs review or approval before going live.
Editors can see exactly how their content will look once published, helping catch layout or formatting issues early.
Try the Feature in the Strapi Demo
Before setting things up locally, you can also try it out via Strapi’s live demo.
Which includes additional feature that allows you to edit content on fly in our preview side editor which is available in our Growth Plan or Enterprise Edition.
Just click “Start your demo”, fill out your info, and once provisioned, you’ll have access to both the Strapi backend and the Next.js frontend.
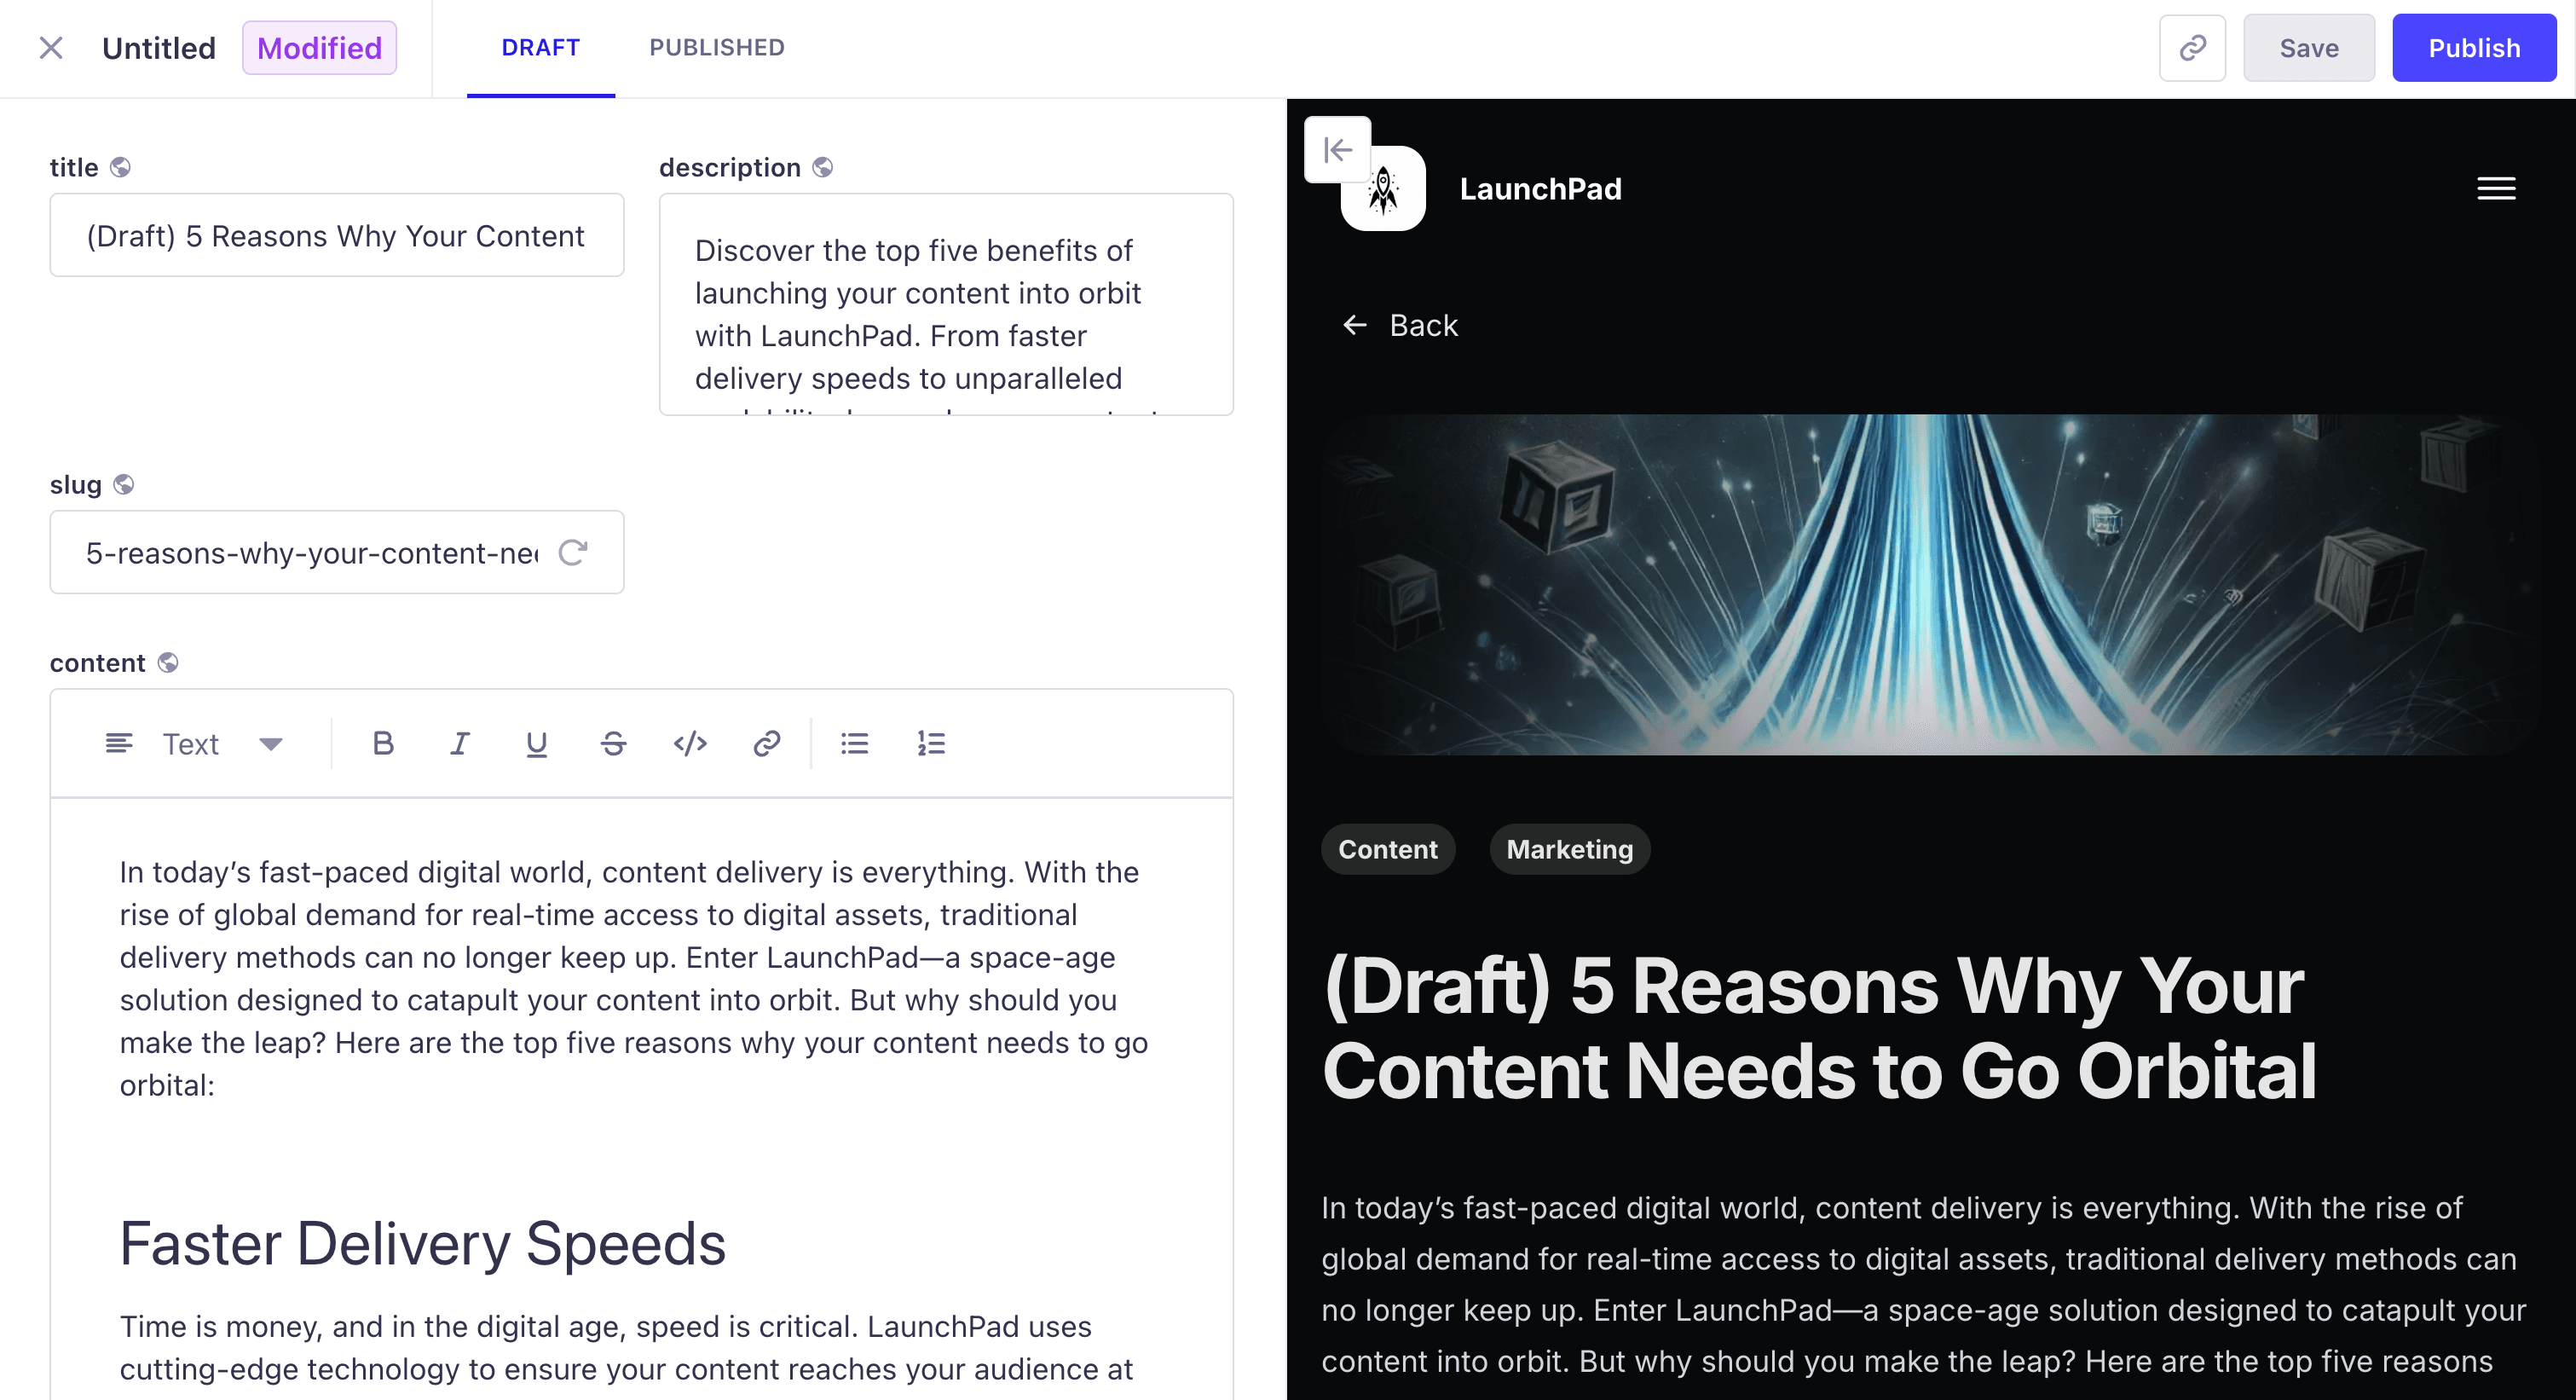
In the admin panel, go to Content Manager > Articles, click an article, and you’ll see a Preview button. Clicking it opens a draft view of the article as it would appear on the live site.
But for this guide we will be using the Community Edition. Which is free to use and gives you the ability to preview your content on the frontend before publishing it both in the preview and live mode.
Resources:
If you prefer to watch a video, here is the video version of this guide.
Project Setup
To save some time we will be using the starter project that I created for this guide.
It is a a simple blog starter project that includes a few articles and a few categories with a Next.js frontend.
To get started locally:
Step 1: Clone the starter project from GitHub
Open your favorite terminal and run the following command to clone the starter project from GitHub.
git clone https://github.com/PaulBratslavsky/strapi-next-js-preview-starter-codeStep 2: Install dependencies
Navigate to the project directory and install the dependencies with the following command.
cd strapi-next-js-preview-starter-code
npm run setup
This will install the dependencies and configure the environment for both the frontend and the backend.
Step 3: Seed the database
Run the following command to seed the database with the demo data.
npm run seedThis will populate the database with the demo data.
> strapi-nextjs-preview-example@1.0.0 seed
> cd server && yarn strapi import -f ../seed-data.tar.gz --force

yarn run v1.22.22
warning ../package.json: No license field
$ strapi import -f ../seed-data.tar.gz --force
? The import will delete your existing data! Are you sure you want to proceed? Yes
--------------------------------
In article-populate middleware.
--------------------------------
--------------------------------
In article-populate middleware.
--------------------------------
Starting import...
✔ entities: 50 transferred (size: 46.2 KB) (elapsed: 51 ms) (906.8 KB/s)
✔ assets: 52 transferred (size: 7.4 MB) (elapsed: 620 ms) (12 MB/s)
✔ links: 132 transferred (size: 25.3 KB) (elapsed: 6 ms) (4.1 MB/s)
✔ configuration: 37 transferred (size: 115.2 KB) (elapsed: 5 ms) (22.5 MB/s)
┌─────────────────────────────────────────┬───────┬───────────────┐
│ Type                                    │ Count │ Size          │
├─────────────────────────────────────────┼───────┼───────────────┤
│ entities                                │    50 │      46.2 KB  │
├─────────────────────────────────────────┼───────┼───────────────┤
│ -- api::about.about                     │     1 │ (     689 B ) │
├─────────────────────────────────────────┼───────┼───────────────┤
│ -- api::article.article                 │    10 │ (    20.9 KB) │
├─────────────────────────────────────────┼───────┼───────────────┤
│ -- api::author.author                   │     2 │ (     536 B ) │
├─────────────────────────────────────────┼───────┼───────────────┤
│ -- api::category.category               │     5 │ (     1.3 KB) │
├─────────────────────────────────────────┼───────┼───────────────┤
│ -- api::global.global                   │     1 │ (     372 B ) │
├─────────────────────────────────────────┼───────┼───────────────┤
│ -- plugin::i18n.locale                  │     1 │ (     253 B ) │
├─────────────────────────────────────────┼───────┼───────────────┤
│ -- plugin::upload.file                  │    11 │ (    16.8 KB) │
├─────────────────────────────────────────┼───────┼───────────────┤
│ -- plugin::users-permissions.permission │    17 │ (     4.7 KB) │
├─────────────────────────────────────────┼───────┼───────────────┤
│ -- plugin::users-permissions.role       │     2 │ (     656 B ) │
├─────────────────────────────────────────┼───────┼───────────────┤
│ assets                                  │    52 │       7.4 MB  │
├─────────────────────────────────────────┼───────┼───────────────┤
│ -- .jpeg                                │    44 │ (     6.8 MB) │
├─────────────────────────────────────────┼───────┼───────────────┤
│ -- .png                                 │     8 │ (   690.1 KB) │
├─────────────────────────────────────────┼───────┼───────────────┤
│ links                                   │   132 │      25.3 KB  │
├─────────────────────────────────────────┼───────┼───────────────┤
│ configuration                           │    37 │     115.2 KB  │
├─────────────────────────────────────────┼───────┼───────────────┤
│ Total                                   │   271 │       7.6 MB  │
└─────────────────────────────────────────┴───────┴───────────────┘
Import process has been completed successfully!
✨  Done in 3.09s.
Step 4: Start the project
Start the project with the following command.
npm run devThe frontend runs on http://localhost:3000, and the Strapi backend on http://localhost:1337
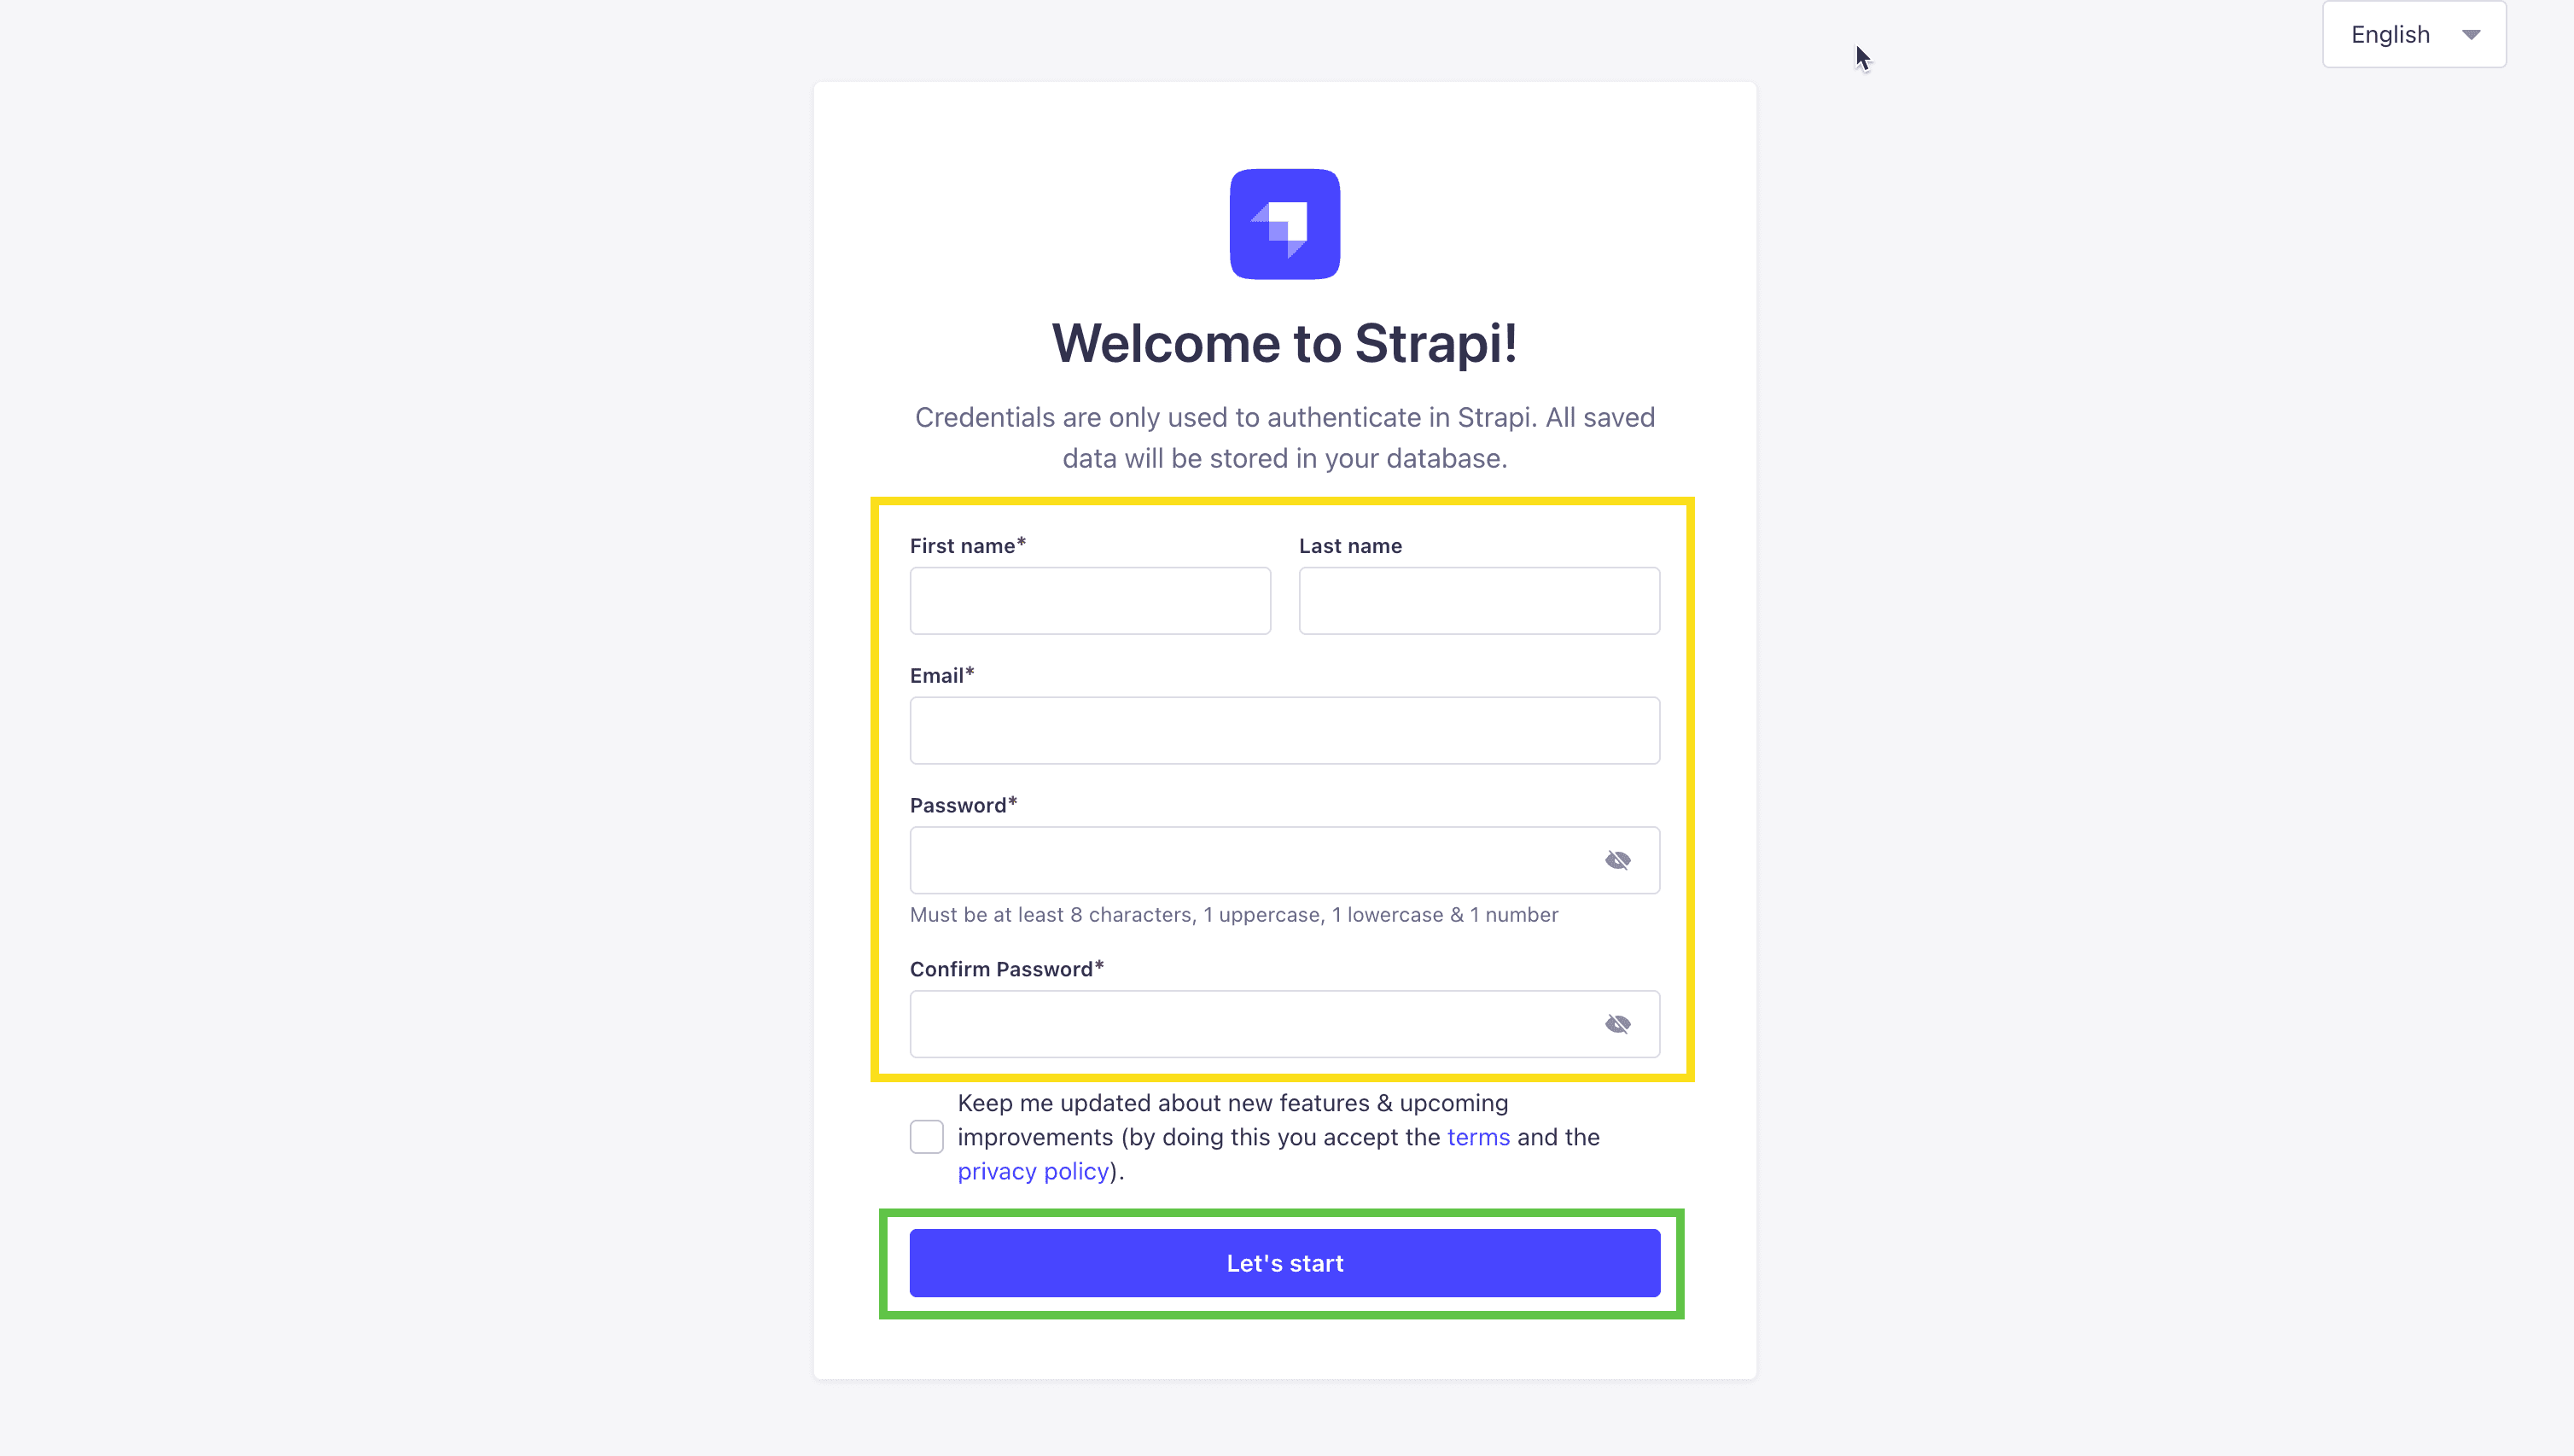
Let's navigate to http://localhost:1337 you will be greeted with the following screen. Go ahead and create your first Strapi Admin user.
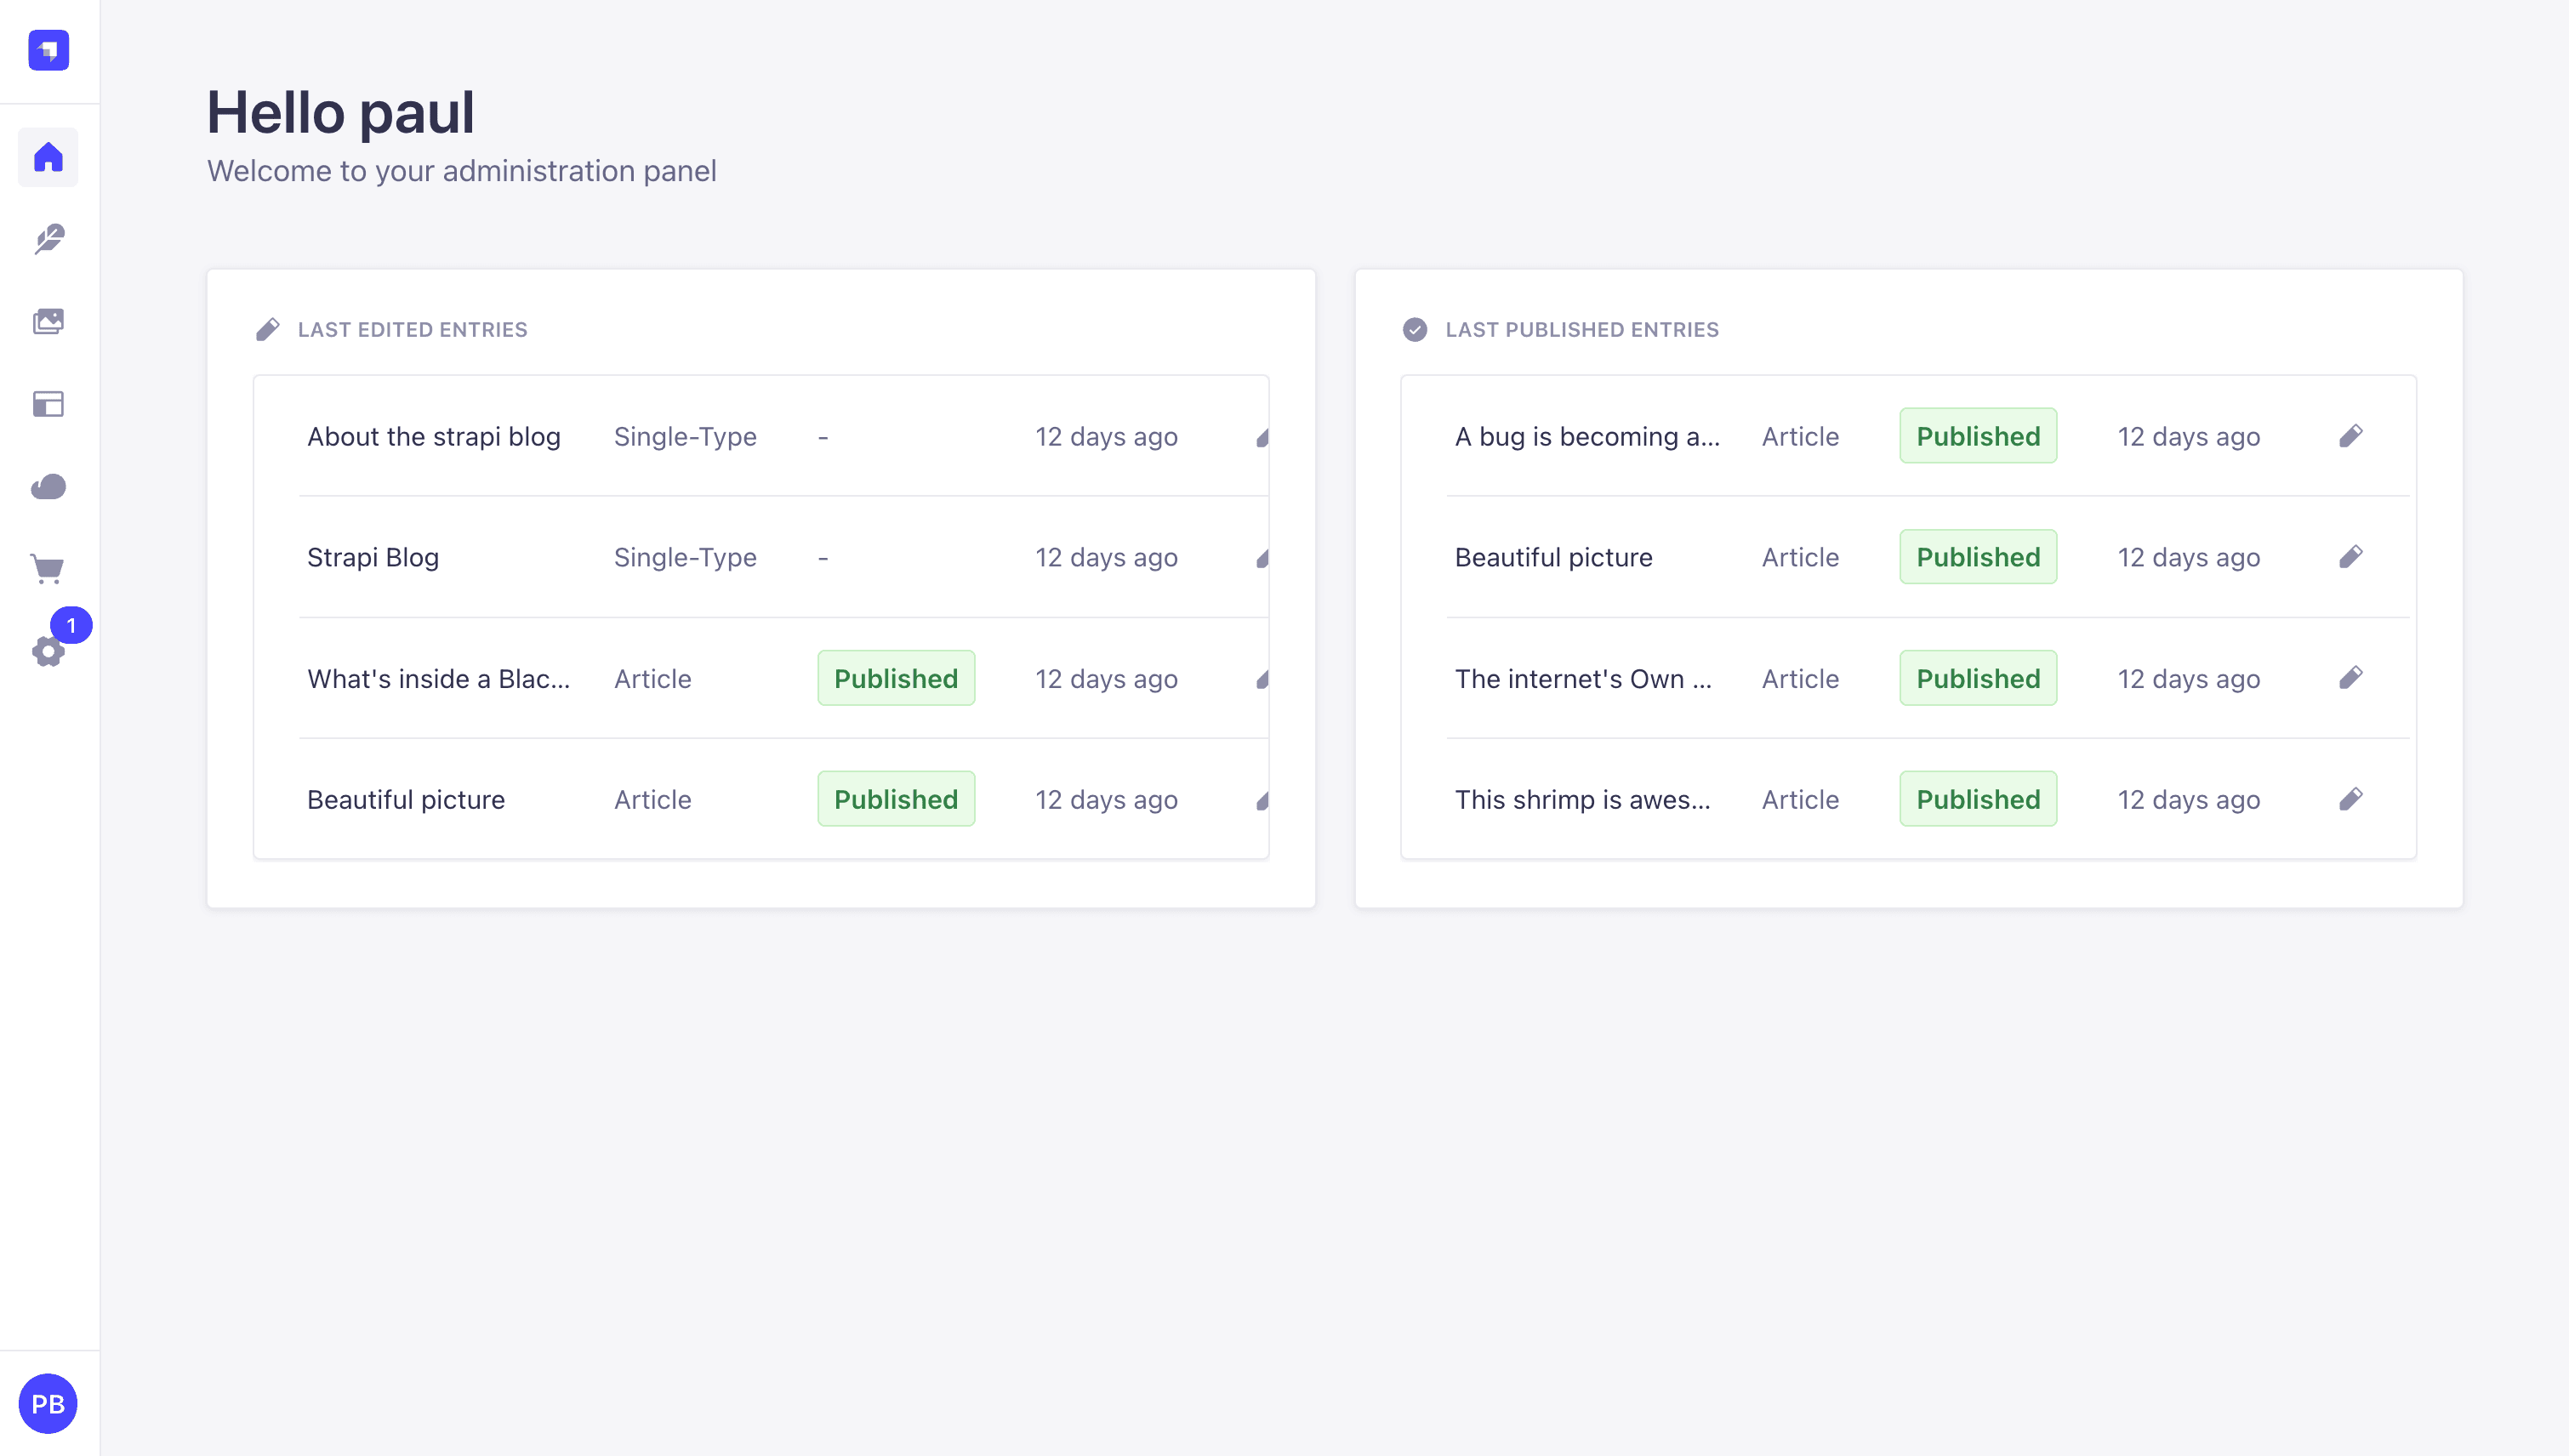
Once created you will be redirected to the Strapi Admin dashboard.
If we navigate to http://localhost:3000 you will see the following screen.
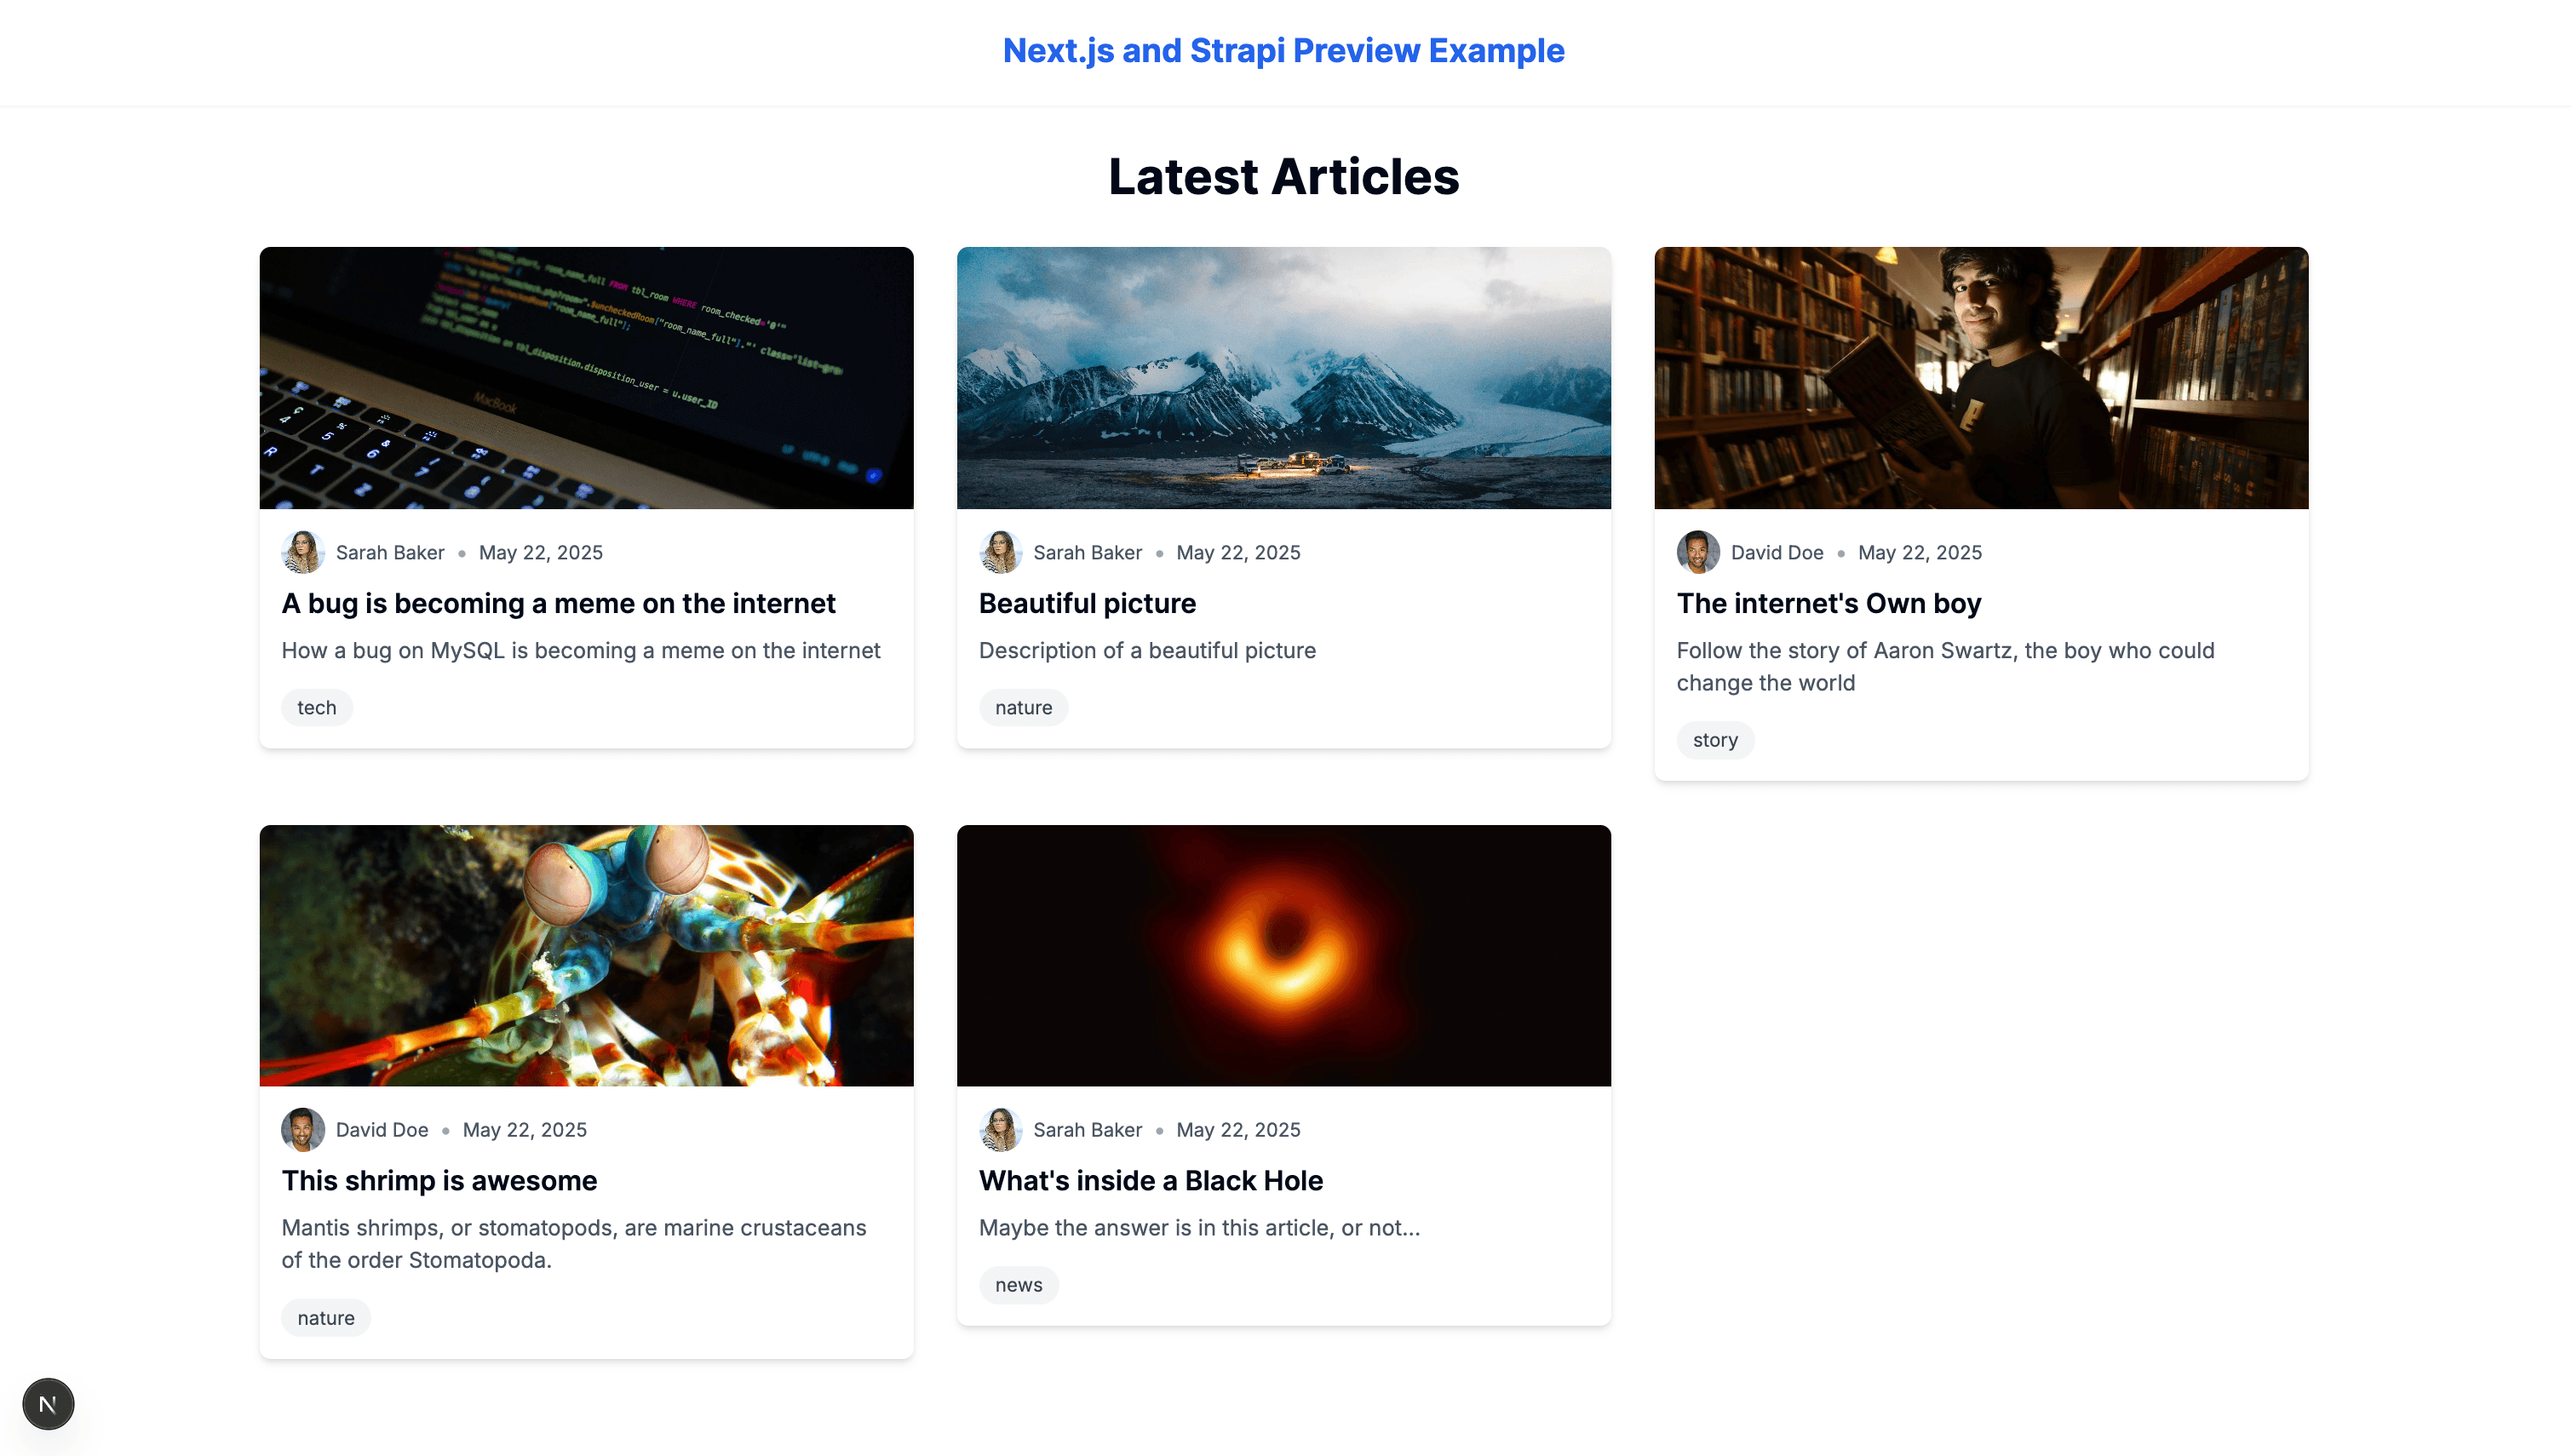
Nice, now we are ready to start building our preview feature.
How To Setup The Preview Feature In Strapi and Next.js
Before we start, in our Strapi Admin, let's navigate to one of our articles and you will notice that their is no Preview button in sight.
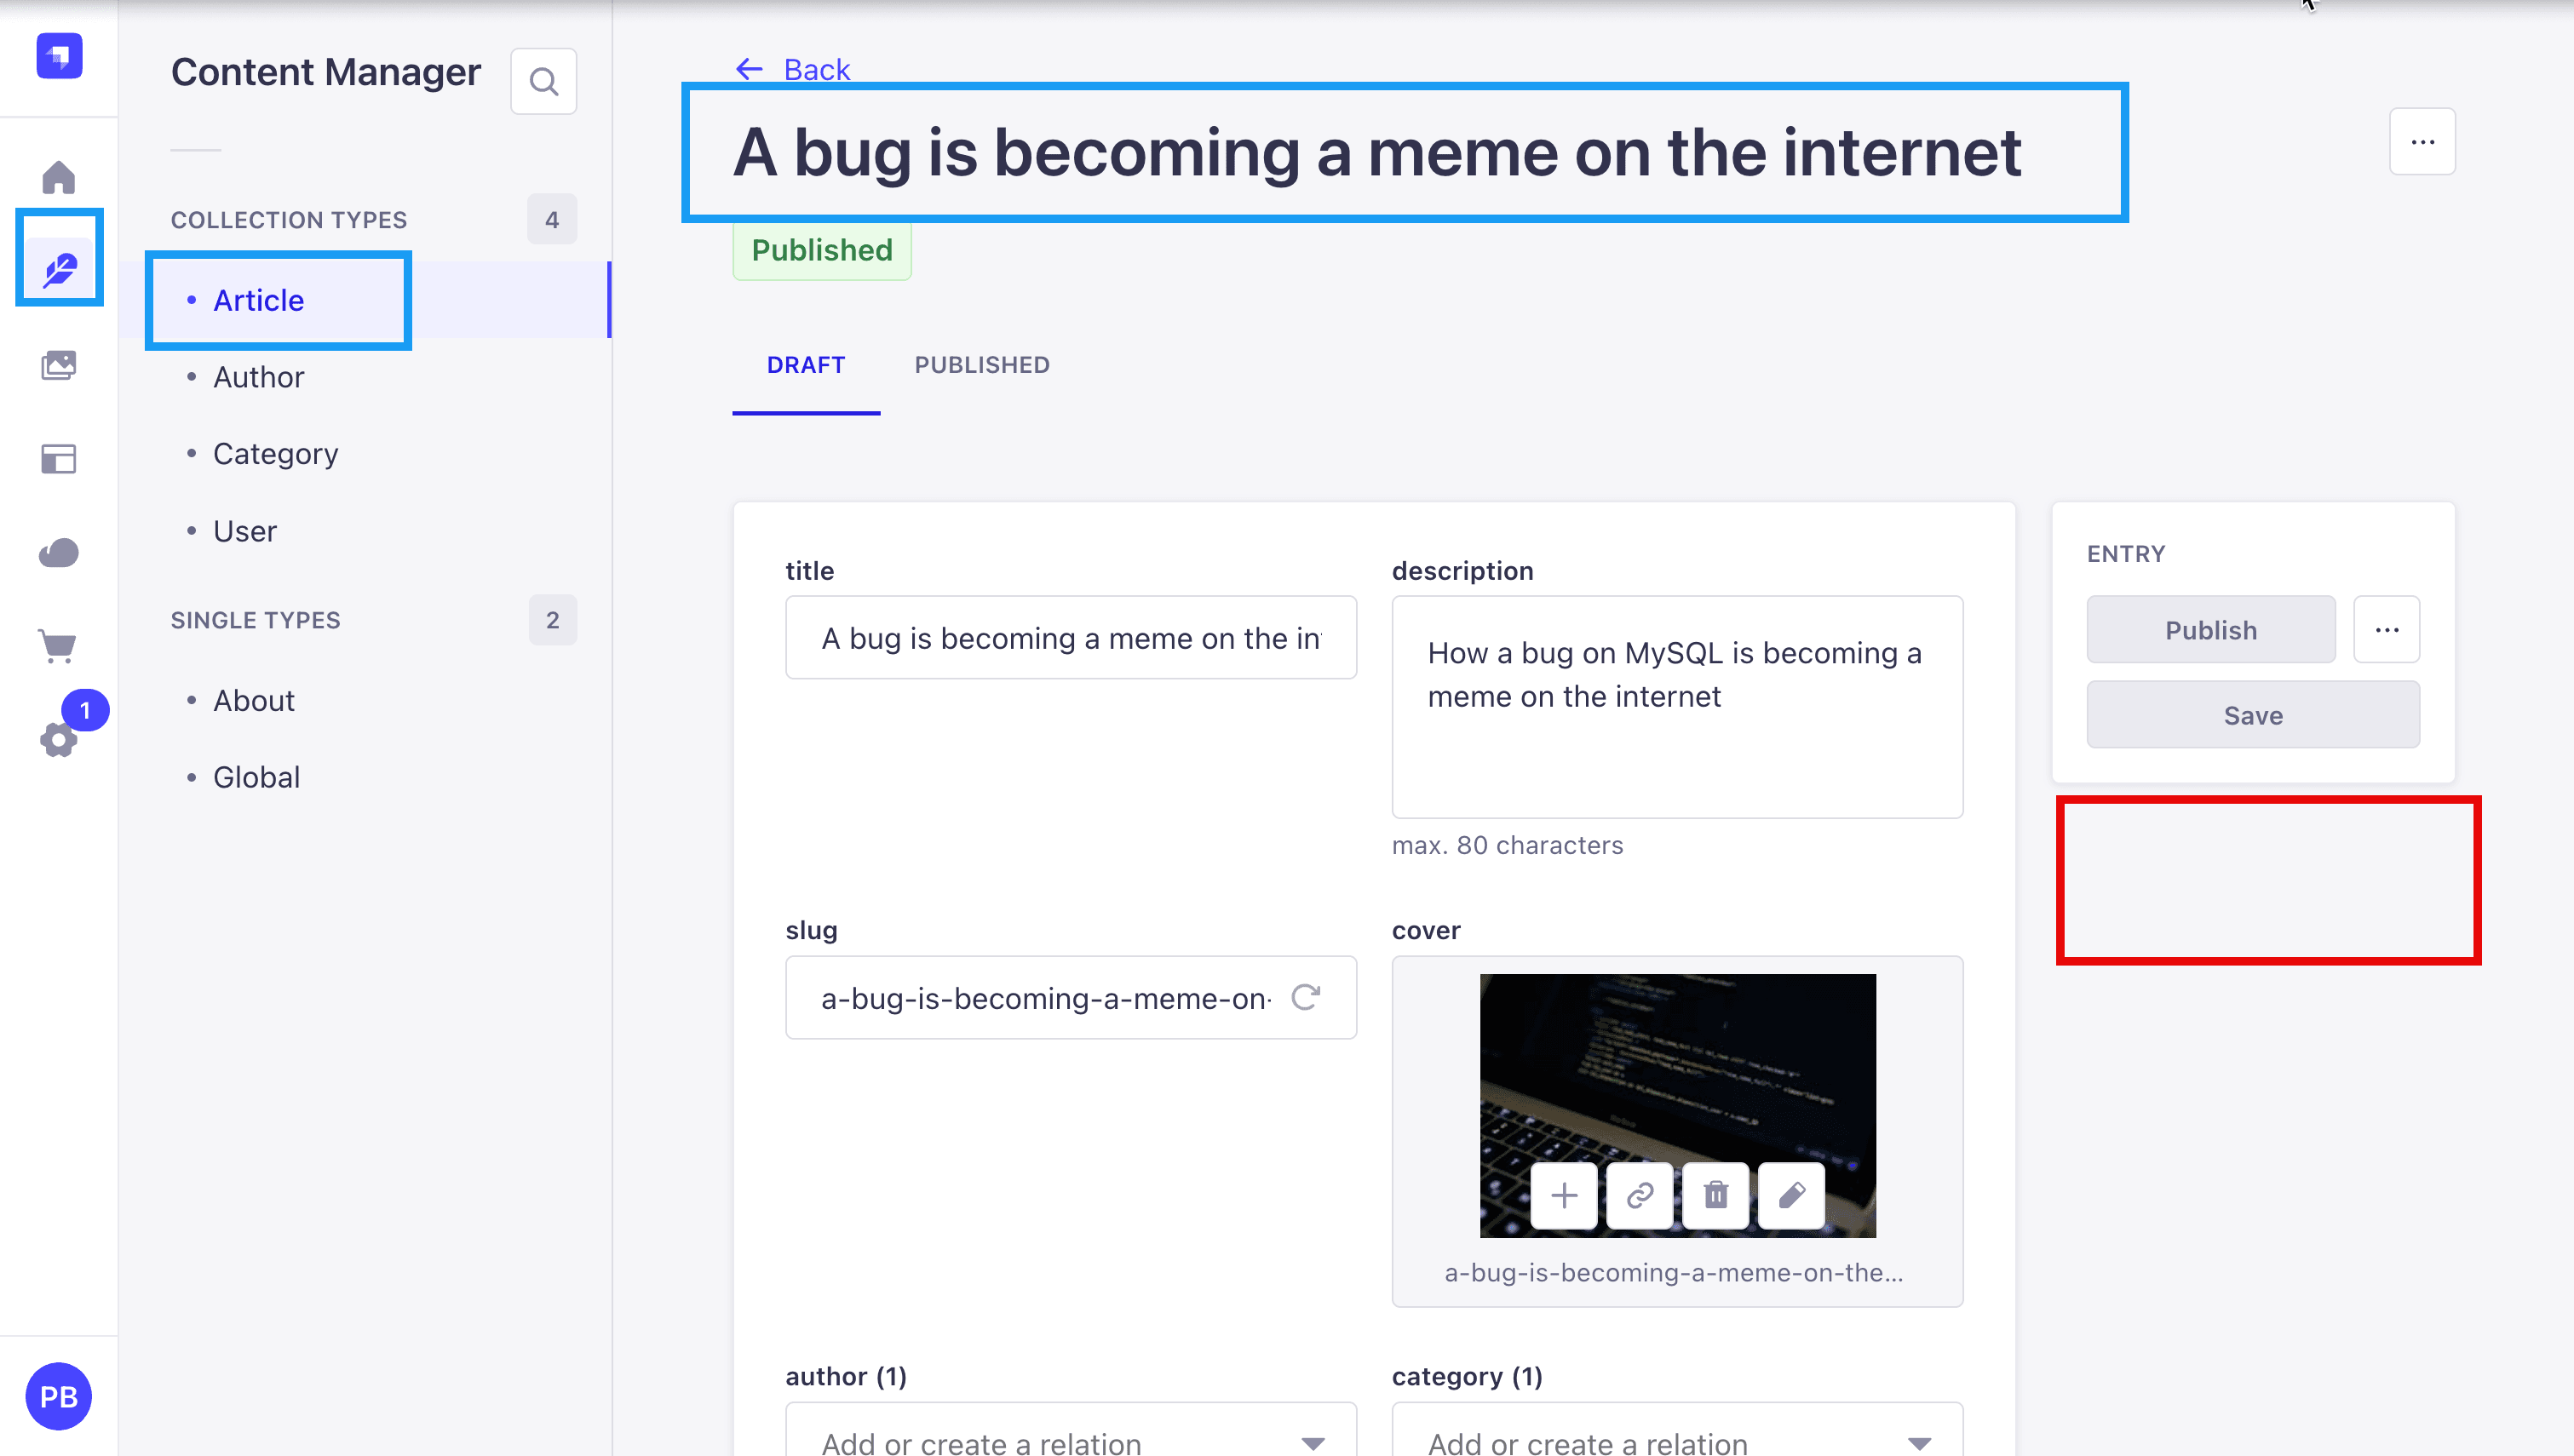
That is because we have not configured the preview feature in Strapi yet. Let's do that now.
Configuring the Preview Feature in Strapi
Inside of our Strapi project folder named server, go to config/admin.ts and paste in the preview configuration and paste in the following code after all the other configurations.
preview: {
    enabled: true,
    config: {
      allowedOrigins: [env("CLIENT_URL")],
      async handler(uid, { documentId, locale, status }) {
        const document = await strapi.documents(uid).findOne({
          documentId,
          populate: null,
          fields: ["slug"],
        });
        const { slug } = document;

        const urlSearchParams = new URLSearchParams({
          secret: env("PREVIEW_SECRET"),
          ...(slug && { slug }),
          uid,
          status,
        });

        const previewURL = `${env("CLIENT_URL")}/api/preview?${urlSearchParams}`;
        return previewURL;
      },
    },
  },
enabled: Turns on the preview feature in Strapi.
config.allowedOrigins: Specifies which frontend domains can receive preview links. Uses CLIENT_URL from environment variables.
config.handler(uid, { documentId, locale, status }): Async function that:
- Fetches the document by documentId using strapi.documents(uid).findOne(...).
- Extracts the slug from the document.
- Constructs a preview URL with query params including slug, uid, status, and a PREVIEW_SECRET.
- Returns the preview URL to be used by the frontend (e.g. Next.js preview route).
Add finally let's add the following environment variables in .env:
CLIENT_URL=http://localhost:3000
PREVIEW_SECRET=your-secret-key
If we navigate back to our article in the Strapi Admin, you will notice that the Preview button is now visible.
If we click on the Preview button, we will see the following screen.
Notice it is not working yet. That is because we have not setup the preview feature in the Next.js frontend. Let's do that now.
How To Setup The Preview Feature In Next.js
In order to receive the preview URL from Strapi, we need to create a preview route in our Next.js app.
Let's create a folder called app/api/preview and inside it create a file called route.ts.
// app/api/preview/route.ts

import { draftMode } from "next/headers";
import { redirect } from "next/navigation";

function getPreviewPath(
  contentType: string | undefined,
  slug: string | null,
  locale: string | null,
  status: string | null
): string {
  const basePath = (() => {
    if (!contentType) return "/";

    if (contentType === "article" || contentType.includes("articles")) {
      return slug ? "/articles/" + slug : "/articles";
    }

    // Can add other content types here

    // if (contentType === 'page' || contentType.includes('pages')) {
    //   return slug ? '/' + slug : '/';
    // }

    return "/" + contentType;
  })();

  const localePath =
    locale && locale !== "en" ? "/" + locale + basePath : basePath;
  const statusParam = status ? "?status=" + status : "";
  return localePath + statusParam;
}

export const GET = async (request: Request) => {
  // Parse query string parameters
  const { searchParams } = new URL(request.url);
  const searchParamsData = Object.fromEntries(searchParams);
  const { secret, slug, locale, uid, status } = searchParamsData;

  console.log(searchParamsData);

  // Check the secret and next parameters
  if (secret !== process.env.PREVIEW_SECRET) {
    return new Response("Invalid token", { status: 401 });
  }

  const contentType = uid?.split(".").pop();
  const finalPath = getPreviewPath(contentType, slug, locale, status);

  // Enable Draft Mode by setting the cookie
  const draft = await draftMode();
  status === "draft" ? draft.enable() : draft.disable();

  // Redirect to the path from the fetched post
  redirect(finalPath);
};
Understanding the route.ts Preview Handler in Next.js
To enable content previews in a Next.js site powered by a headless CMS like Strapi, you need a backend route that handles preview requests securely.
Below is a breakdown of how the route.ts file works to enable Draft Mode and redirect users to a previewable version of the content.
Step 1: Parsing Query Parameters The handler reads the preview request parameters from the URL:
const { secret, slug, locale, uid, status } = Object.fromEntries(
  new URL(request.url).searchParams
);
These parameters are typically passed from the CMS when a user clicks “Preview” on a content entry.
Step 2: Validating the Secret Token To ensure the request is authorized, the code checks for a secret query param and compares it to an environment variable:
if (secret !== process.env.PREVIEW_SECRET) {
  return new Response("Invalid token", { status: 401 });
}
If the secret doesn't match, the request is rejected.
Step 3: Determining the Content Type The code extracts the content type (e.g. post, page) from the UID:
const contentType = uid?.split(".").pop();This helps define the preview path later.
Step 4: Generating the Preview Path
A helper function, getPreviewPath, constructs the preview URL based on:
- Content type (e.g. post or page)
- Slug (e.g. /blog/my-article)
- Locale (e.g. /fr/blog/mon-article)
- Status (e.g. ?status=draft)
Example:
"/articles/my-article?status=draft";Step 5: Enabling Draft Mode Next.js’s Draft Mode is toggled based on the status value:
status === "draft" ? draft.enable() : draft.disable();When enabled, it allows the frontend to fetch and display unpublished content.
Step 6: Redirecting to the Preview URL Finally, the user is redirected to the preview URL:
redirect(finalPath);This takes them to the correct page with Draft Mode enabled if needed.
This preview handler:
- Secures access with a shared secret
- Parses incoming request data
- Enables or disables Next.js Draft Mode
- Redirects users to the correct preview path
Now that we have our preview route setup, we just need to modify our code in the client/app/articles/[slug]/page.tsx file to use the Draft Mode.
Let's import the draftMode function from the next/headers module:
import { draftMode } from "next/headers";We will use the draftMode function to check if the page is in Draft Mode and if it is, we will query the API based on the status.
Let's add the following code to the client/app/articles/[slug]/page.tsx file:
const { isEnabled: isDraftMode } = await draftMode();
const status = isDraftMode ? "draft" : "published";
const { data } = await getArticleBySlug(slug, status)
if (data.length === 0) notFound();
const article = data[0]

return (
  ...
)
The completed code will look like this:
import Link from "next/link";
import { notFound } from "next/navigation";
import { formatDate } from "@/lib/utils";
import BlockRenderer from "@/components/block-renderer";
import { ArrowLeft } from "lucide-react";
import { getArticleBySlug } from "@/lib/strapi-client";
import { StrapiImage } from "@/components/custom/strapi-image";
import { draftMode } from "next/headers";

export default async function ArticlePage({
  params,
}: {
  params: Promise<{ slug: string }>;
}) {
  const resolvedParams = await params;
  const slug = resolvedParams.slug;

  const { isEnabled: isDraftMode } = await draftMode();
  const status = isDraftMode ? "draft" : "published";
  const { data } = await getArticleBySlug(slug, status);
  if (data.length === 0) notFound();
  const article = data[0];

  return (
    <main className="container mx-auto px-4 py-8 max-w-4xl">
      <Link
        href="/"
        className="inline-flex items-center text-blue-600 hover:text-blue-800 mb-6"
      >
        <ArrowLeft className="w-4 h-4 mr-2" />
        Back to articles
      </Link>

      <article>
        <div className="mb-8">
          <h1 className="text-4xl font-bold mb-4">{article.title}</h1>
          <div className="flex items-center mb-6">
            <div className="relative h-10 w-10 rounded-full overflow-hidden mr-3">
              <StrapiImage
                src={
                  article.author.avatar.url ||
                  "/placeholder.svg?height=50&width=50&query=avatar"
                }
                alt={article.author.name}
                fill
                className="object-cover"
              />
            </div>
            <div>
              <p className="font-medium">{article.author.name}</p>
              <p className="text-sm text-gray-600">
                Published on {formatDate(article.publishedAt)}
              </p>
            </div>
            <span className="mx-3 text-gray-300">|</span>
            <span className="bg-gray-100 rounded-full px-3 py-1 text-sm text-gray-700">
              {article.category.name}
            </span>
          </div>
        </div>

        <div className="relative w-full h-96 mb-8 rounded-lg overflow-hidden">
          <StrapiImage
            src={
              article.cover.url ||
              "/placeholder.svg?height=600&width=1200&query=article cover"
            }
            alt={article.cover.alternativeText || article.title}
            fill
            className="object-cover"
            priority
          />
        </div>

        <div className="prose prose-lg max-w-none">
          {article.blocks.map((block: any, index: number) => (
            <BlockRenderer key={index} block={block} />
          ))}
        </div>
      </article>
    </main>
  );
}
We need to update the getArticleBySlug function to accept the status parameter.
Let's make the changes to the getArticleBySlug function in the client/lib/strapi-client.ts file:
export async function getArticleBySlug(slug: string, status: string) {
  console.log(slug, "slug");
  const article = await client.collection("articles").find({
    filters: {
      slug: { $eq: slug },
    },
    status: status as "draft" | "published" | undefined,
  });
  return article;
}
Finally, let's update the env variables in the .env in our next.js project with the following values.
STRAPI_BASE_URL=http://localhost:1337
PREVIEW_SECRET=your-secret-key
Note: The PREVIEW_SECRET should be the same as the one in our Strapi project.
Now that everything is setup, we can start the Strapi server and the Next.js server by running the following command in the root of the project.
npm run devNow, back in our Strapi Admin, let's navigate to one of our articles and click the Preview button.
Nice, we are now able to preview our content in the Next.js frontend.
Summary
Strapi 5’s preview feature lets content editors view draft content directly on the frontend before it’s published—perfect for editorial review workflows.
In this guide, we used a starter project to walk through:
- Setting up Strapi with preview enabled using `config/admin.ts
- Creating a secure preview route in Next.js with
app/api/preview/route.ts - Toggling draft mode and redirecting to the correct content path
- Updating the article page to support previewing draft vs published content
- Passing the correct status (draft or published) to the
getArticleBySlugfunction
Conclusion
With just a few configuration changes, you can unlock a powerful preview experience for your content team using Strapi and Next.js.
This workflow allows editors to catch mistakes, improve layout, and confidently review changes before going live—all with the click of a Preview button.
For more advanced customizations, see the following talks from StrapiConf by Rémi de Juvigny.
Happy coding!
Paul
P.S: Come and hang out with me at Strapi's Discord
We have open office hours every week Monday through Friday at 12:30pm CST.
Come and hang out with us, ask questions, or just say hi!