
Introduction
Web development keeps changing, and it's all about building fast, reliable websites and apps. That's why many developers use tools like Strapi, a headless CMS, and Next.js.
But there's a way to make these tools work even better together: by using Strapi types and TypeScript.
In this post, we will cover how to set Strapi types in your front end so you, too, can have these awesome benefits.
Let's get started.
Setting Up Initial Project
Instead of starting from scratch, I have this simple starter project that we will use.
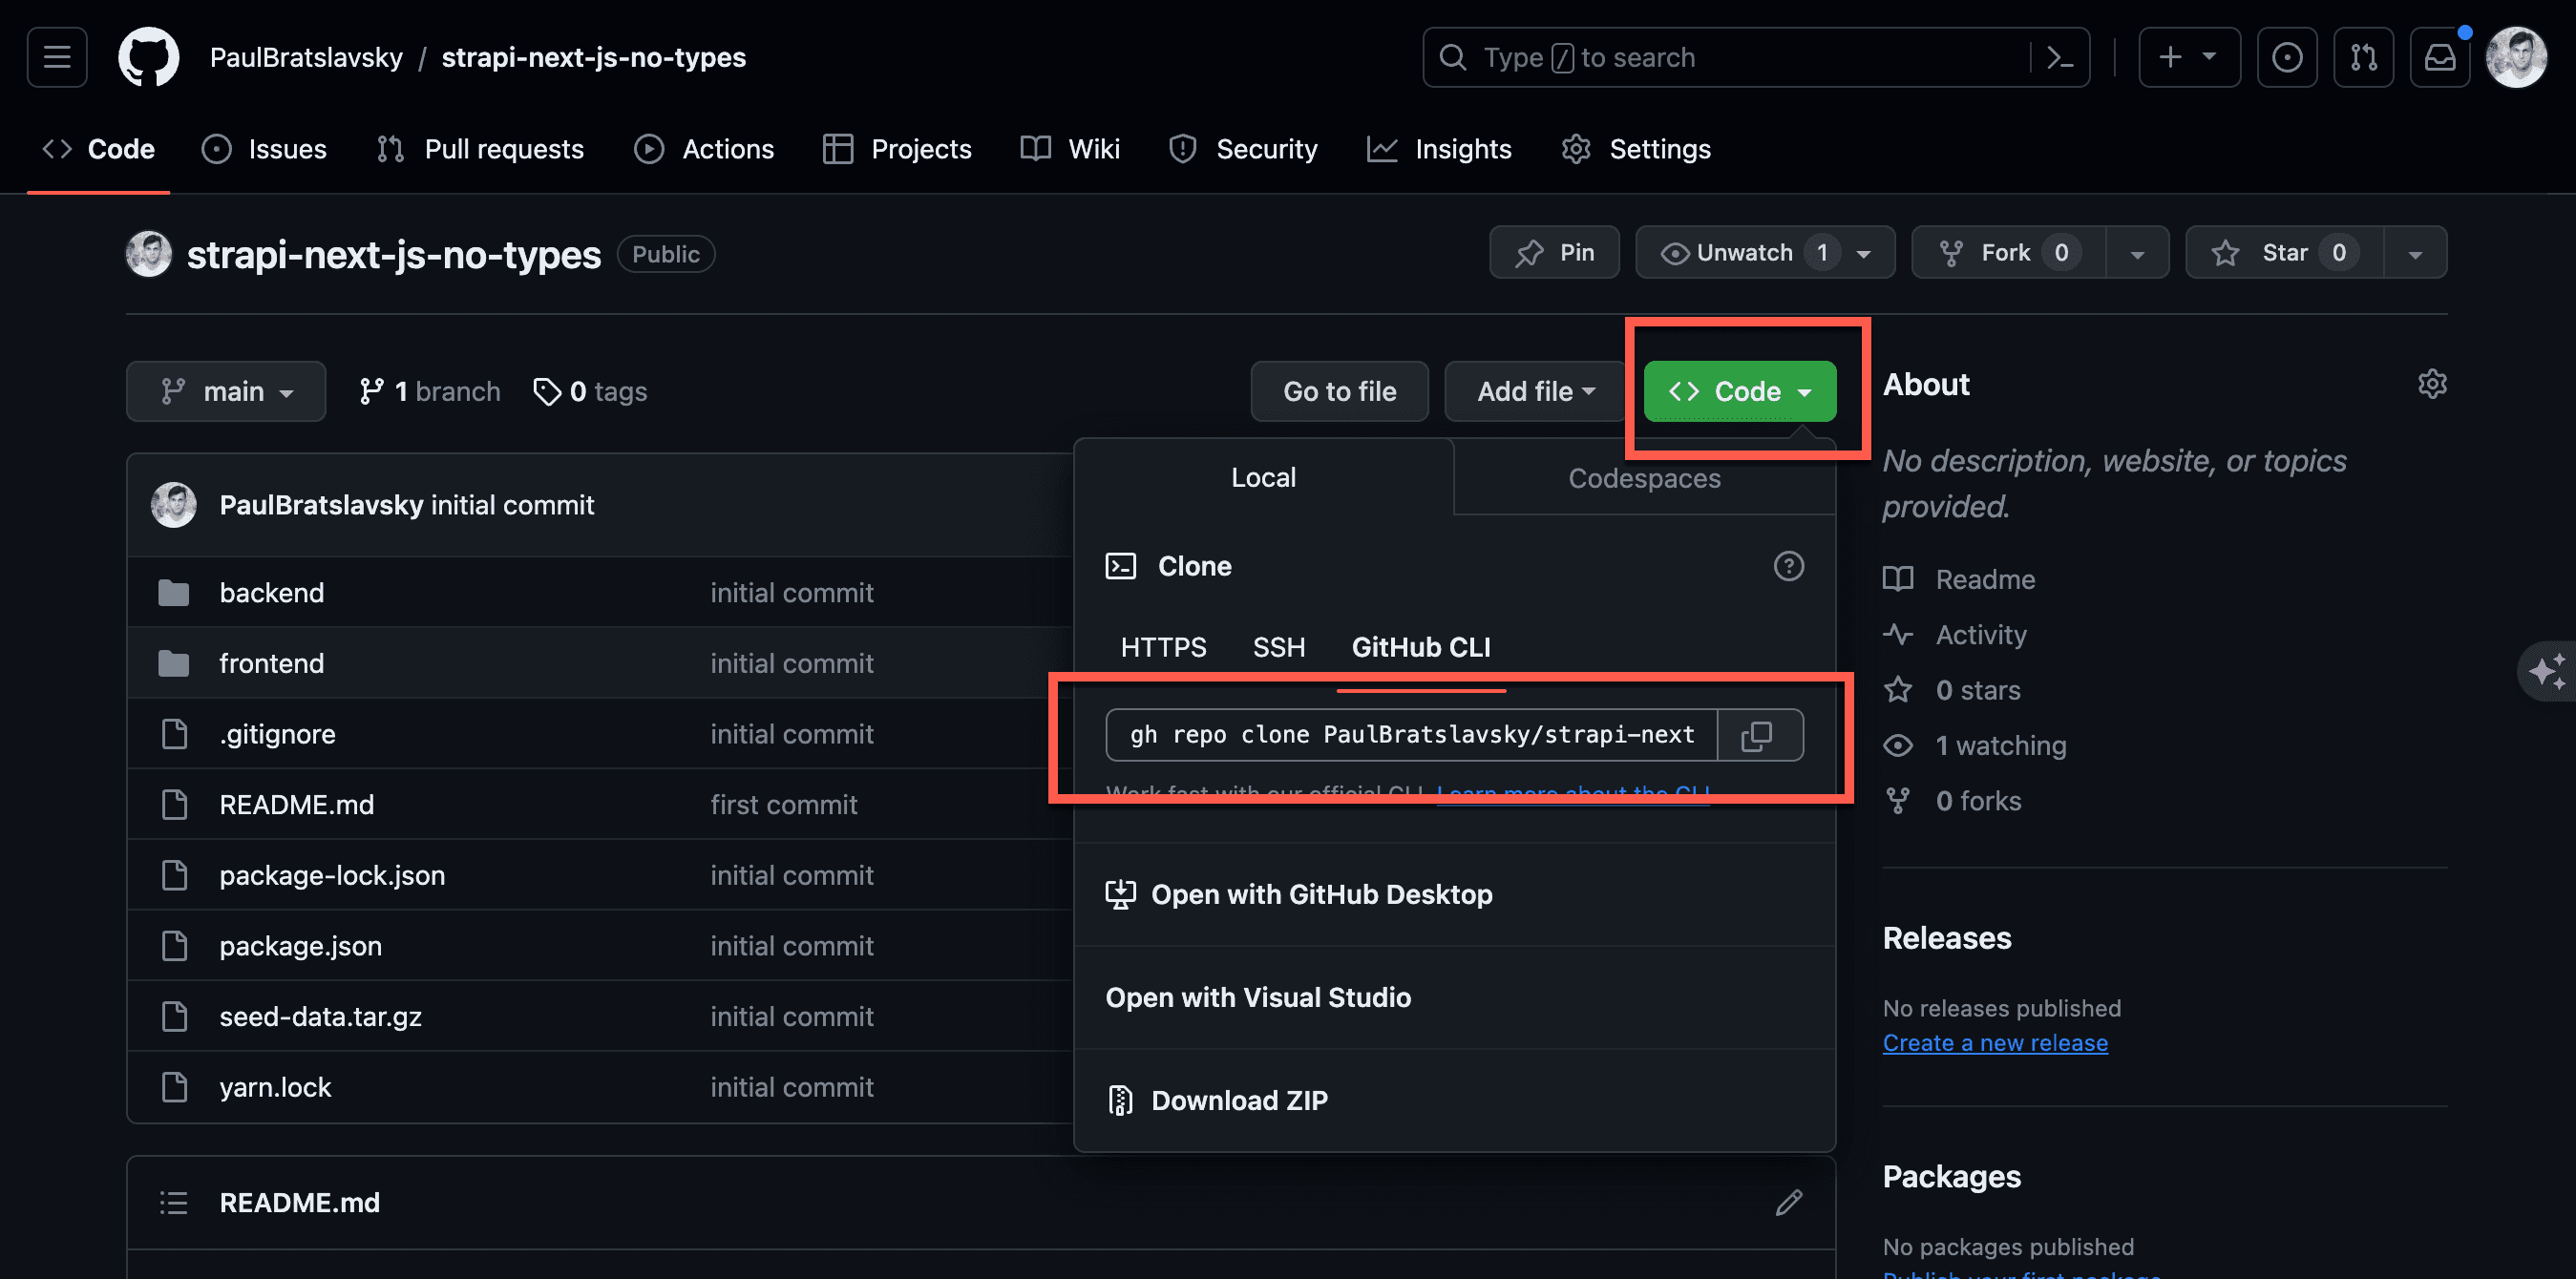
Go to the above repo and clone the project to your local computer. I will be using GitHub CLI since it is the easiest way.
In my terminal, I will run the following command.
gh repo clone PaulBratslavsky/strapi-next-js-no-typesOnce you clone the project cd into the project directory strapi-next-js-no-types, run the following command to set up Strapi and Next JS.
yarn run setupThis will install all the required dependencies. Once it is done, we will seed our test data.
Seeding Initial Data
Before seeding the data, let's ensure you create a .env file inside your backend directory and paste the contents of the .env.example file.
  HOST=0.0.0.0
  PORT=1337
  APP_KEYS=AobODHcxZZcCl1QnSICbag==,ell4w82bPBXiCvJDn5ONHQ==,gWrzk+svSrpeSKrSwJt5Ng==,ifL/R/p7tizn8+6JZV99RA==
  API_TOKEN_SALT=/PxsuKz4iVK8yiQx14lSNQ==
  ADMIN_JWT_SECRET=9E3FdhrPvtS2fUtAV1sd9w==
  TRANSFER_TOKEN_SALT=022gQbf/VKd6PyTWFp5oaw==
  # Database
  DATABASE_CLIENT=sqlite
  DATABASE_FILENAME=.tmp/data.db
  JWT_SECRET=J003pNoJHC0d4+EN6VPXwQ==
You can now run the following command to seed our test data.
yarn run seedYou will be prompted with the following message. Just click y followed by the enter key to proceed.
? The import will delete your existing data! Are you sure you want to proceed?
(y/N)
After the process is complete, you should see the following.
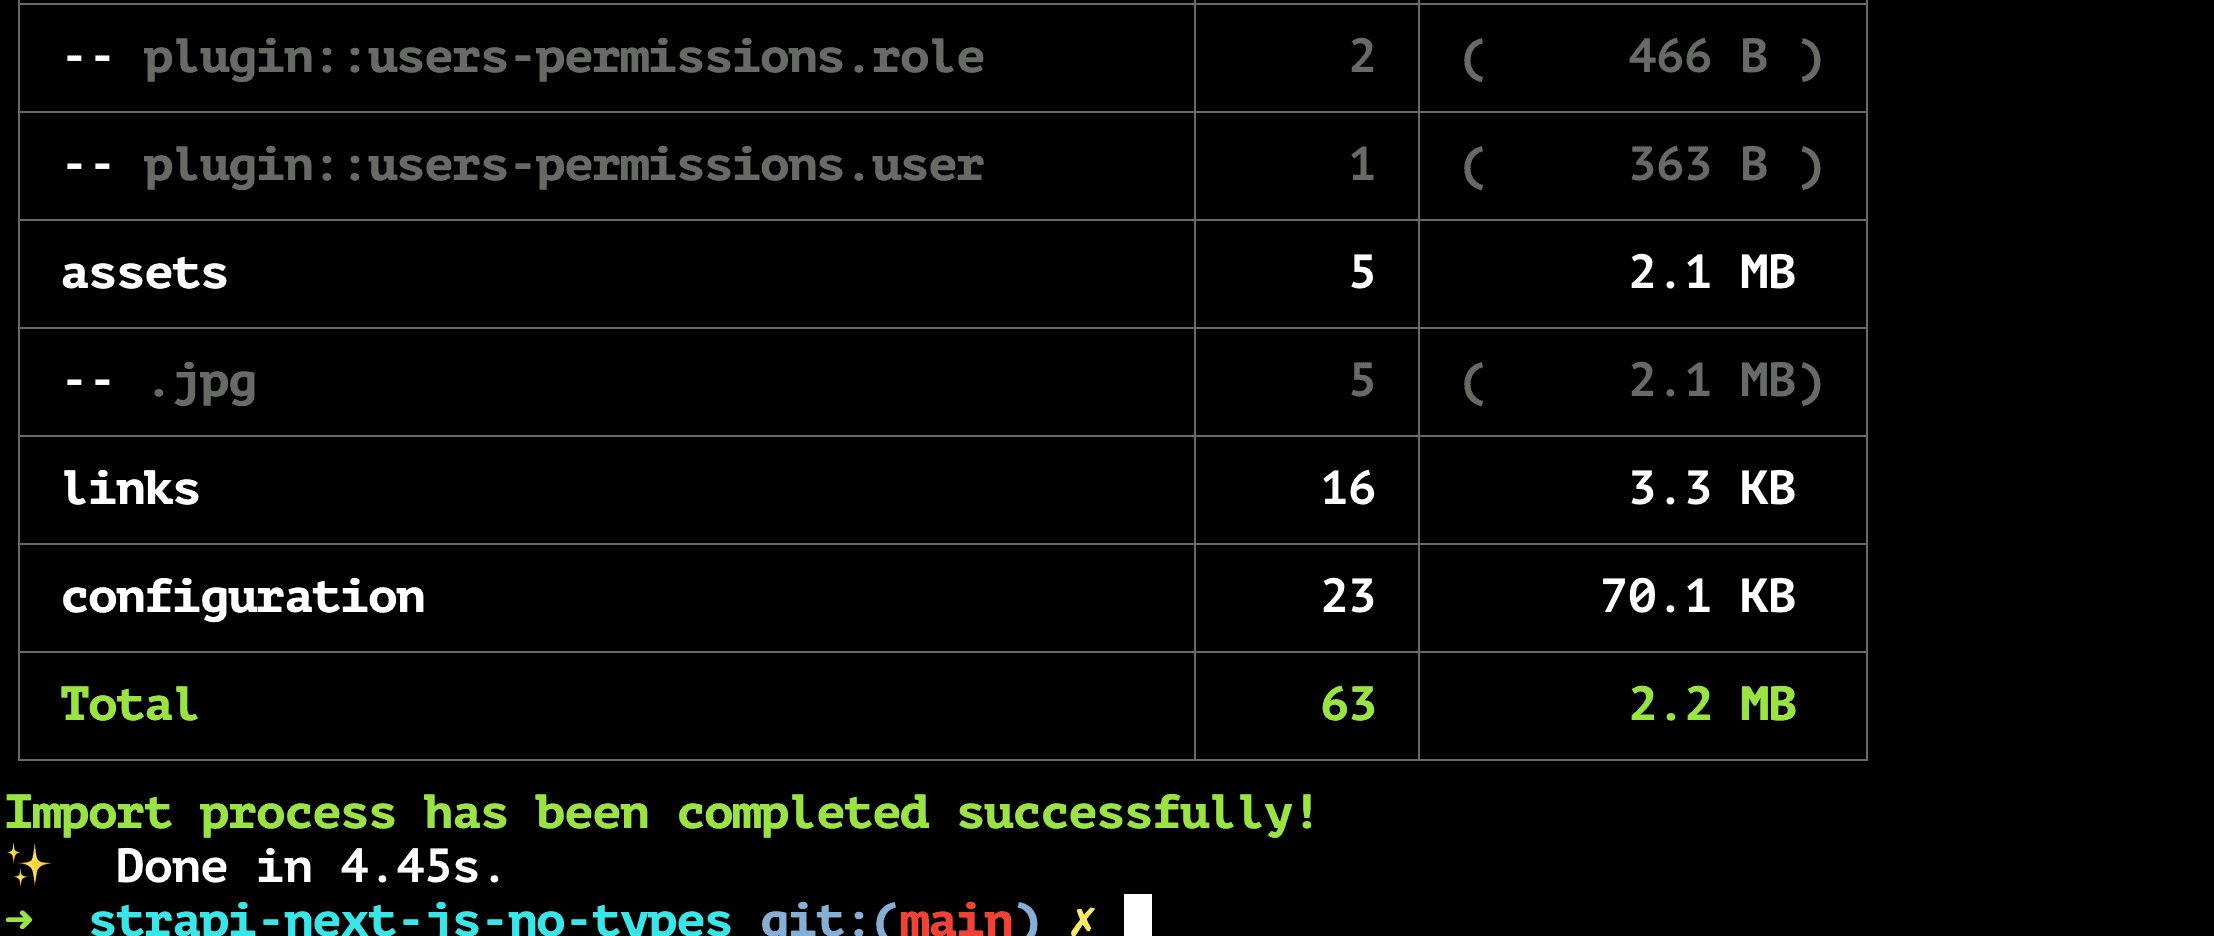
Now that we have our basic data, we can start our application with the following command from the root of your project.
yarn run dev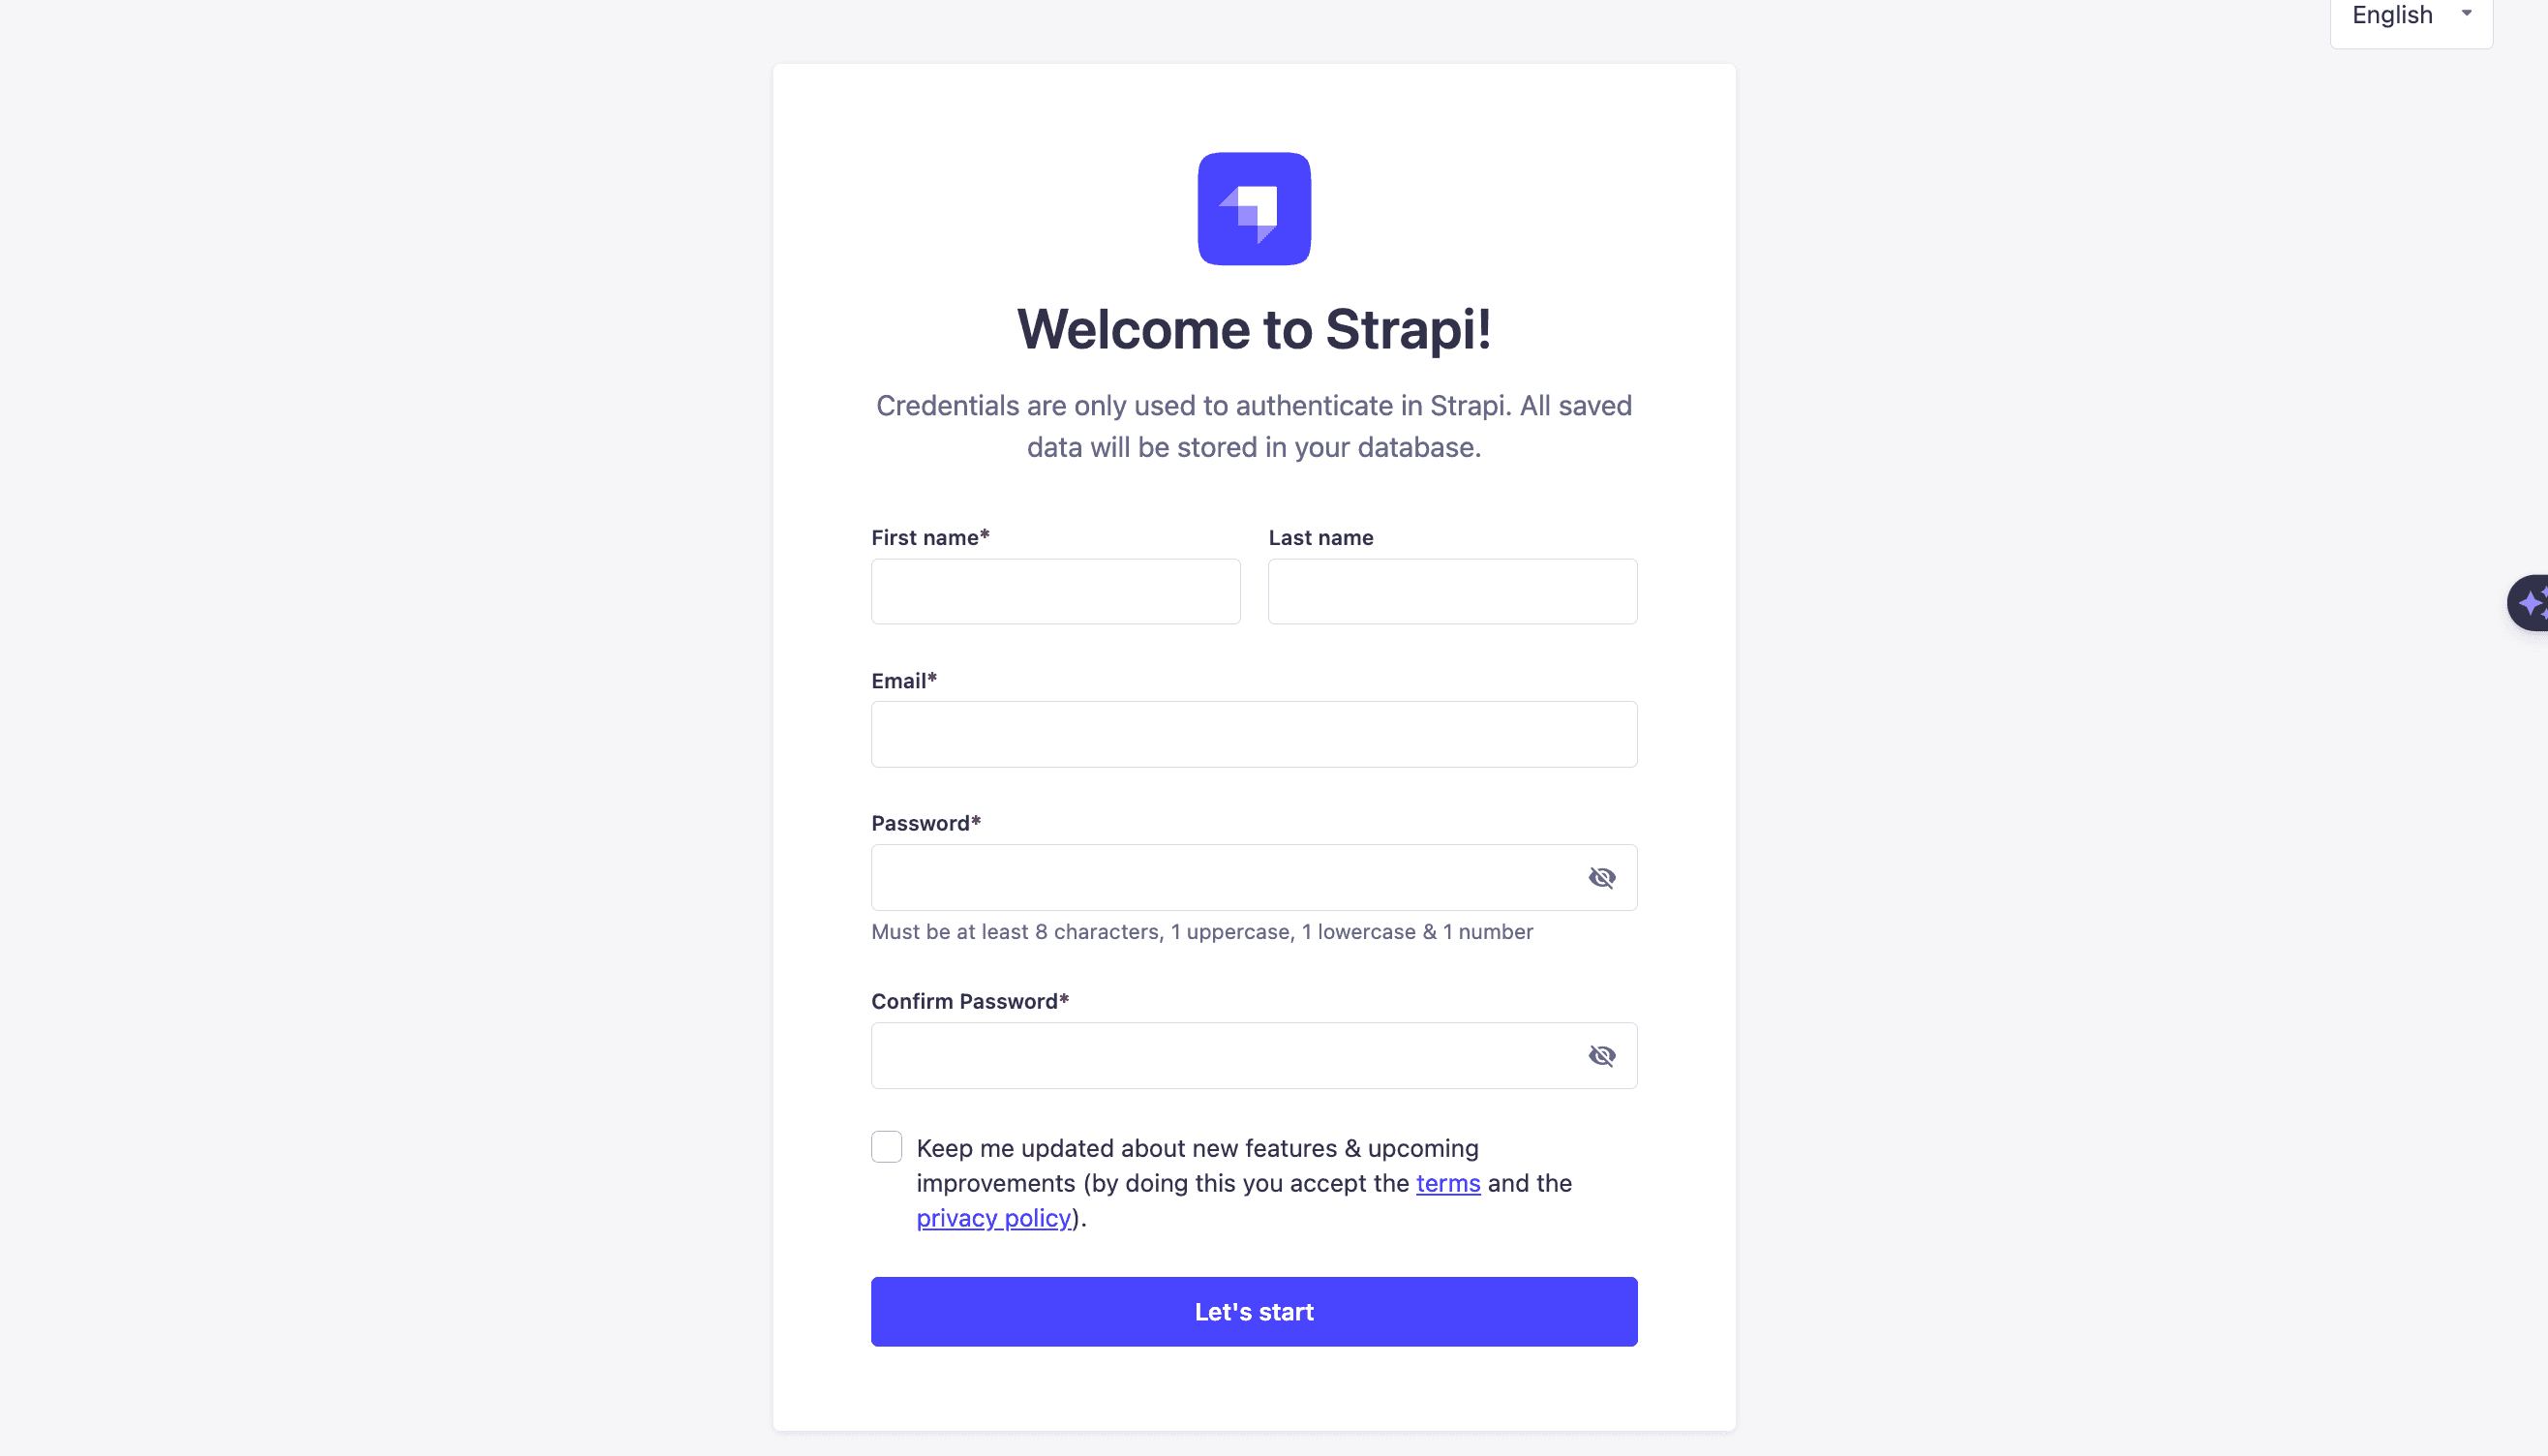
You will be prompted to create your first Admin User. After creating the user and clicking Let's Start, you will be greeted by Strapi's Admin Panel.

You should find our test data and permissions to allow public api access set.
Let's Add Strapi Types
Let's take a look at at this basic code example. Currently we do not know what types data returns from our API..
export default async function Home() {
  const data = await getData();

  return (
    <main className="flex min-h-screen flex-col items-center justify-between p-24">
      <div className="mb-32 grid text-center lg:max-w-5xl lg:w-full lg:mb-0 lg:grid-cols-4 lg:text-left">
        {data.data.map((post: any, index: string) => {
          return <Card key={index} data={post} />;
        })}
      </div>
    </main>
  );
}
Let's add our Strapi types and fix this in the next section.
Adding Strapi Types To Our Next JS Project
Prerequisites
To make this process easier, we will need these two things.
Strapi Content API for dynamic content API response types
Script to make copying our Strapi types to our project front end easy.
We will walk through the setup first, then we will go over the workflow.
Let's start by getting our types from Strapi.
All our generated Strapi types are in our backend/types/generated folder in the file called contentTypes.d.ts.
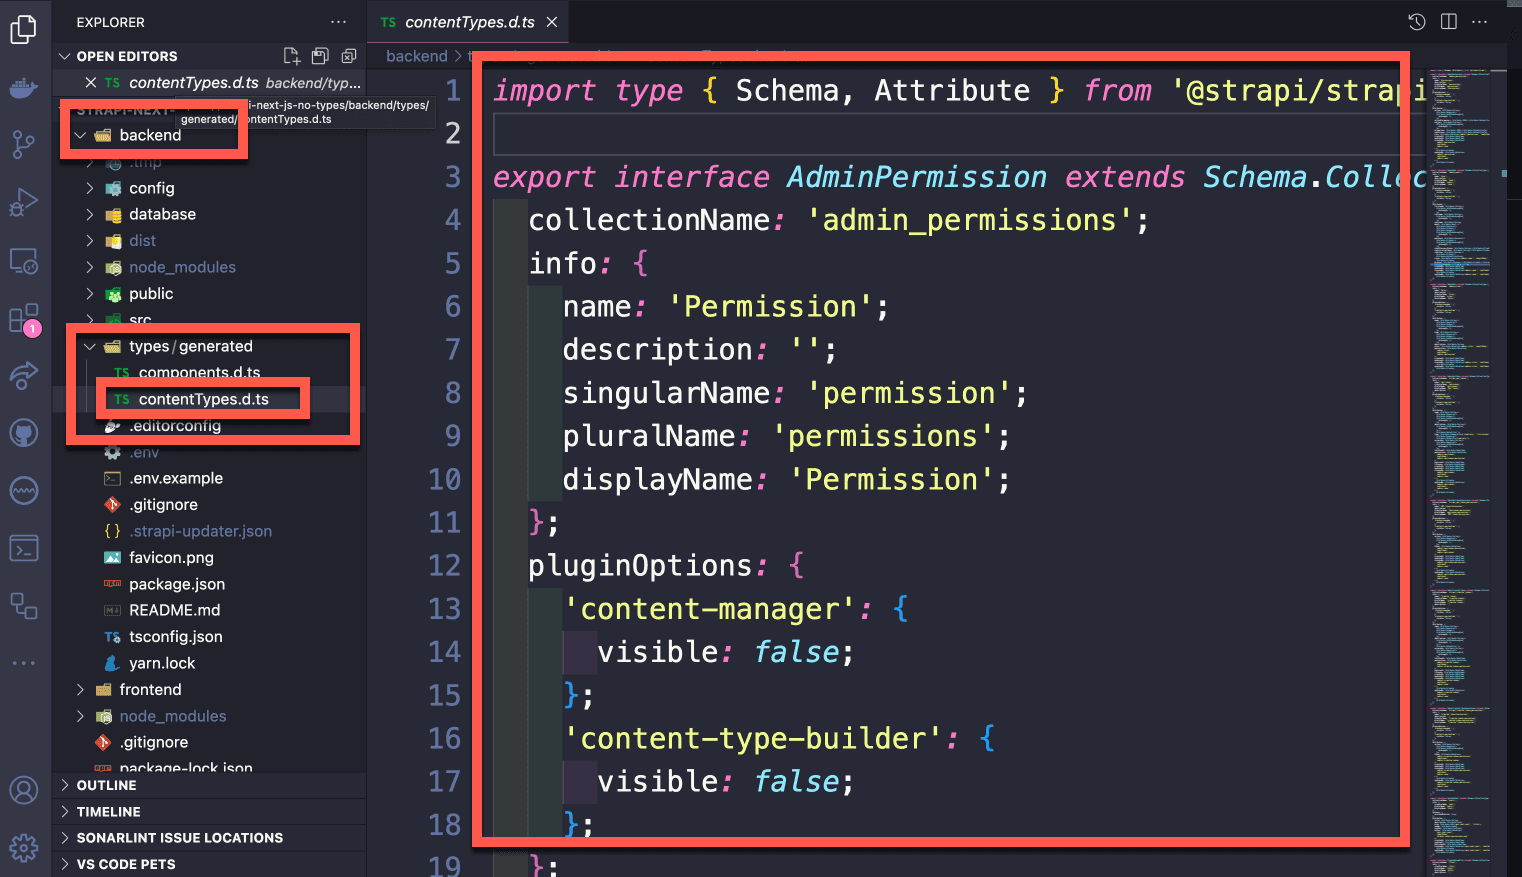
We must have a copy of these types in our front-end project. To help us accomplish this, we will use the script provided above.
But first, run the following command to install @strapi/types to your project.
yarn add --dev @strapi/strapiMake sure you run the command from the frontend folder.
Inside the root of your project, create a file named copyTypes.js and paste the following code.
const fs = require("fs");
const path = require("path");

const destinationFolder = "frontend/src/types";

const files = [
  {
    src: path.join(__dirname, "./backend/types/generated/contentTypes.d.ts"),
    dest: path.join(__dirname, `./${destinationFolder}/contentTypes.d.ts`),
  },
  {
    src: path.join(__dirname, "./backend/types/generated/components.d.ts"),
    dest: path.join(__dirname, `./${destinationFolder}/components.d.ts`),
  },
];

function copyFile({ src, dest }) {
  const destinationDir = path.dirname(dest);

  // Check if source file exists
  if (!fs.existsSync(src)) {
    console.error(`Source file does not exist: ${src}`);
    process.exit(1);
  }

  // Ensure destination directory exists or create it
  if (!fs.existsSync(destinationDir)) {
    fs.mkdirSync(destinationDir, { recursive: true });
  }

  // Read the source file, modify its content and write to the destination file
  const content = fs.readFileSync(src, "utf8");

  fs.writeFile(dest, content, (err) => {
    if (err) {
      console.error(`Error writing to destination file: ${err}`);
      process.exit(1);
    } else {
      console.log(`File ${src} copied and modified successfully!`);
    }
  });
}

files.forEach((file) => copyFile(file));
Let's update the package.json file in the root with the following inside the scrips object.
"copytypes": "node copyTypes.js"You should now be able to run the following command.
yarn run copytypesGo ahead and do so.
You should see the following message.
➜  strapi-next-js-no-types git:(strapi-typed) ✗ yarn run copytypes
File copied and modified successfully!
✨  Done in 0.22s.
And see a new types folder found in frontend/src/types with a new file called contentTypes.d.ts.
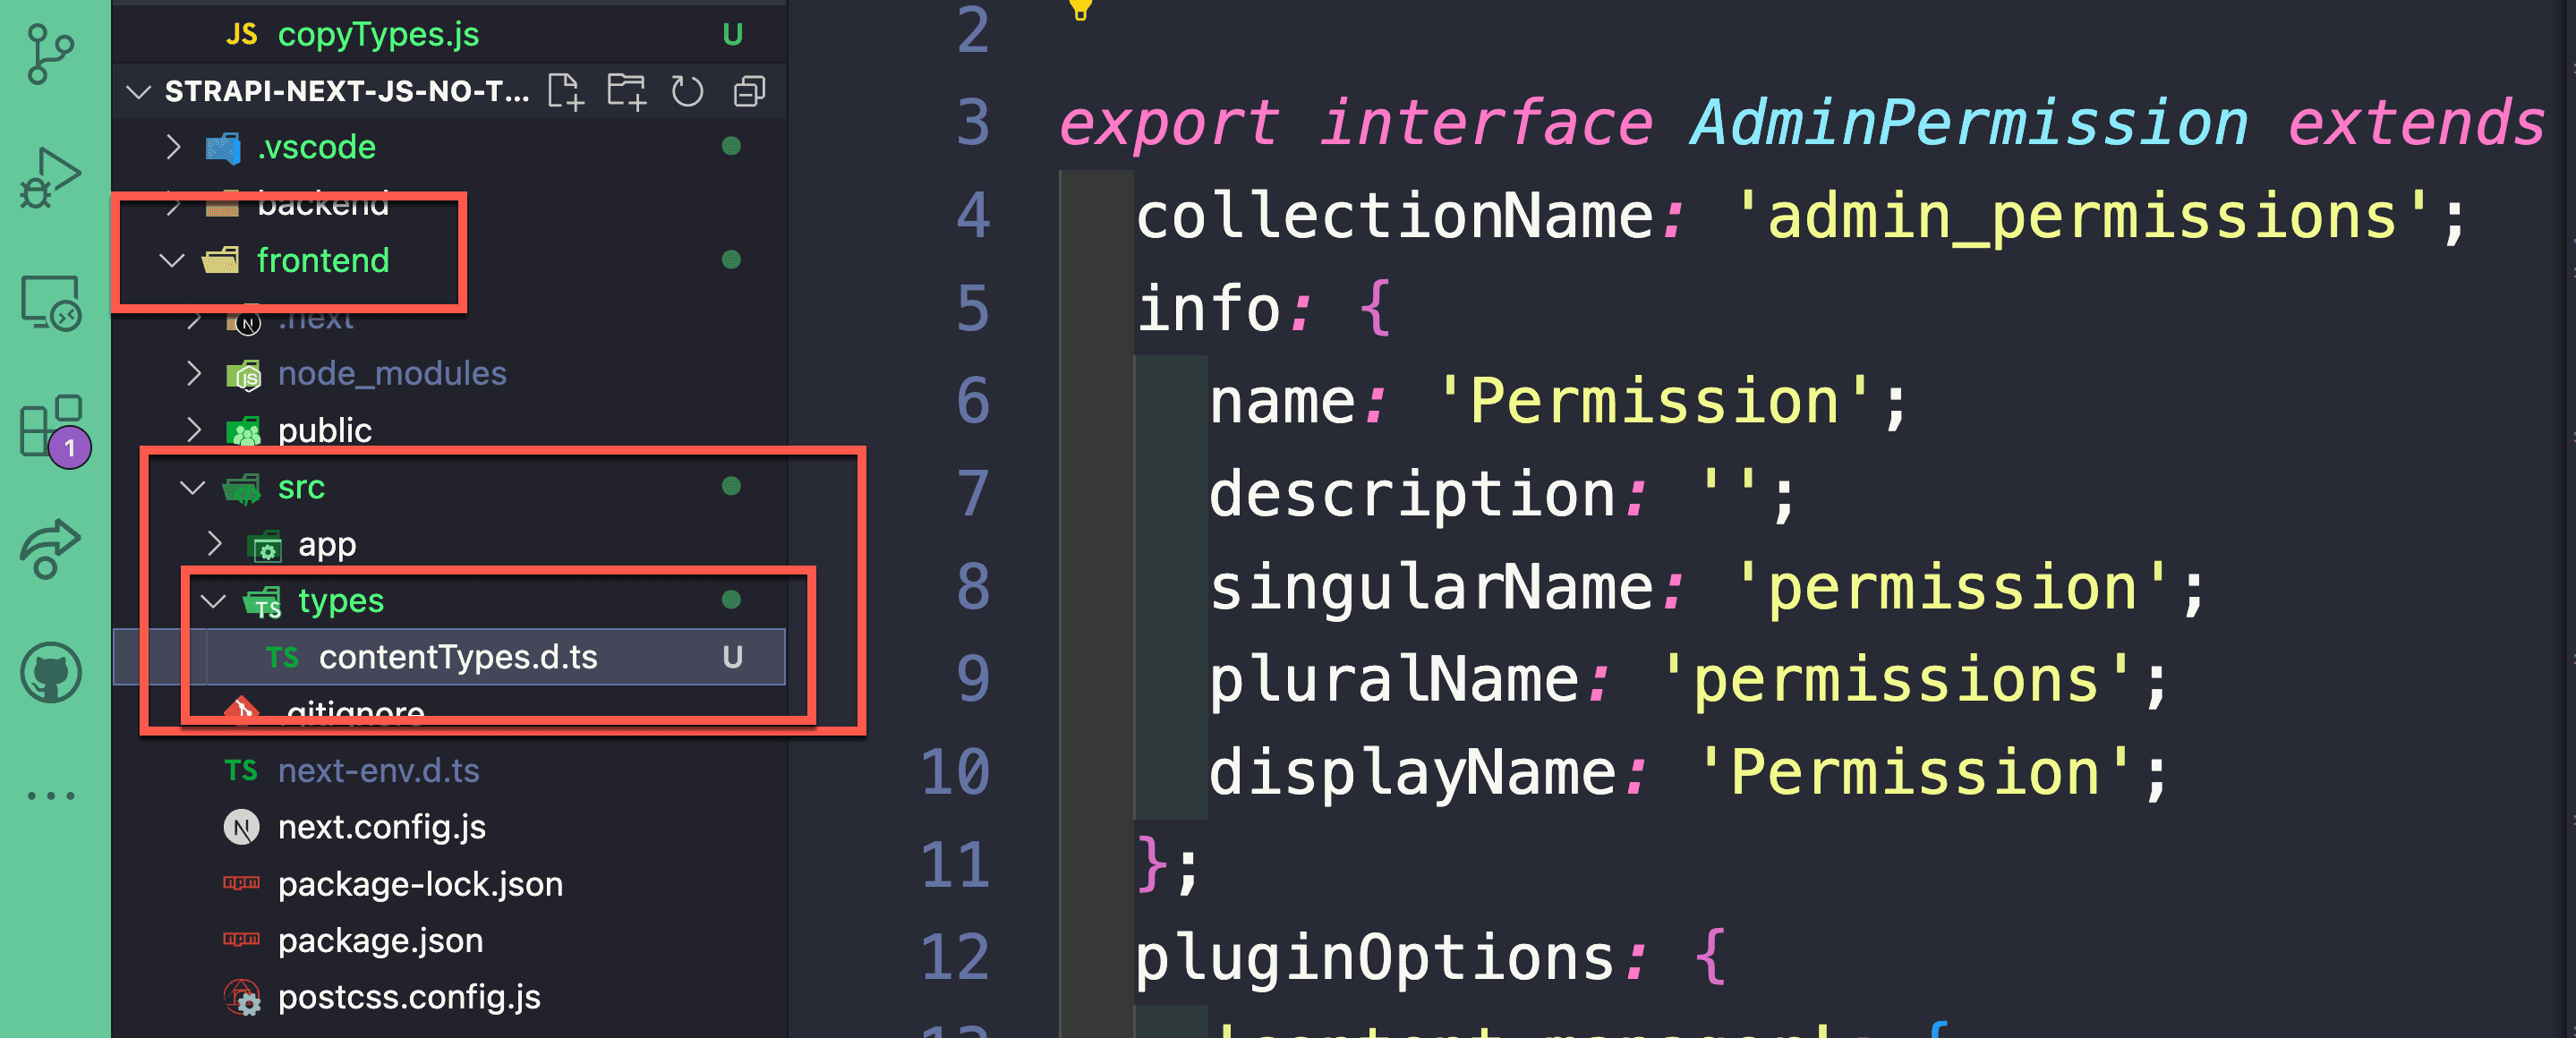
Finally, create a new file inside frontend/src/types folder named types.ts and add the following code.
import type { Attribute, Common, Utils } from "@strapi/strapi";

type IDProperty = { id: number };

type InvalidKeys<TSchemaUID extends Common.UID.Schema> = Utils.Object.KeysBy<
  Attribute.GetAll<TSchemaUID>,
  Attribute.Private | Attribute.Password
>;

export type GetValues<TSchemaUID extends Common.UID.Schema> = {
  [TKey in Attribute.GetOptionalKeys<TSchemaUID>]?: Attribute.Get<
    TSchemaUID,
    TKey
  > extends infer TAttribute extends Attribute.Attribute
    ? GetValue<TAttribute>
    : never;
} & {
  [TKey in Attribute.GetRequiredKeys<TSchemaUID>]-?: Attribute.Get<
    TSchemaUID,
    TKey
  > extends infer TAttribute extends Attribute.Attribute
    ? GetValue<TAttribute>
    : never;
} extends infer TValues
  ? // Remove invalid keys (private, password)
    Omit<TValues, InvalidKeys<TSchemaUID>>
  : never;

type RelationValue<TAttribute extends Attribute.Attribute> =
  TAttribute extends Attribute.Relation<
    infer _TOrigin,
    infer TRelationKind,
    infer TTarget
  >
    ? Utils.Expression.MatchFirst<
        [
          [
            Utils.Expression.Extends<
              TRelationKind,
              Attribute.RelationKind.WithTarget
            >,
            TRelationKind extends `${string}ToMany`
              ? Omit<APIResponseCollection<TTarget>, "meta">
              : APIResponse<TTarget> | null
          ]
        ],
        `TODO: handle other relation kind (${TRelationKind})`
      >
    : never;

type ComponentValue<TAttribute extends Attribute.Attribute> =
  TAttribute extends Attribute.Component<infer TComponentUID, infer TRepeatable>
    ? IDProperty &
        Utils.Expression.If<
          TRepeatable,
          GetValues<TComponentUID>[],
          GetValues<TComponentUID> | null
        >
    : never;

type DynamicZoneValue<TAttribute extends Attribute.Attribute> =
  TAttribute extends Attribute.DynamicZone<infer TComponentUIDs>
    ? Array<
        Utils.Array.Values<TComponentUIDs> extends infer TComponentUID
          ? TComponentUID extends Common.UID.Component
            ? { __component: TComponentUID } & IDProperty &
                GetValues<TComponentUID>
            : never
          : never
      >
    : never;

type MediaValue<TAttribute extends Attribute.Attribute> =
  TAttribute extends Attribute.Media<infer _TKind, infer TMultiple>
    ? Utils.Expression.If<
        TMultiple,
        APIResponseCollection<"plugin::upload.file">,
        APIResponse<"plugin::upload.file"> | null
      >
    : never;

export type GetValue<TAttribute extends Attribute.Attribute> =
  Utils.Expression.If<
    Utils.Expression.IsNotNever<TAttribute>,
    Utils.Expression.MatchFirst<
      [
        // Relation
        [
          Utils.Expression.Extends<TAttribute, Attribute.OfType<"relation">>,
          RelationValue<TAttribute>
        ],
        // DynamicZone
        [
          Utils.Expression.Extends<TAttribute, Attribute.OfType<"dynamiczone">>,
          DynamicZoneValue<TAttribute>
        ],
        // Component
        [
          Utils.Expression.Extends<TAttribute, Attribute.OfType<"component">>,
          ComponentValue<TAttribute>
        ],
        // Media
        [
          Utils.Expression.Extends<TAttribute, Attribute.OfType<"media">>,
          MediaValue<TAttribute>
        ],
        // Fallback
        // If none of the above attribute type, fallback to the original Attribute.GetValue (while making sure it's an attribute)
        [Utils.Expression.True, Attribute.GetValue<TAttribute, unknown>]
      ],
      unknown
    >,
    unknown
  >;

export interface APIResponseData<TContentTypeUID extends Common.UID.ContentType>
  extends IDProperty {
  attributes: GetValues<TContentTypeUID>;
}

export interface APIResponseCollectionMetadata {
  pagination: {
    page: number;
    pageSize: number;
    pageCount: number;
    total: number;
  };
}

export interface APIResponse<TContentTypeUID extends Common.UID.ContentType> {
  data: APIResponseData<TContentTypeUID>;
}

export interface APIResponseCollection<
  TContentTypeUID extends Common.UID.ContentType
> {
  data: APIResponseData<TContentTypeUID>[];
  meta: APIResponseCollectionMetadata;
}
This file includes helpful interfaces to help us utilize our Strapi types.
In the next section we will put this to use.
Applying Strapi Types In Our Frontend
Now that our project is set up, let's use our types.
Inside your frontend project, navigate to frontend/srs/app/page.tsx and replace the code with the following update.
// import our types
import type { APIResponseCollection, APIResponseData } from "@/types/strapi";
import qs from "qs";
const query = qs.stringify({ populate: "*" });
async function getData() {
const res = await fetch("http://127.0.0.1:1337/api/posts?" + query);
if (!res.ok) {
// This will activate the closest `error.js` Error Boundary
throw new Error("Failed to fetch data");
}
return res.json();
}
export default async function Home() {
// typescript will infer the type of `data` as `APIResponseCollection<"api::post.post">`
const data = (await getData()) as APIResponseCollection<"api::post.post">;
return (
<main className="flex min-h-screen flex-col items-center justify-between p-24">
<div className="mb-32 grid text-center lg:max-w-5xl lg:w-full lg:mb-0 lg:grid-cols-4 lg:text-left">
{data.data.map((post: APIResponseData<"api::post.post">) => {
return <Card key={post.id} data={post} />;
})}
</div>
</main>
);
}
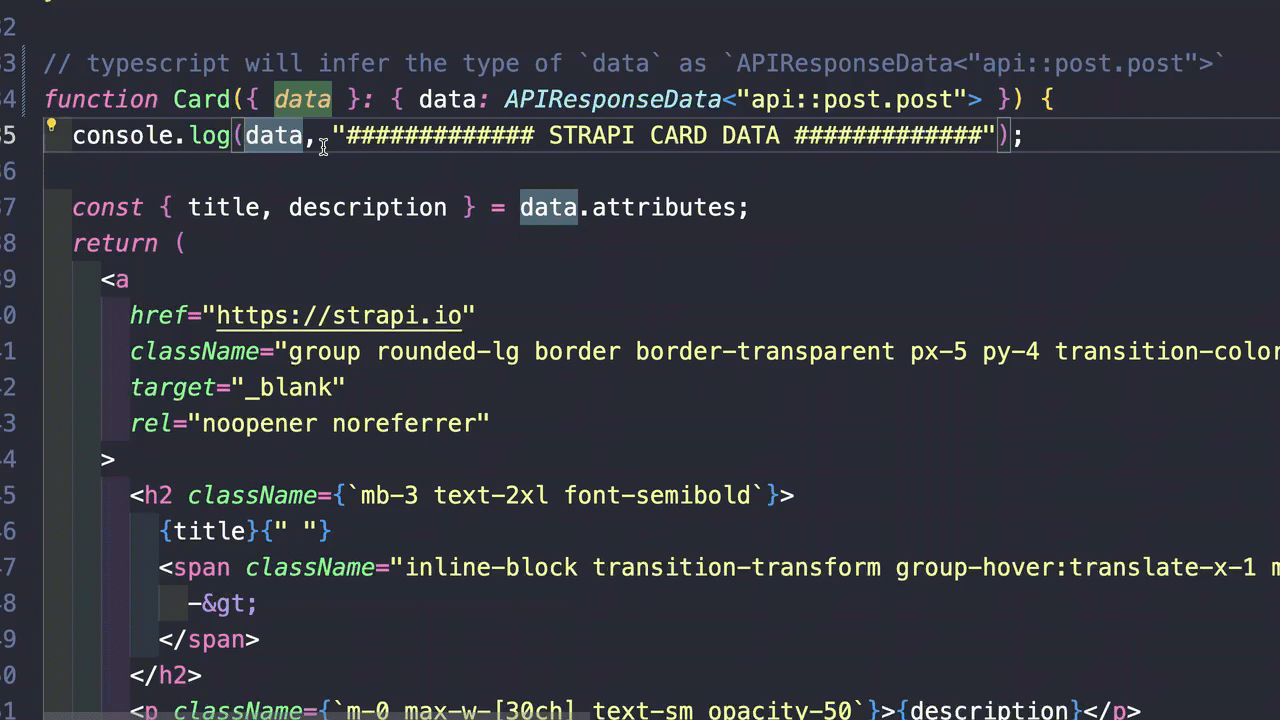
// typescript will infer the type of `data` as `APIResponseData<"api::post.post">`
// Look up types by content id "api::post.post"
function Card({ data }: { data: APIResponseData<"api::post.post"> }) {
console.log(data, "############# STRAPI CARD DATA #############");
const { title, description } = data.attributes;
return (
<a
href="https://strapi.io"
className="group rounded-lg border border-transparent px-5 py-4 transition-colors hover:border-gray-300 hover:bg-gray-100 hover:dark:border-neutral-700 hover:dark:bg-neutral-800/30"
target="_blank"
rel="noopener noreferrer"
>
<h2 className={`mb-3 text-2xl font-semibold`}>
{title}{" "}
<span className="inline-block transition-transform group-hover:translate-x-1 motion-reduce:transform-none">
->
</span>
</h2>
<p className={`m-0 max-w-[30ch] text-sm opacity-50`}>{description}</p>
</a>
);
}Notice in the gif below that we are able to infer our Strapi types.
Workflow
Before finishing up, let's add another field to our post collection and walk through the workflow.
1. Add A New Field
Inside Strapi Content Builder let's add a new field. We will add an Enumeration field named status with the following options.
- DRAFT
- SCHEDULED

2. Run The copytypes Script
Run the following command to update Strapi types in the front end.
yarn run copytypesRestart your application. And you will now see our status field.
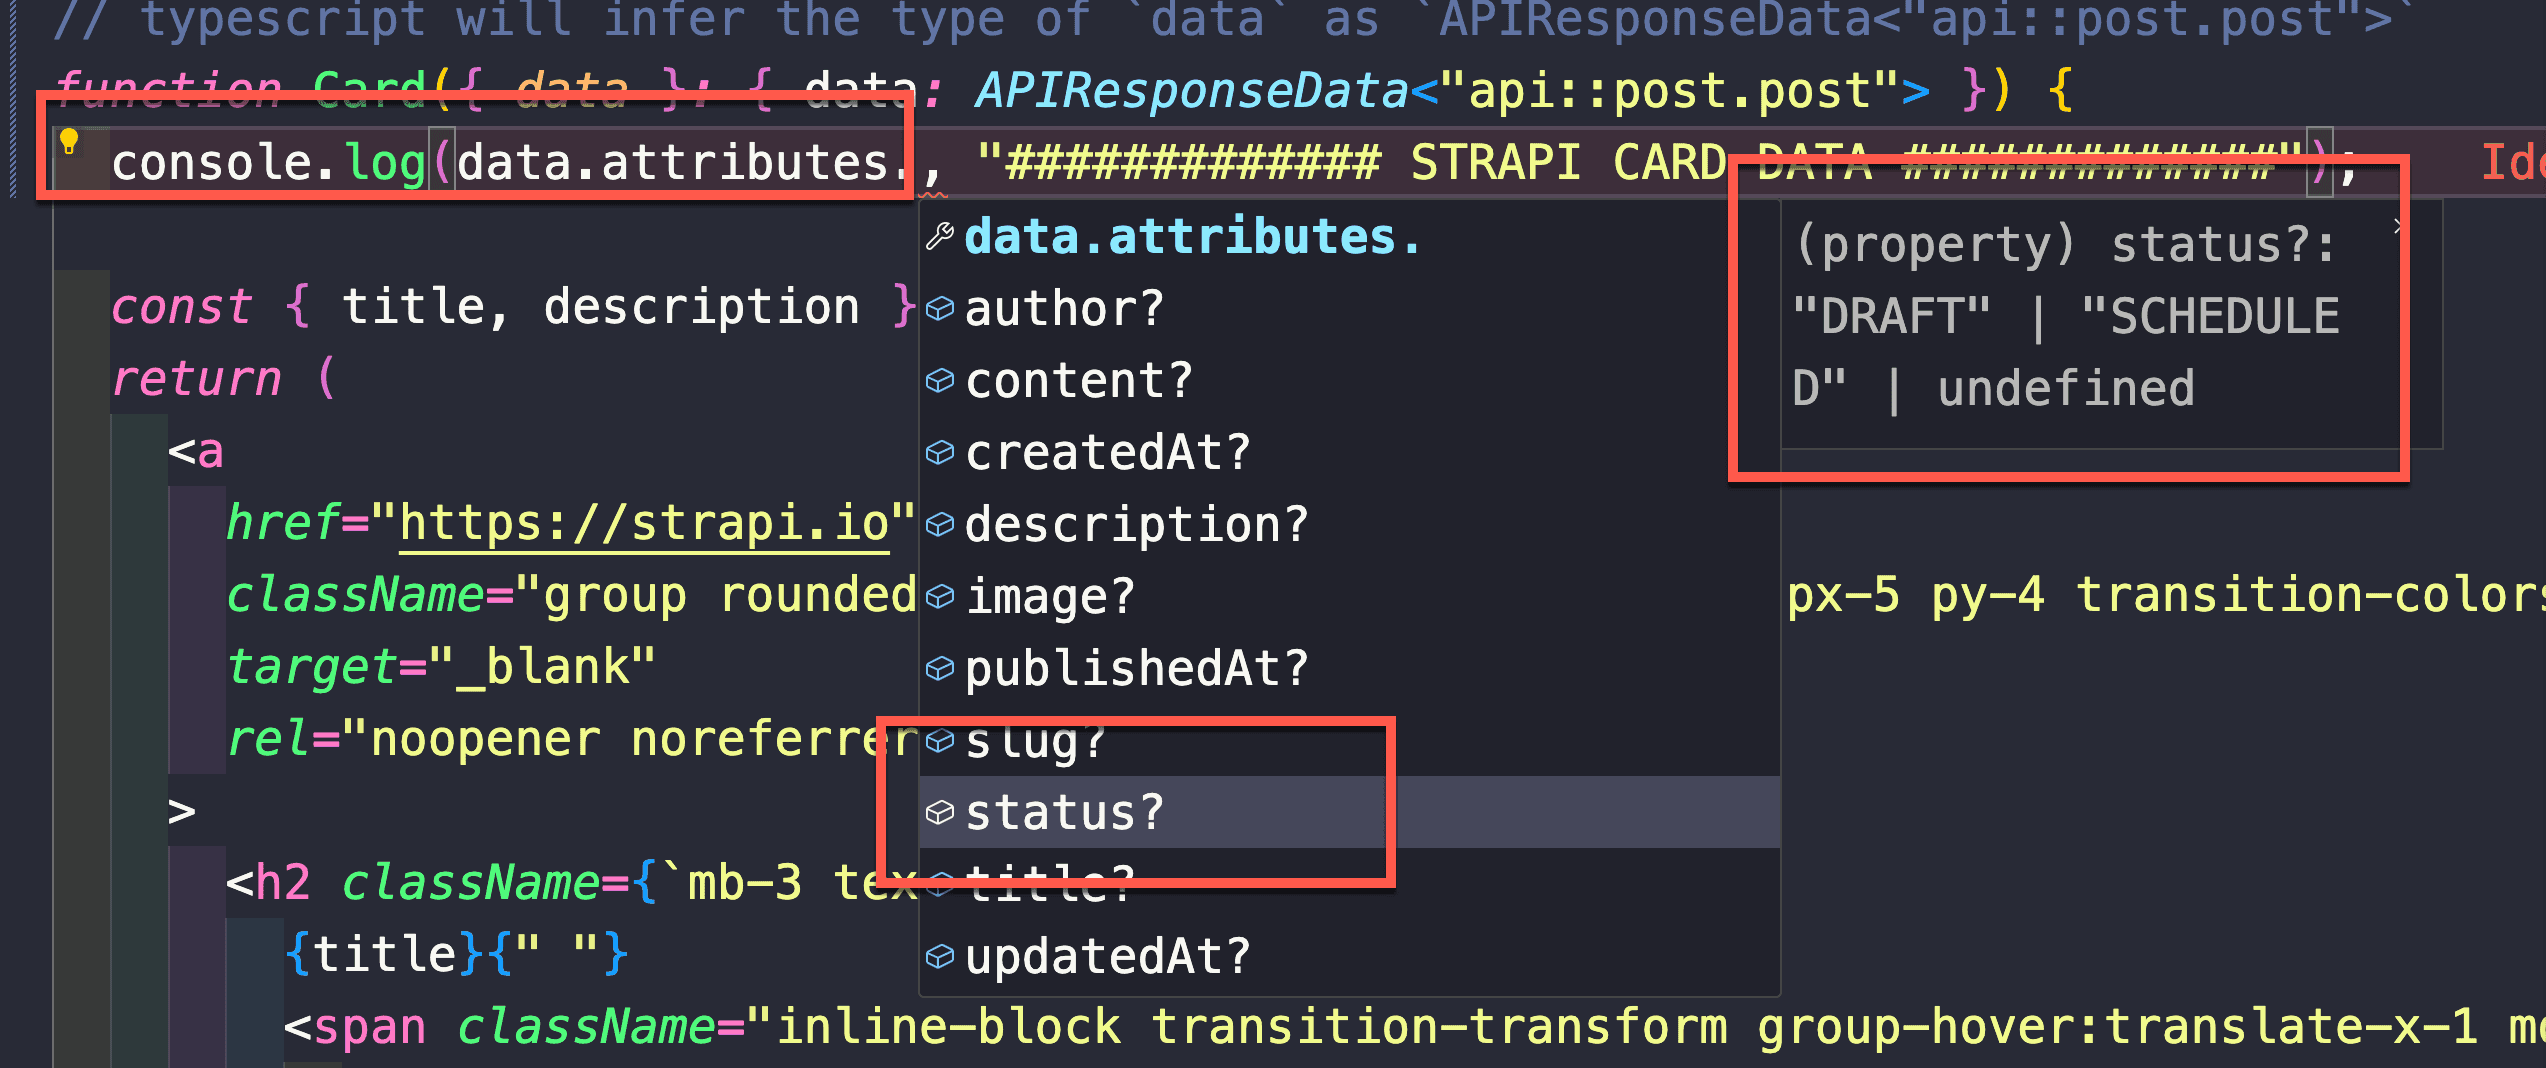
With these changes, TypeScript will now help us ensure we are using the correct data types, making our application more reliable and reducing potential runtime errors.
Conclusion
This tutorial delved into improving the frontend experience by utilizing Strapi types and TypeScript together.
By following the steps outlined, the real magic unveils itself.
When applying these predefined Strapi types within our frontend project.
It leads to clearer, more maintainable code. It helps prevent many common mistakes when developers have to guess the shape or type of data they are working with.
This is just the start, and while we wait for the SDK, I hope you find this approach helpful.
Feel free to share your tips for using TS in the comment below.
GitHub: Starter Code GitHub: Final Code