

Introduction
Caching shouldn't be opinionated, at least not more than it already was. Next.js 15 has decided to take a step back from aggressively caching every API call in the name of performance.
Now, by default, fetch requests are un-cached.
For example, if we make a server-side fetch call to an API endpoint like:
const articles = await fetch("http://localhost:1337/api/articles").then((res) =>
  res.json(),
);
We get fresh data, no stale responses, no unexpected caching surprises, no need to manually opt-out using no-store, force-dynamic, or mess around with cache control headers.
Convenient? Sure. Confusing? Who could say?
But in fairness to the Next.js team, Next.js 15 introduces a new caching paradigm, the dynamicIO API. I personally think this is a solid idea, and as well as an "Incremental step towards a simplified rendering and caching model."
Let’s break down their new caching approach and see what it’s all about.
First Look at the dynamicIO API
Okay, here is the new dynamicIO API. A fresh caching API. Exclusively in the canary version of Next.js.
To run a canary version of Next.js and try out the dynamicIO API in your Next.js 15 project, paste this command into your project directory:
npm i next@canaryThe API comes with a suite of cool features, functions, like cacheLife, cacheTag, and as well as the use cache directive, that are super handy for data caching in server components.
To take advantage of these tools, enable the dynamicIO flag to true in your Next.js config file:
/** @type {import('next').NextConfig} */
const nextConfig = {
  experimental: {
    dynamicIO: true,
  },
};

export default nextConfig;
For practical examples of how dynamicIO caching can optimize performance, we're going to set up a basic, decoupled backend API layer that serves data via a REST API.
Setting up a Strapi 5 Backend API Layer
We'll be using Strapi for our backend API layer. Strapi is a headless, decoupled, API-driven content management system that lets you manage and serve content directly from an admin panel—in just a few minutes.
Install Strapi 5
To quickly get started with Strapi, install it in the same directory as your Next.js project by running:
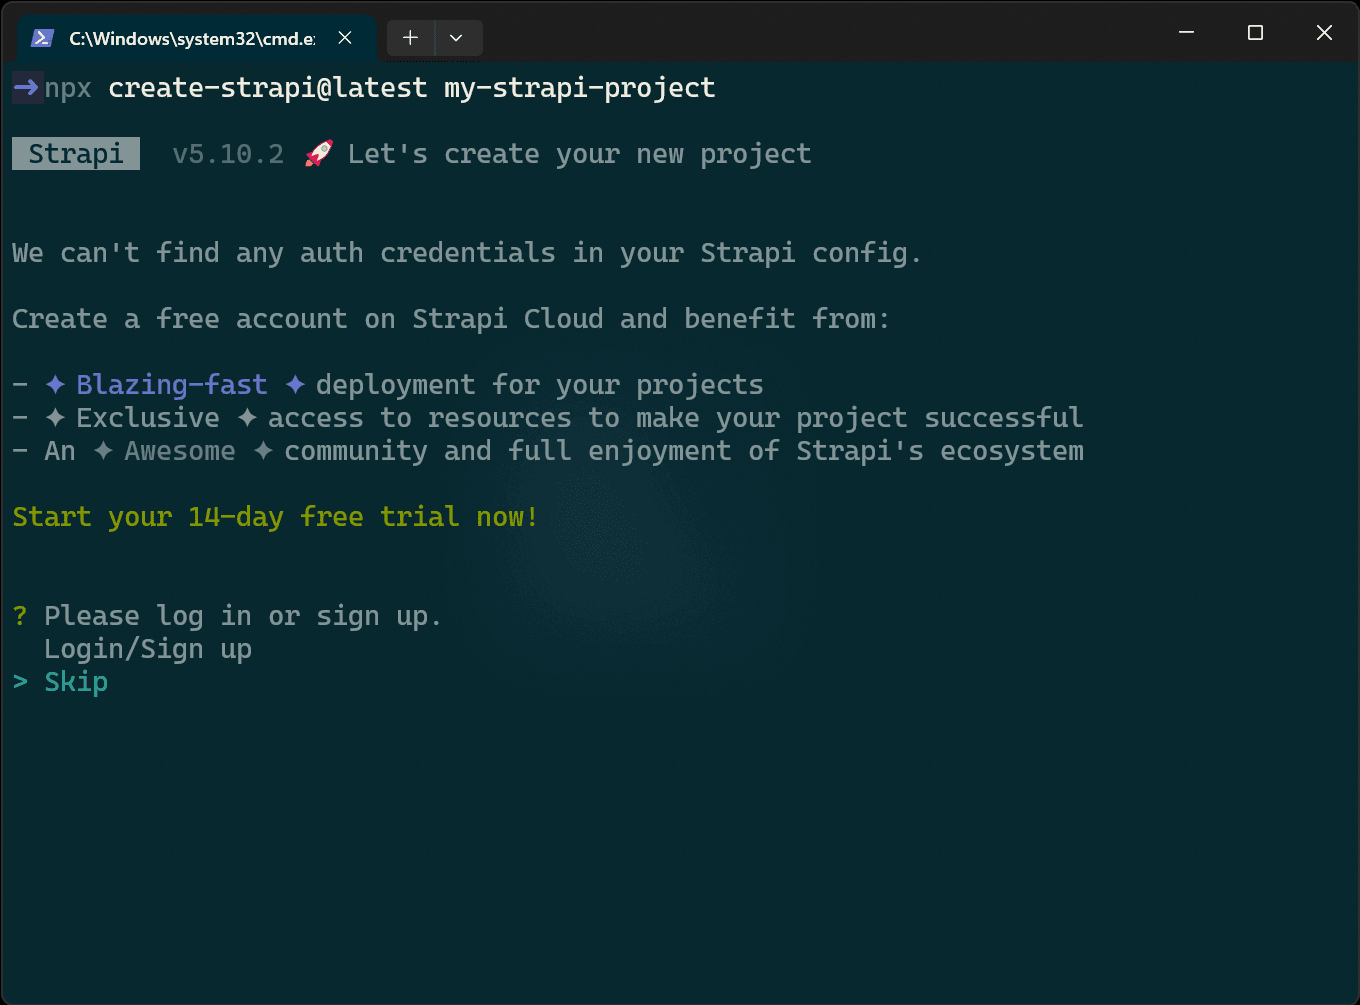
npx create-strapi@latest my-strapi-projectDuring installation, you'll be prompted to confirm a project name. For this demo, use my-strapi-project. This command will create a new instance of your Strapi project.
Next, the terminal will ask you to either log in or sign up for Strapi Cloud (which offers a free 14-day trial) or skip this step. Use the arrow keys to navigate and press Enter to select your option. For this demo, simply skip the step.
When you press Enter, the terminal will prompt you with several additional questions. For each prompt, provide the following configuration.
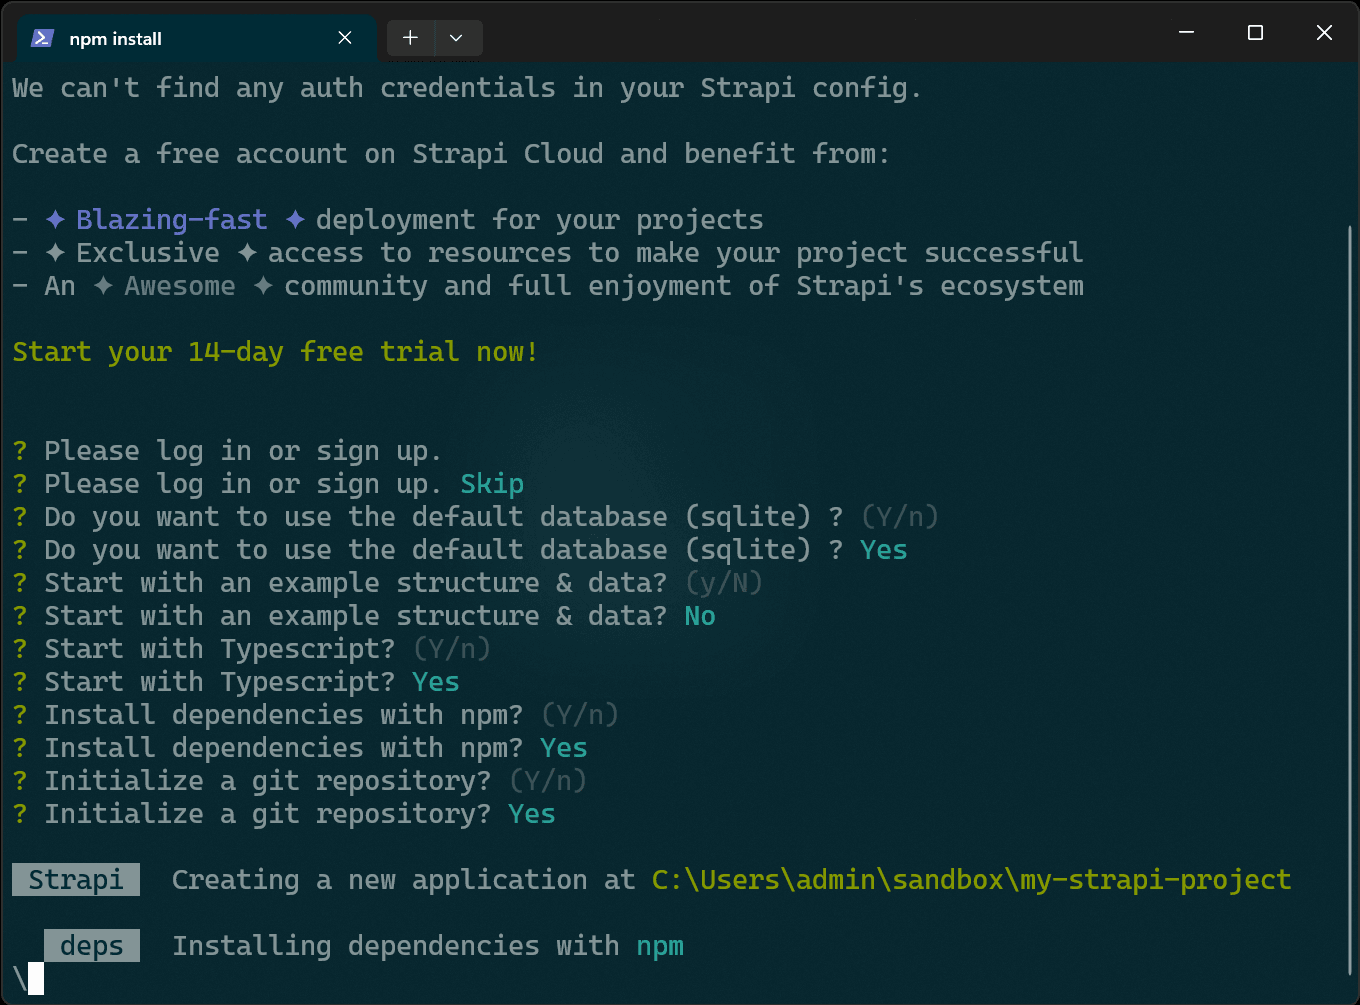
The key settings to watch out for are:
? Start with an example structure & data? (y/N)Make sure to select Yes. This option pre-populates Strapi's database with example data, which is essential for our demo.
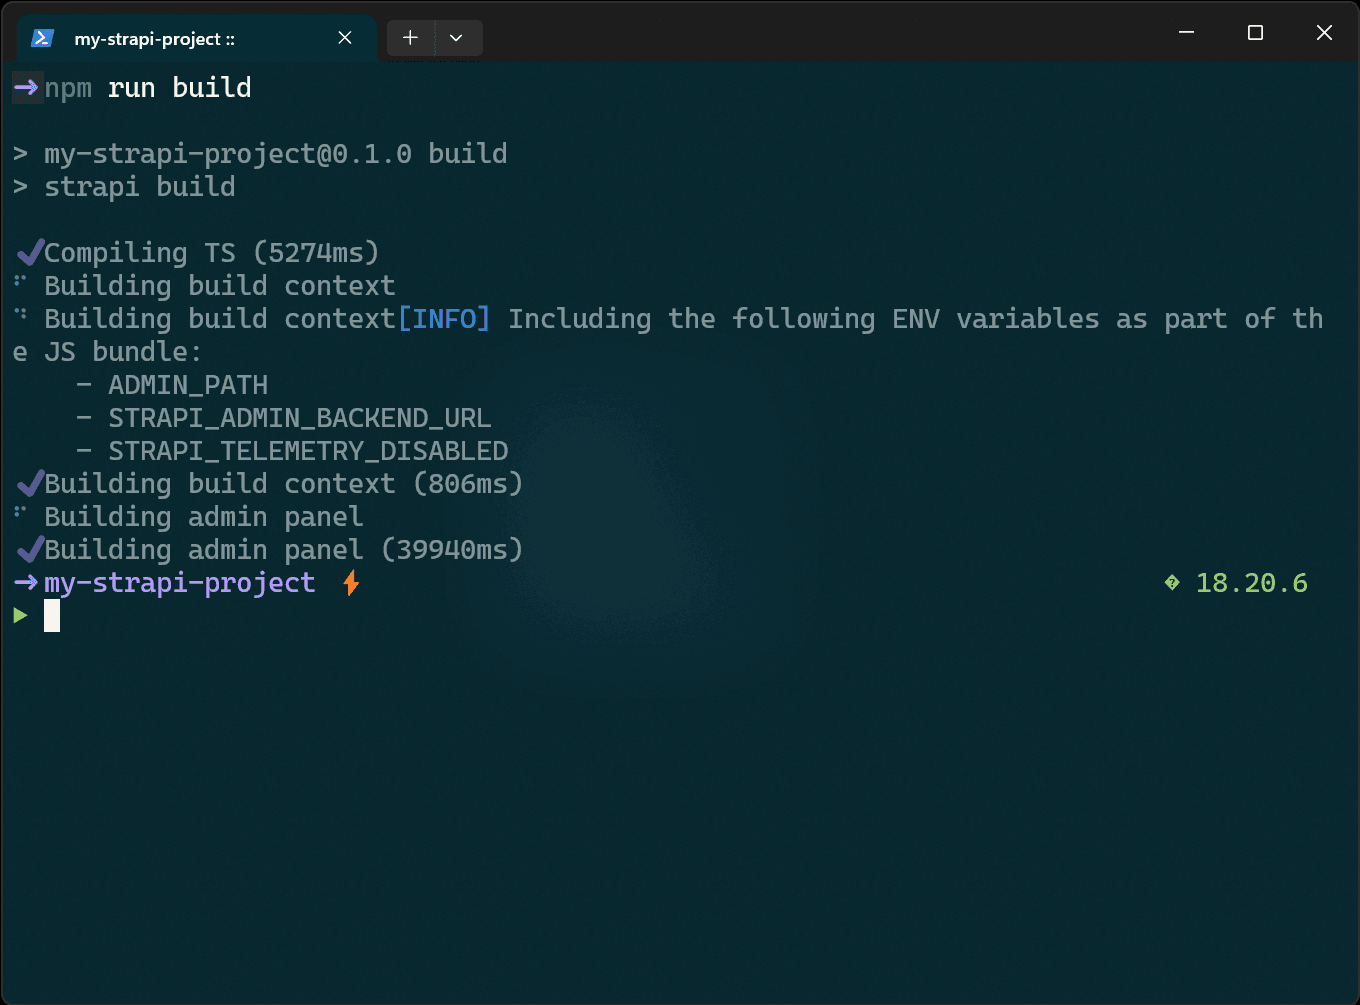
After installation, run the following command to build the Strapi admin panel:
npm run buildOnce the build completes successfully, you'll see a terminal output similar to this, indicating that your Strapi admin has been built.
Start your Strapi Application
While you're still in the my-strapi-project directory (or whatever you named your project), you'll need to start the Strapi server so we can work with the data you'll be serving. Run the following command:
npm run developAfter a few minutes, the server will start up and you'll be redirected to the admin panel at http://localhost:1337/admin. If the browser doesn't automatically redirect, simply type the URL manually.
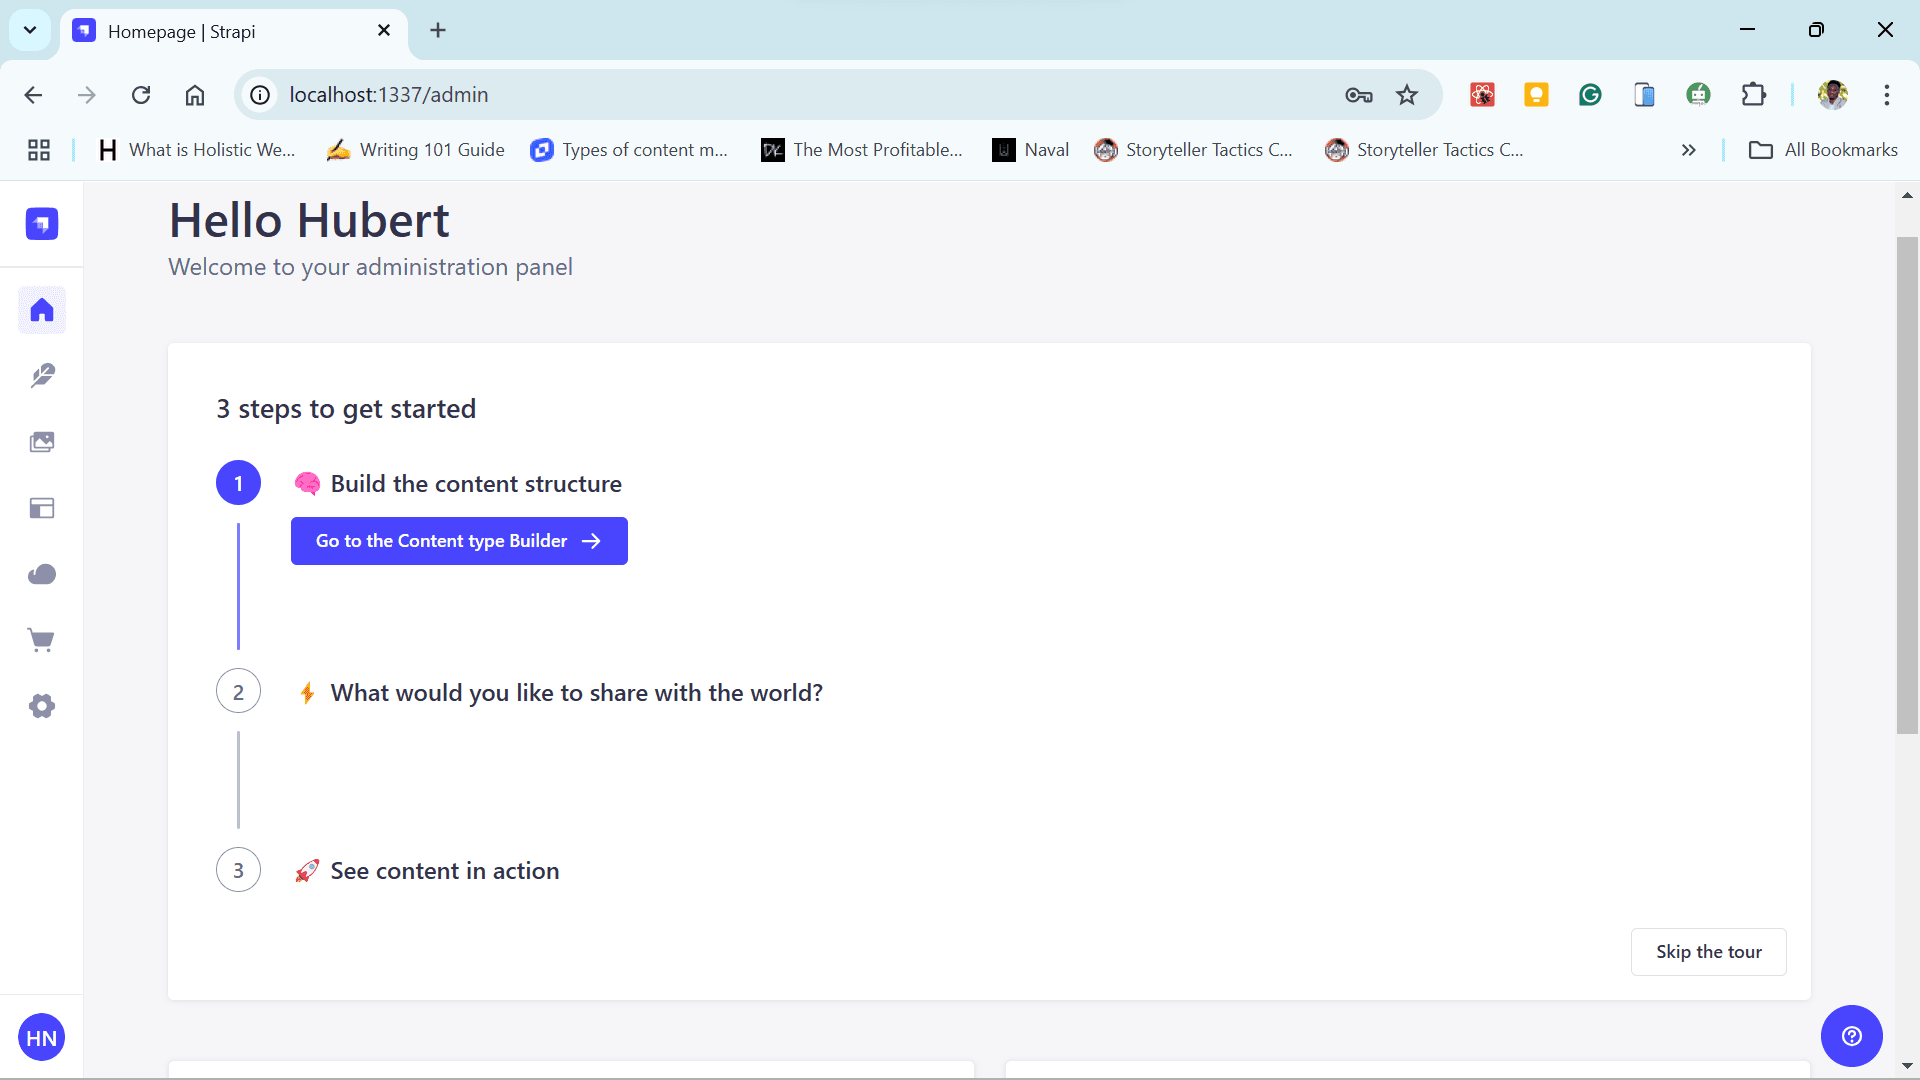
Before you can access the admin panel, you'll be prompted to register an admin user for authentication.
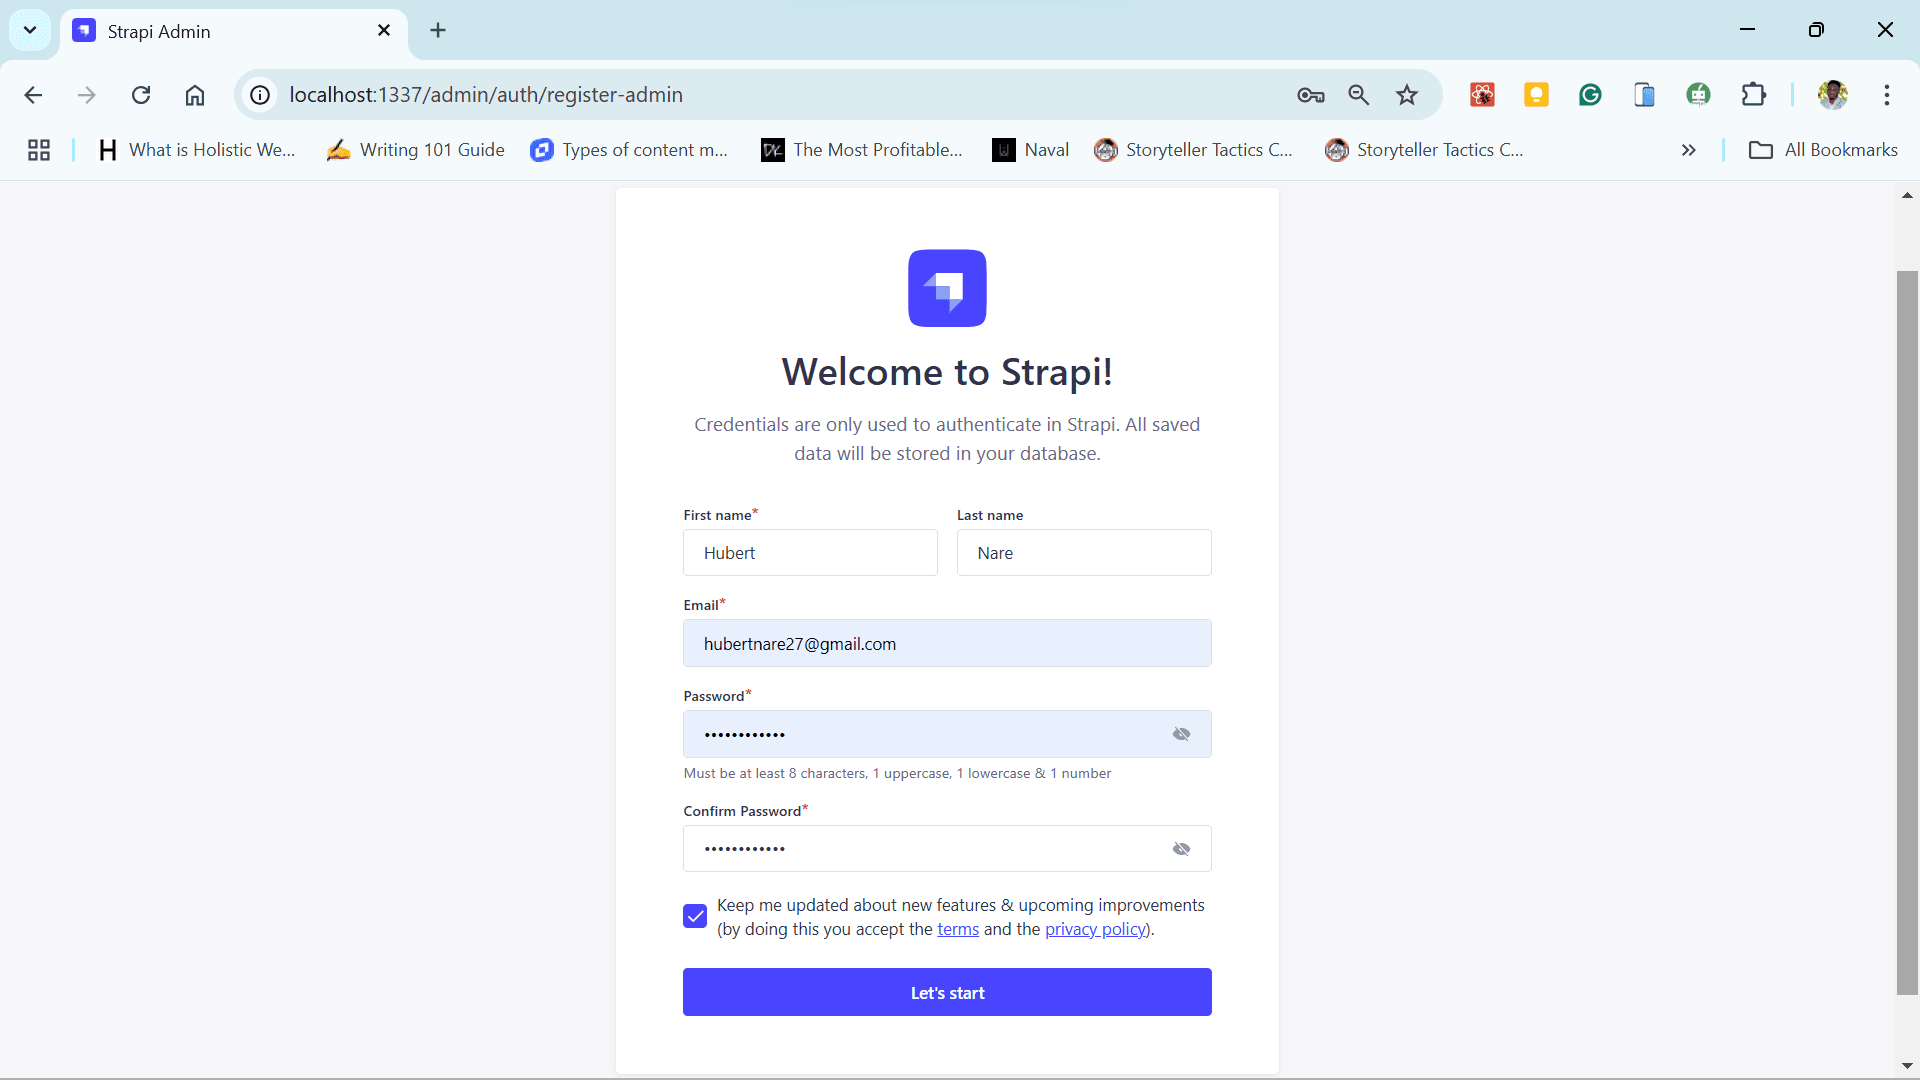
After completing the registration, you'll be logged into the admin panel, where you can perform a variety of tasks, including creating a custom API from scratch.
You'll be greeted by an admin welcome screen, basically, a playground where you can create and manage your content data structures and serve them to the client via REST or GraphQL endpoints.
However, our main focus will be on serving data from the 'Content Manager' through REST APIs.
Strapi Sample Schema
Let's take a quick look at the sample schema that Strapi provides for our demo.
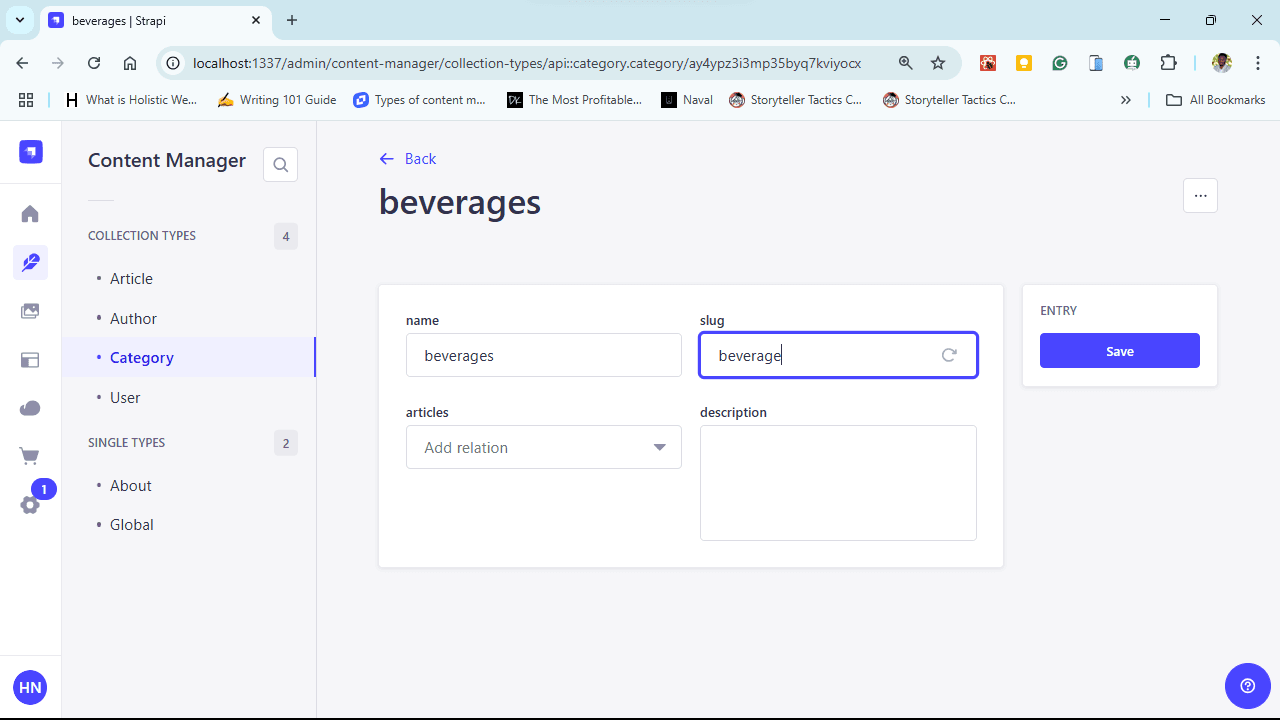
In the admin panel, head over to Content Manager > Article (under COLLECTION TYPES) and you'll see a visual breakdown of the Article schema, featuring attributes like title, description, slug, and status.
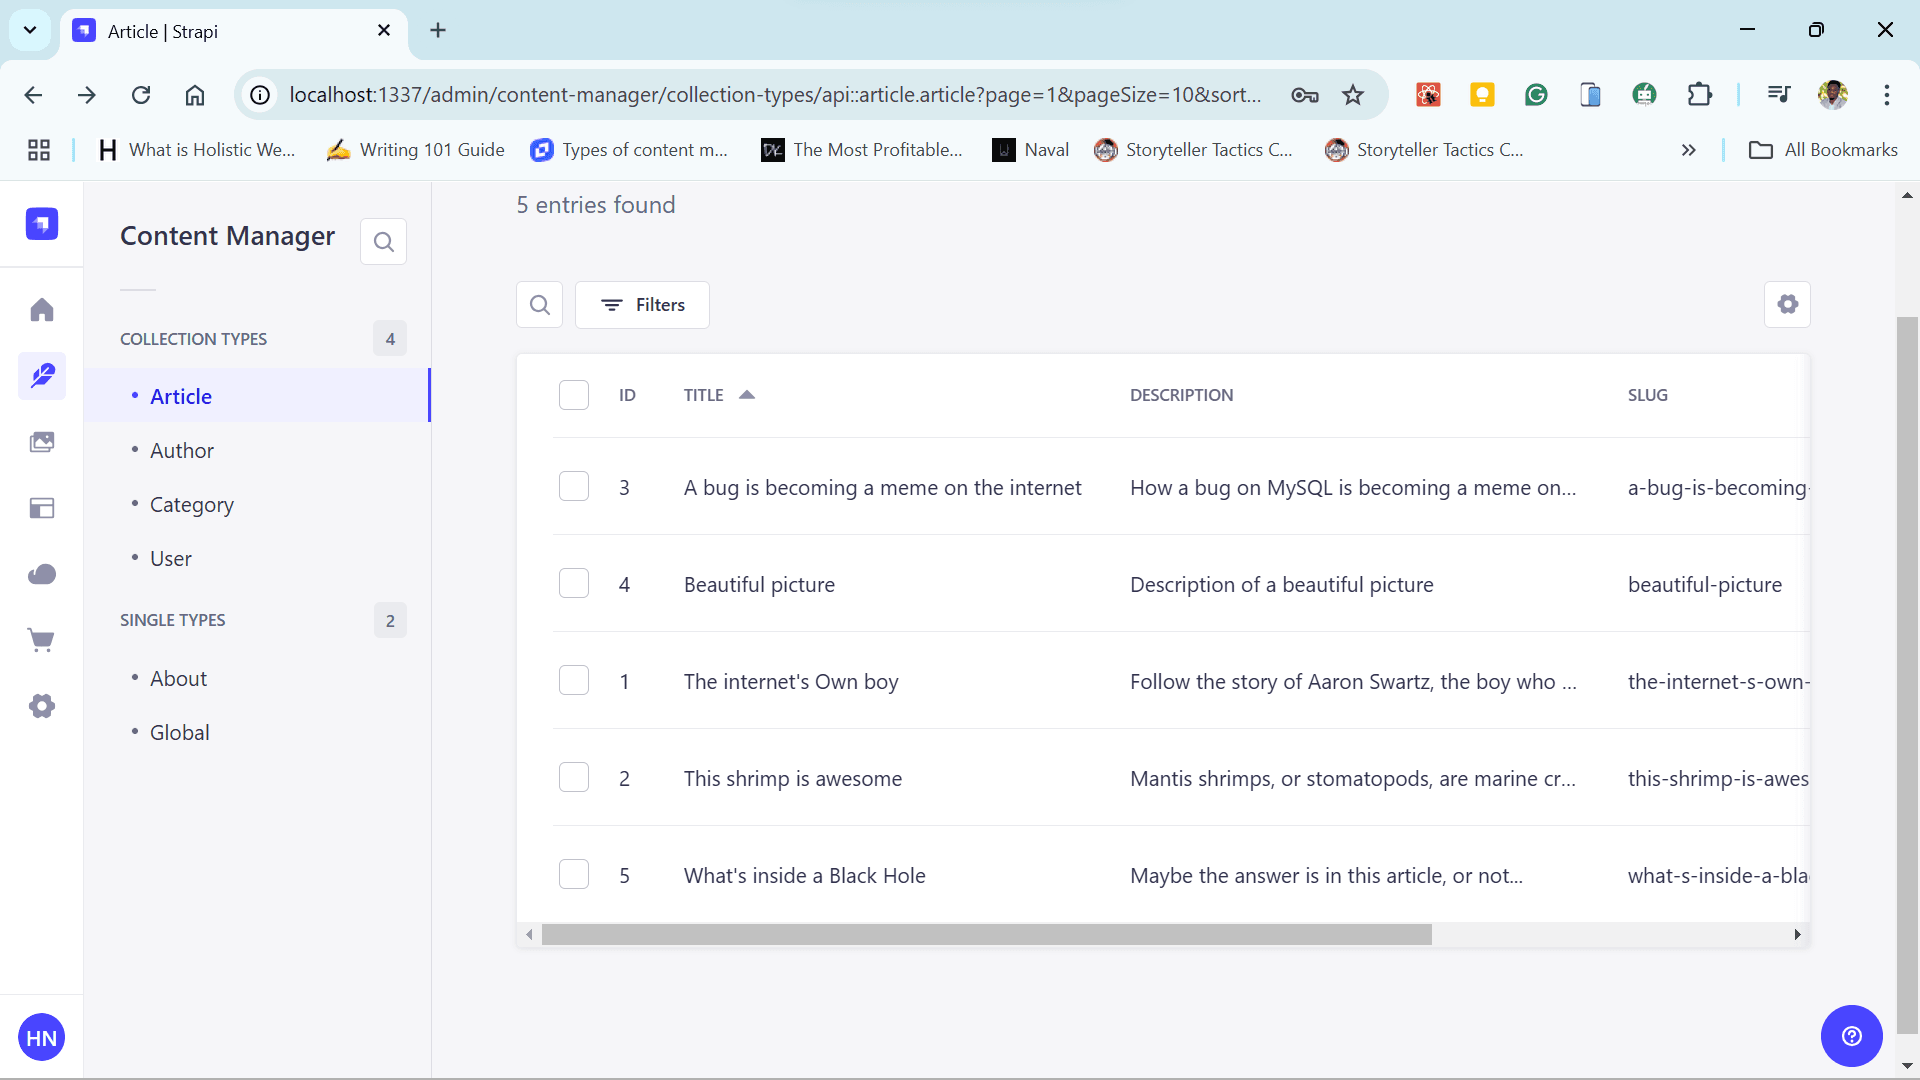
From the pre-seeded data, you can see that Strapi has modeled a typical blog post structure. It includes blog articles, their authors, categories, and even user details.
For a more in-depth look, check out a detailed schema in the schema.json file located at src/api/article/content-types/article/schema.json:
{
  "kind": "collectionType",
  "collectionName": "articles",
  "info": {
    "singularName": "article",
    "pluralName": "articles",
    "displayName": "Article",
    "description": "Create your blog content"
  },
  "options": {
    "draftAndPublish": true
  },
  "pluginOptions": {},
  "attributes": {
    "title": {
      "type": "string"
    },
    "description": {
      "type": "text",
      "maxLength": 80
    },
    "slug": {
      "type": "uid",
      "targetField": "title"
    },
    "cover": {
      "type": "media",
      "multiple": false,
      "required": false,
      "allowedTypes": ["images", "files", "videos"]
    },
    "author": {
      "type": "relation",
      "relation": "manyToOne",
      "target": "api::author.author",
      "inversedBy": "articles"
    },
    "category": {
      "type": "relation",
      "relation": "manyToOne",
      "target": "api::category.category",
      "inversedBy": "articles"
    },
    "blocks": {
      "type": "dynamiczone",
      "components": ["shared.media", "shared.quote", "shared.rich-text", "shared.slider"]
    }
  }
}
We're going to access this data via the API endpoint at http://localhost:1337/api/article and use it to demonstrate various caching techniques with Next.js.
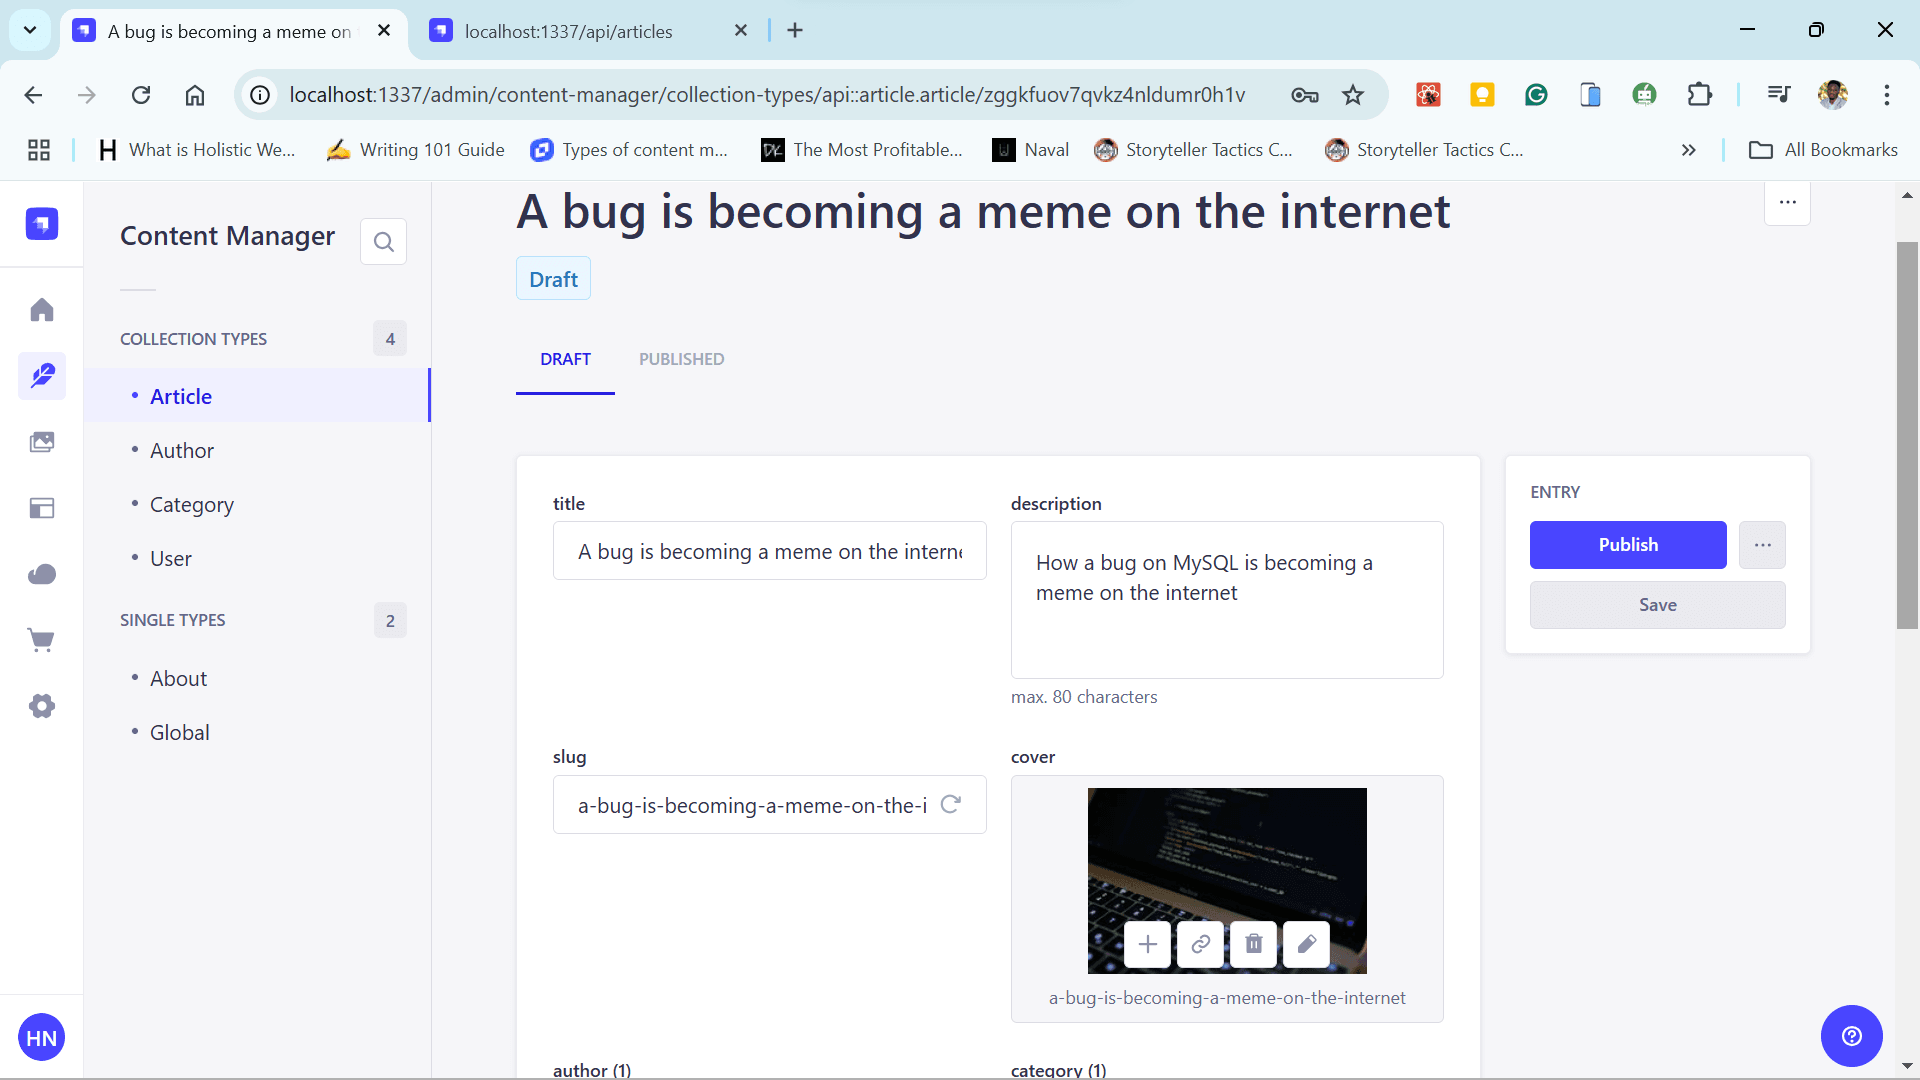
Note: For the data to be accessible through the API, ensure you publish your articles. By default, Strapi saves content as drafts for editing purposes. Simply click on each article entry in the Content Manager and hit the "Publish" button.
 To get a quick feel for Strapi, head over to the Strapi documentation. With that foundation in place, let's move on to caching with Next.js.
The 'use cache' directive
Next.js has been doing an impressive job in helping developers build modern, high-performance, hybrid web applications.
Balancing rendering workloads between the client and server has never been easier, taking full advantage of both environments.
For example, this makes so much sense when using directives like 'use client' to run computational work in the browser and 'use server' to ship the workload out to a remote server.
Well, the concept is pretty intuitive; simple directives are used to define conceptual network boundaries between client and server.
Put it in three words: "To Define Context"
Okay, so what does this have to do with the "use cache" directive?
Well, the 'use cache' directive follows the same idea, but at the caching level.
What it means, fundamentally, is you get the same level of simplicity in your code to switch between different contexts. Just as 'use client' and 'use server' define execution boundaries, the 'use cache' helps transition between dynamic and static data using nothing more than string literals or JavaScript directives.
The only caveat here is 'use cache' is not a native React function.
But how exactly does a single directive fit into Next.js' incremental step towards a simplified caching model?
Let's discuss more on the API design and benefits of the 'use cache'
Closer Look at the dynamicIO API
The "trick" to having a simpified caching model lies in a flexible approach, optimizing your app by caching components, data, or individual pieces of code as needed.
It's all about a "composed" framework.
To demonstrate how that works, take a look at some code.
async function getArticles() {
try {
const res = await fetch("http://127.0.0.1:1337/api/articles");
if (!res.ok) throw new Error("Failed to fetch articles");
const data = await res.json();
return data.data || [];
} catch (error) {
console.error(error);
return [];
}
}
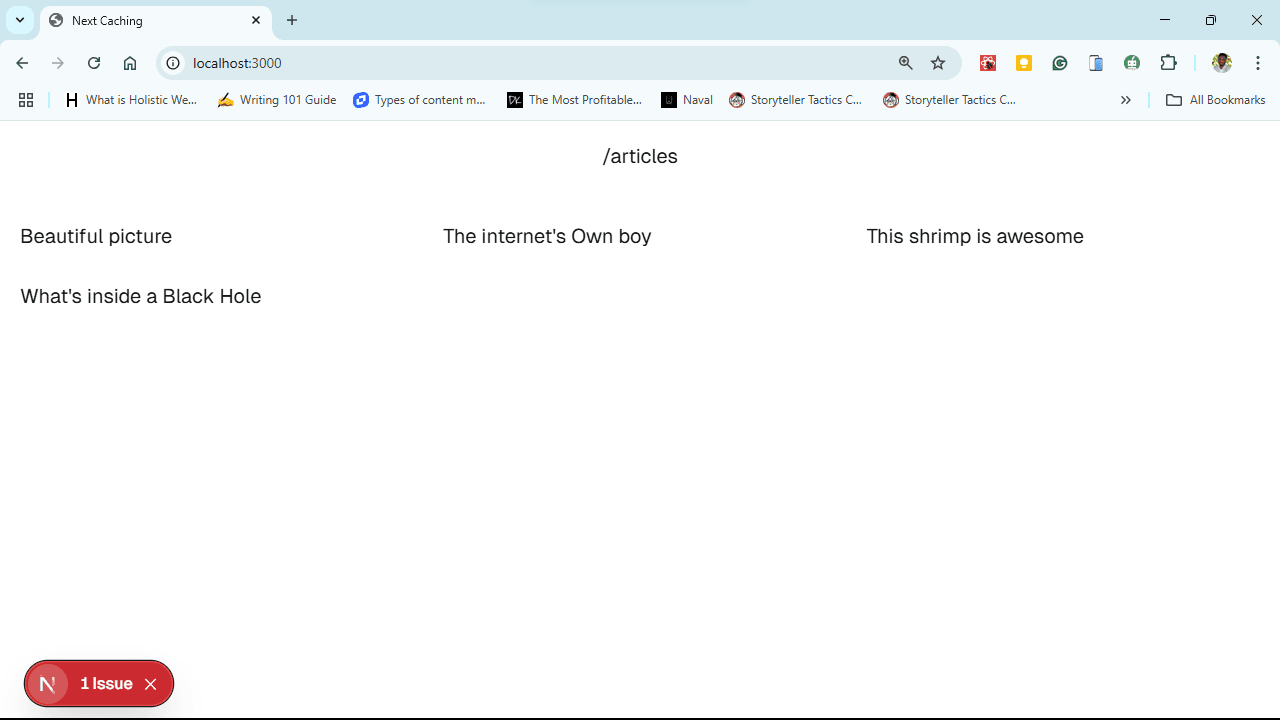
async function ArticlesList() {
const articles = await getArticles();
return (
<div className="mt-10 grid grid-cols-1 md:grid-cols-2 lg:grid-cols-3 gap-6 w-full max-w-6xl">
{articles.length > 0 ? (
articles.map((article) => <p key={article.id}>{article.title}</p>)
) : (
<p className="text-gray-500">No articles found.</p>
)}
</div>
);
}
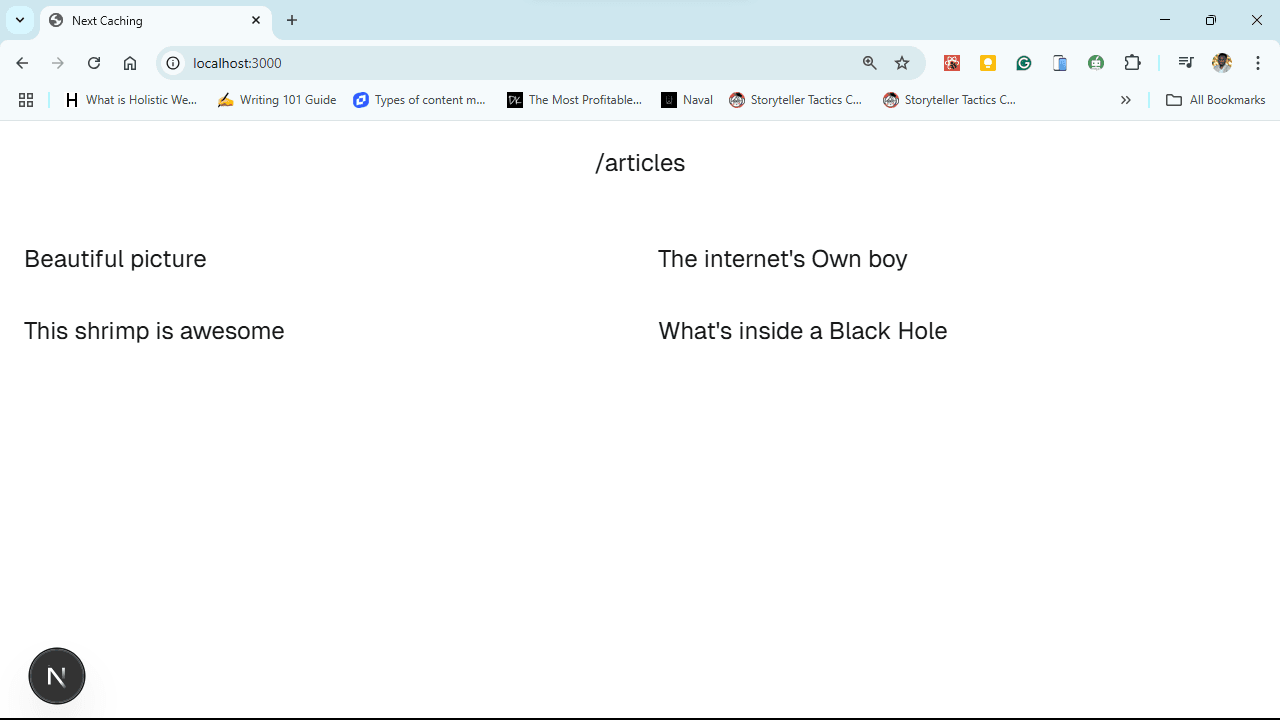
export default function Home() {
return (
<div className="items-center justify-items-center font-[family-name:var(--font-geist-sans)] p-4">
<div>
<h1>/articles</h1>
</div>
<ArticlesList />
</div>
);
}What’s Happening Here?
The function getArticles() makes a fetch call to the Strapi endpoint http://127.0.0.1:1337/api/articles to retrieve a list of articles from a Strapi API.
Why This is a Purely Dynamic Fetch
By default, Next.js applies caching and pre-rendering optimizations where possible. However, in this case, the fetch request inside getArticles() does not use any caching mechanism.
The reason?
The dynamicIO API is enabled in next.config.mjs, which excludes data fetching operations in the App Router from pre-renders unless explicitly cached.
Handling Dynamic Data Fetching in Next.js with dynamicIO and Suspense
The dynamicIO feature in Next.js excludes data fetching operations in the App Router from pre-renders unless explicitly cached. This helps optimize dynamic data fetching in server components.
In other words, this feature ensures that data is always fetched fresh at runtime instead of being served from a pre-rendered cache.
Sounds great, right? But, if you’ve been following along and testing our articles page, you might have noticed an error.
The Suspense Issue
If you click to expand the error, it looks something like this:
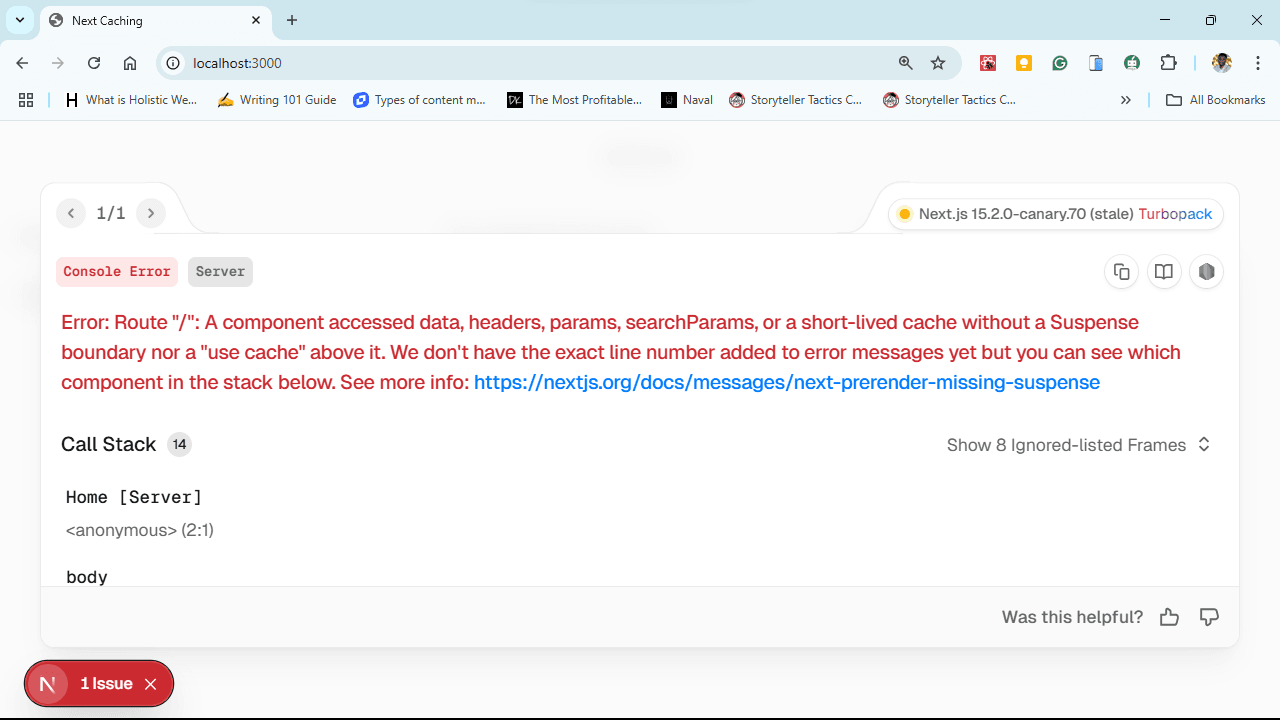
Why The Next.js Suspense Issue Happens
Next.js is basically telling us:
“You need to either wrap your component in a Suspense boundary with a fallback if it’s dynamic or explicitly cache it.”
Fixing It with Suspense
To resolve this, wrap your component inside <Suspense> and provide a fallback.
First, import Suspense
import { Suspense } from "react";Then, wrap your dynamic component
export default function Home() {
  return (
    <div className="items-center justify-items-center font-[family-name:var(--font-geist-sans)] p-4">
      <div>
        <h1>/articles</h1>
      </div>
      <Suspense fallback={<div>Loading articles...</div>}>
        <ArticlesList />
      </Suspense>
    </div>
  );
}
Why This Works By adding a Suspense boundary, any data fetching inside it is treated as dynamic and fetched at runtime. This ensures that Next.js doesn’t try to pre-render it and allows it to handle dynamic responses properly.
TL;DR: Want Dynamic? Wrap it in
<Suspense>. Want Static? Explicitly cache it.
Conceptualizing Application-Layer Caching Boundaries
By default, dynamicIO forces runtime fetching (i.e., always hitting the API for fresh data). But we don’t always need that! 'use cache', lets us explicitly control what gets stored and reused.
The game plan is simple:
- Without
'use cache', every fetch is fresh (AKA dynamic). - With
'use cache', we control what’s cached and for how long.
Next.js Caching Strategies
Now, caching isn’t one-size-fits-all. Sometimes, you want to avoid repeatedly asking the API for the same thing; other times, you need to cache expensive calculations or entire UI blocks. So, let’s break caching down into key boundaries within our app:
1. Next.js File Level Caching (Cache Full Pages & Layouts)
When working with Next.js 15, we can cache an entire page at the file level, making it fully static. This means the page is generated once and remains unchanged until the cache is manually refreshed.
Caching the Entire Page:
Use the 'use cache' directive at the top of the file.
"use cache"; // Marks the page as fully static

async function getArticles() {
  try {
    const res = await fetch("http://127.0.0.1:1337/api/articles");
    if (!res.ok) throw new Error("Failed to fetch articles");
    const data = await res.json();
    return data.data || [];
  } catch (error) {
    console.error(error);
    return [];
  }
}

async function ArticlesList() {
  const articles = await getArticles();

  return (
    <div className="mt-10 grid grid-cols-1 md:grid-cols-2 lg:grid-cols-3 gap-6 w-full max-w-6xl">
      {articles.length > 0 ? (
        articles.map((article) => <p key={article.id}>{article.title}</p>)
      ) : (
        <p className="text-gray-500">No articles found.</p>
      )}
    </div>
  );
}

export default function Home() {
  return (
    <div className="items-center justify-items-center font-[family-name:var(--font-geist-sans)] p-4">
      <div>
        <h1>/articles</h1>
      </div>
      <ArticlesList />
    </div>
  );
}
Observing Cached Behavior If we unpublish some articles in Strapi, the API will no longer return them.

However, the cached page will still display all previously fetched articles.
Since the page was cached at the file level, Next.js does not re-fetch data from Strapi, resulting in outdated content being displayed.
In some cases, we might have multiple components inside a single file, each handling different data-fetching logic. Instead of caching the entire file, we can selectively cache individual components by placing the 'use cache' directive within them.
2. Next.js Component-Level caching
Caching isn’t an all-or-nothing deal. Next.js lets us cache specific components while keeping others dynamic, so we can optimize performance making our application just a little bit snappy.
Selectively Caching Components In the following setup, we have:
- A static Sidebar component (cached).
- A dynamic ArticlesFeed component (not cached).
Let’s make that happen.
// Cached Sidebar (Categories)
async function Sidebar() {
  "use cache"; // Cache categories

  const categories = await getCategories();

  return (
    <aside className="p-4 border-r w-1/4">
      <h2 className="text-lg font-bold">Categories</h2>
      <ul className="space-y-2">
        {categories.length > 0 ? (
          categories.map((category) => (
            <li key={category.documentId}>
              <Link
                href={`/categories/${category.slug}`}
                className="text-blue-600 hover:underline"
              >
                {category.name}
              </Link>
            </li>
          ))
        ) : (
          <p className="text-gray-500">No categories found.</p>
        )}
      </ul>
    </aside>
  );
}
Articles? Always Fresh, Never Stale
Articles change all the time: new posts, edits, and the occasional typo fix. So, we don’t cache them at all. Next.js already fetches server components dynamically by default, so we just let it do its thing.
// Dynamic Articles List (Always Fresh)
async function ArticlesList() {
  const articles = await getArticles();

  return (
    <div className="mt-10 grid grid-cols-1 md:grid-cols-2 lg:grid-cols-3 gap-6 w-full max-w-6xl">
      {articles.length > 0 ? (
        articles.map((article) => <p key={article.id}>{article.title}</p>)
      ) : (
        <p className="text-gray-500">No articles found.</p>
      )}
    </div>
  );
}
Bringing It All Together
We wrap ArticlesList in a <Suspense> boundary, so the page loads instantly, even if articles take a few seconds to show up.
// Page Component
export default async function Home() {
  return (
    <div className="flex p-4">
      <Sidebar />
      <div className="flex-1 p-4">
        <h1 className="text-lg font-bold">Articles</h1>
        <Suspense fallback={<div>Loading articles...</div>}>
          <ArticlesList />
        </Suspense>
      </div>
    </div>
  );
}
What Happens When We Edit a Category?
Imagine we go into Strapi and change a category:
The sidebar doesn’t update immediately since it’s cached; we’re still seeing stale categories, but the articles section updates dynamically.
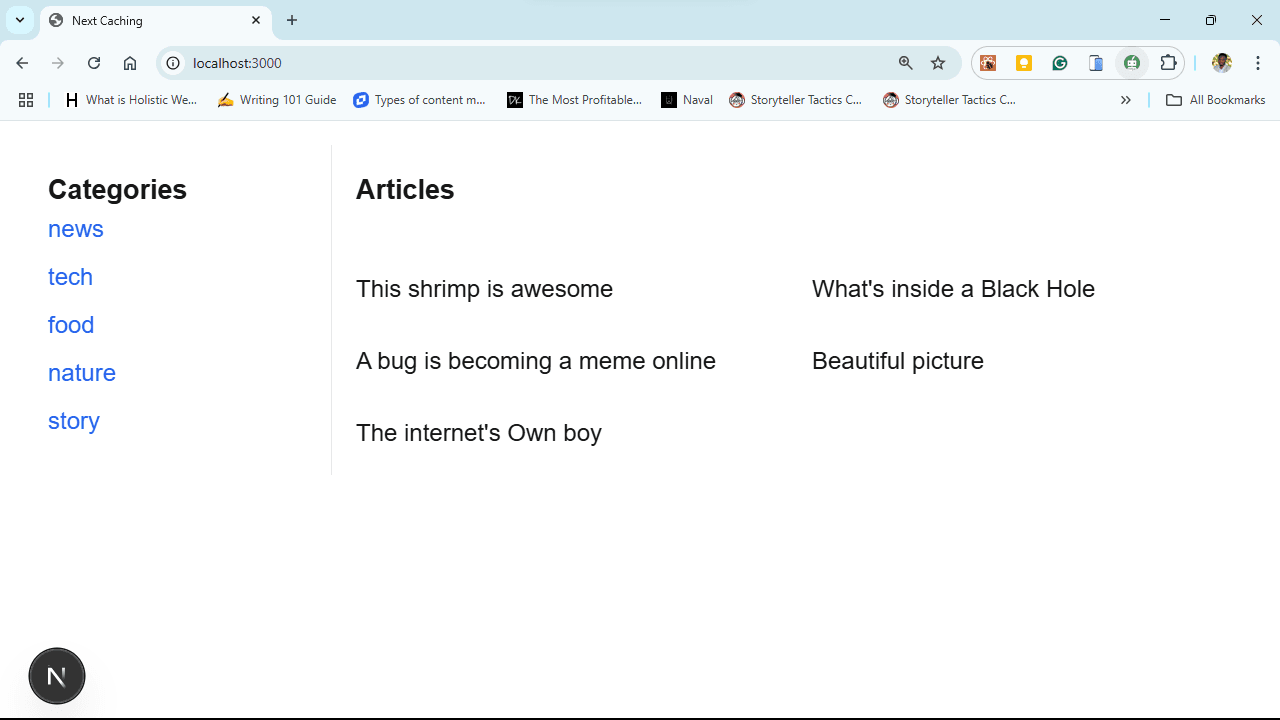
Then what we get is a hybrid caching strategy that keeps our app fast and efficient, ensuring we get fresh content where it matters and pre-baked markup where it doesn’t.
3. Next.js API Response Level caching
So far, we’ve cached components and left others dynamic, but what if we cached the API response itself instead of just the UI?
Why Bother? Let’s say we’re making a slow API request or querying a huge database. Instead of running the same expensive operation over and over, we can cache the response and reuse it.
For more granularity, Next.js's use cache lets us cache any async function, not just components or routes.
Caching a Strapi API Response Let’s say we’re fetching categories from our Strapi API:
export async function getCategories() {
  'use cache'; // Cache the API response

  const res = await fetch("http://localhost:1337/api/categories");
  if (!res.ok) throw new Error("Failed to fetch categories");

  const data = await res.json();
  return data.data || [];
}
Now, whenever getCategories() is called, Next.js reuses the cached response until the data gets revalidated.
But how do we revalidate cached API responses on demand?
Revalidating use cache with dynamicIO
Next.js gives us two approaches:
cacheTag– Manually invalidate specific cached and revalidateTag.cacheLife– Set a cache lifetime in seconds, minutes, or days.
Let's see how they are used.
1. Revalidating on demand with cacheTag in Next.js
Imagine in our Strapi-powered blog where categories update occasionally. We don’t want to wait for the cache to expire, we want to revalidate instantly when a new category is added.
import { unstable_cacheTag as cacheTag } from "next/cache";

export async function getCategories() {
  "use cache";
  cacheTag("categories-data"); // Tagging this API response

  const res = await fetch("http://127.0.0.1:1337/api/categories");
  if (!res.ok) throw new Error("Failed to fetch categories");

  const data = await res.json();
  return data.data || [];
}
Whenever getCategories() is called, Next.js caches the response under the "categories-data" tag.
Now, when a new category is added in Strapi, we trigger revalidation by calling:
import { revalidateTag } from "next/cache";

export async function revalidateCategories() {
  revalidateTag("categories-data"); // Invalidates the cached categories
}
Meaning that we have:
- Instant cache updates when new data is available.
- No unnecessary refetching unless something changes.
2. Setting cache expiration with cacheLife in Next.js
If we want to control how long cached API responses last, we use cacheLife().
Basic Example:
import { unstable_cacheLife as cacheLife } from "next/cache";

export async function getCategories() {
  "use cache";
  cacheLife("minutes"); // Automatically expires after a few minutes

  const res = await fetch("http://127.0.0.1:1337/api/categories");
  if (!res.ok) throw new Error("Failed to fetch categories");

  const data = await res.json();
  return data.data || [];
}
Here, the cached response will automatically expire after a set duration.
Next.js Custom Cache Profiles (Best for Blogs & E-commerce)
We can define custom cache profiles in next.config.js:
module.exports = {
  experimental: {
    dynamicIO: true,
    cacheLife: {
      categories: {
        stale: 1800, // (Client) Serve stale cache for 30 mins
        revalidate: 600, // (Server) Refresh every 10 mins
        expire: 86400, // (Server) Max lifetime: 1 day
      },
    },
  },
};
Now, inside our function, we can apply the "categories" cache profile like this:
import { unstable_cacheLife as cacheLife } from "next/cache";

export async function getCategories() {
  "use cache";
  cacheLife("categories"); // Uses the profile defined in next.config.js

  const res = await fetch("http://127.0.0.1:1337/api/categories");
  if (!res.ok) throw new Error("Failed to fetch categories");

  const data = await res.json();
  return data.data || [];
}
Well, What Happens Now?
- Fresh categories every 10 minutes.
- Stale categories are served for 30 minutes (to prevent UI flickers).
- Data expires fully after 1 day.
Wrapping it all together
As the Next.js team puts it:
"Incremental step towards a simplified rendering and caching model."
And honestly? That’s exactly what dynamicIO delivers.
Next.js 15 ditches the old "cache by default" approach in favor of giving developers more control. Instead of fighting implicit caching behavior, we now have explicit tools like use cache, cacheTag, and cacheLife to manage API responses efficiently.
That alone simplifies how caching fits into the bigger picture of rendering, revalidating, and scaling applications.
And that? That’s a win.