

Any application with users requires authentication, but setting up a complete authentication and authorization workflow from scratch could be time-consuming and inefficient.
Strapi enables us to request data for our headless CMS API using multi-authentication providers like Google, Twitter, etc. Making it easier for authenticated users to perform actions only available to authorized users.
The Strapi authentication system allows us to quickly build a robust authentication system for our application. In this tutorial, we will create a simple React application that uses Strapi for authentication and authorization.
An Introduction to Headless CMS
The Content Management System (CMS) allows you to create and manage content for your website and applications. In a traditional CMS, the front-end and back-end of the website or application are integrated. Aside from pre-made themes and custom codes, there are no customization options. Traditional CMSes like WordPress, Joomla, and Drupal integrate the website's front-end with the back-end.
A headless CMS lets you build out your client or front-end, connecting it to the CMS via APIs. With a headless CMS, the application front-end can be built using any technology, allowing multiple clients to connect and pull data from the same CMS.
An Introduction to Strapi
Strapi is the leading open-source, headless, customizable Content Management System. With Strapi, you can easily build custom APIs in REST or GraphQL that can be consumed by any client or front-end framework. We'll be using Strapi API while building authentication and authorization with React.
Authentication and Authorization with Strapi
To authenticate users, Strapi provides two auth options: one social (Google, Twitter, Facebook, etc.) and another local auth (email and Password). Both of these options return a token (JWT token), which will be used to make further requests. JWT token contains user information and expiry which get validated for each request.
For authorization, Strapi has the Roles & Permissions plugin, which allows complete protection of your API by ACL strategy. ACL strategy manages the permissions between the groups of users. Each time an API request is sent, it checks if an Authorization header is present and grabs the JWT token which contains the user ID and verifies if the user making the request has access to the resource.
For this tutorial, we will be using local auth (email and password).
What is React?
React is a Javascript library for building a user interface with reusable components. In React, you write once and use it everywhere, resulting in less coding and faster development.
React has large community support and it's used by giants like Facebook, Tesla, etc. React provides some outstanding features like JSX (Javascript syntactic extension), Virtual DOM (Document Object Model), etc. Click here to learn more.
Goal
At the end of this tutorial, we will have covered how to add authentication to our React application with Strapi.
Prerequisites
To follow through with this article, you need:
- Basic knowledge of JavaScript
- Basic knowledge of React
- A code editor like VSCode
- Node.js version (^14.17.0, or >=16.0.0). You can download Node.js from Node.js official site if you haven't already.
- npm 7 or greater installed
What We’re Building
We’ll build a simple social card application, where users can register, log in, and edit their social cards.
Setting up the Backend With Strapi
To get started, we will begin by setting up the backend with strapi.
- Create the project directory:
    mkdir react_strapi_auth
cd react_strapi_auth- Create the directory for the backend:
mkdir backend- Create the directory for the frontend:
mkdir frontendOur project structure will look similar to this:
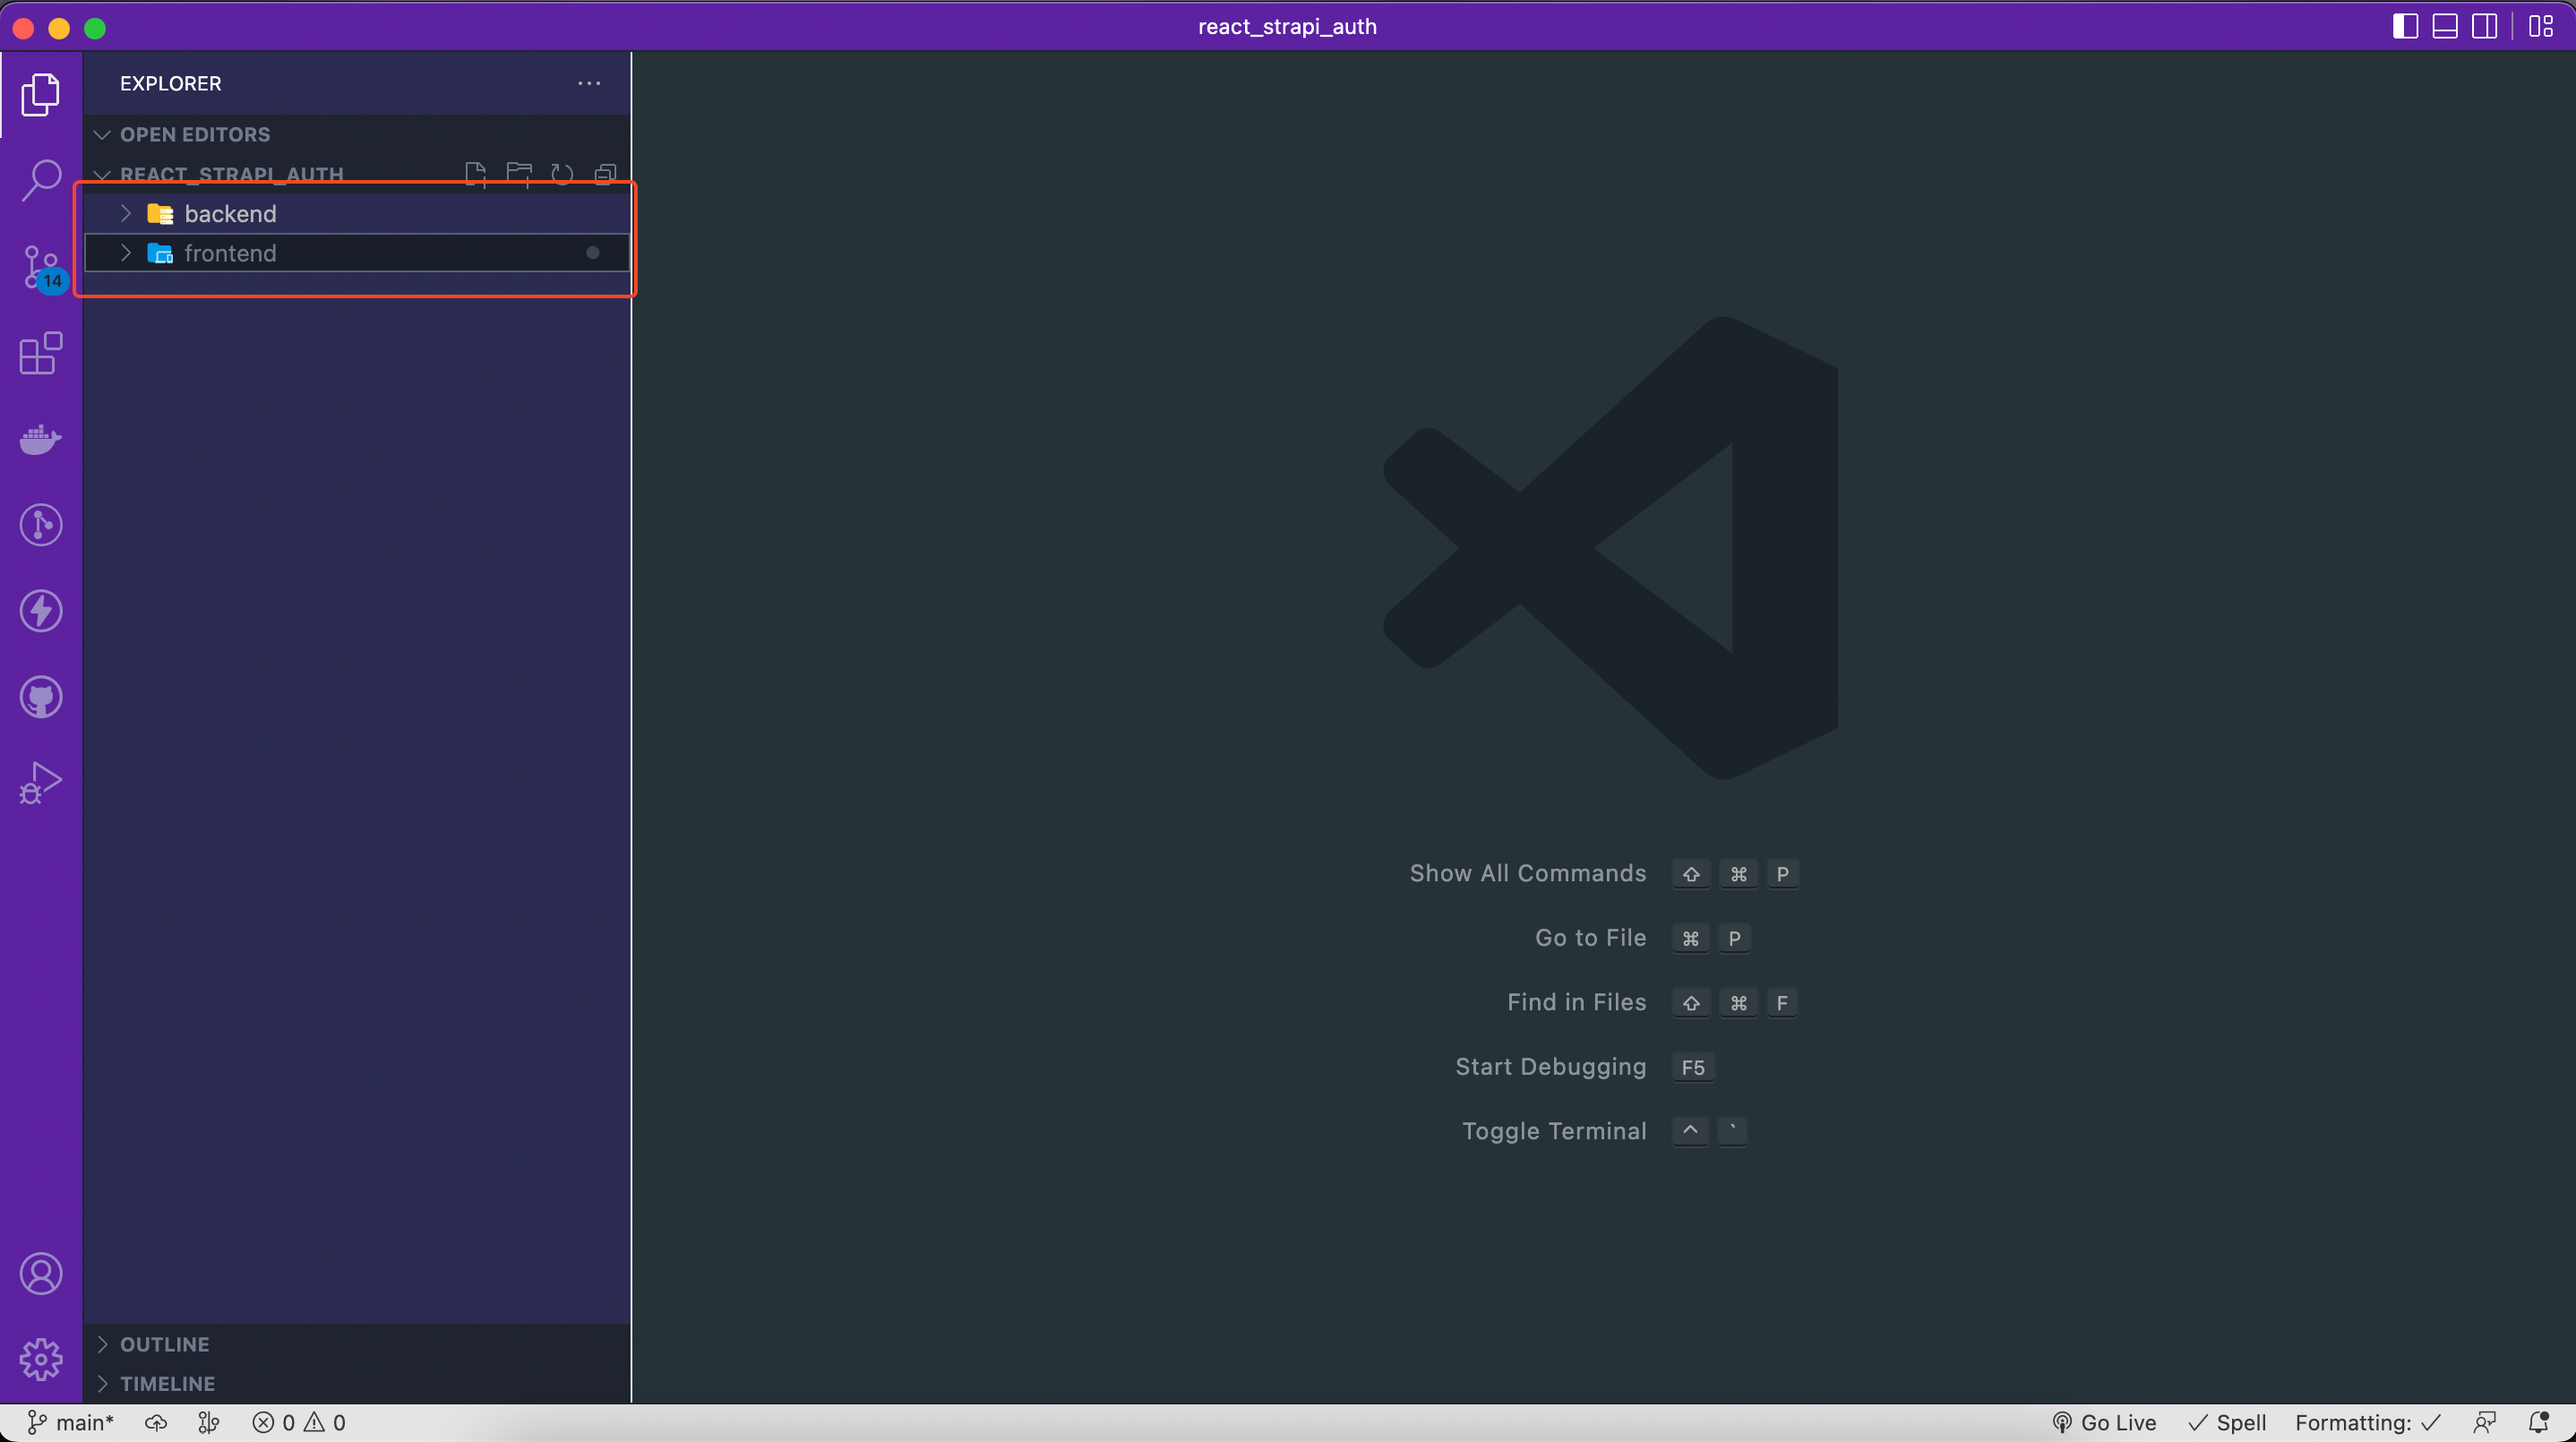
Creating A Strapi Project
Change the directory to the backend and then run either of the commands to create the Strapi project in the current folder.
Note:
.at the end is to tell the strapi-app script to create a project in the current folder.
        # Change directory
        cd backend
        # Create Strapi project
        yarn create strapi-app .
        #or
        npx create-strapi-app@latest .
Next, choose the installation type Quickstart. It uses the default database SQLite and is recommended. Once the installation is complete, the Strapi admin dashboard should automatically open in your browser. Fill out the details to create an admin account.

Modify User Collection Type
The collection is a table containing entity information. Strapi, by default, provides us with a User collection with minimal fields like username, email, password, etc. For this tutorial, we will be extending the User Collection by adding our fields.
Navigate to the Content-Type Builder > Collection Types > User .
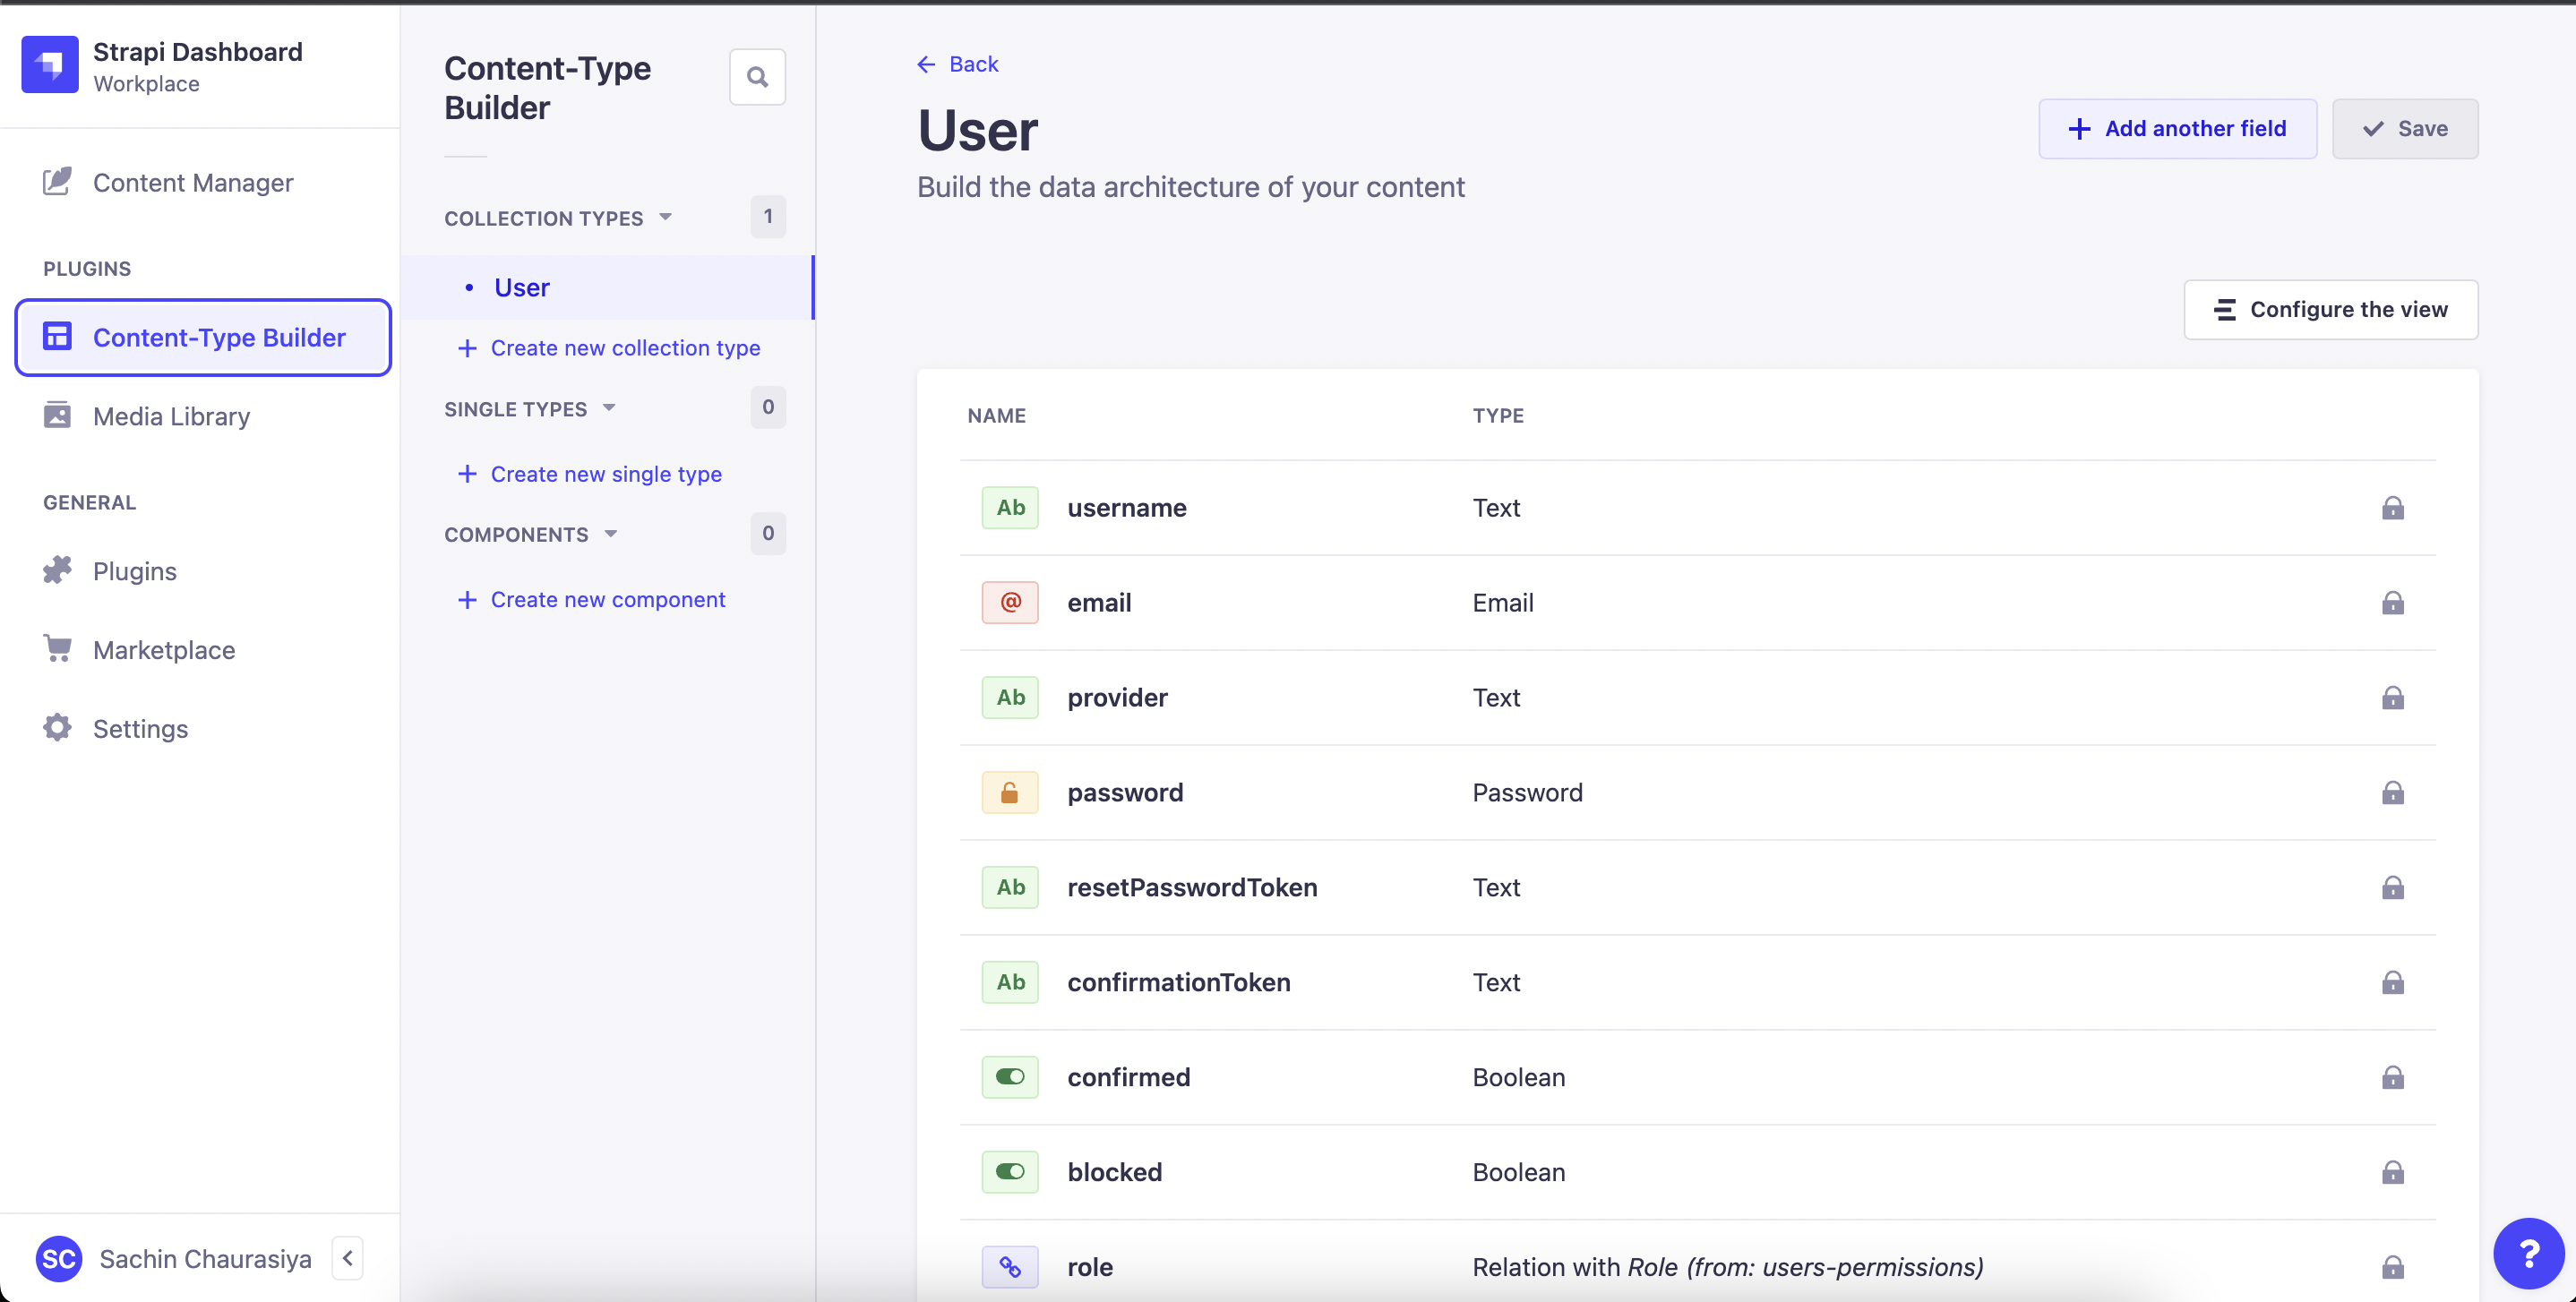
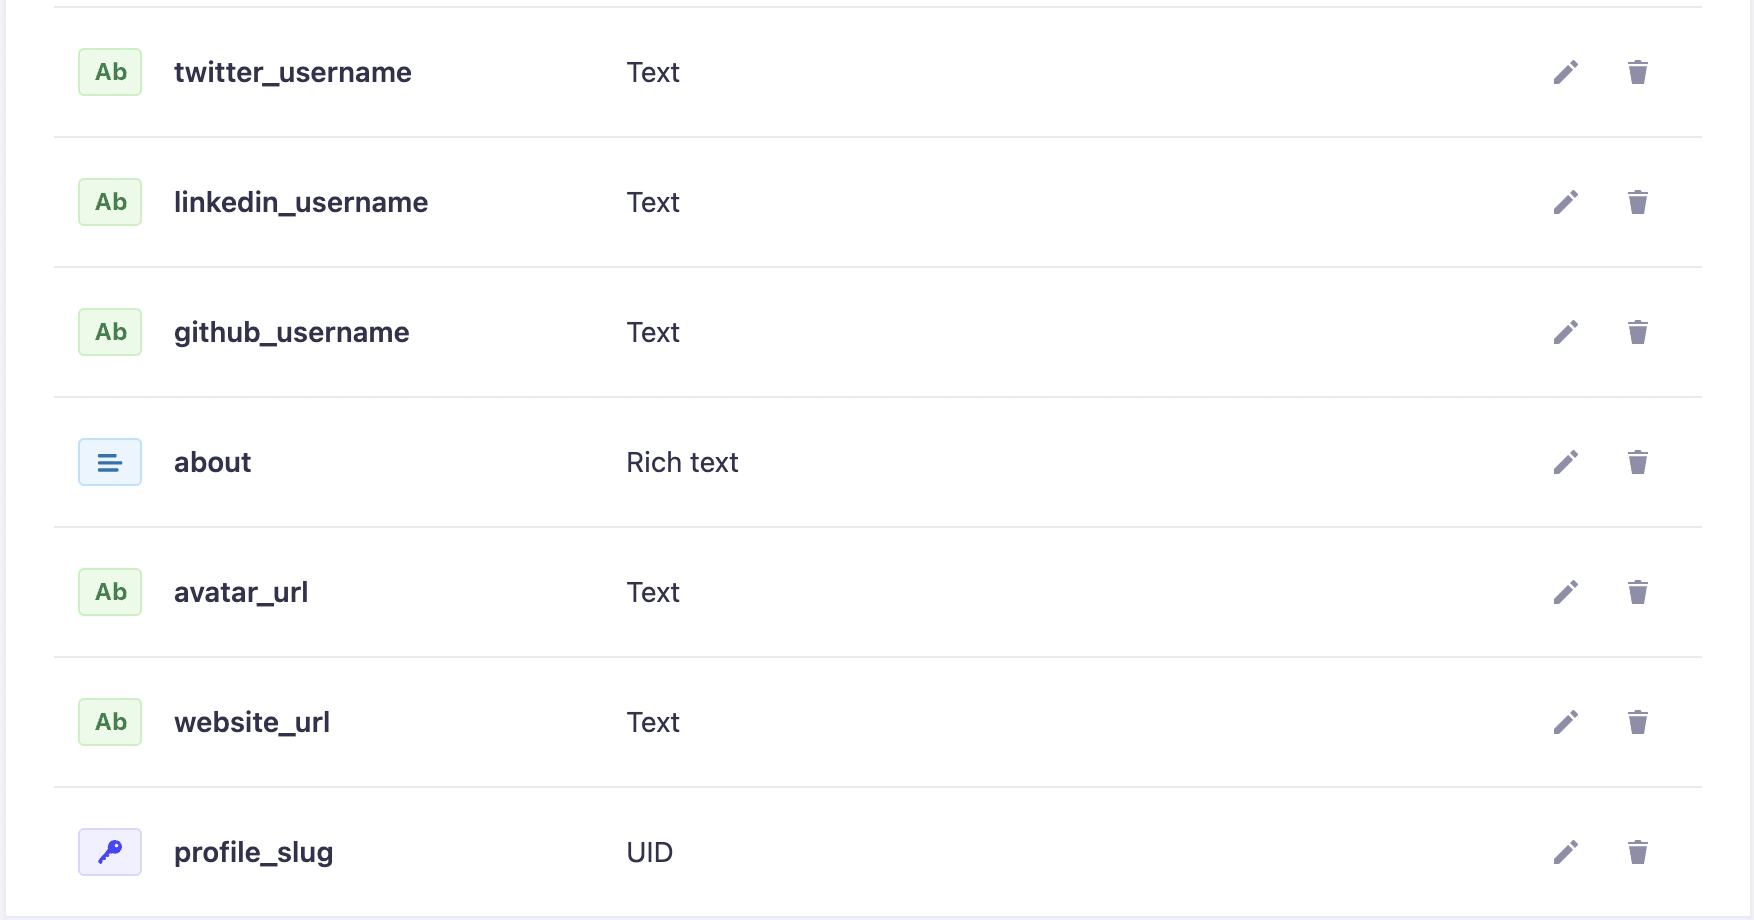
Now, we will add 7 more fields to this collection. Click on + ADD ANOTHER FIELD to add these fields.
- about (Rich Text) Advanced Settings:
        Default value : Hello There 👋,
        Required field : ✅
Maximum length : 120- avatar_url (Text - short text) Advanced Settings:
RegExp pattern: [(http(s)?):\/\/(www\.)?a-zA-Z0-9@:%._\+~#=]{2,256}\.[a-z]{2,6}\b([-a-zA-Z0-9@:%_\+.~#?&//=]*)- website_url (Text - short text) Advanced Settings:
RegExp pattern: [(http(s)?):\/\/(www\.)?a-zA-Z0-9@:%._\+~#=]{2,256}\.[a-z]{2,6}\b([-a-zA-Z0-9@:%_\+.~#?&//=]*)- twitter_username (Text - short text) Advanced Settings:
Unique field: ✅- linkedin_username (Text - short text) Advanced Settings:
Unique field: ✅- github_username (Text - short text) Advanced Settings:
Unique field: ✅- profile_slug (UID) (Attached field - username)
Click on Save; this will save the changes to the collection type and restart the server.
Configure Permissions for Public and Authenticated Users
As Strapi is secure by default, we cannot access data from the API unless we enable permissions. To set permissions:
-
Navigate to Settings > Users & Permissions plugin > Roles.
-
Go to Public and enable the following actions for the User under Users-permissions.
- Count ✅
- find ✅
- findOne ✅
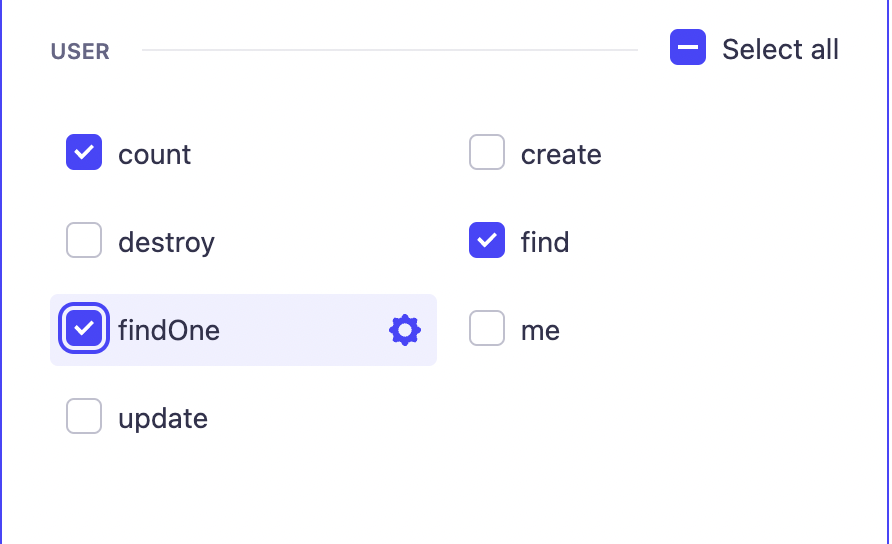
-
Click on Save and it will update the permission for public users.
-
Go to Authenticated and enable the following actions for the User , Auth and Permissions under Users-permissions.
- Auth ( Select All ✅ )
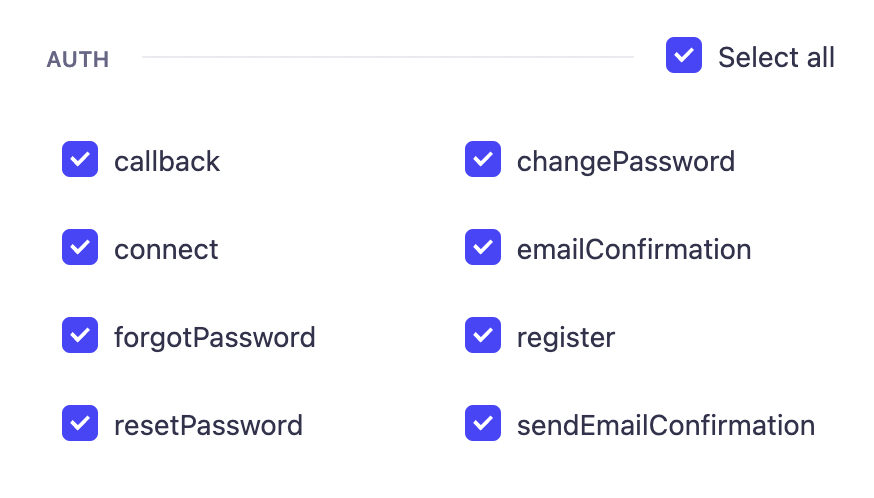
- User ( Select All ✅ )
- Permission ( Select All ✅ )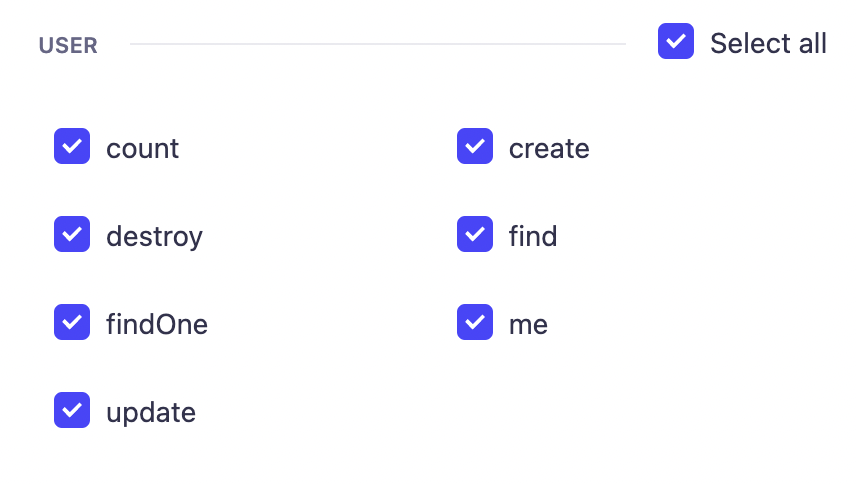
- Click on Save and it will update the permission for authenticated users.
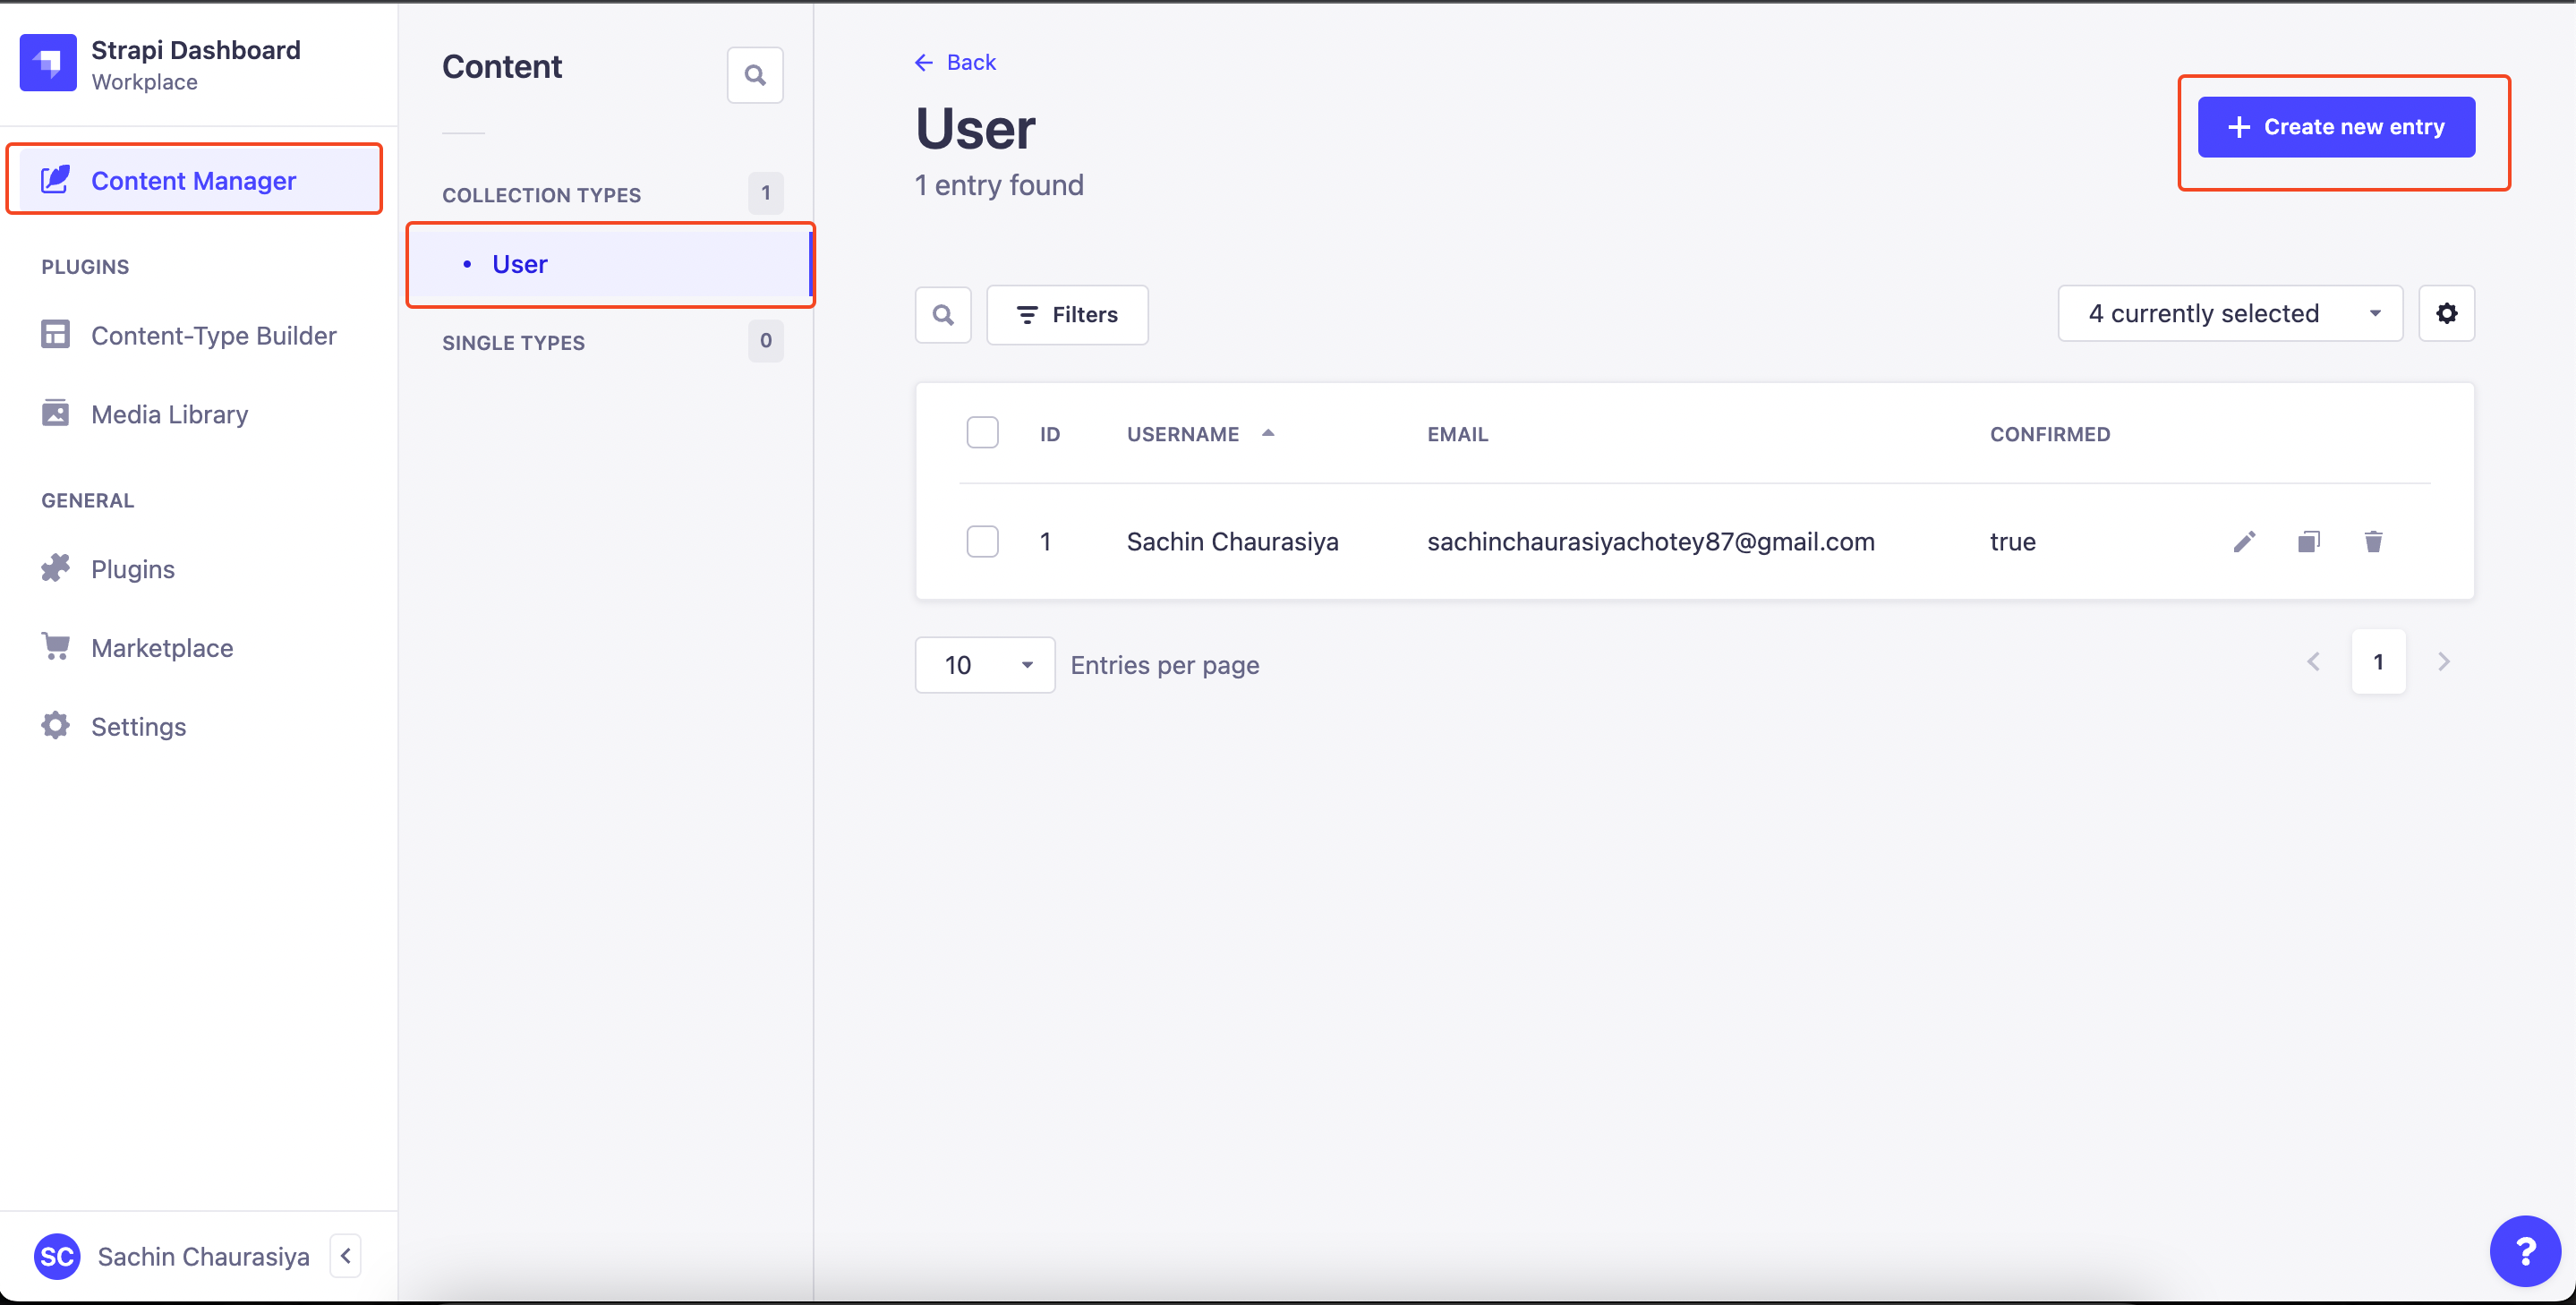
Creating Data for the Application
You will need to create a few users for our application. To create new users, navigate to Content Manager > User and click on Create new entry. Fill out the required details and click on Save to create the entry.
 The backend setup is done; now, move forward and set up the front-end of our application.
Setting up the Front-End with React
Change the directory to the frontend and then run either of the commands to create the react project in the current folder.
Note:
.at the end is to tell the create-react-app script to create a project in the current folder.
        # Change directory
        cd frontend
        # Create react project
        npx create-react-app .
        #OR
        yarn create react-app .
Remove these files:
- App.css
- App.test.js
- logo.svg
- serviceWorker.js
Rename these files accordingly:
- App.js --> App.jsx
- index.js --> index.jsx
Install the Dependencies
For this application, we will be using antd for UI components, react-icons for icons, and react-router-dom for routing.
Let's install them in our project.
yarn add antd react-router-dom react-iconsAlright, we have our frontend set up is ready. Now, let's code our social card application.
Setup Constant and Helper
Create a src/constant.js file and add the below content to it.
      # src/constant.js

      export const AVATAR_API = "https://ui-avatars.com/api";
      export const API = "http://localhost:1337/api";
      export const AUTH_TOKEN = "authToken";
      export const BEARER = "Bearer";
If the avatar URL is not available, then we will use the avatar API to get the avatar by username.
Create a src/helpers.js file and add the below content to it. These are the helpers that we will be using for managing the jwt token for the Authenticated user.
    # src/helpers.js

    import { AUTH_TOKEN } from "./constant";

    export const getToken = () => {
      return localStorage.getItem(AUTH_TOKEN);
    };

    export const setToken = (token) => {
      if (token) {
        localStorage.setItem(AUTH_TOKEN, token);
      }
    };

    export const removeToken = () => {
      localStorage.removeItem(AUTH_TOKEN);
    };
Setup the AuthContext
Create a React context to store logged-in user details. React Context is designed to store data which is global and shared between components. You can read more about the react context here.
Create a folder named context and create a file AuthContext.js.
    mkdir context
    touch AuthContext.js
After creating the AuthContext.js, add the code below content to it. Here, you are doing two things: first, we are creating the AuthContext to hold 3 things, user, isLoading and setUser method, and second, creating a custom hook by using the useContext hook with AuthContext, so that you can directly use this custom hook to get the AuthContext data.
    # context/AuthContext.js
    import { createContext, useContext } from "react";

    export const AuthContext = createContext({
      user: undefined,
      isLoading: false,
      setUser: () => {},
    });

    export const useAuthContext = () => useContext(AuthContext);
Setup the AuthProvider
The next step is to create a provider component for the application which will use the above AuthContext. AuthProvider will be the wrapper component which will provide the authenticated user details.
This component will take one prop which is "children" and return it with AuthContext provider values. it will fetch the authenticated user details if the jwt token is present.
    # components/AuthProvider/AuthProvider.jsx

    import React, { useState } from "react";
    import { AuthContext } from "../../context/AuthContext";
    import { message } from "antd";
    import { API, BEARER } from "../../constant";
    import { useEffect } from "react";
    import { getToken } from "../../helpers";

    const AuthProvider = ({ children }) => {
      const [userData, setUserData] = useState();
      const [isLoading, setIsLoading] = useState(false);

      const authToken = getToken();

      const fetchLoggedInUser = async (token) => {
        setIsLoading(true);
        try {
          const response = await fetch(`${API}/users/me`, {
            headers: { Authorization: `${BEARER} ${token}` },
          });
          const data = await response.json();

          setUserData(data);
        } catch (error) {
          console.error(error);
          message.error("Error While Getting Logged In User Details");
        } finally {
          setIsLoading(false);
        }
      };

      const handleUser = (user) => {
        setUserData(user);
      };

      useEffect(() => {
        if (authToken) {
          fetchLoggedInUser(authToken);
        }
      }, [authToken]);

      return (
        <AuthContext.Provider
          value={{ user: userData, setUser: handleUser, isLoading }}
        >
          {children}
        </AuthContext.Provider>
      );
    };

    export default AuthProvider;
Now, replace the src/index.jsx content with the below content.
Here, you're wrapping your App component with AuthProvider and Router Component to handle authenticated users and routing respectively.
    # src/index.jsx
    import React from "react";
    import ReactDOM from "react-dom/client";
    import "./index.css";
    import App from "./App";
    import AuthProvider from "./components/AuthProvider/AuthProvider";
    import { BrowserRouter as Router } from "react-router-dom";

    const root = ReactDOM.createRoot(document.getElementById("root"));
    root.render(
      <React.StrictMode>
        <AuthProvider>
          <Router>
            <App />
          </Router>
        </AuthProvider>
      </React.StrictMode>
    );
Create AppHeader Component
The application provider has been set up now; let's create a header component for our application.
Note: All of the CSS is available in the
src/index.cssfile here.
The AppHeader component will render four links based on authenticated user data. If user data is present, it will render the user profile link and a logout link. Else, it'll render links for registering and login into the application.
# components/Appheader/Appheader.jsx
import { Button, Space } from "antd";
import React from "react";
import { CgWebsite } from "react-icons/cg";
import { useNavigate } from "react-router-dom";
import { useAuthContext } from "../../context/AuthContext";
import { removeToken } from "../../helpers";
const AppHeader = () => {
const { user } = useAuthContext();
const navigate = useNavigate();
const handleLogout = () => {
removeToken();
navigate("/signin", { replace: true });
};
return (
<Space className="header_space">
<Button className="header_space_brand" href="/" type="link">
<CgWebsite size={64} />
</Button>
<Space className="auth_buttons">
{user ? (
<>
<Button className="auth_button_login" href="/profile" type="link">
{user.username}
</Button>
<Button
className="auth_button_signUp"
type="primary"
onClick={handleLogout}
>
Logout
</Button>
</>
) : (
<>
<Button className="auth_button_login" href="/signin" type="link">
Login
</Button>
<Button
className="auth_button_signUp"
href="/signup"
type="primary"
>
SignUp
</Button>
</>
)}
</Space>
</Space>
);
};
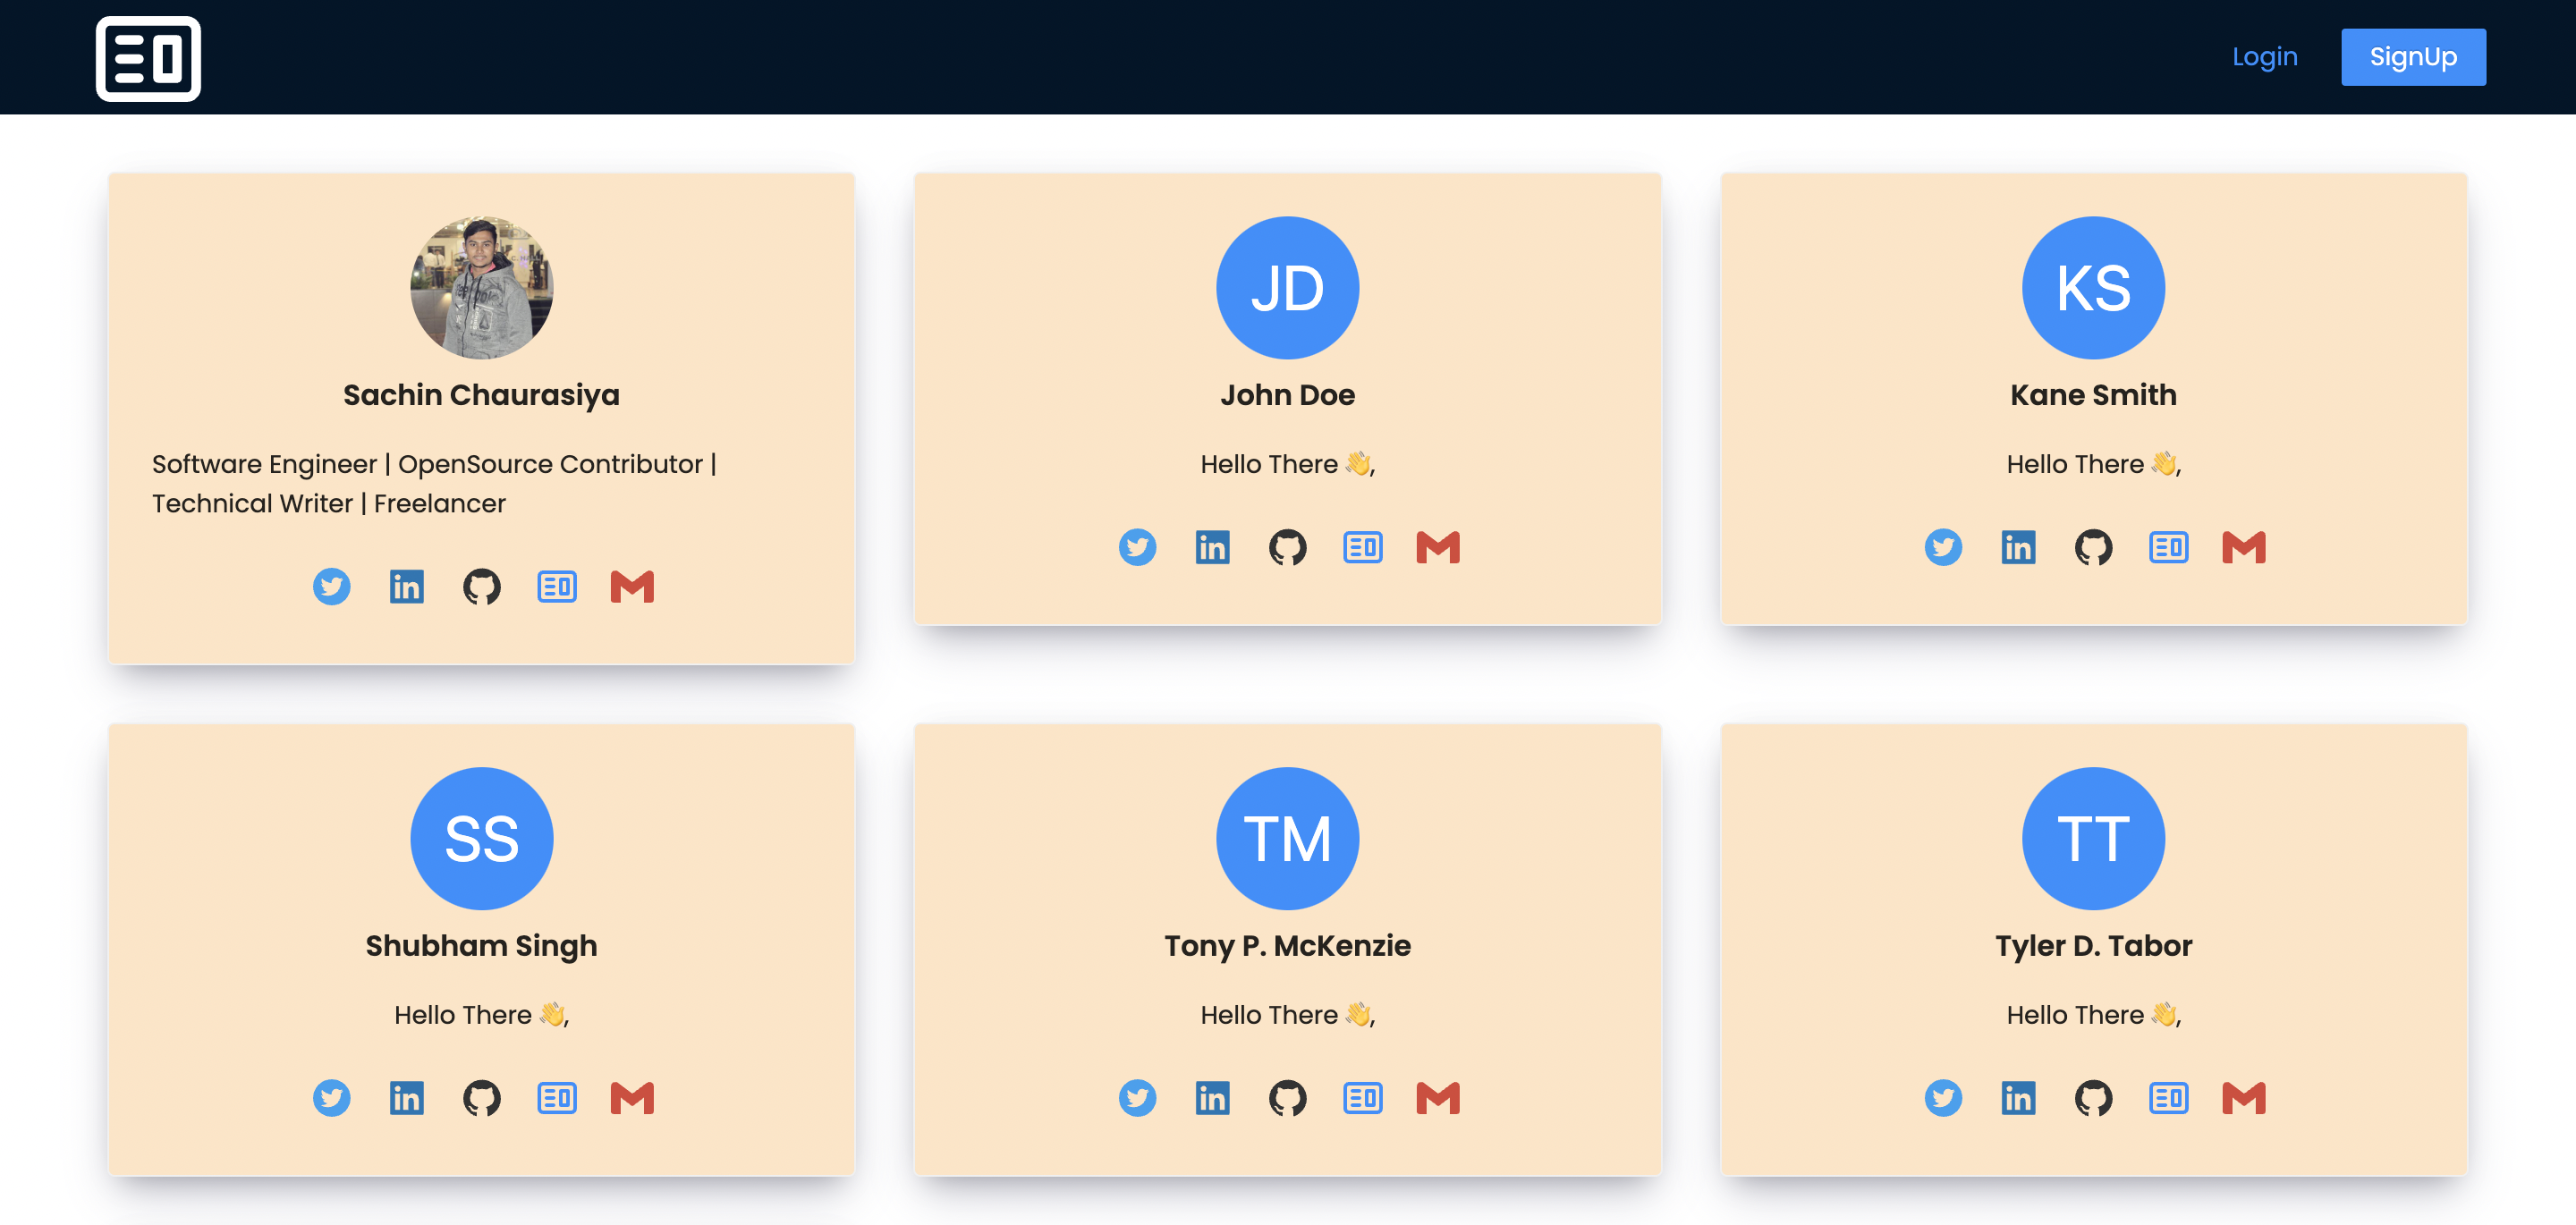
export default AppHeader;Create SocialCards Component
This component will be responsible for fetching all the available profiles in our application and then showing social cards for all the profiles.
# SocialCards/SocialCards.jsx
import {
Button,
Card,
Col,
Image,
message,
Row,
Space,
Spin,
Typography,
} from "antd";
import React, { useEffect, useState } from "react";
import {
AiFillTwitterCircle,
AiFillLinkedin,
AiFillGithub,
} from "react-icons/ai";
import { CgWebsite } from "react-icons/cg";
import { SiGmail } from "react-icons/si";
import { API, AVATAR_API } from "../../constant";
const SocialCards = () => {
const [profiles, setProfiles] = useState([]);
const [isLoading, setIsLoading] = useState(false);
const fetchProfiles = async () => {
setIsLoading(true);
try {
const response = await fetch(`${API}/users`);
const data = await response.json();
setProfiles(data ?? []);
} catch (error) {
console.error(error);
message.error("Error while fetching profiles!");
} finally {
setIsLoading(false);
}
};
useEffect(() => {
fetchProfiles();
}, []);
if (isLoading) {
return <Spin size="large" />;
}
return (
<Row gutter={[32, 32]}>
{profiles.map((profile, index) => (
<Col md={8} lg={8} sm={24} xs={24} key={`${profile.id}_${index}`}>
<Card className="social_card">
<Space
className="social_card_space"
direction="vertical"
align="center"
>
<Image
className="social_image"
preview={false}
src={
profile.avatar_url ??
`${AVATAR_API}?name=${profile.username}&background=1890ff&color=fff`
}
/>
<Typography.Title level={5}>{profile.username}</Typography.Title>
<Typography.Paragraph>{profile.about}</Typography.Paragraph>
<Space size={16} wrap>
{profile.twitter_username && (
<Button
className="social_button twitter"
href={`https://twitter.com/${profile.twitter_username}`}
type="link"
target="_blank"
>
<AiFillTwitterCircle size={24} />
</Button>
)}
{profile.linkedin_username && (
<Button
className="social_button linkedin"
href={`https://www.linkedin.com/in/${profile.linkedin_username}`}
type="link"
target="_blank"
>
<AiFillLinkedin size={24} />
</Button>
)}
{profile.github_username && (
<Button
className="social_button github"
href={`https://github.com/${profile.github_username}`}
type="link"
target="_blank"
>
<AiFillGithub size={24} />
</Button>
)}
{profile.website_url && (
<Button
className="social_button website"
href={profile.website_url}
type="link"
target="_blank"
>
<CgWebsite size={24} />
</Button>
)}
{profile.email && (
<Button
className="social_button gmail"
href={`mailto:${profile.email}`}
type="link"
target="_blank"
>
<SiGmail size={24} />
</Button>
)}
</Space>
</Space>
</Card>
</Col>
))}
</Row>
);
};
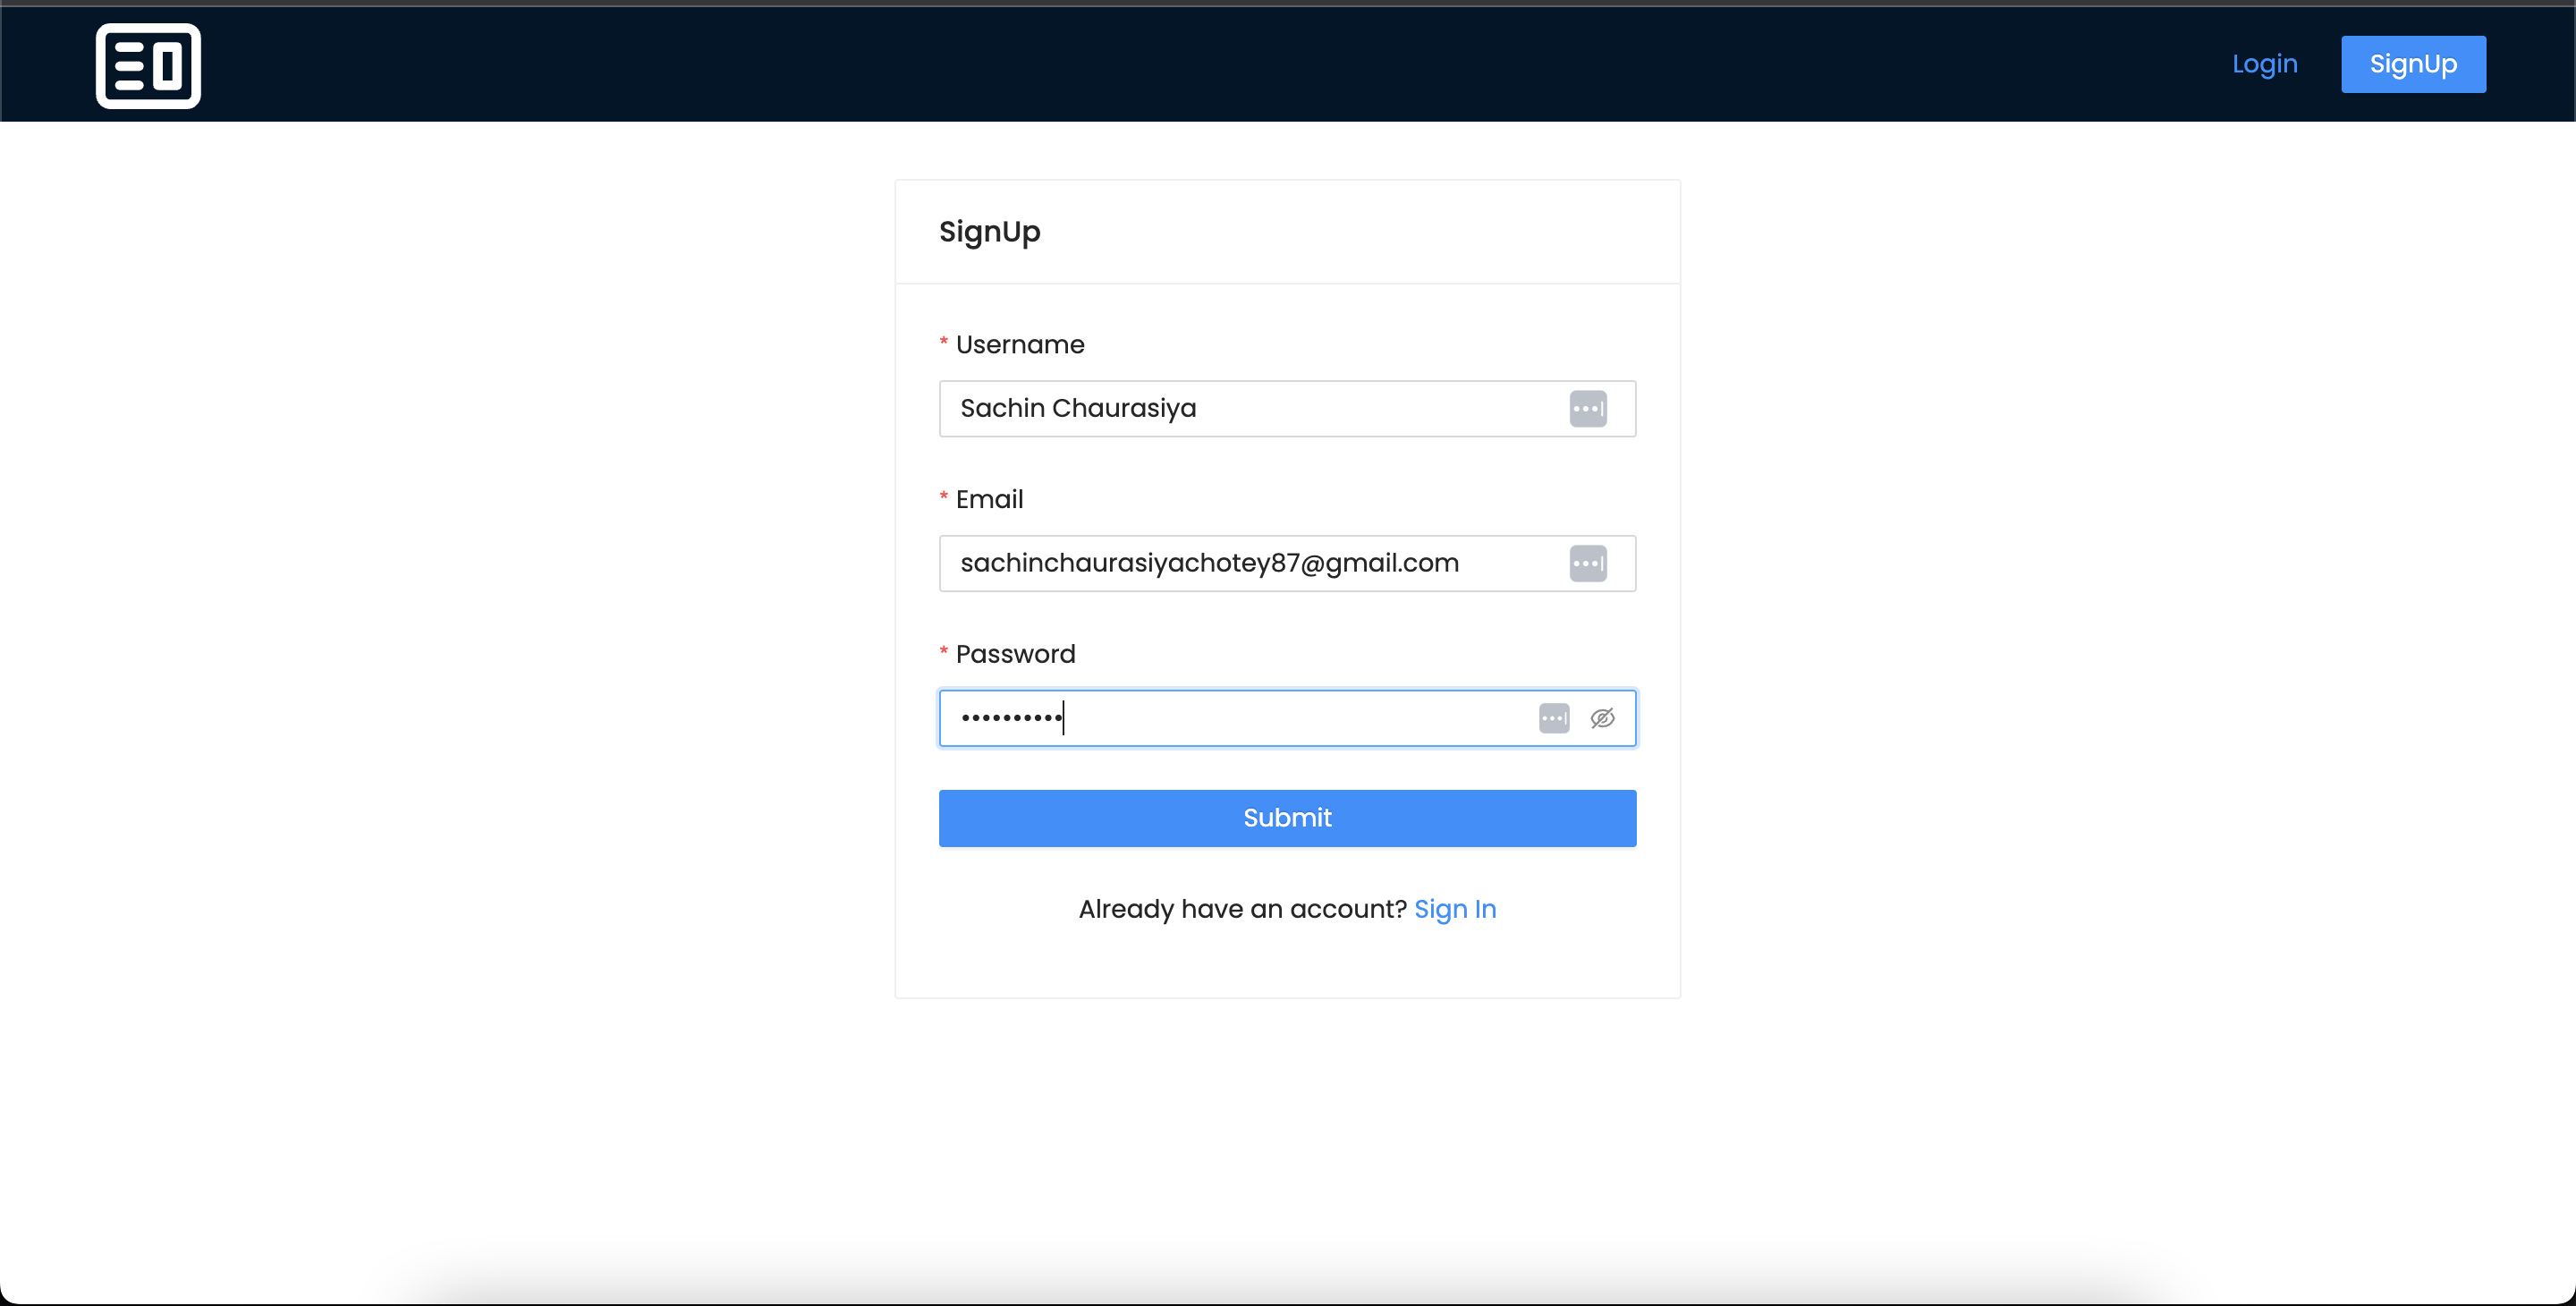
export default SocialCards;Create Register Functionality
You will start by creating the signup page component and there, add a form which will contain 3 fields: username, email and password. You'll use the custom hook, useAuthContext, to get the setUser method to set the Authenticated user data after a successful registration.
You'll also use useScreenSize custom hook to get the user screen type. You can get the code for it hooks/useScreenSize.jsx. Once the user clicks on the submit button, it will call the onFinish method which will call the /auth/local/register endpoint with user data to create the user. On Success, you'll store the authenticated user data and jwt token and redirect users to their profile.
# pages/SignUp/SignUp.jsx
import {
Alert,
Button,
Card,
Col,
Form,
Input,
message,
Row,
Spin,
Typography,
} from "antd";
import React, { Fragment, useState } from "react";
import { Link } from "react-router-dom";
import { useNavigate } from "react-router-dom";
import { useAuthContext } from "../../context/AuthContext";
import useScreenSize from "../../hooks/useScreenSize";
import { API } from "../../constant";
import { setToken } from "../../helpers";
const SignUp = () => {
const { isDesktopView } = useScreenSize();
const navigate = useNavigate();
const { setUser } = useAuthContext();
const [isLoading, setIsLoading] = useState(false);
const [error, setError] = useState("");
const onFinish = async (values) => {
setIsLoading(true);
try {
const response = await fetch(`${API}/auth/local/register`, {
method: "POST",
headers: {
"Content-Type": "application/json",
},
body: JSON.stringify(values),
});
const data = await response.json();
if (data?.error) {
throw data?.error;
} else {
// set the token
setToken(data.jwt);
// set the user
setUser(data.user);
message.success(`Welcome to Social Cards ${data.user.username}!`);
navigate("/profile", { replace: true });
}
} catch (error) {
console.error(error);
setError(error?.message ?? "Something went wrong!");
} finally {
setIsLoading(false);
}
};
return (
<Fragment>
<Row align="middle">
<Col span={isDesktopView ? 8 : 24} offset={isDesktopView ? 8 : 0}>
<Card title="SignUp">
{error ? (
<Alert
className="alert_error"
message={error}
type="error"
closable
afterClose={() => setError("")}
/>
) : null}
<Form
name="basic"
layout="vertical"
onFinish={onFinish}
autoComplete="off"
>
<Form.Item
label="Username"
name="username"
rules={[
{
required: true,
type: "string",
},
]}
>
<Input placeholder="Username" />
</Form.Item>
<Form.Item
label="Email"
name="email"
rules={[
{
required: true,
type: "email",
},
]}
>
<Input placeholder="Email address" />
</Form.Item>
<Form.Item
label="Password"
name="password"
rules={[{ required: true }]}
>
<Input.Password placeholder="Password" />
</Form.Item>
<Form.Item>
<Button
type="primary"
htmlType="submit"
className="login_submit_btn"
>
Submit {isLoading && <Spin size="small" />}
</Button>
</Form.Item>
</Form>
<Typography.Paragraph className="form_help_text">
Already have an account? <Link to="/signin">Sign In</Link>
</Typography.Paragraph>
</Card>
</Col>
</Row>
</Fragment>
);
};
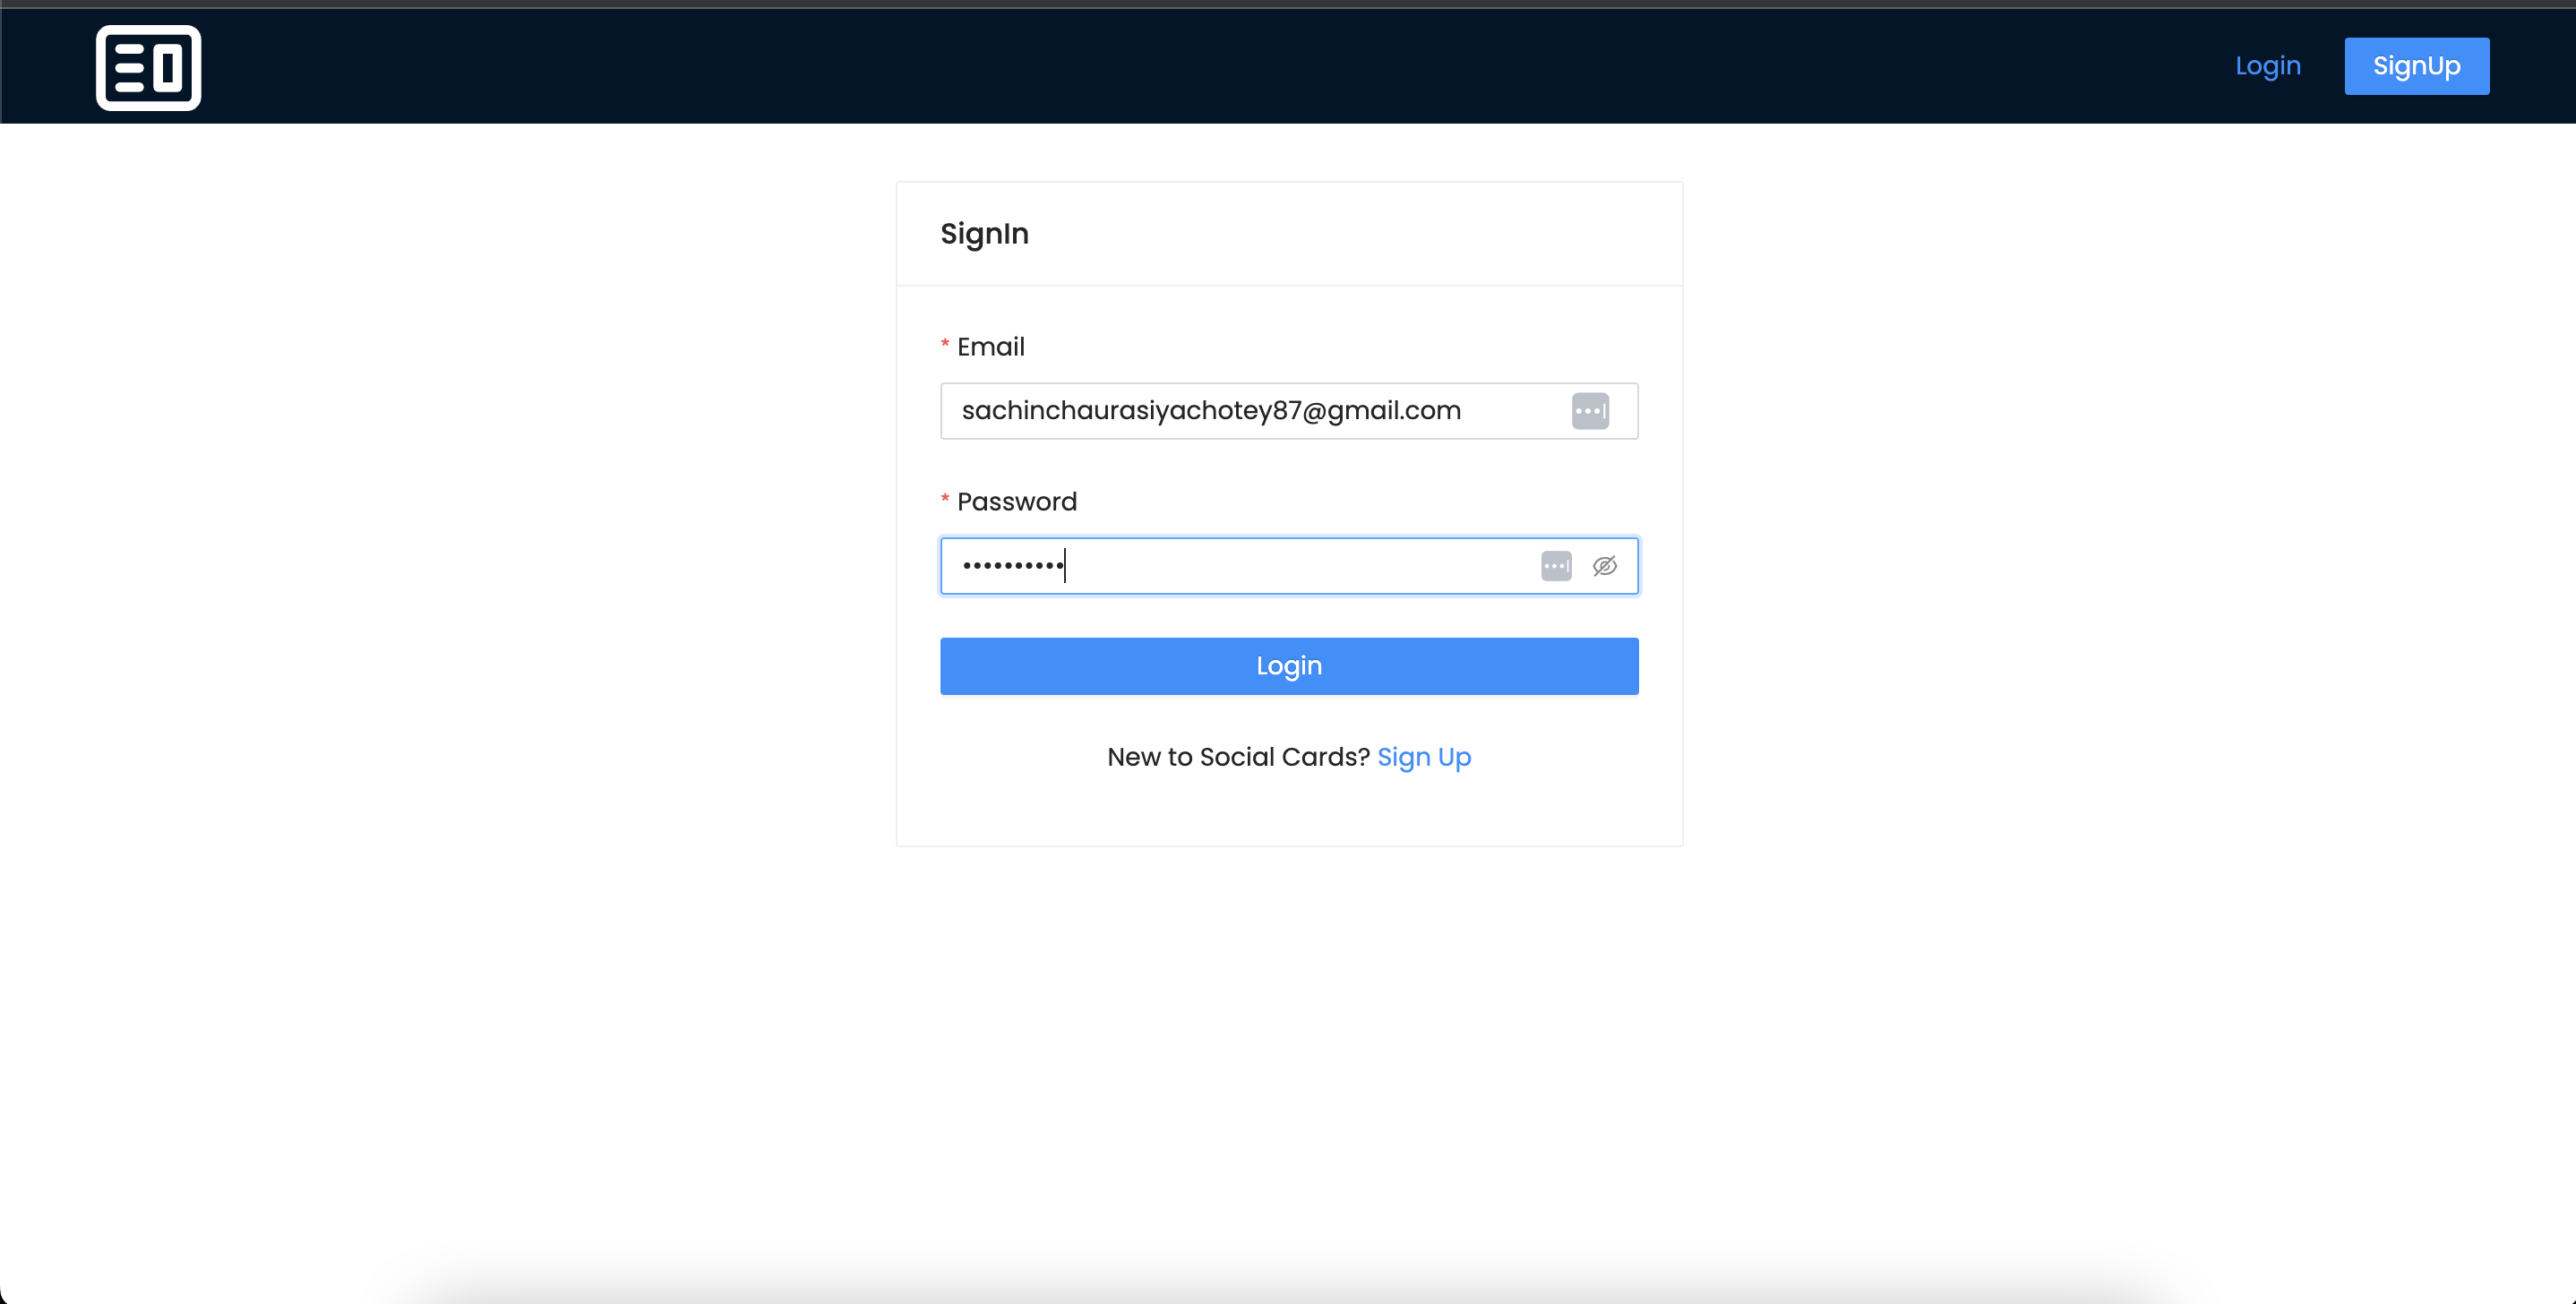
export default SignUp;Create Sign-In Functionality
If the user already has an account, they'll need a login form to authenticate the application. You'll create a Sign-In page to handle that. Once the user clicks on the submit button, it will call the onFinish method, which will call the /auth/local endpoint with user data to create the user. On Success, it'll store the authenticated user data and jwt token and redirect users to their profile.
# pages/SignIn/SignIn.jsx
import {
Alert,
Button,
Card,
Col,
Form,
Input,
message,
Row,
Spin,
Typography,
} from "antd";
import React, { Fragment, useState } from "react";
import { Link } from "react-router-dom";
import { useNavigate } from "react-router-dom";
import { useAuthContext } from "../../context/AuthContext";
import useScreenSize from "../../hooks/useScreenSize";
import { API } from "../../constant";
import { setToken } from "../../helpers";
const SignIn = () => {
const { isDesktopView } = useScreenSize();
const navigate = useNavigate();
const { setUser } = useAuthContext();
const [isLoading, setIsLoading] = useState(false);
const [error, setError] = useState("");
const onFinish = async (values) => {
setIsLoading(true);
try {
const value = {
identifier: values.email,
password: values.password,
};
const response = await fetch(`${API}/auth/local`, {
method: "POST",
headers: {
"Content-Type": "application/json",
},
body: JSON.stringify(value),
});
const data = await response.json();
if (data?.error) {
throw data?.error;
} else {
// set the token
setToken(data.jwt);
// set the user
setUser(data.user);
message.success(`Welcome back ${data.user.username}!`);
navigate("/profile", { replace: true });
}
} catch (error) {
console.error(error);
setError(error?.message ?? "Something went wrong!");
} finally {
setIsLoading(false);
}
};
return (
<Fragment>
<Row align="middle">
<Col span={isDesktopView ? 8 : 24} offset={isDesktopView ? 8 : 0}>
<Card title="SignIn">
{error ? (
<Alert
className="alert_error"
message={error}
type="error"
closable
afterClose={() => setError("")}
/>
) : null}
<Form
name="basic"
layout="vertical"
onFinish={onFinish}
autoComplete="off"
>
<Form.Item
label="Email"
name="email"
rules={[
{
required: true,
type: "email",
},
]}
>
<Input placeholder="Email address" />
</Form.Item>
<Form.Item
label="Password"
name="password"
rules={[{ required: true }]}
>
<Input.Password placeholder="Password" />
</Form.Item>
<Form.Item>
<Button
type="primary"
htmlType="submit"
className="login_submit_btn"
>
Login {isLoading && <Spin size="small" />}
</Button>
</Form.Item>
</Form>
<Typography.Paragraph className="form_help_text">
New to Social Cards? <Link to="/signup">Sign Up</Link>
</Typography.Paragraph>
</Card>
</Col>
</Row>
</Fragment>
);
};
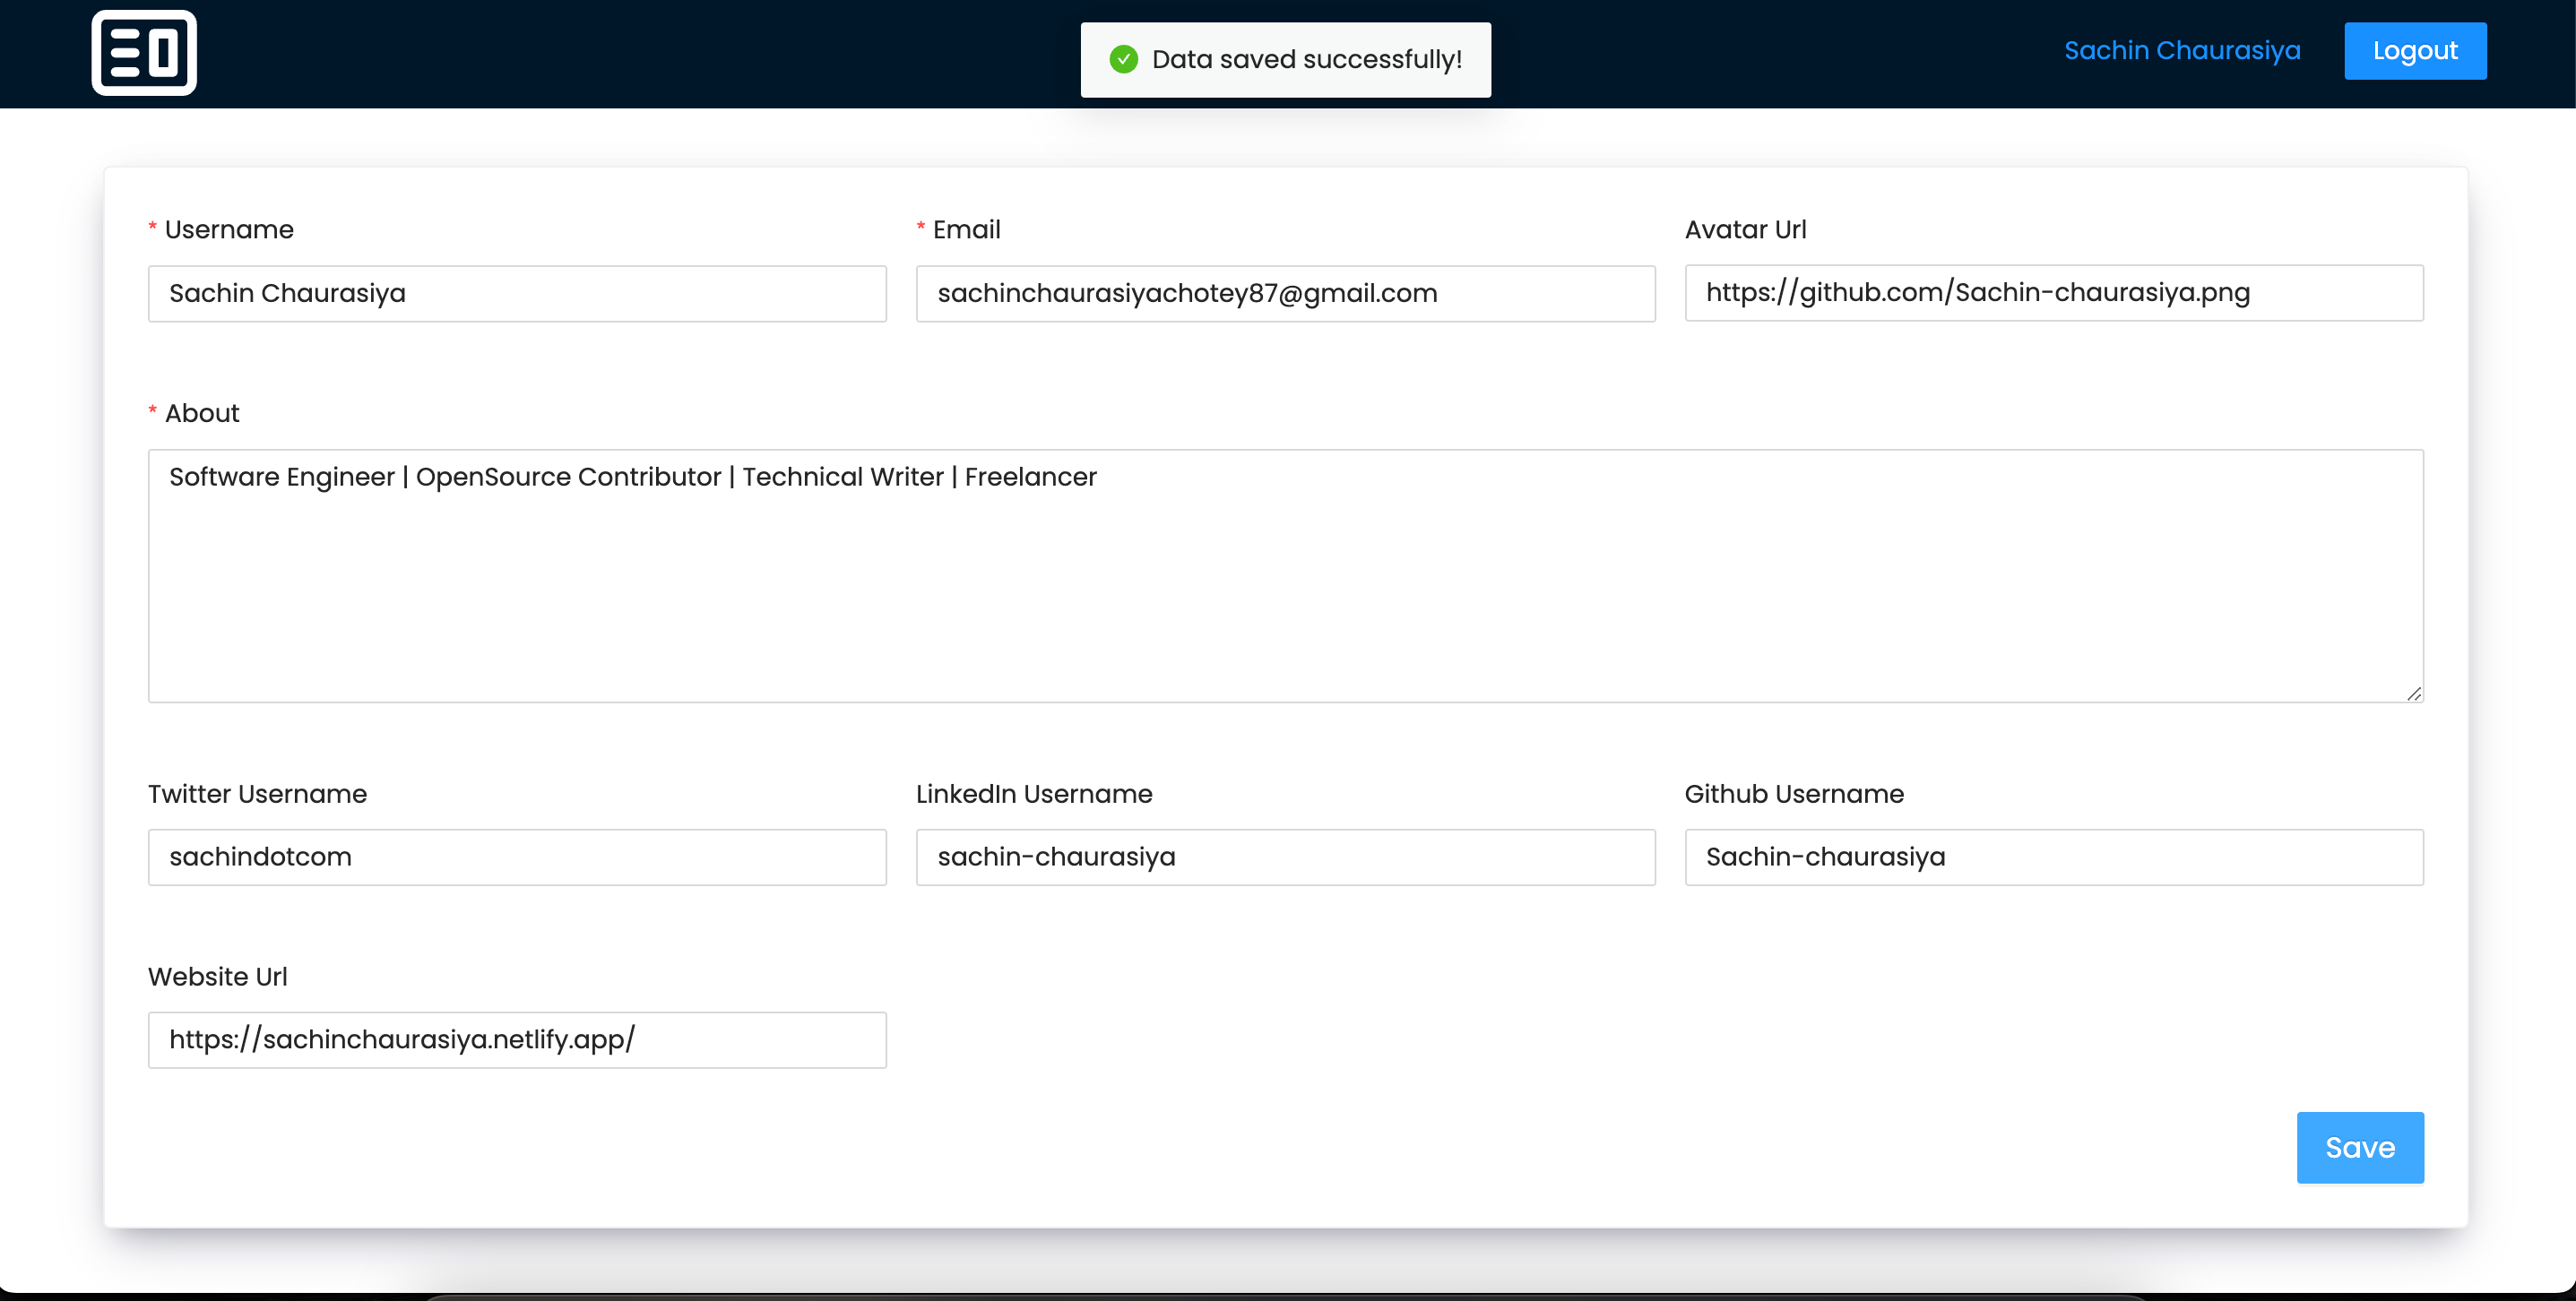
export default SignIn;Add Edit Profile Functionality for Authenticated Users
The profile component will hold the authenticated user data and allow the user to update the data. Once the user is logged in to the application, it will redirect to the profile component and this route will be a protected route.
    # components/Profile/Profile.jsx

    import React from "react";
    import { Button, Card, Col, Form, Input, message, Row, Spin } from "antd";
    import { useAuthContext } from "../../context/AuthContext";
    import { API } from "../../constant";
    import { useState } from "react";
    import { getToken } from "../../helpers";

    const Profile = () => {
      const [loading, setLoading] = useState(false);
      const { user, isLoading, setUser } = useAuthContext();

      const handleProfileUpdate = async (data) => {
        setLoading(true);
        try {
          const response = await fetch(`${API}/users/${user.id}`, {
            method: "PUT",
            headers: {
              "Content-Type": "application/json",
              // set the auth token to the user's jwt
              Authorization: `Bearer ${getToken()}`,
            },
            body: JSON.stringify(data),
          });
          const responseData = await response.json();

          setUser(responseData);
          message.success("Data saved successfully!");
        } catch (error) {
          console.error(Error);
          message.error("Error While Updating the Profile!");
        } finally {
          setLoading(false);
        }
      };

      if (isLoading) {
        return <Spin size="large" />;
      }

      return (
        <Card className="profile_page_card">
          <Form
            layout="vertical"
            initialValues={{
              username: user?.username,
              email: user?.email,
              twitter_username: user?.twitter_username,
              linkedin_username: user?.linkedin_username,
              github_username: user?.github_username,
              avatar_url: user?.avatar_url,
              website_url: user?.website_url,
              about: user?.about,
            }}
            onFinish={handleProfileUpdate}
          >
            <Row gutter={[16, 16]}>
              <Col md={8} lg={8} sm={24} xs={24}>
                <Form.Item
                  label="Username"
                  name="username"
                  rules={[
                    {
                      required: true,
                      message: "Username is required!",
                      type: "string",
                    },
                  ]}
                >
                  <Input placeholder="Username" />
                </Form.Item>
              </Col>
              <Col md={8} lg={8} sm={24} xs={24}>
                <Form.Item
                  label="Email"
                  name="email"
                  rules={[
                    {
                      required: true,
                      message: "Email is required!",
                      type: "email",
                    },
                  ]}
                >
                  <Input placeholder="Email" />
                </Form.Item>
              </Col>
              <Col md={8} lg={8} sm={24} xs={24}>
                <Form.Item
                  label="Avatar Url"
                  name="avatar_url"
                  rules={[
                    {
                      type: "url",
                    },
                  ]}
                >
                  <Input placeholder="Avatar Url" />
                </Form.Item>
              </Col>
              <Col span={24}>
                <Form.Item
                  label="About"
                  name="about"
                  rules={[
                    {
                      required: true,
                      type: "string",
                      max: 120,
                    },
                  ]}
                >
                  <Input.TextArea placeholder="About" rows={6} />
                </Form.Item>
              </Col>
              <Col md={8} lg={8} sm={24} xs={24}>
                <Form.Item
                  label="Twitter Username"
                  name="twitter_username"
                  rules={[
                    {
                      type: "string",
                    },
                  ]}
                >
                  <Input placeholder="Twitter Username" />
                </Form.Item>
              </Col>
              <Col md={8} lg={8} sm={24} xs={24}>
                <Form.Item
                  label="LinkedIn Username"
                  name="linkedin_username"
                  rules={[
                    {
                      type: "string",
                    },
                  ]}
                >
                  <Input placeholder="LinkedIn Username" />
                </Form.Item>
              </Col>
              <Col md={8} lg={8} sm={24} xs={24}>
                <Form.Item
                  label="Github Username"
                  name="github_username"
                  rules={[
                    {
                      type: "string",
                    },
                  ]}
                >
                  <Input placeholder="Github Username" />
                </Form.Item>
              </Col>
              <Col md={8} lg={8} sm={24} xs={24}>
                <Form.Item
                  label="Website Url"
                  name="website_url"
                  rules={[
                    {
                      type: "url",
                    },
                  ]}
                >
                  <Input placeholder="Website Url" />
                </Form.Item>
              </Col>
            </Row>
            <Button
              className="profile_save_btn"
              htmlType="submit"
              type="primary"
              size="large"
            >
              {loading ? (
                <>
                  <Spin size="small" /> Saving
                </>
              ) : (
                "Save"
              )}
            </Button>
          </Form>
        </Card>
      );
    };

    export default Profile;
There are four functionalities: register, login, logout and Edit Profile. The next step is to create routes for these and add them to the app component.
Add Routes
There'll be four routes: home, signin, signup and profile ( protected ). For the profile route, there should be a condition that if the token is present, it should only render the profile component; otherwise it should redirect the user to the login page.
    # src/Routes.jsx

    import React from "react";
    import { Routes, Route, Navigate } from "react-router-dom";
    import Profile from "./components/Profile/Profile";
    import SocialCards from "./components/SocialCards/SocialCards";
    import { getToken } from "./helpers";
    import SignIn from "./pages/SignIn/SignIn";
    import SignUp from "./pages/SignUp/SignUp";

    const AppRoutes = () => {
      return (
        <Routes>
          <Route path="/" element={<SocialCards />} />
          <Route path="/signin" element={<SignIn />} />
          <Route path="/signup" element={<SignUp />} />
          <Route
            path="/profile"
            element={getToken() ? <Profile /> : <Navigate to="/signin" />}
          />
        </Routes>
      );
    };

    export default AppRoutes;
Configure App Component
Finally, change the content of App.jsx to the below content. It will render the AppRoutes component and everything will be taken care of by the AppRoutes.
    # src/App.jsx

    import React from "react";
    import { Col, Layout, Row } from "antd";
    import AppHeader from "./components/Appheader/Appheader";
    import AppRoutes from "./Routes";
    const { Header, Content } = Layout;

    const App = () => {
      return (
        <Layout>
          <Row gutter={[0, 32]}>
            <Col span={24}>
              <Header>
                <AppHeader />
              </Header>
            </Col>
            <Col span={22} offset={1}>
              <Content>
                <AppRoutes />
              </Content>
            </Col>
          </Row>
        </Layout>
      );
    };

    export default App;
Conclusion
So far, we have seen how to build a React application with authentication using Strapi as a headless CMS. Let’s summarize what we’ve been able to achieve so far.
- You created and set up Strapi, configured the User collection type, and modified permissions for public and authenticated users.
- You created a new React application with antd for styling.
- In Strapi, you used the local provider (email and password) for authentication.
- In React, you used local storage to store the JWT token, allowing authenticated requests to Strapi.
- To store the authenticated user data, you used React Context.
There are probably a few things you learned from this tutorial that you can apply to your projects. The Strapi and React application source code is available on GitHub and listed in the resources section if you need them.
Resources
Here are a few articles I think will be helpful:
- Authentication, Roles and Permissions in Strapi
- Registration and Login in Strapi with VueJS
- Strapi v4 Authentication with Remix
Here is the code for the React frontend and Strapi backend: