
Sending and receiving text messages in recent times are frequently done online and in real-time. Text messages in real-time chat applications are sent and received immediately, depending on the speed of the router. Realtime messaging is very essential in chat applications, and Socket.io grants us this privilege.
Goal
In this tutorial, you’ll build a chat application hovering around:
- Authentication Email Auth, Token Auth, and Role Auth
- SQL database (PostgreSQL)
Prerequisites
To follow this tutorial, be sure you have the following:
- Node installed (version
18orv20), - Basic knowledge of NextJS,
- PostgreSQL installed (preferably version
14or higher, with a minimum requirement of version12), and - Text Editor, VS code preferably.
This article is a modification of How to Build a Real-time Chat Forum using Strapi, Socket.io, React, and MongoDB.
Now that everything is correct let’s set up the PostgreSQL database.
Setting up PostgreSQL
Search and open up PgAdmin in the start menu of your computer. PgAdmin will help create and manage your Strapi database.
PgAdmin is included with your PostgreSQL installation. Upon opening PgAdmin for the first time, you'll be prompted to enter the password you set during the PostgreSQL setup.
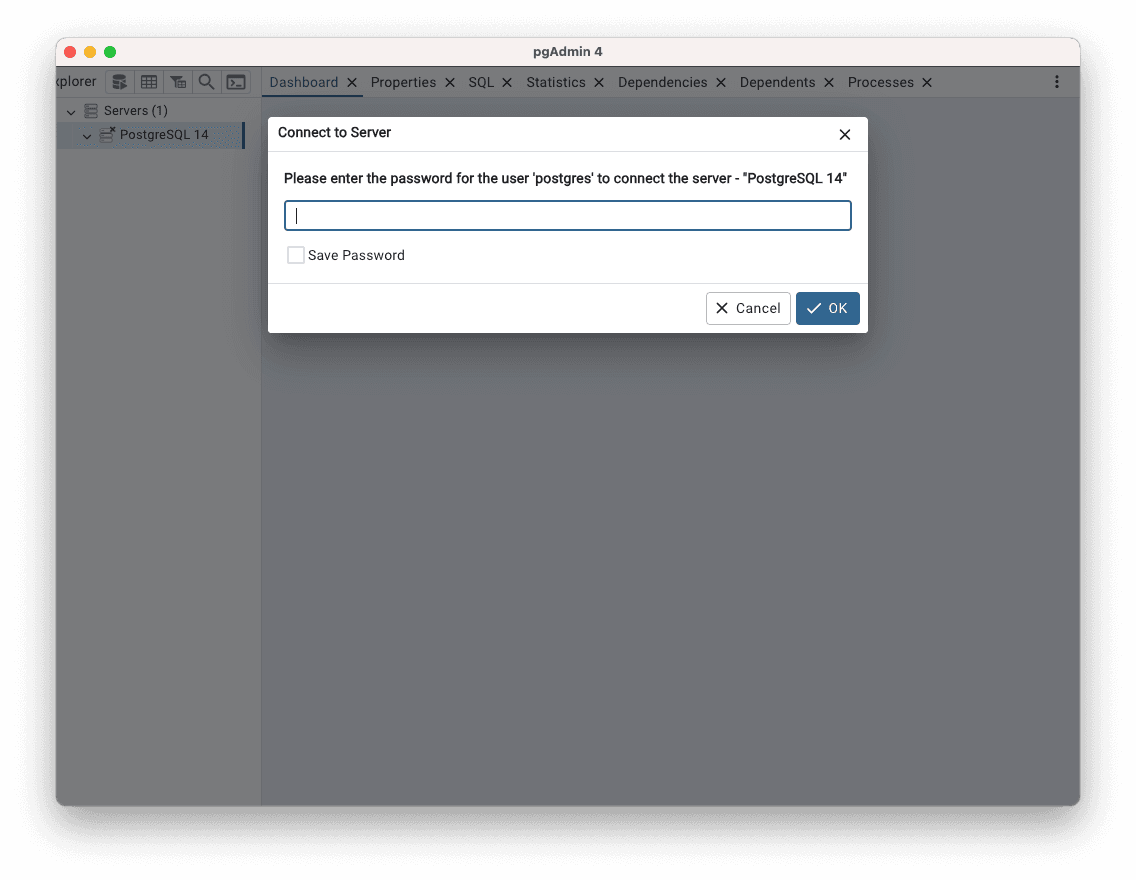
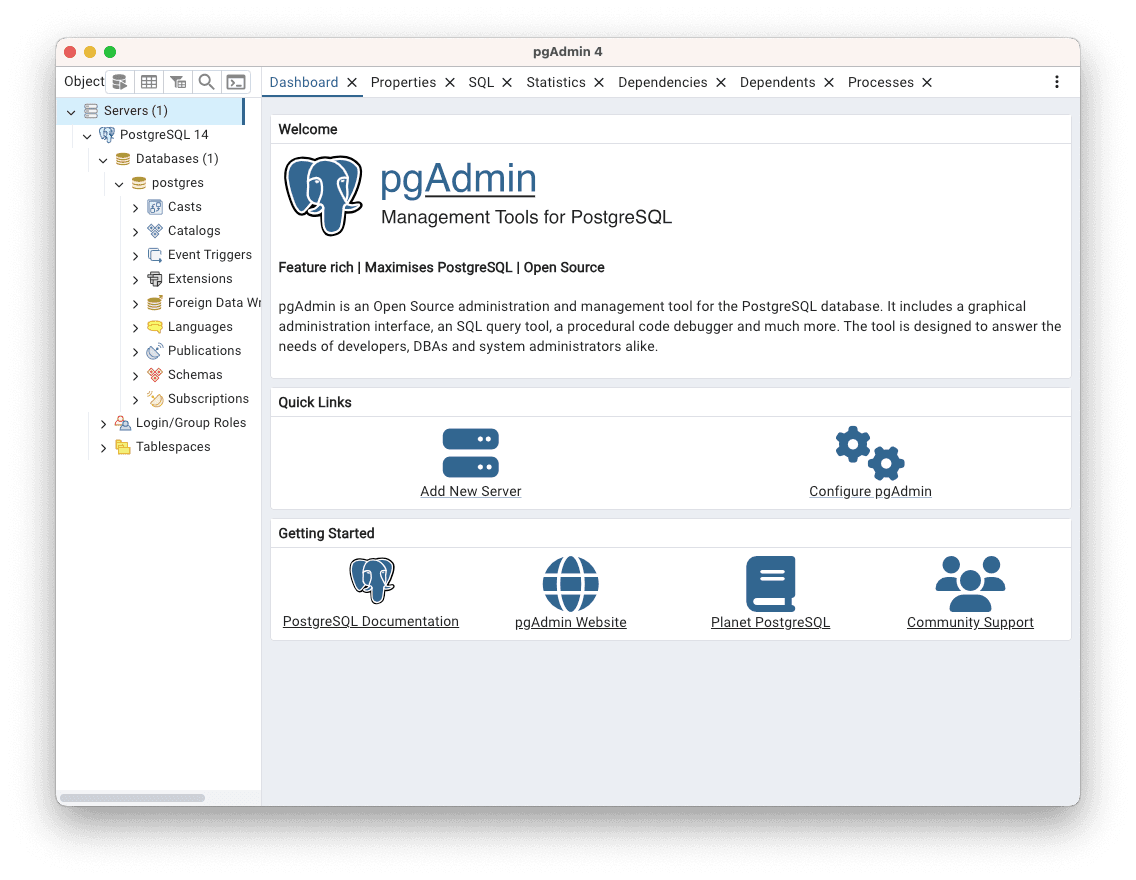
On the left navigation bar, click on Servers and click on PostgreSQL 14.
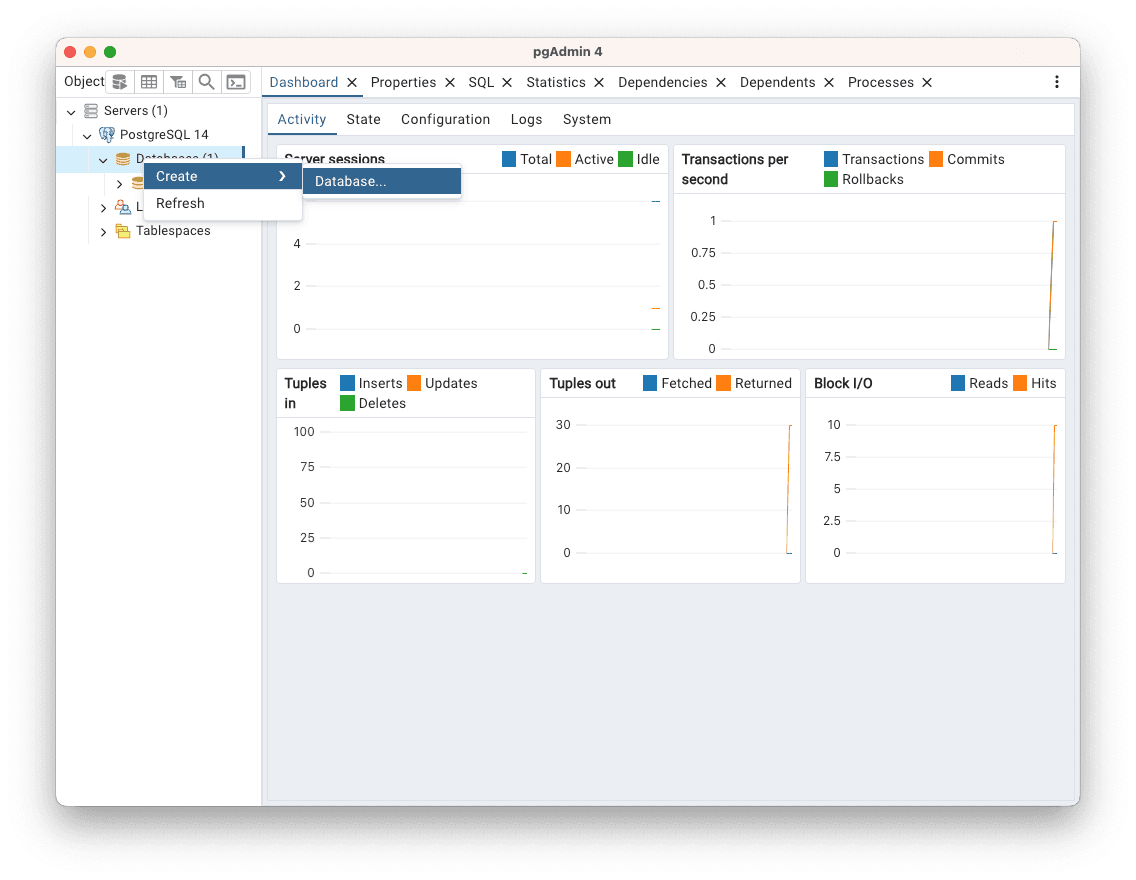
Right-click on Databases, hover over Create and click on Database.
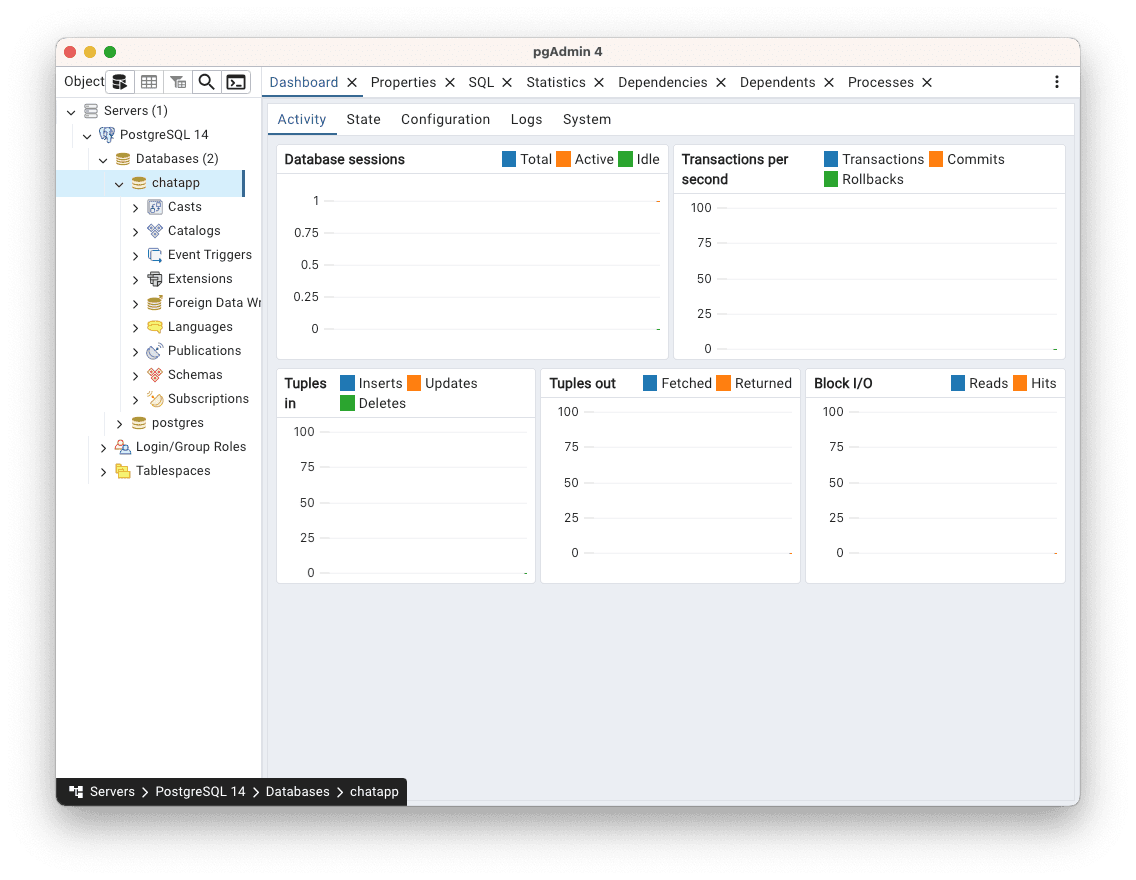
You can name the database anything you desire, but in this tutorial, the name of the database is chatapp. Once you're done naming the database, hit save.
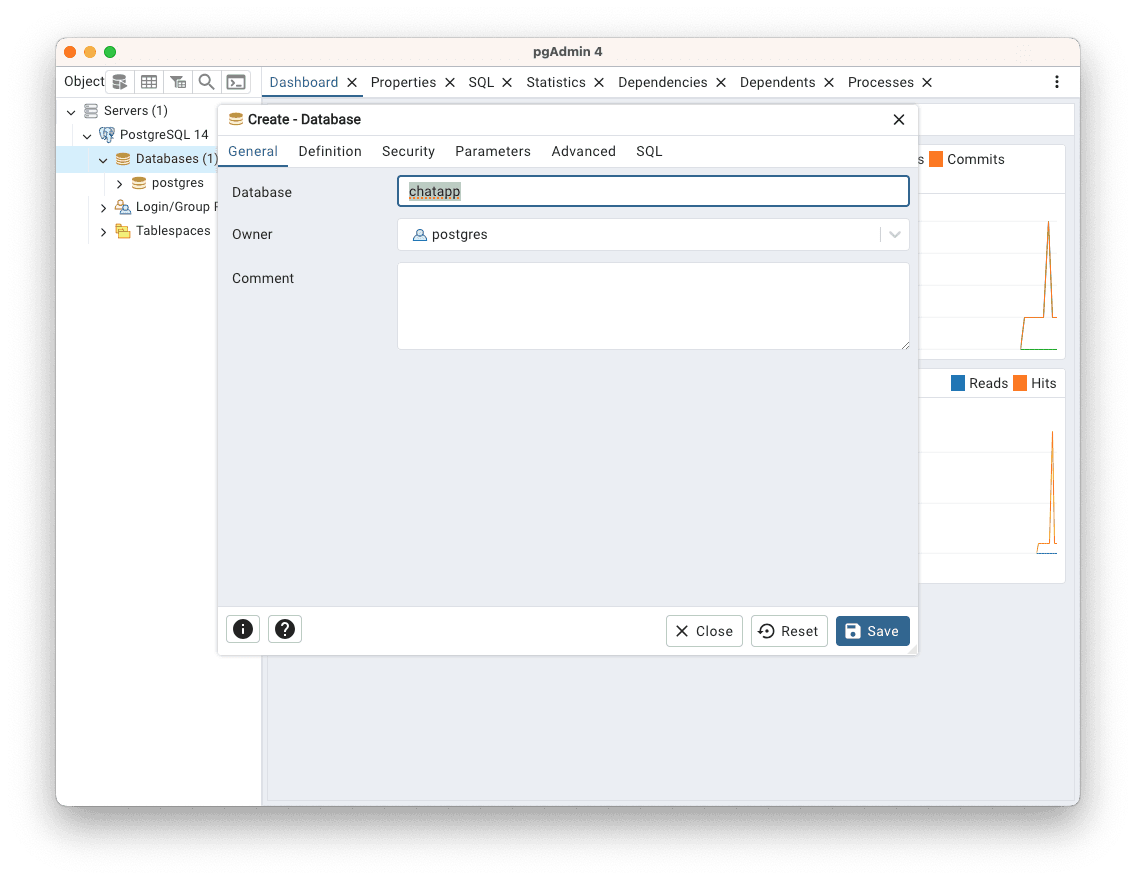
The name of the database, chatapp, will be shown on the left navigation bar as shown below:
Connecting PostgreSQL with Strapi
In this last section, you learned how to create a database in PostgreSQL. In this section, you’ll learn how to connect PostgreSQL with Strapi using the Quickstart option and the Custom setup option.
Custom Setup
Open up your terminal and create a folder for this application. This folder is the project’s root directory for this application. In this tutorial, the name of this folder is strapified-chat. Not a bad name, right?
mkdir strapified-chatOpen the folder in your desired code editor or run the code below in your terminal to open the folder with Vs Code:
cd strapified-chat
code .
After starting your code editor, open the integrated terminal in your code editor to quickly initialize and create a package.json file for the project using the code below:
npm init --yInstalling Strapi
The following npm command will install the latest Strapi instance.
npx create-strapi@latest chatappIf you prefer yarn instead, in your terminal, run the command;
yarn create strapiWhen you press enter, the terminal will ask for a project name. For this instance name it, chatapp.
You can check out the official Strapi page to learn about the different ways to install Strapi.
The terminal will prompt you to either log in or sign up for Strapi Cloud or skip this step. Use the arrow keys to navigate and press Enter to select your option.
For this demo, skip this step, but in a live production app, this just means you will have to host the project yourself.
During the Strapi installation process, when prompted with:
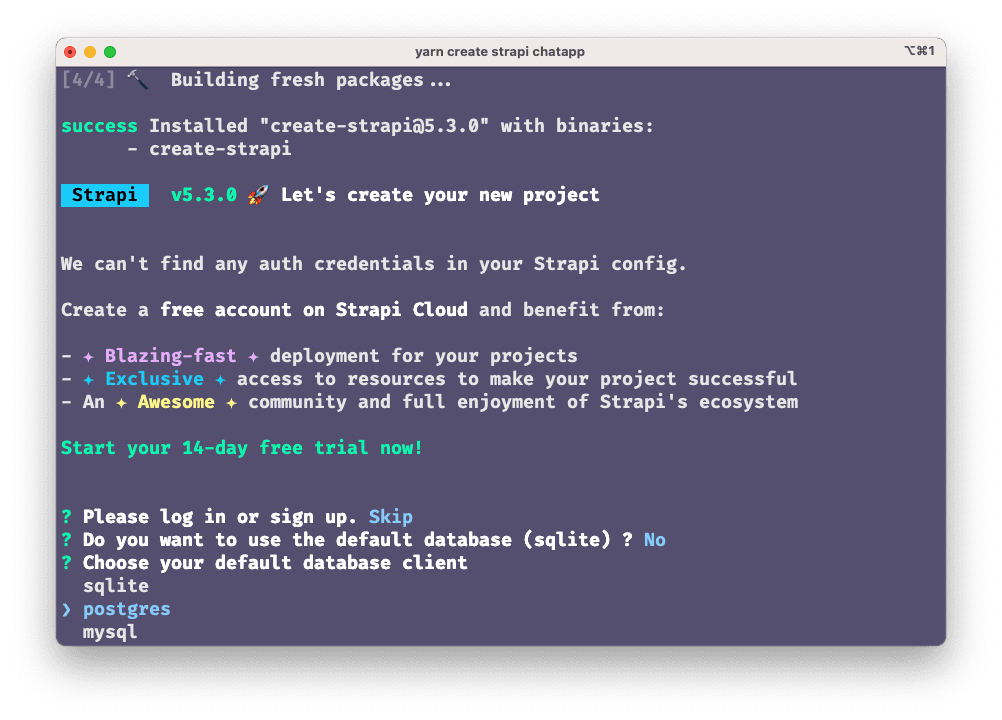
? Do you want to use the default database (sqlite)? Y/nSelect No by typing n and pressing Enter. This action allows you to customize the database settings. Use the arrow keys to navigate through the options, and select postgres as your database client. Confirm your selection by pressing Enter.
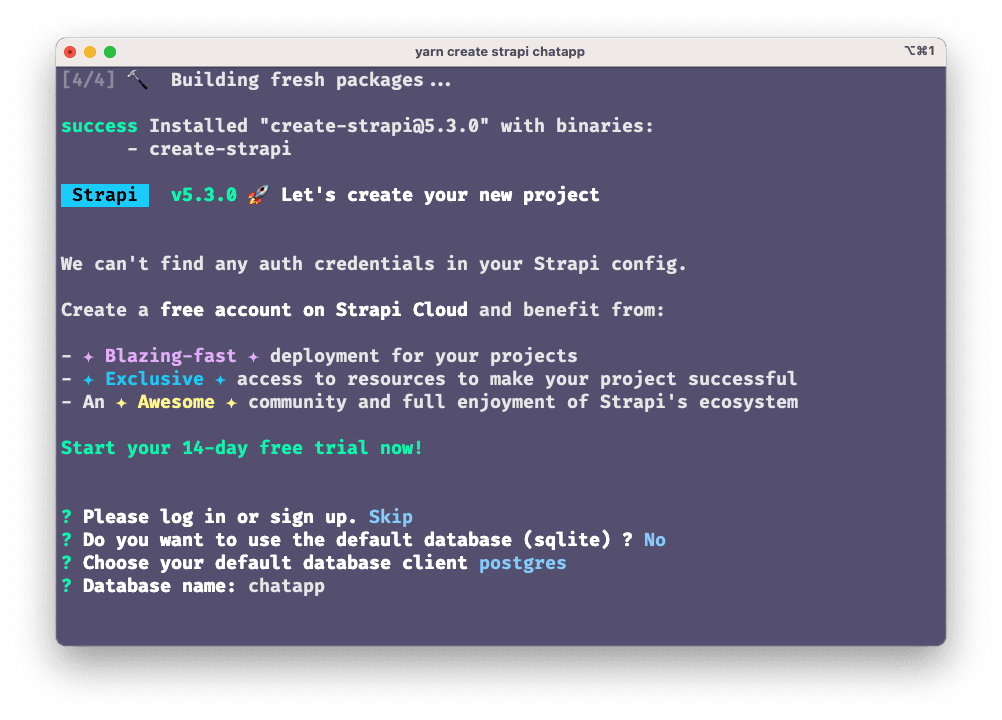
For the database name, type chatapp and press Enter to proceed to the next prompt.
The terminal will ask you a bunch more questions. For each of these questions, input the following configuration:
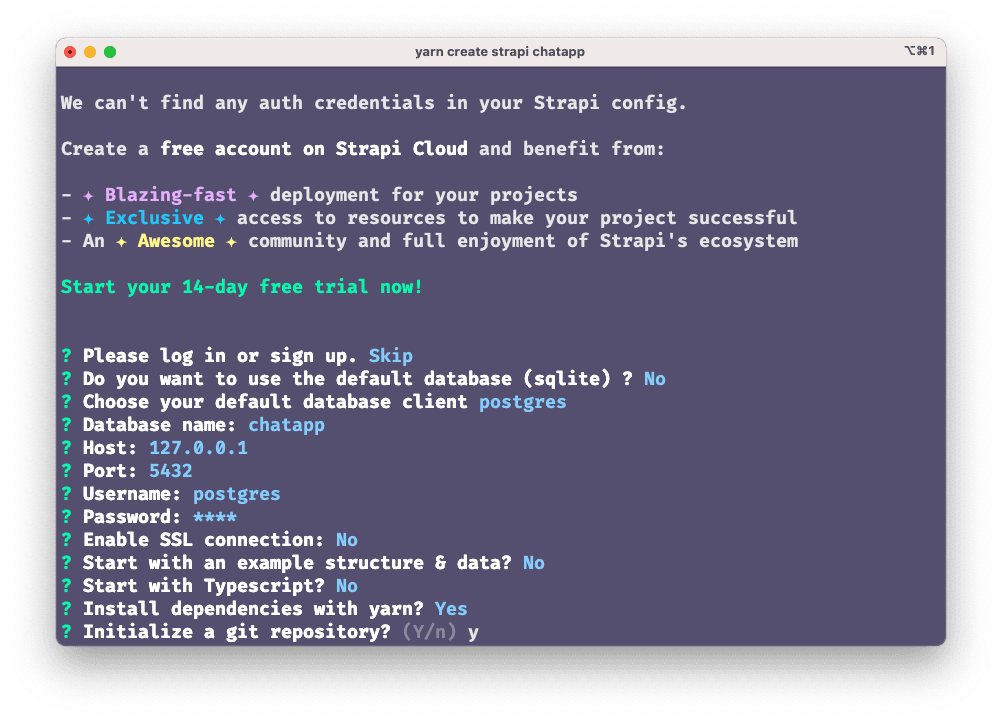
Once the series of questions is over, Strapi will create the project using the custom options you specified. When the installation is done, Strapi sends a success message and outlines the basic commands that help get your project started.
Accessing Strapi Admin
Now that you have installed Strapi into the application, it’s time to get access to Strapi admin. Move into the created project and run the Strapi build command below to build the Strapi admin UI:
cd chatapp
npm run build
The output is shown below:
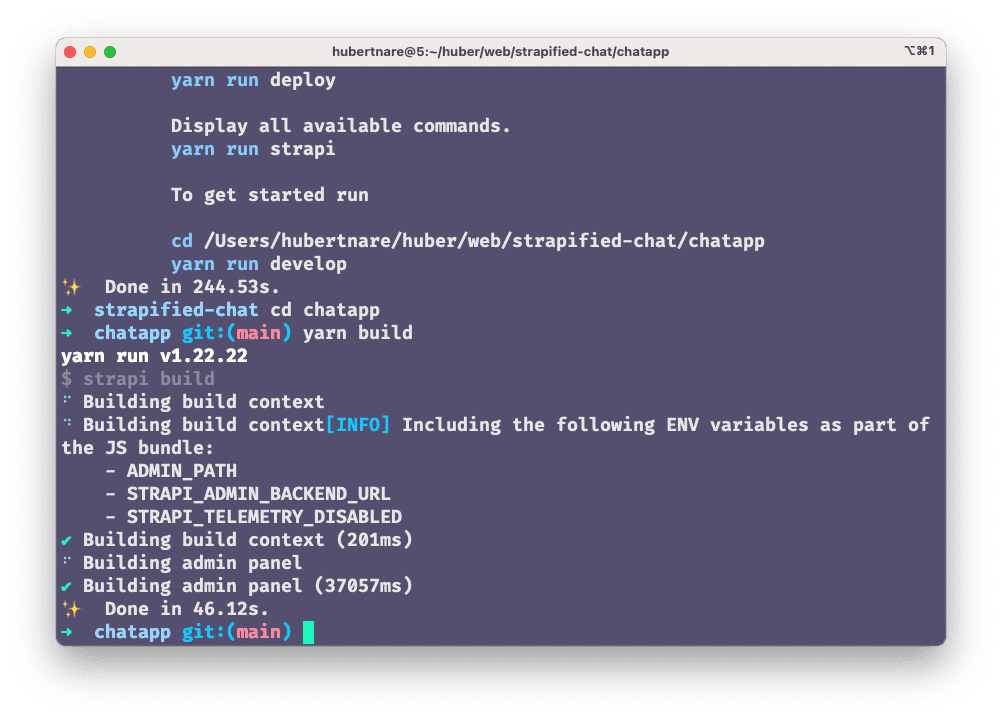
To start Strapi in development mode, run the following command:
npm run developThis command launches the Strapi local development server, which will be accessible on port 1337
Configuring Strapi
Once the installation is complete, open the folder named strapified-chat in a code editor. Click on chatapp, then select database.js from the config folder.
Replace the following code into the database.js file to configure the PostgreSQL database.
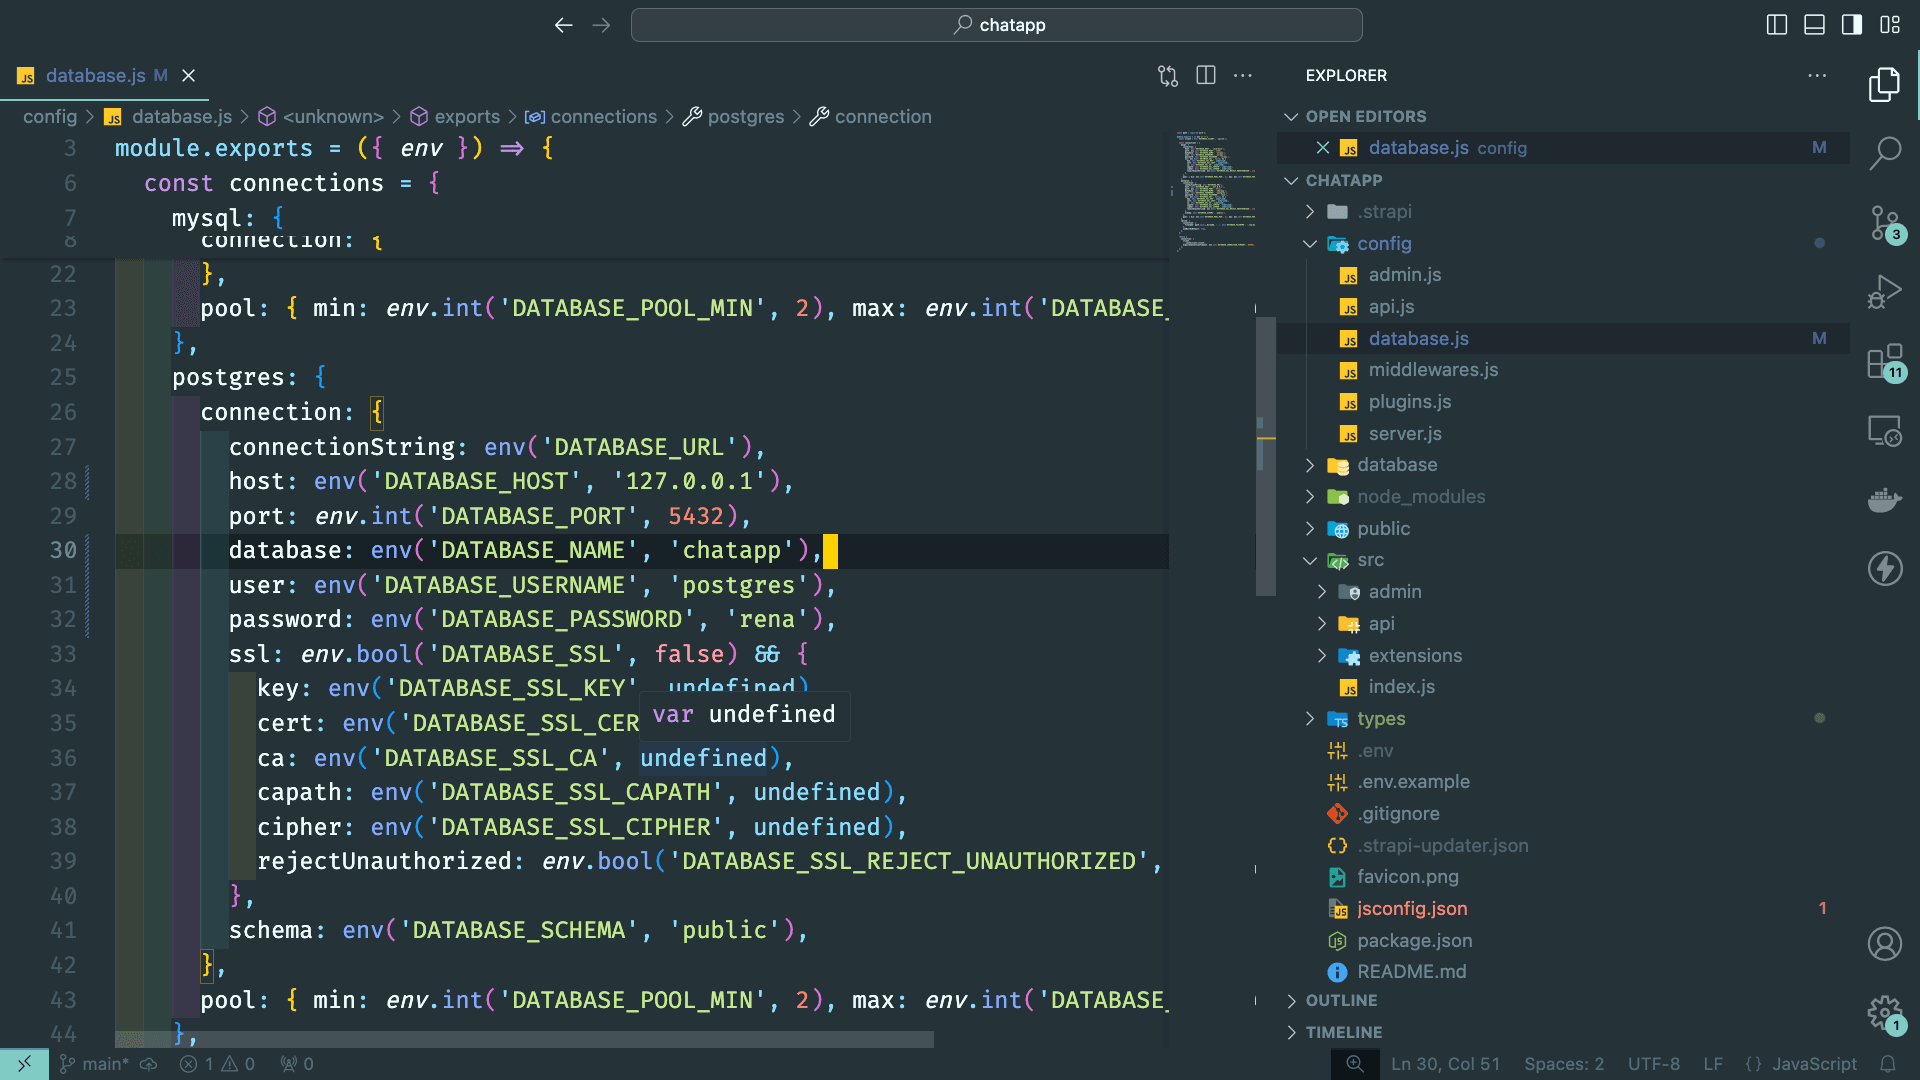
Replace the following code into the database.js file to configure the PostgreSQL database.
module.exports = ({ env }) => {
  const client = env("DATABASE_CLIENT", "sqlite");

  const connections = {
    mysql: {
      connection: {
        host: env("DATABASE_HOST", "localhost"),
        port: env.int("DATABASE_PORT", 3306),
        database: env("DATABASE_NAME", "strapi"),
        user: env("DATABASE_USERNAME", "strapi"),
        password: env("DATABASE_PASSWORD", "strapi"),
        ssl: env.bool("DATABASE_SSL", false) && {
          key: env("DATABASE_SSL_KEY", undefined),
          cert: env("DATABASE_SSL_CERT", undefined),
          ca: env("DATABASE_SSL_CA", undefined),
          capath: env("DATABASE_SSL_CAPATH", undefined),
          cipher: env("DATABASE_SSL_CIPHER", undefined),
          rejectUnauthorized: env.bool(
            "DATABASE_SSL_REJECT_UNAUTHORIZED",
            true,
          ),
        },
      },
      pool: {
        min: env.int("DATABASE_POOL_MIN", 2),
        max: env.int("DATABASE_POOL_MAX", 10),
      },
    },
    postgres: {
      connection: {
        connectionString: env("DATABASE_URL"),
        host: env("DATABASE_HOST", "127.0.0.1"),
        port: env.int("DATABASE_PORT", 5432),
        database: env("DATABASE_NAME", "chatapp"),
        user: env("DATABASE_USERNAME", "postgres"),
        password: env("DATABASE_PASSWORD", "your_db_password"),
        ssl: env.bool("DATABASE_SSL", false) && {
          key: env("DATABASE_SSL_KEY", undefined),
          cert: env("DATABASE_SSL_CERT", undefined),
          ca: env("DATABASE_SSL_CA", undefined),
          capath: env("DATABASE_SSL_CAPATH", undefined),
          cipher: env("DATABASE_SSL_CIPHER", undefined),
          rejectUnauthorized: env.bool(
            "DATABASE_SSL_REJECT_UNAUTHORIZED",
            true,
          ),
        },
        schema: env("DATABASE_SCHEMA", "public"),
      },
      pool: {
        min: env.int("DATABASE_POOL_MIN", 2),
        max: env.int("DATABASE_POOL_MAX", 10),
      },
    },
    sqlite: {
      connection: {
        filename: path.join(
          __dirname,
          "..",
          env("DATABASE_FILENAME", ".tmp/data.db"),
        ),
      },
      useNullAsDefault: true,
    },
  };

  return {
    connection: {
      client,
      ...connections[client],
      acquireConnectionTimeout: env.int("DATABASE_CONNECTION_TIMEOUT", 60000),
    },
  };
};
Once you’re done inputing the code above in your database.js file, hit save and let Strapi restart the server.
Setting up NextJS
After connecting PostgreSQL with Strapi, the next step is to install NextJS into the Chat application.
Run the create-next-app command below to spin up the next application in a new folder.
npx create-next-app next-chatFollow the prompt to install create-next-app.
Email Authentication using Nodemailer
Nodemailer is a NodeJS module that enables you to send emails from your email server. Nodemailer makes use of your email service's credentials to send these emails. In this section, you will learn how to set up Nodemailer for your different email services. Now, open your terminal in the next-chat directory and install Nodemailer.
cd next-chat
npm i nodemailer
Configuring Nodemailer
After installing Nodemailer, navigate to the pages/api directory in your next-chat project and create a new file named mail.js. Your file structure should now include: pages/api/mail.js.
To send an email using nodemailer requires an email service. This tutorial makes use of the Google Mail service (Gmail), but you can choose a different email or SMTP service.
To make use of the Google Mailing Service with nodemailer, you need to allow access to a less secured app.
Open the mail.js file and add the following code to configure Nodemailer.
export default function (req, res) {
  const nodemailer = require("nodemailer");
  const transporter = nodemailer.createTransport({
    port: 465,
    host: "smtp.gmail.com",
    secure: "true",
    auth: {
      user: "examaple@gmail.com", //Replace with your email address
      pass: "example", // Replace with the password to your email.
    },
  });
  const mailData = {
    from: "Chat API",
    to: req.body.email,
    subject: `Verify your email`,
    text: req.body.message,
  };
  transporter.sendMail(mailData, function (err, info) {
    if (err)
      return res.status(500).json({ message: `an error occurred ${err}` });
    res.status(200).json({ message: info });
    de;
  });
}
Setting up the Login Form
Now that nodemailer has been configured, let's create a simple login form that will accept the email from the user.
Open up the index.js file in the pages folder and replace the code with the following code.
import styles from "../styles/Home.module.css";
export default function Home() {
  return (
    <div className={styles.container}>
      <form className={styles.main}>
        <h1>Login</h1>
        <label htmlFor="name">Email: </label>
        <input type="email" id="name" />
        <br />
        <input type="submit" />
      </form>
    </div>
  );
}
After refactoring the index.js file and creating a simple form, the next step is to add functionality.
Getting the Email from the User
- Import the
useStatedependency from react in theindex.jsfile.import { useState }from"react"; - Add an
onChangeevent that will listen for any change in the input and store it in a state variable.
export default function Home() {
  const [email, setEmail] = useState("");
  const [user, setUser] = useState("");
  return (
    <div className={styles.container}>
      <form className={styles.main}>
        <h1>Login</h1>
        <label htmlFor="user">Username: </label>
        <input
          type="text"
          id="user"
          value={user}
          onChange={(e) => setUser(e.target.value)} // Getting the inputs
        />
        <br />
        <label htmlFor="name">Email: </label>
        <input
          type="email"
          id="name"
          onChange={(e) => setEmail(e.target.value)} // Getting the inputs
        />
        <br />
        <input type="submit" />
      </form>
    </div>
  );
}- Now, create a function that will get the email when the user clicks submit and sends a POST to
api/mail.
export default function Home() {
  const [email, setEmail] = useState("");
  const [user, setUser] = useState("");
  const handlesubmit = (e) => {
    e.preventDefault();
    let message = "Testing, Testing..... It works🙂";
    let data = {
      email, // User's email
      message,
    };
    fetch("/api/mail", {
      method: "POST", // POST request to /api//mail
      headers: {
        "Content-Type": "application/json",
      },
      body: JSON.stringify(data),
    }).then(async (res) => {
      if (res.status === 200) {
        console.log(await res.json());
      } else {
        console.log(await res.json());
      }
    });
    setEmail("");
    setUser("");
  };
  return (
    <div className={styles.container}>
      <form className={styles.main}>
        <h1>Login</h1>
        <label htmlFor="user">Username: </label>
        <input
          type="text"
          id="user"
          value={user}
          onChange={(e) => setUser(e.target.value)} // Getting the inputs
        />{" "}
        <br />
        <label htmlFor="name">Email: </label>
        <input
          type="email"
          id="name"
          value={email}
          onChange={(e) => setEmail(e.target.value)} // Getting the inputs
        />
        <br />
        <input type="submit" onClick={handlesubmit} /> // Handling Submit
      </form>
    </div>
  );
}
Once you are done with adding the code above and hitting save, head on to localhost:3000 to try out the form.
Token Authentication using JWT
According to the documentation, JSON Web Token (JWT) is an open standard (RFC 7519) that defines a compact and self-contained way for securely transmitting information between parties as a JSON object. JWT generates a unique token that can authenticate and authorize a user.
Adding JWT to the Application
Open up your terminal in the next-chat folder and install the JSON Web Token dependency.
npm i jsonwebtokenAdd the following code to the handleSubmit function in the index.js file.
import jwt from "jsonwebtoken";

const handleSubmit = (e) => {
  e.preventDefault();

  const SECRET = "this is a secret"; // JWT secret
  const account = { email: "example@example.com" }; // Use meaningful data (e.g., email)
  const token = jwt.sign(account, SECRET, { expiresIn: "1h" }); // Create the token with expiration

  console.log("Generated Token:", token); // Log the token
};
For security purposes, the
SECRETvariable for JWT should be a random set of strings and should be stored in an environmental variable.
Setting up Strapi
Strapi is an open-source headless CMS that gives developers the freedom to choose their favorite tools and frameworks and allows editors to manage and distribute their content using their application's admin panel. Now that you’ve generated the token using JWT, it’s time to store the username, email, and token using my favorite CMS, Strapi.
Ensure that your Strapi server is up and running.
cd chatapp
npm run develop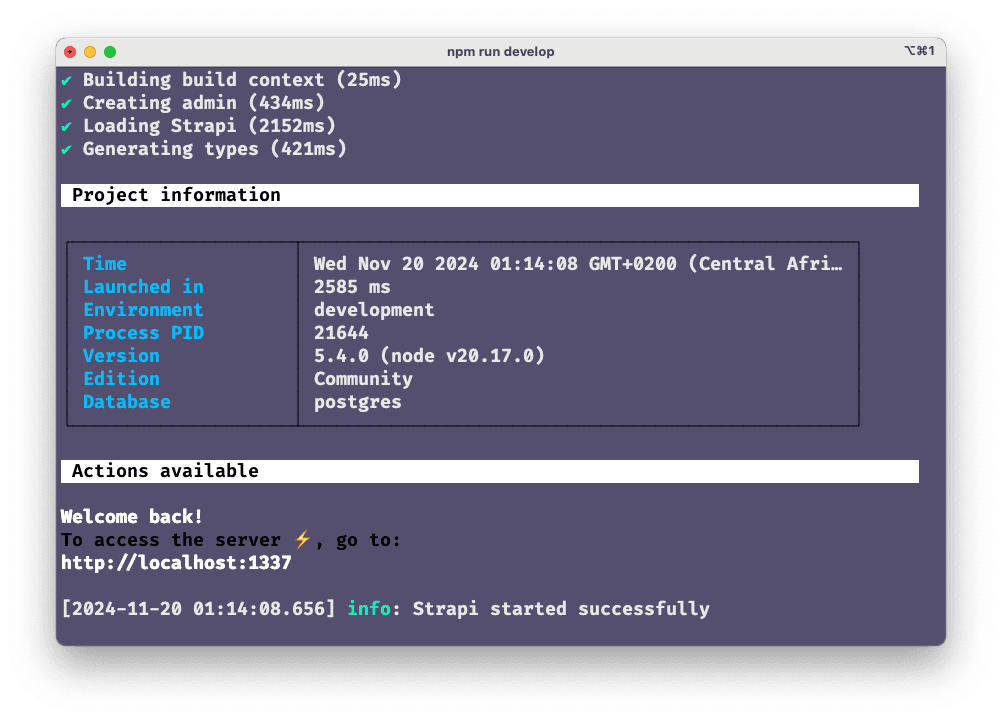
Navigate to http://localhost:1337/admin and log in with your Strapi admin credentials.
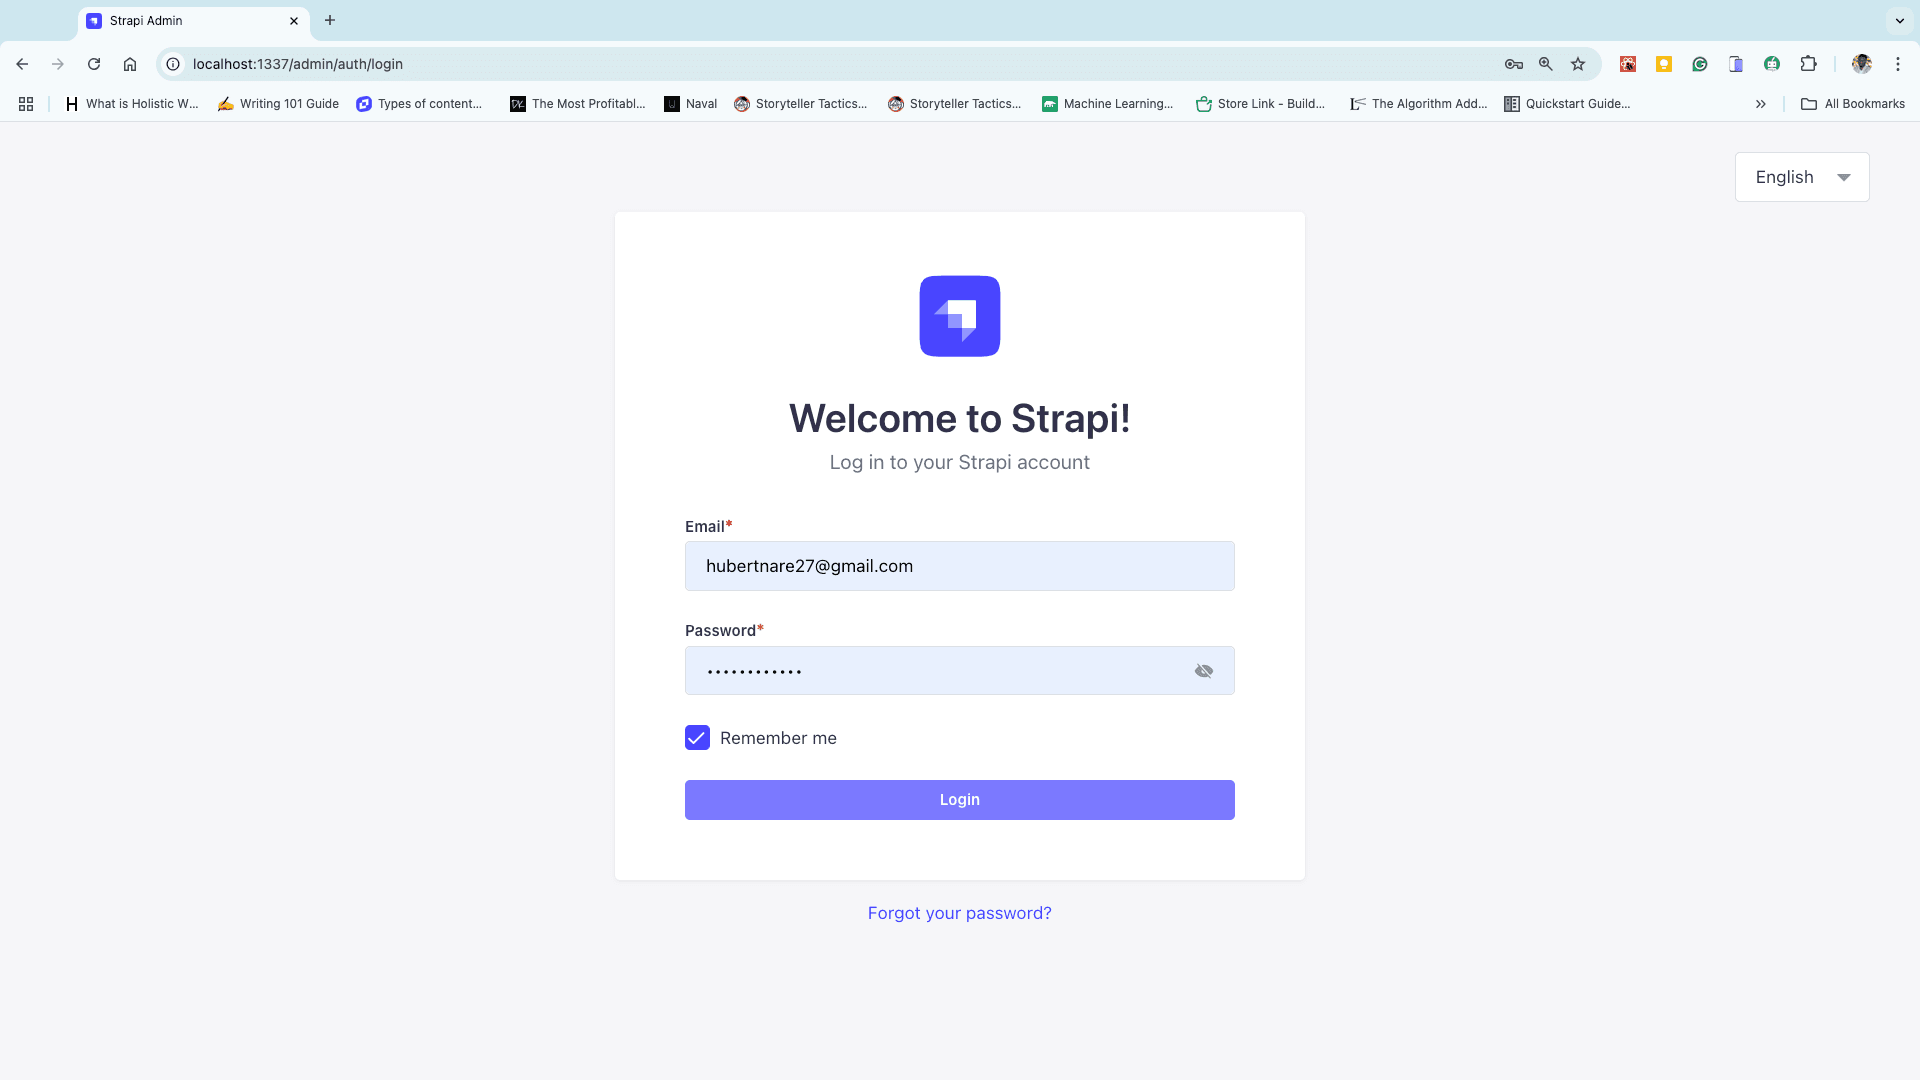
After a successful login, click on Content-Type Builder on the side-nav bar and click on Create new collection type.
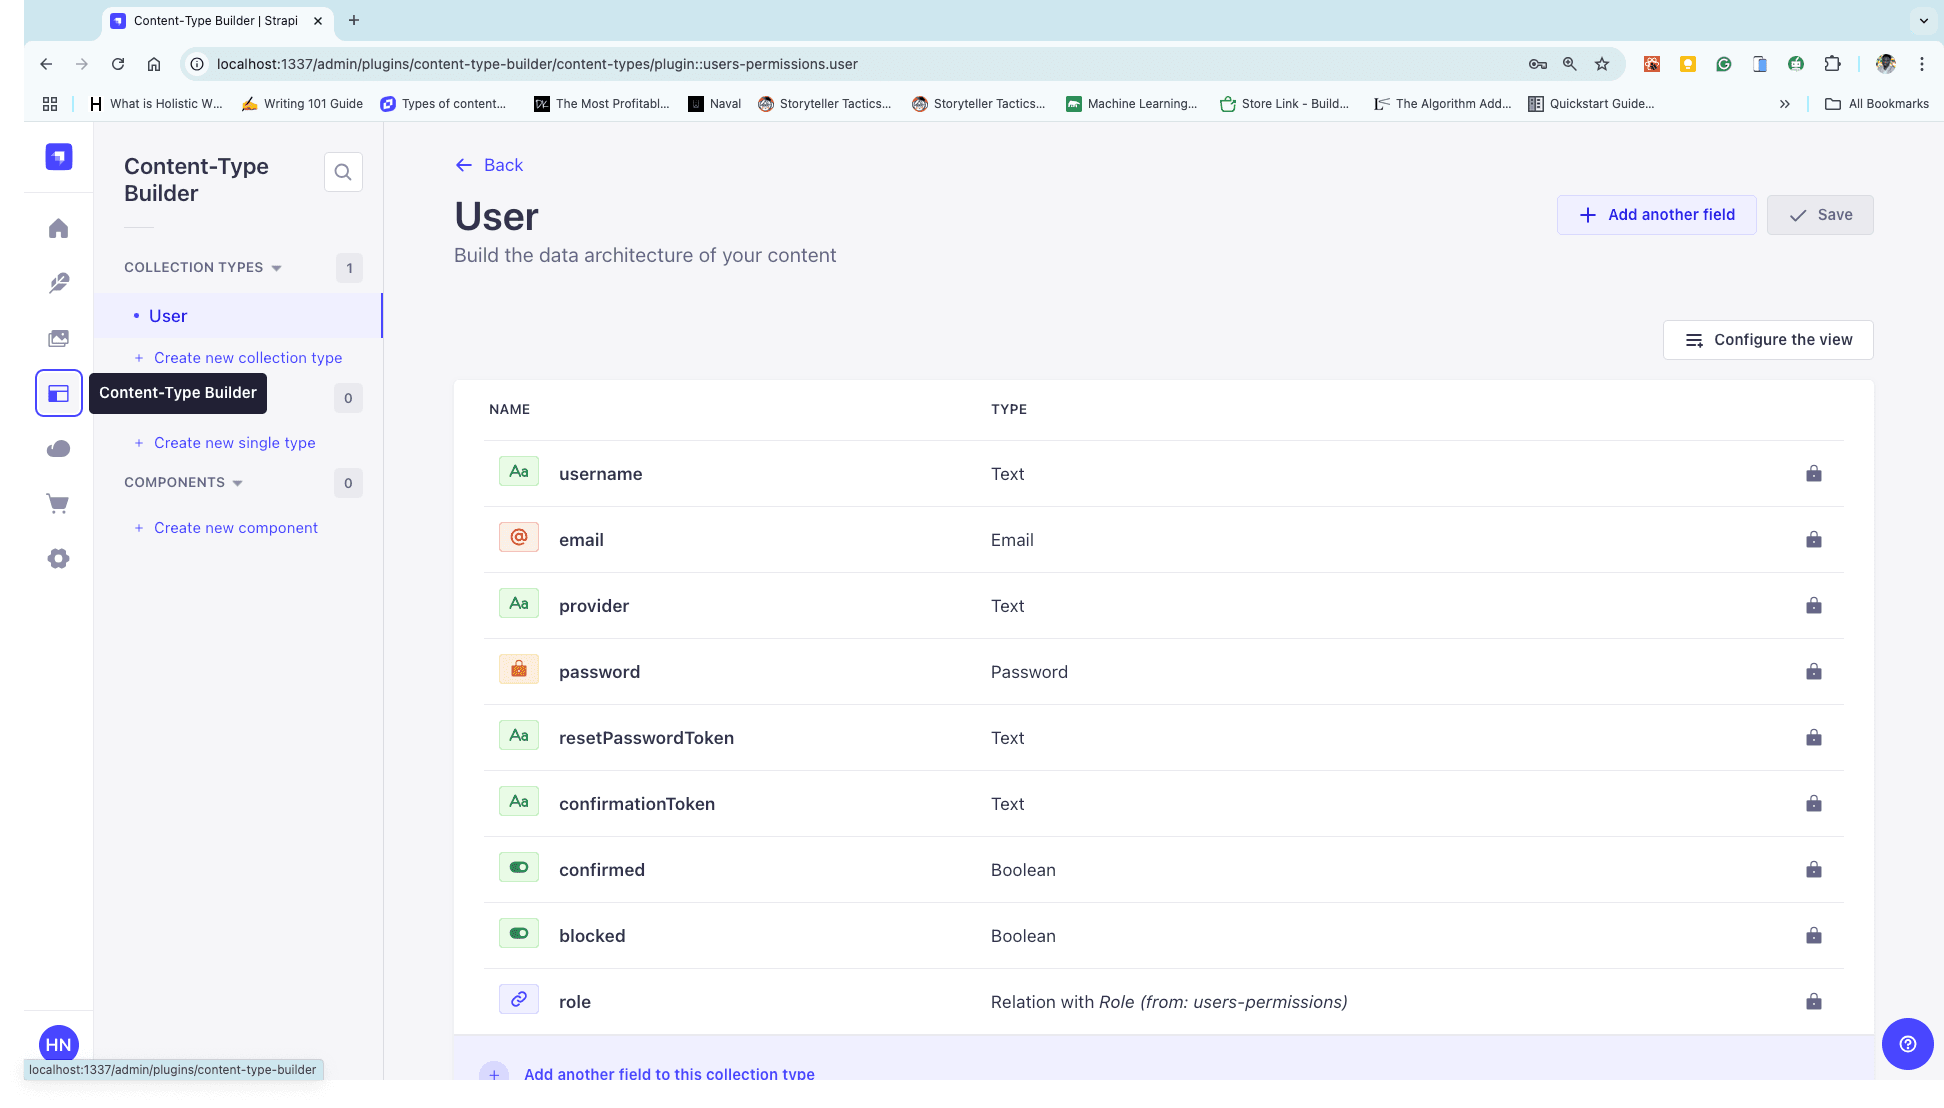
Give it a name of your choice, but in this tutorial, the name of the collection type is Account.
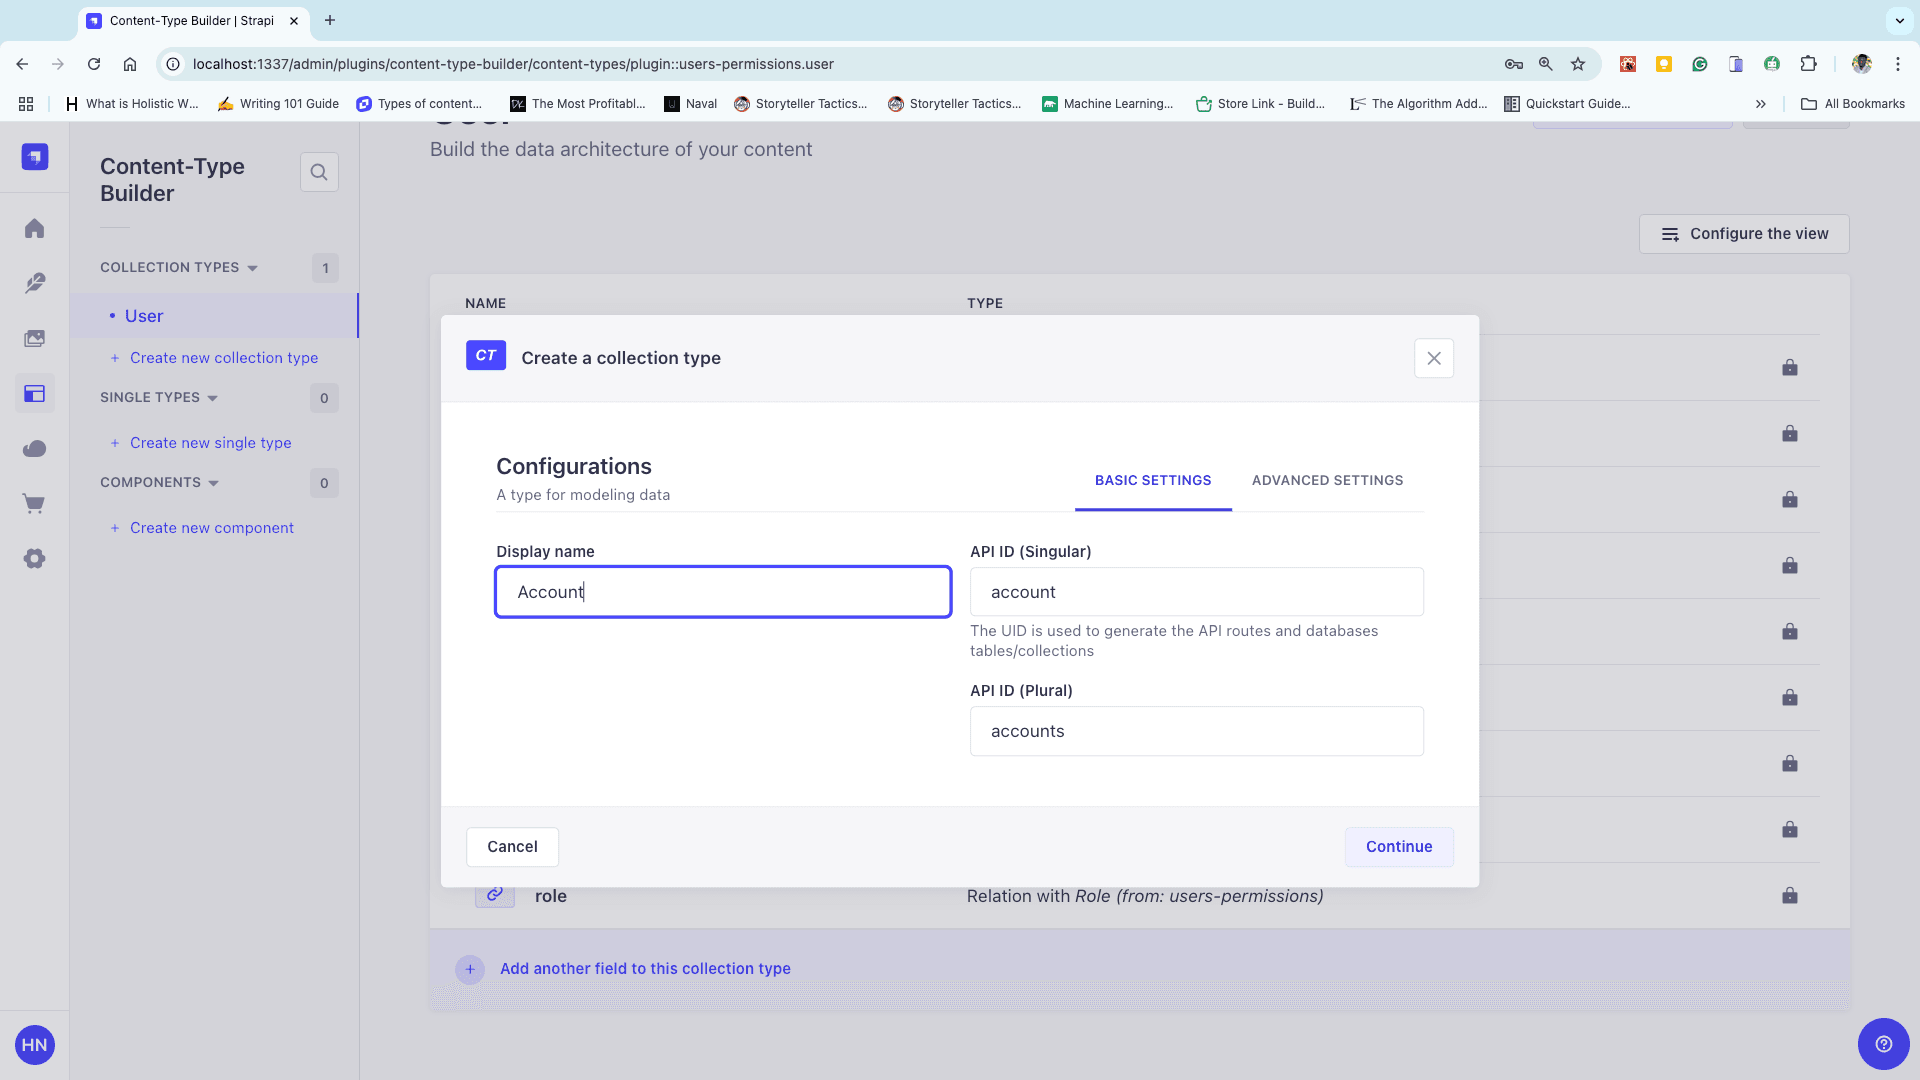
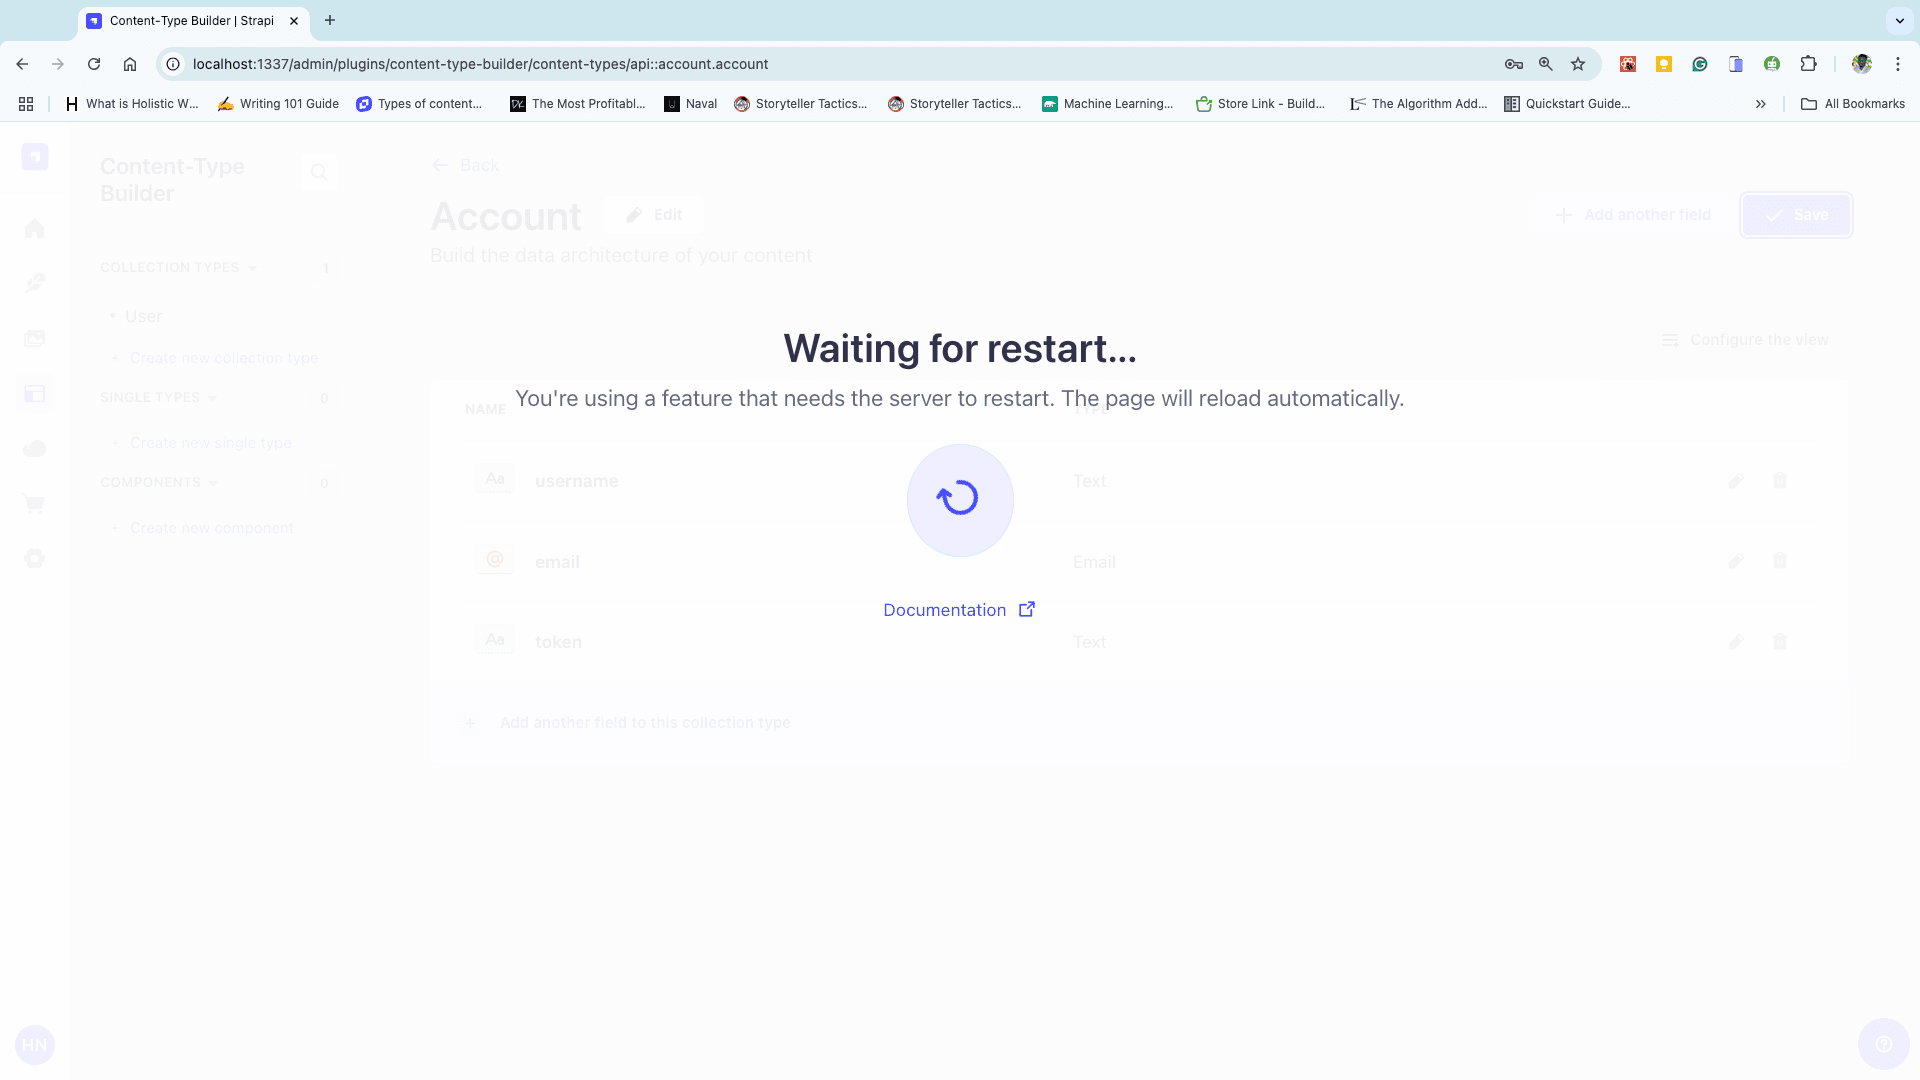
After naming the collection type, hit continue, choose Text, and name it username.
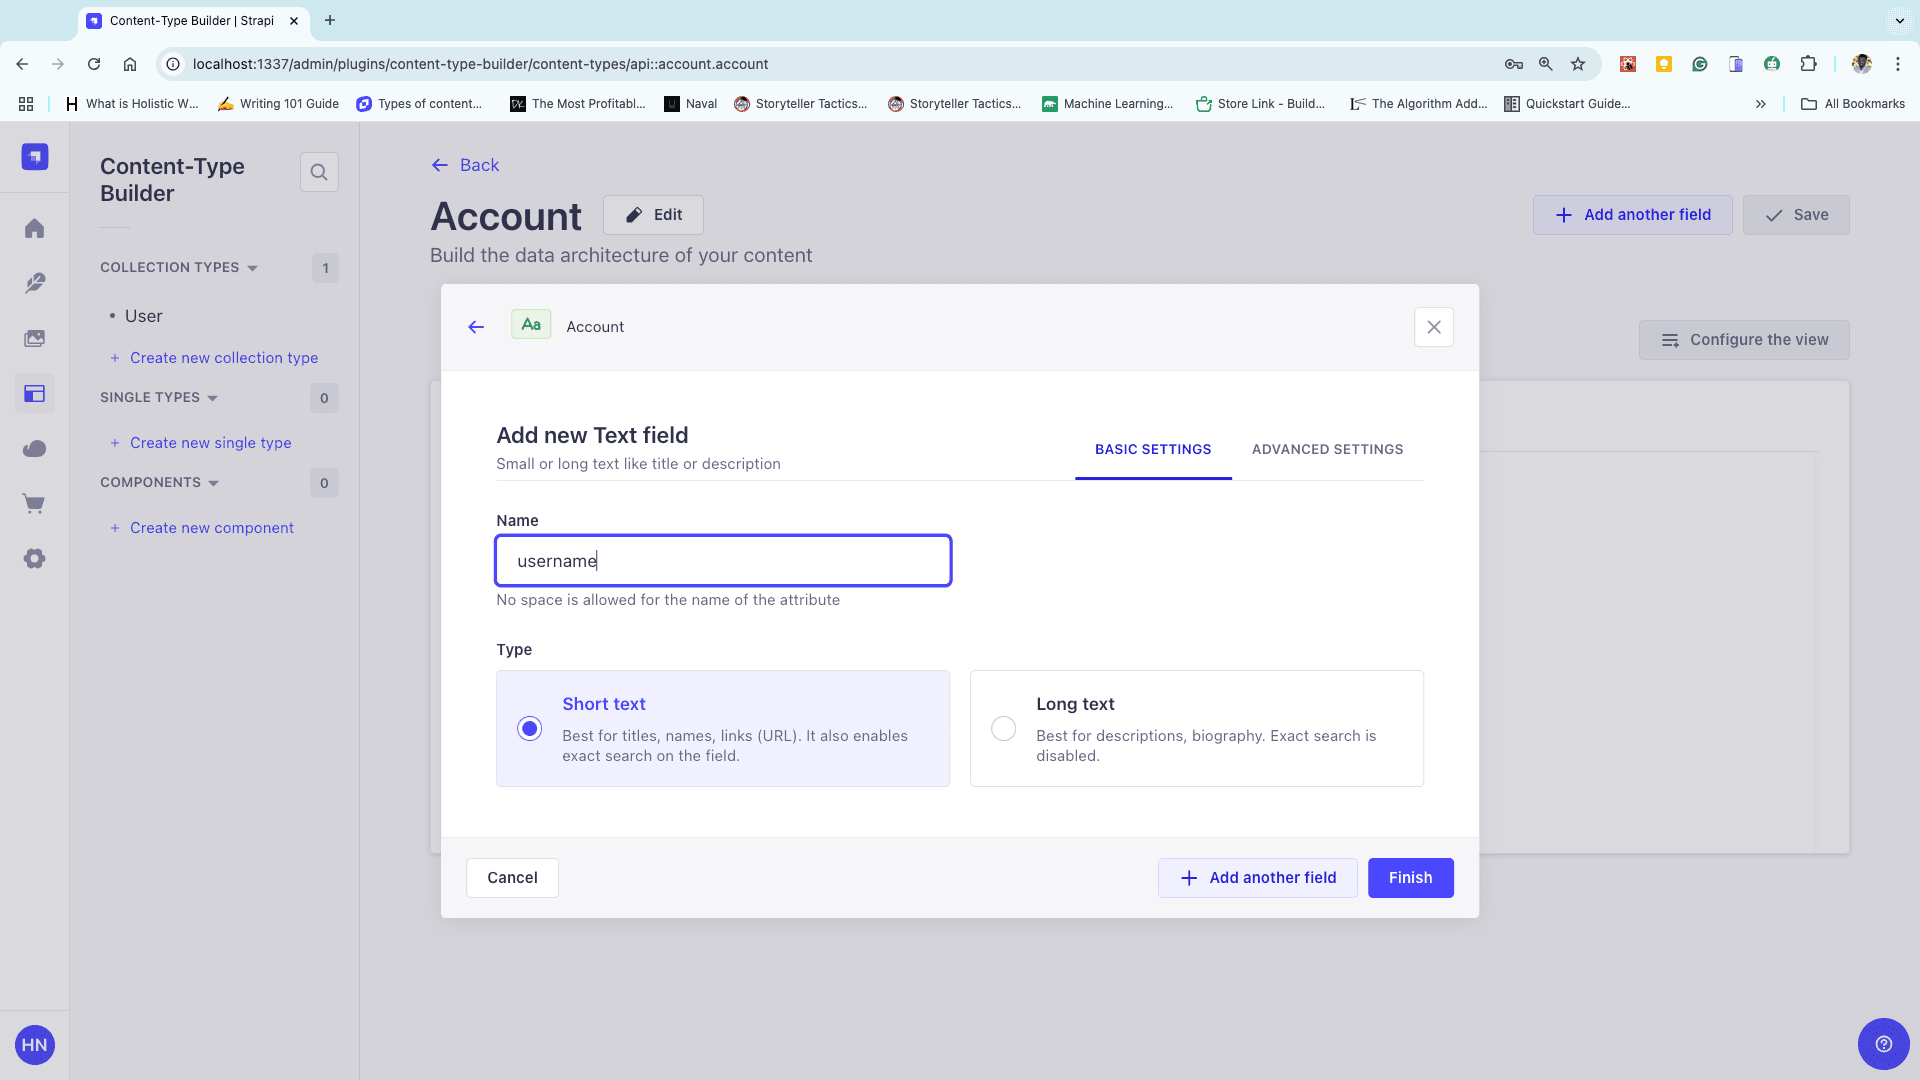
Click on Add another field to configure the field for email and token. Choose the Email field for Email and Text field for Token, then hit finish. The output is shown below.
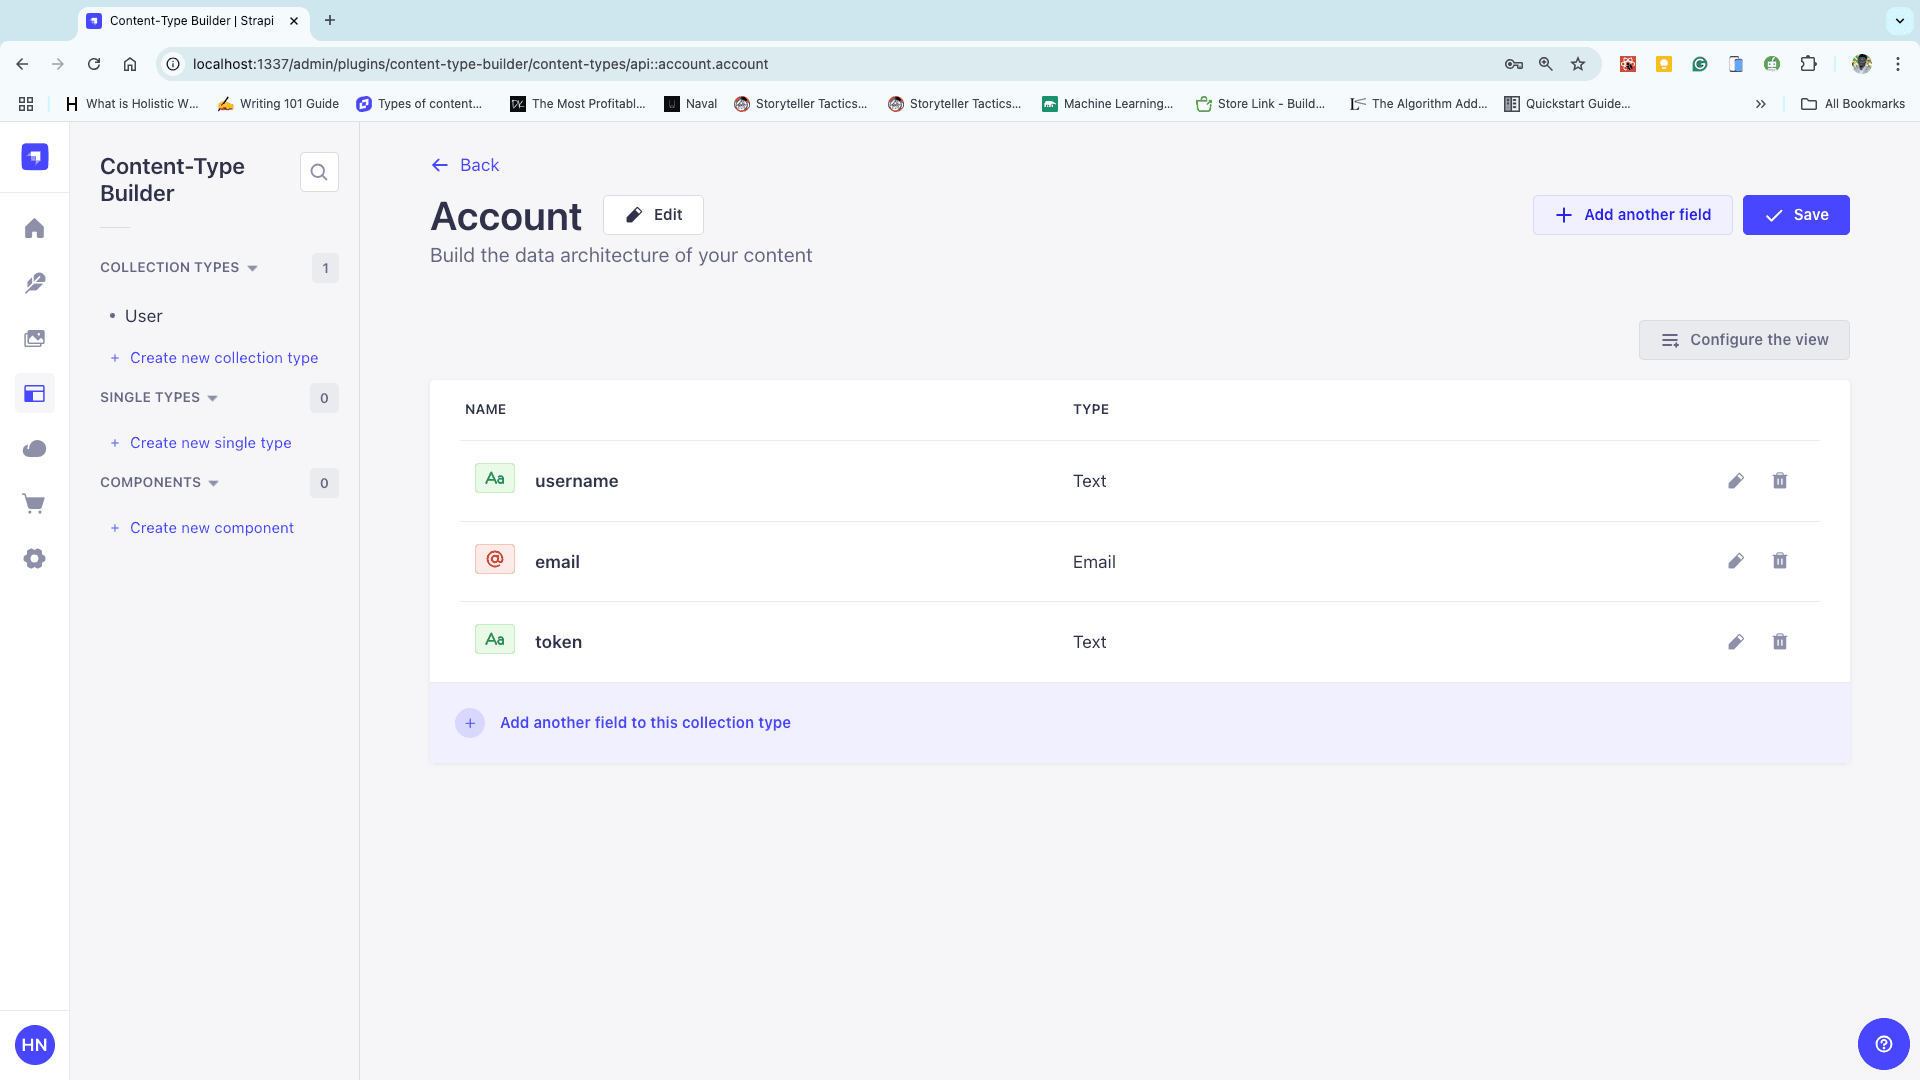
Click on Save at the top-right of the screen and let Strapi restart the server.
Permissions in Strapi
To increase security, Strapi blocks all CRUD requests to a newly created collection type by default. The user’s credentials need to be sent to the account collection type, so this feature will not be needed in this application.
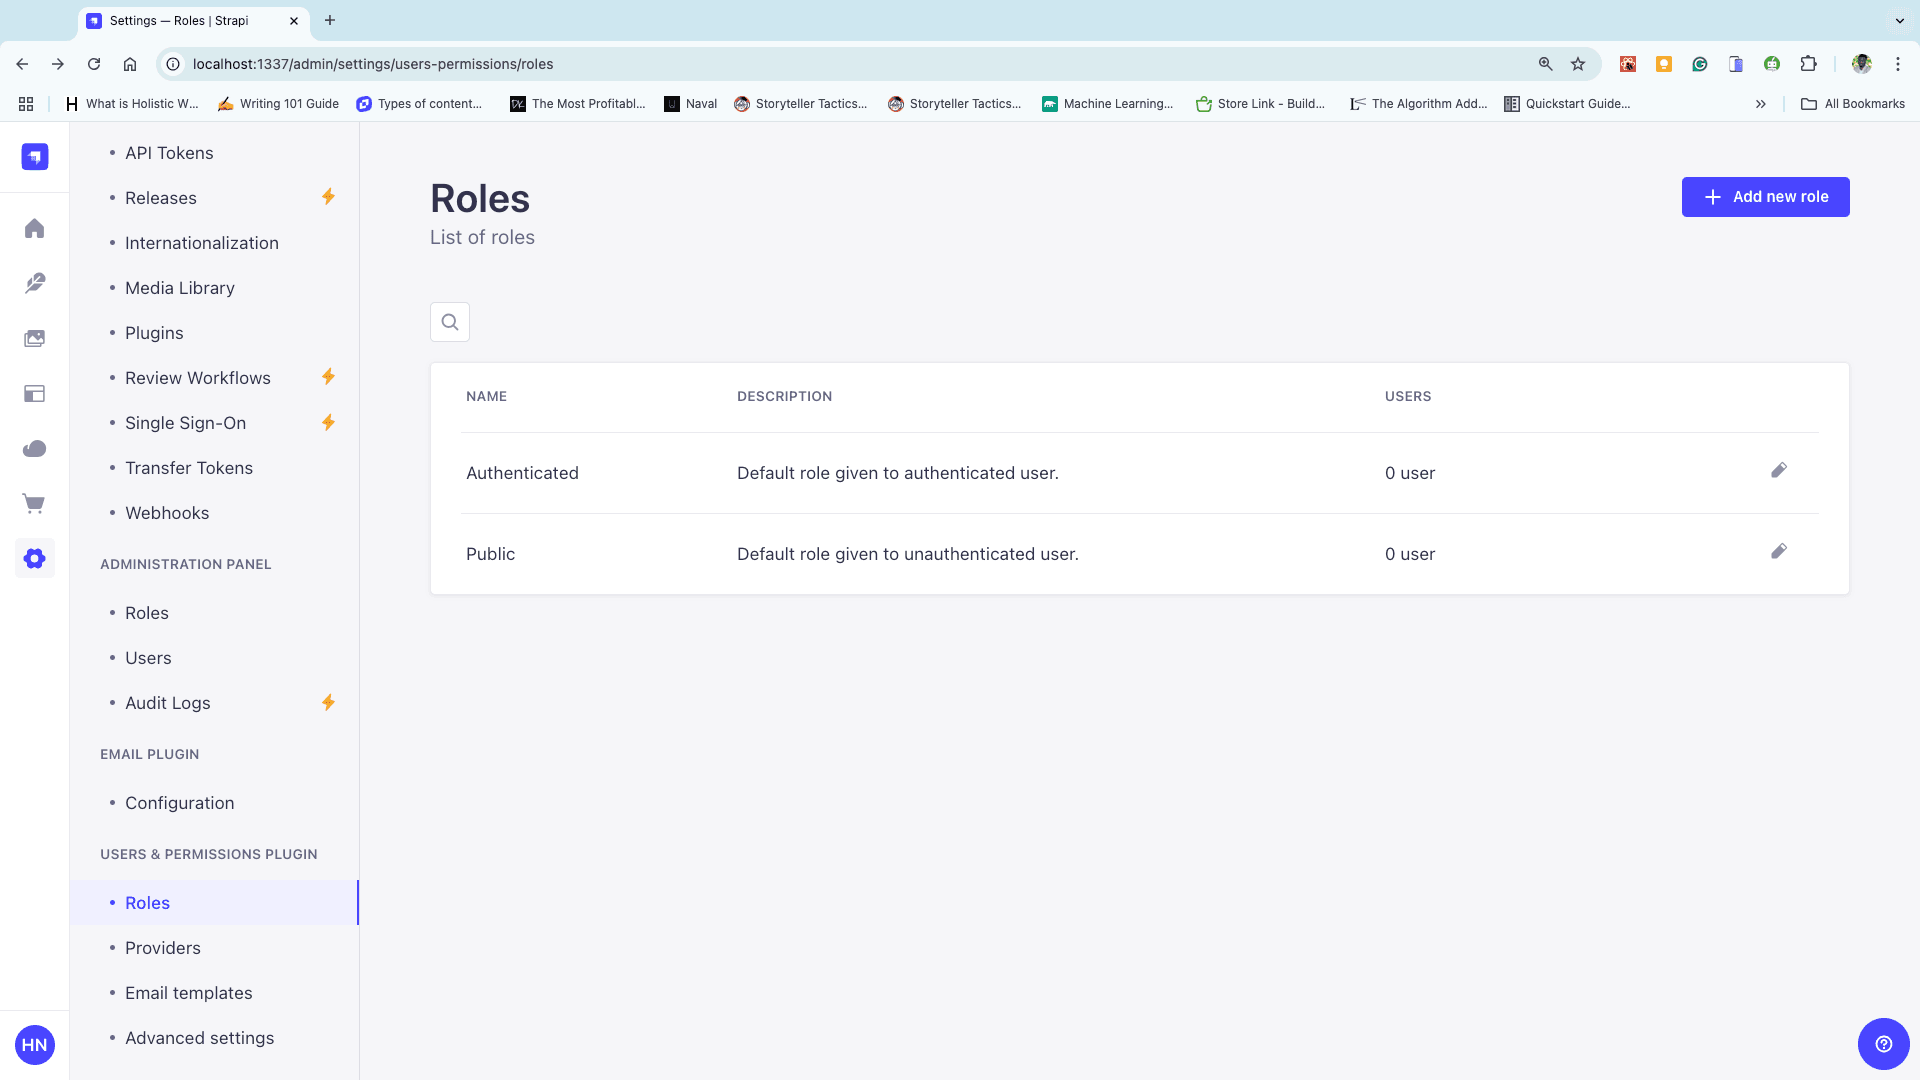
To allow requests, click on Settings on the side-nav bar and click on Roles under USERS & PERMISSIONS PLUGIN.
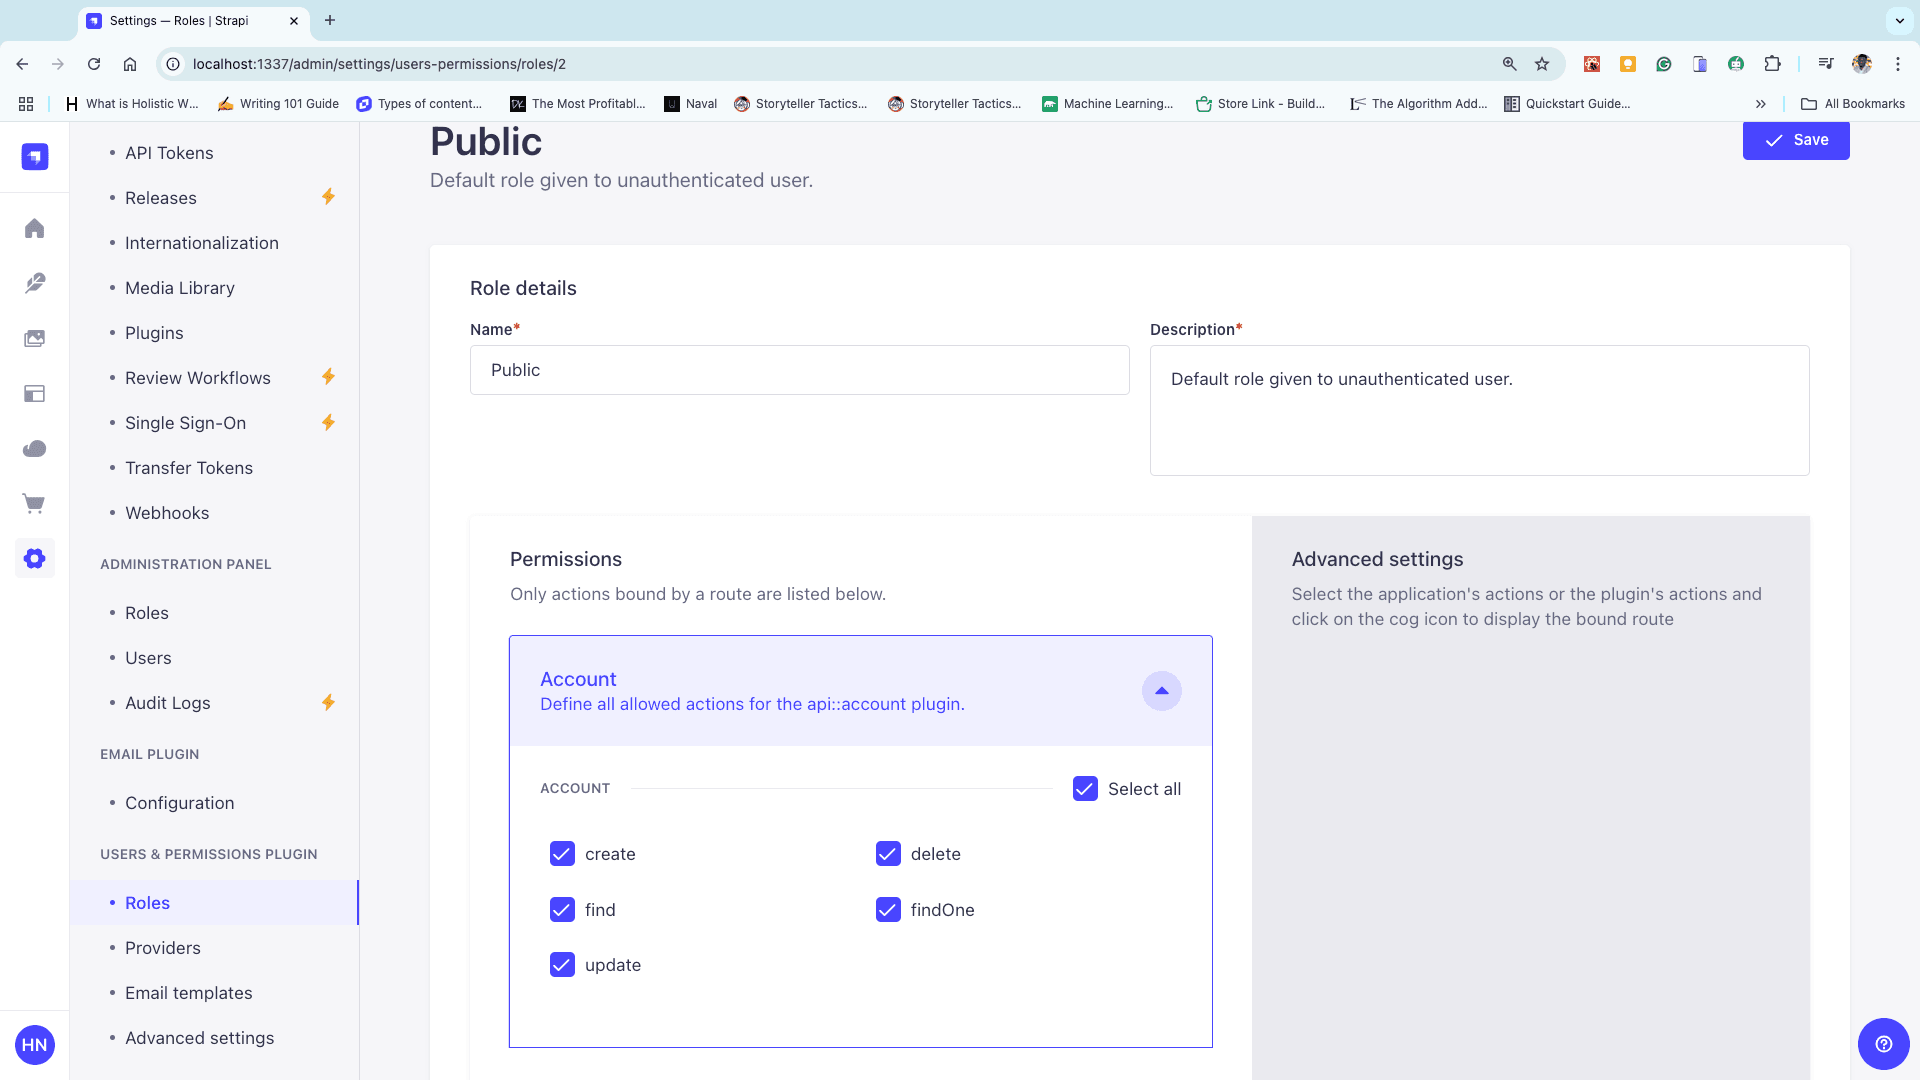
Scroll down to Accounts, click on the drop-down, Select all, and hit Save at the top-right of the screen.
Storing the User’s Credentials
Now that you’ve learned how to edit the permission of a collection type, it’s time to learn how to store the user’s details in that collection type using Strapi.
Make sure your NextJS application is running.
cd next-chat
npm run dev
The next step is to make a post request to "http://localhost:1337/api/accounts", passing the credentials of the user as a parameter.
Open your index.js file in the pages folder and add the following code to the handlesubmit function.
const handleSubmit = (e) => {
  e.preventDefault();

  const message = "Testing, Testing..... It works 🙂"; // Demo message
  const data = {
    email, // User's email
    message,
  };

  // JWT payload and secret
  const account = { email };
  const SECRET = "this is a secret";
  const token = jwt.sign(account, SECRET, { expiresIn: "1h" }); // Token with expiration

  // Strapi data payload
  const strapiData = {
    data: {
      username: user, // User's name
      email,
      token, // JWT token
    },
  };

  // Send data to Strapi
  fetch("http://localhost:1337/api/accounts", {
    method: "POST",
    headers: {
      "Content-Type": "application/json",
    },
    body: JSON.stringify(strapiData), // Payload
  })
    .then(async (res) => {
      if (res.ok) {
        const response = await res.json();
        console.log("Strapi Response:", response); // Success
      } else {
        const error = await res.json();
        console.error("Strapi Error:", error); // Error
      }
    })
    .catch((err) => console.error("Fetch Error:", err));
};
Load up localhost:3000 in your favorite browser to test the request.
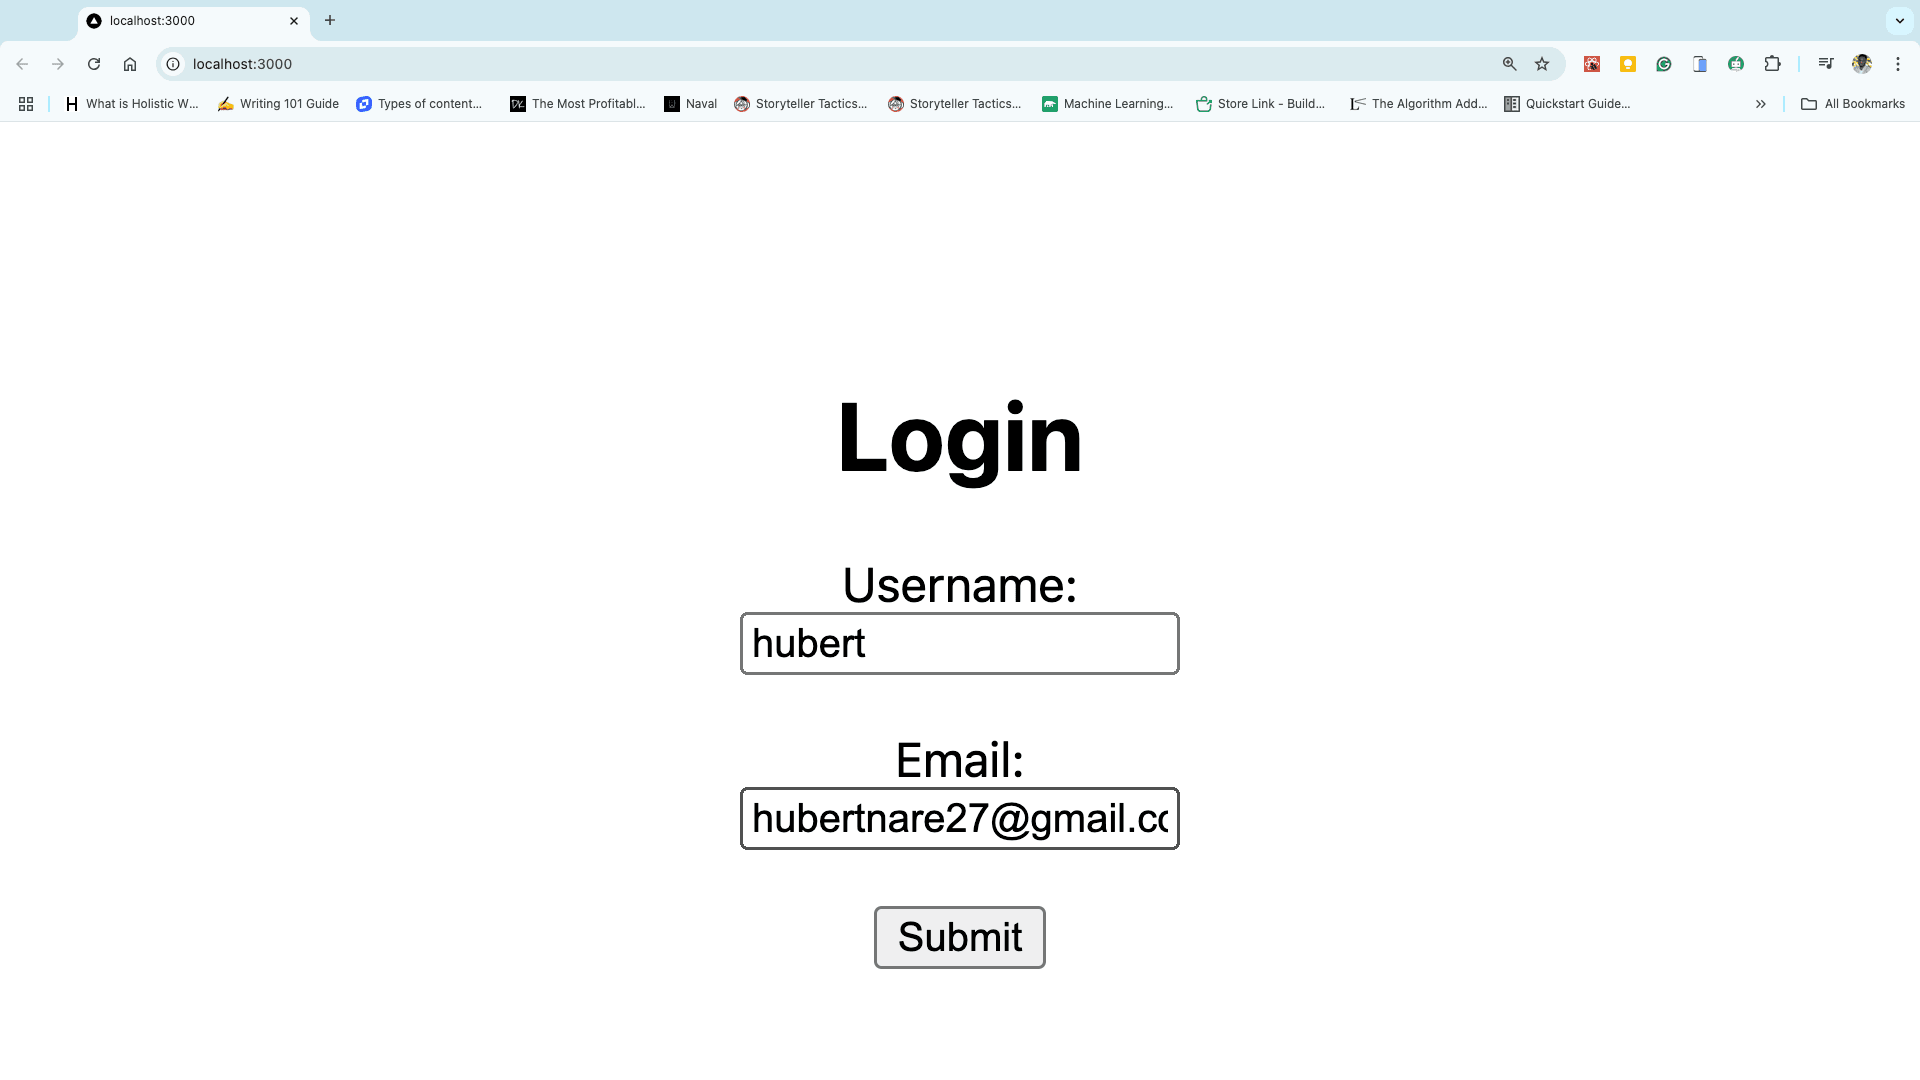
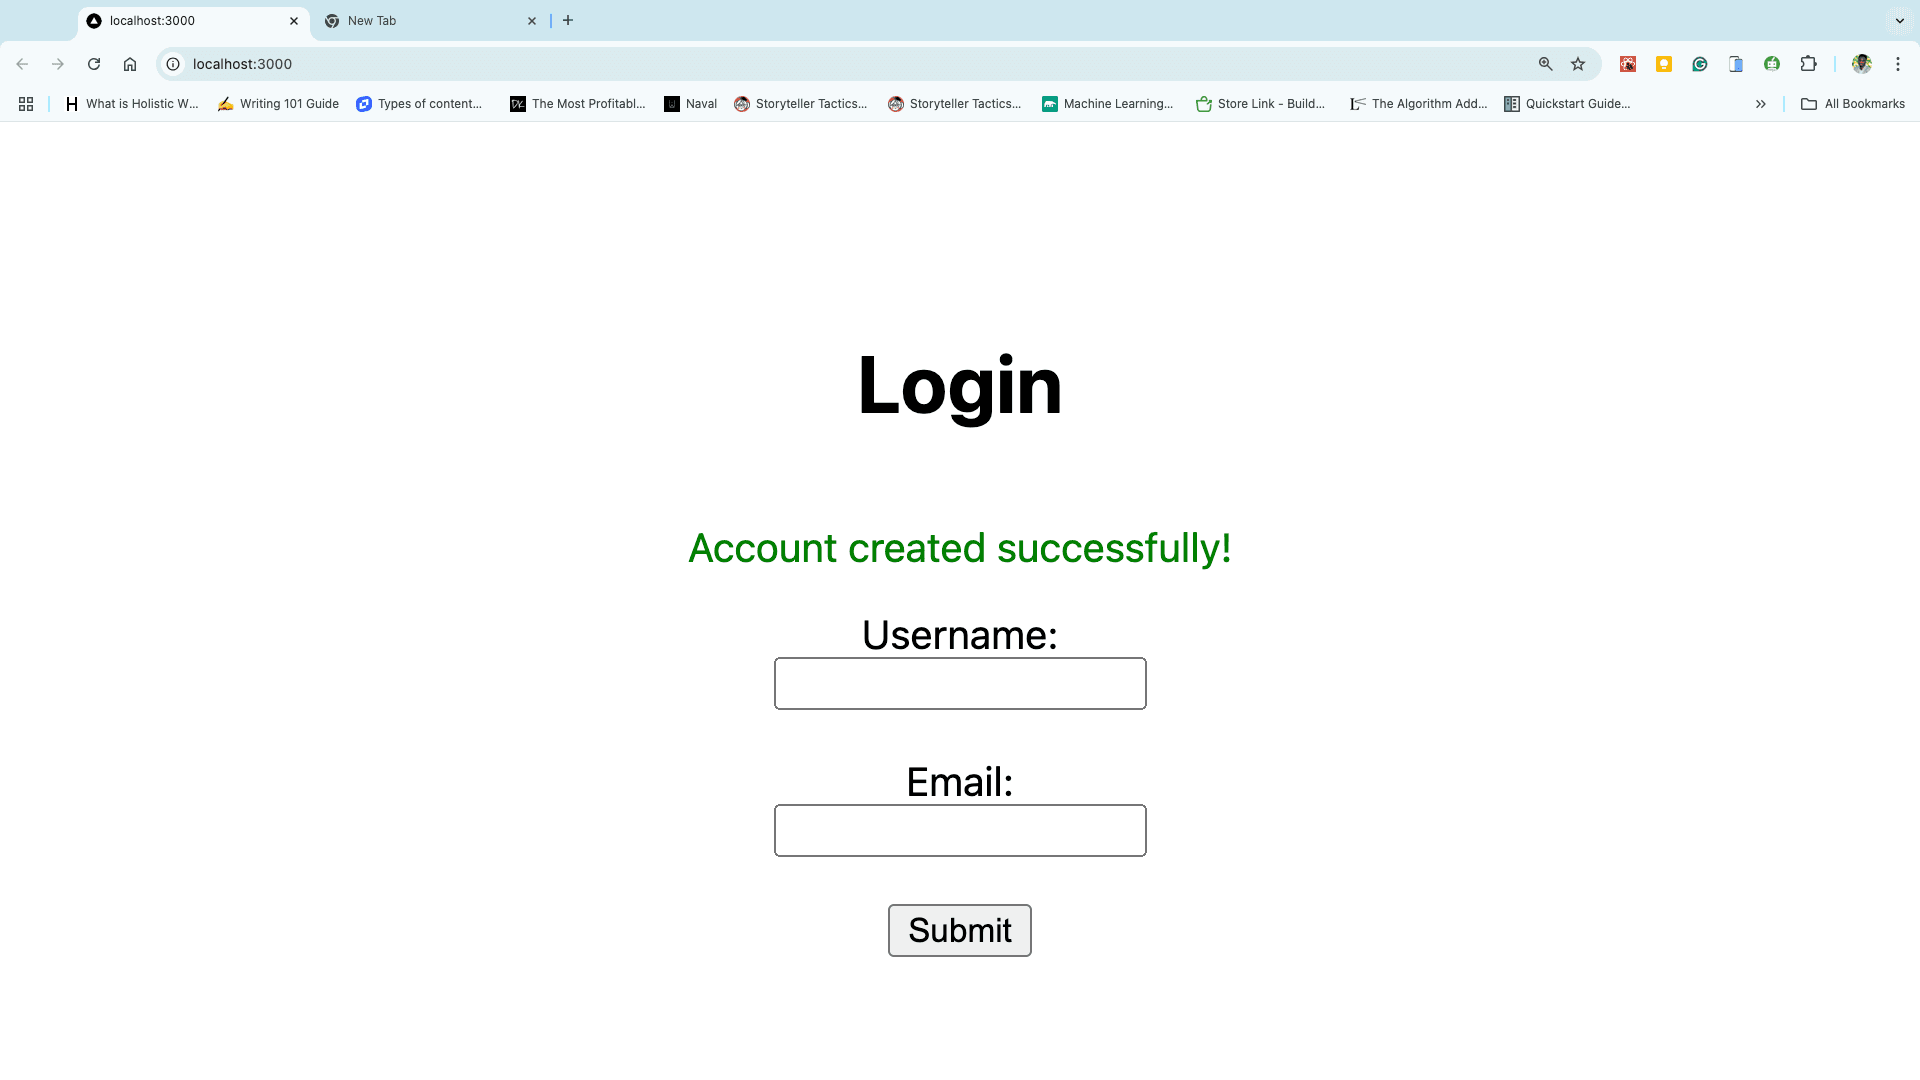
Enter your Username and Email, then click Submit. If successful, a confirmation message will appear, indicating the details were added successfully.
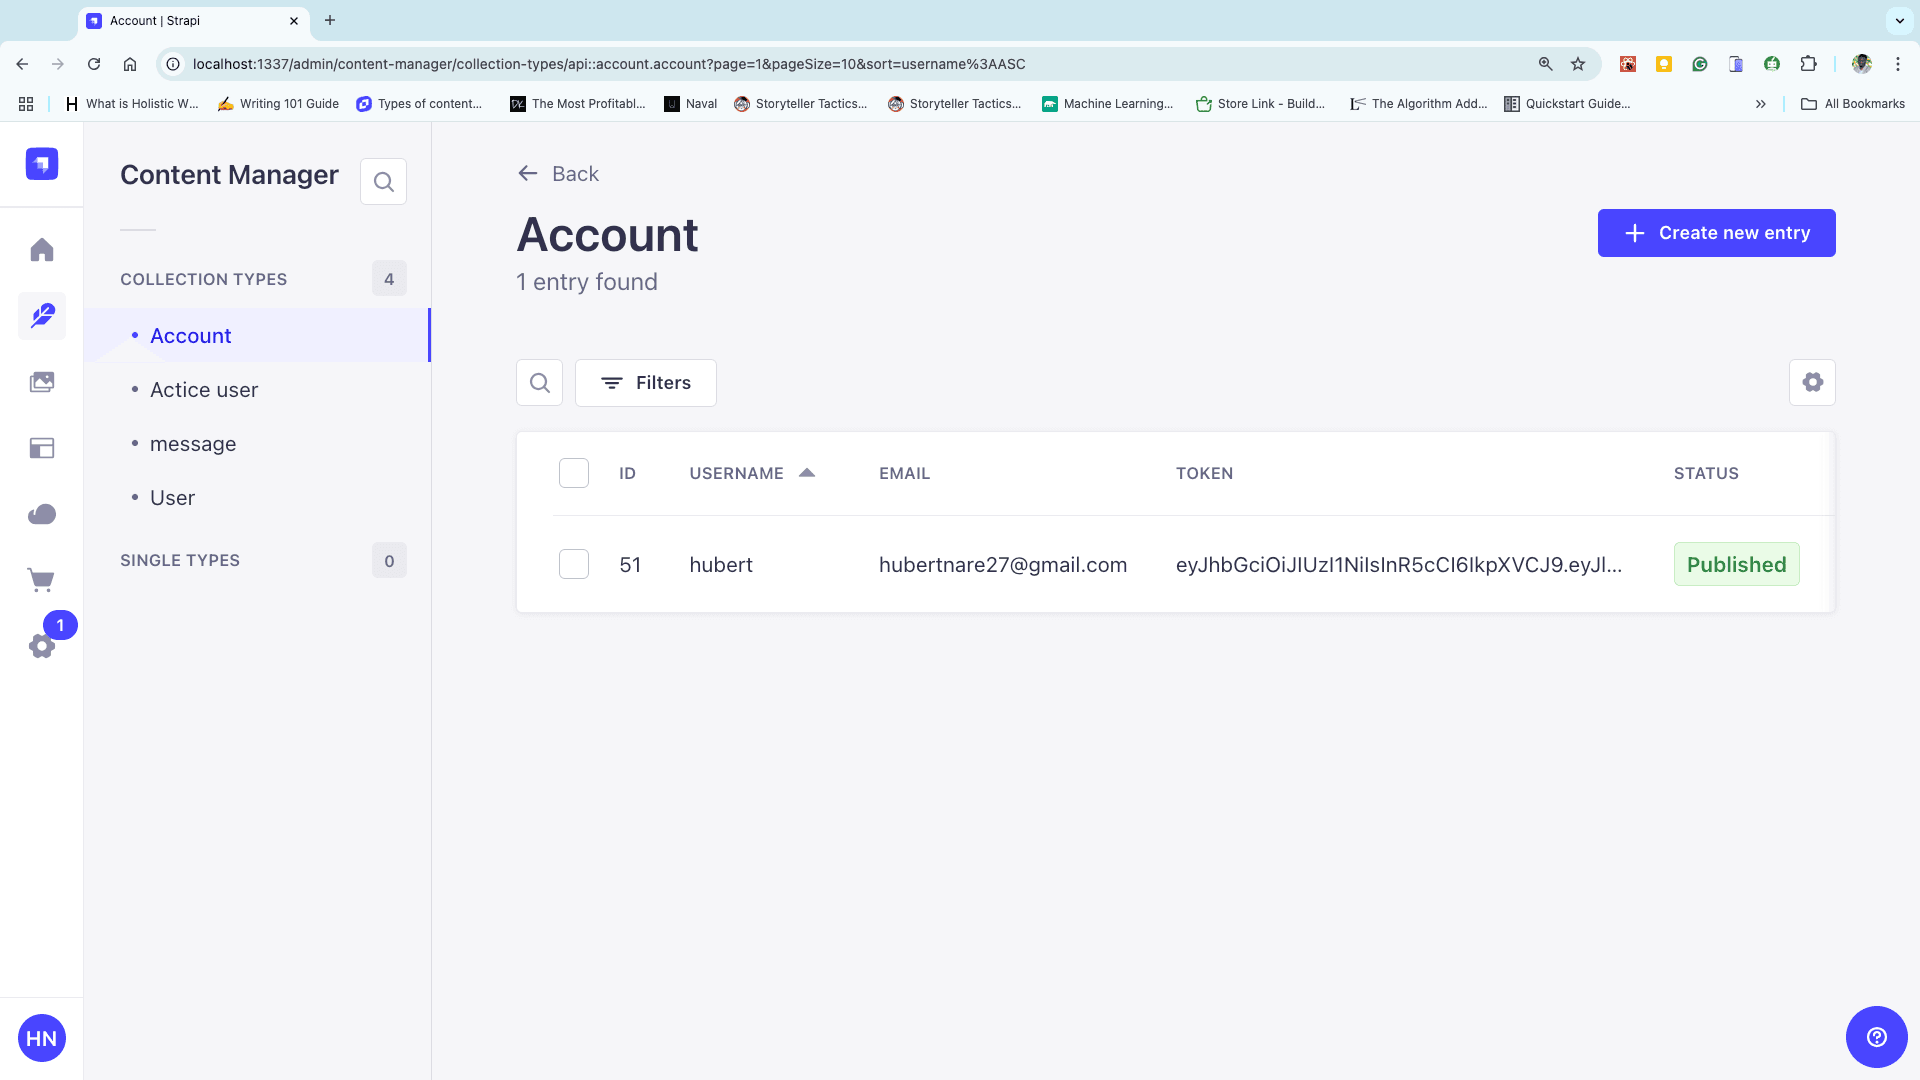
Click on Content Manager in your Strapi’s admin panel to check if it was added to Strapi.
Authenticating the User
After setting up Strapi, the next step is to use the token stored in strapi to authenticate the user. To do this, a link containing the token will be sent to the user’s email.
Open up your index.js file in the pages folder and add the following code to send the link to the user’s email in the handlesubmit function.
const handleSubmit = (e) => {
  e.preventDefault();

  // JWT payload and secret
  const account = { email }; // Use meaningful data like email
  const SECRET = "this is a secret";
  const token = jwt.sign(account, SECRET, { expiresIn: "1h" }); // Token with expiration

  // Create message with the token
  const message = `http://localhost:3000/chat/${token}`;

  // Prepare email data
  const data = {
    email, // User's email
    message,
  };

  // Send the email data to the API
  fetch("/api/mail", {
    method: "POST",
    headers: {
      "Content-Type": "application/json",
    },
    body: JSON.stringify(data),
  })
    .then(async (res) => {
      if (res.ok) {
        console.log("Email sent:", await res.json());
      } else {
        console.error("Email error:", await res.json());
      }
    })
    .catch((err) => console.error("Fetch error:", err));

  // Clear input fields
  setEmail("");
  setUser("");
};
Navigate to "http://localhost:3000", fill in a valid email, and check your inbox to see if the message was successfully sent.
Verifying the Token
Once the link has been sent to the user and the user clicks on it, we need to get the token and verify it. This will prevent the user from generating random strings and in turn, it increases security.
Create a folder in the pages folder called chat and create a file in the chat folder named token.js
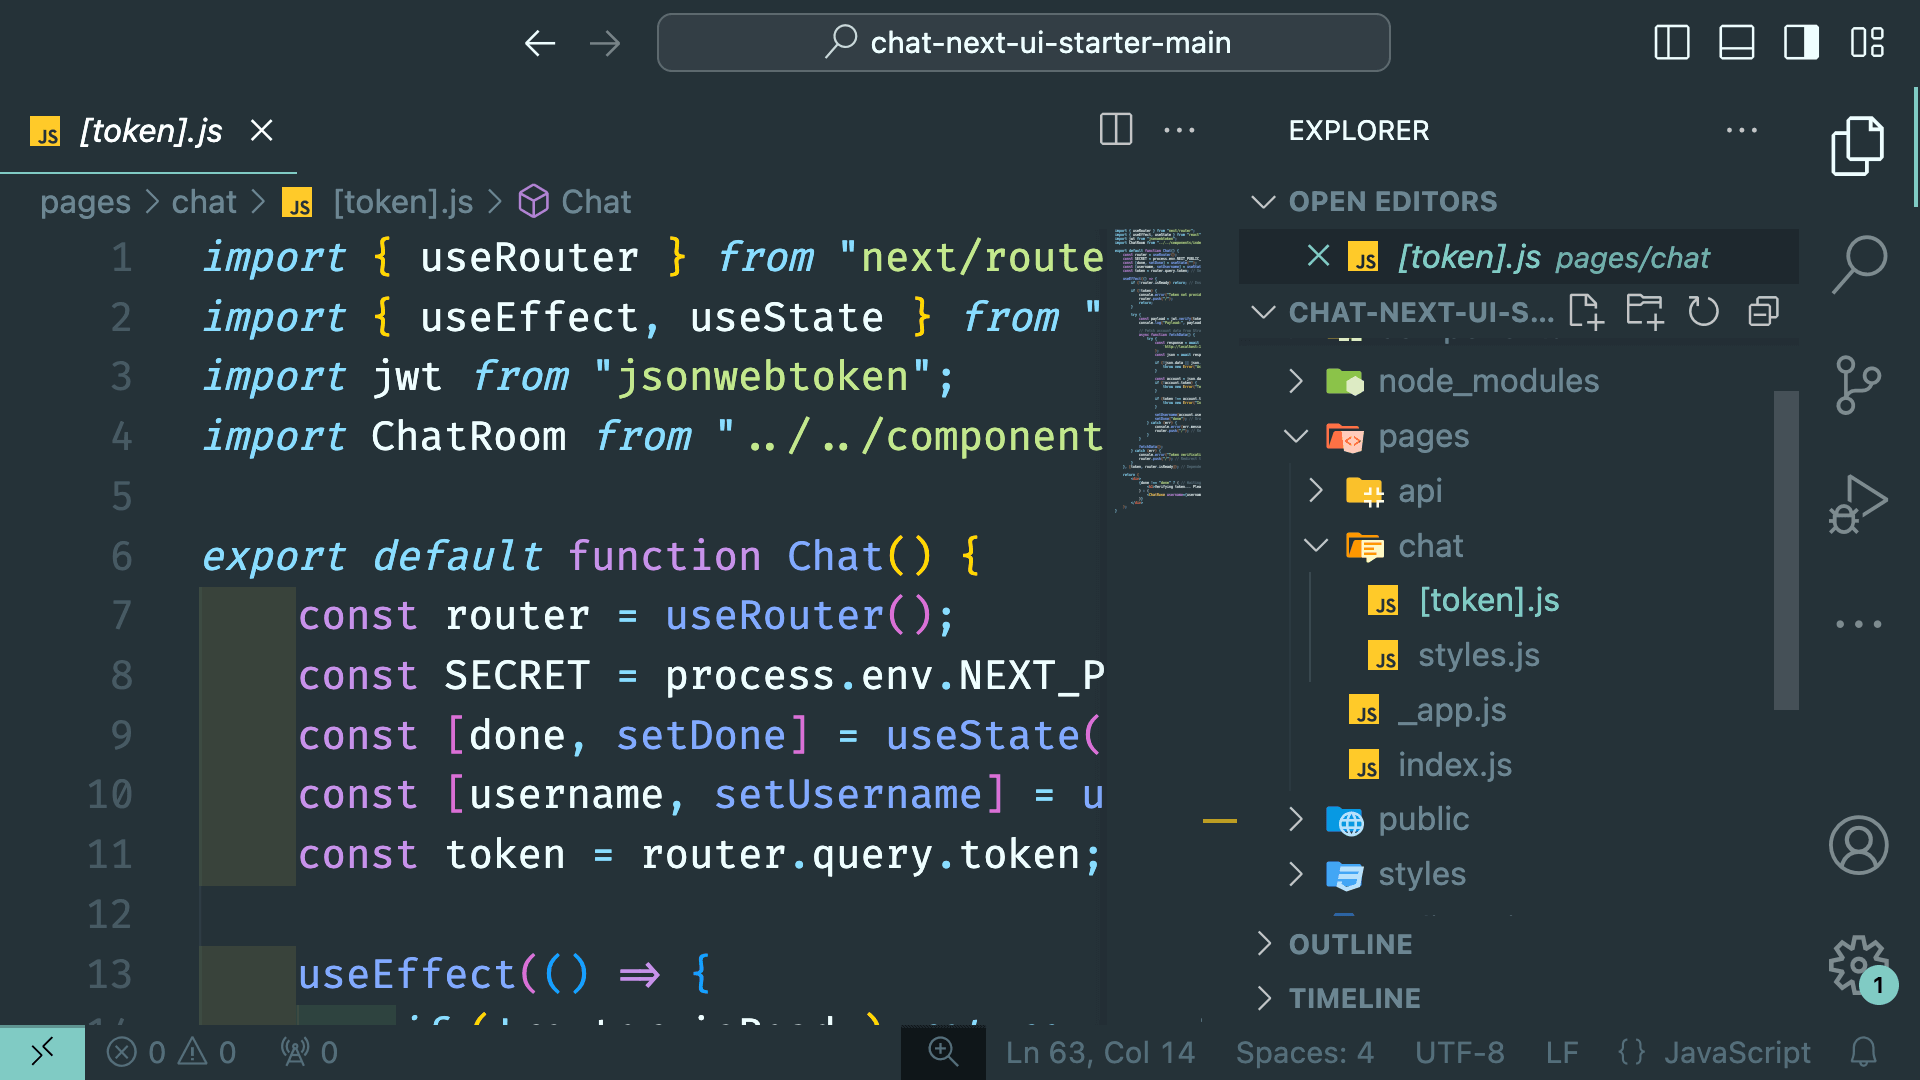
Add the following code to the token.js file to get the token from the URL and verify it using the JWT Secret.
import { useRouter } from "next/router";
import { useEffect, useState } from "react";
import jwt from "jsonwebtoken";

export default function Chat() {
  const router = useRouter();
  const SECRET = "this is a secret"; // JWT Secret
  const [done, setDone] = useState("");
  const token = router.query.token; // Extract token from the URL

  useEffect(() => {
    if (!router.isReady) return; // Ensure the router is ready

    try {
      const payload = jwt.verify(token, SECRET); // Verify the token
      console.log("Payload:", payload); // Debugging payload
      setDone("done"); // Grant access
    } catch (error) {
      console.error("Token verification failed:", error.message); // Log the error
      router.push("/"); // Redirect on failure
    }
  }, [token, router.isReady]); // Watch for token changes

  return (
    <div>
      {done !== "done" ? (
        <h1>Verifying token... Please wait</h1>
      ) : (
        <h1>Welcome to the Group Chat</h1>
      )}
    </div>
  );
}
After verifying the token and extracting the payload, the next step is to check if the verified token matches the one stored in Strapi. To do this, the email from the token's payload is used to query Strapi.
Add the following code to the token.js file to query Strapi using the email stored in the token payload and verify the token.
export default function Chat() {
  // Rest of the code
  useEffect(() => {
    // Rest of the code
    try {
      const payload = jwt.verify(token, SECRET); // Verifying the token using the secret

      async function fetchData() {
        const response = await fetch(
          `http://localhost:1337/api/accounts?filters[email][$eq]=${payload.email}`,
        );
        const json = await response.json();

        if (!json.data || json.data.length === 0) {
          throw new Error("Account not found in Strapi");
        }

        const account = json.data[0]; // Fetch the first matching account
        if (account.token !== token) {
          throw new Error("Token mismatch");
        }

        console.log(account); // Debug the fetched account
        setDone("done"); // Grant access to the chat page
      }

      fetchData();
    } catch (error) {
      console.error("Error:", error.message); // Log the error
      router.push("/"); // Redirect the user to the home page
    }
  }, [token]); // Listens for changes in the token
  // Rest of the code
}
After retrieving the user’s data from Strapi, the next step is to compare the token in the URL with the one stored in Strapi. This ensures that the user is valid and authorized.
Add the following code to verify the tokens match.
// Rest of the code

useEffect(() => {
  // Ensure the router is ready
  if (!router.isReady) return;

  async function fetchData() {
    try {
      const payload = jwt.verify(token, SECRET); // Verify the token using the secret

      // Query Strapi using the email from the payload
      const response = await fetch(
        `http://localhost:1337/api/accounts?filters[email][$eq]=${payload.email}`,
      );
      const json = await response.json();

      if (!json.data || json.data.length === 0) {
        throw new Error("Account not found in Strapi");
      }

      const account = json.data[0]; // Get the first matching account
      if (account.token !== token) {
        // Compare tokens
        throw new Error("Token mismatch");
      }

      // Tokens match; grant access
      console.log("Tokens match:", account);
      setDone("done");
    } catch (error) {
      console.error("Error:", error.message); // Log the error
      router.push("/"); // Redirect to home page on failure
    }
  }

  fetchData();
}, [token, router.isReady]); // Listen for changes in token and router readiness

// Rest of the code
Sending Messages
Now that security has been added to the chat application, it’s time to set up our chat environment.
This article is a modification of a previous article. Refer to it for clarity on the various features.
Run npm install to install all the dependencies for this chat application. Once the installation is complete, run npm run dev to start up the chat application.
Please ensure that you add the right Gmail credentials to the mail.js file. Also, ensure your strapi server is running. To do this, open your terminal and run
npm run developin your Strapi project folder.
Clone, fork or download the next-chat file for this chat application using this GitHub link.
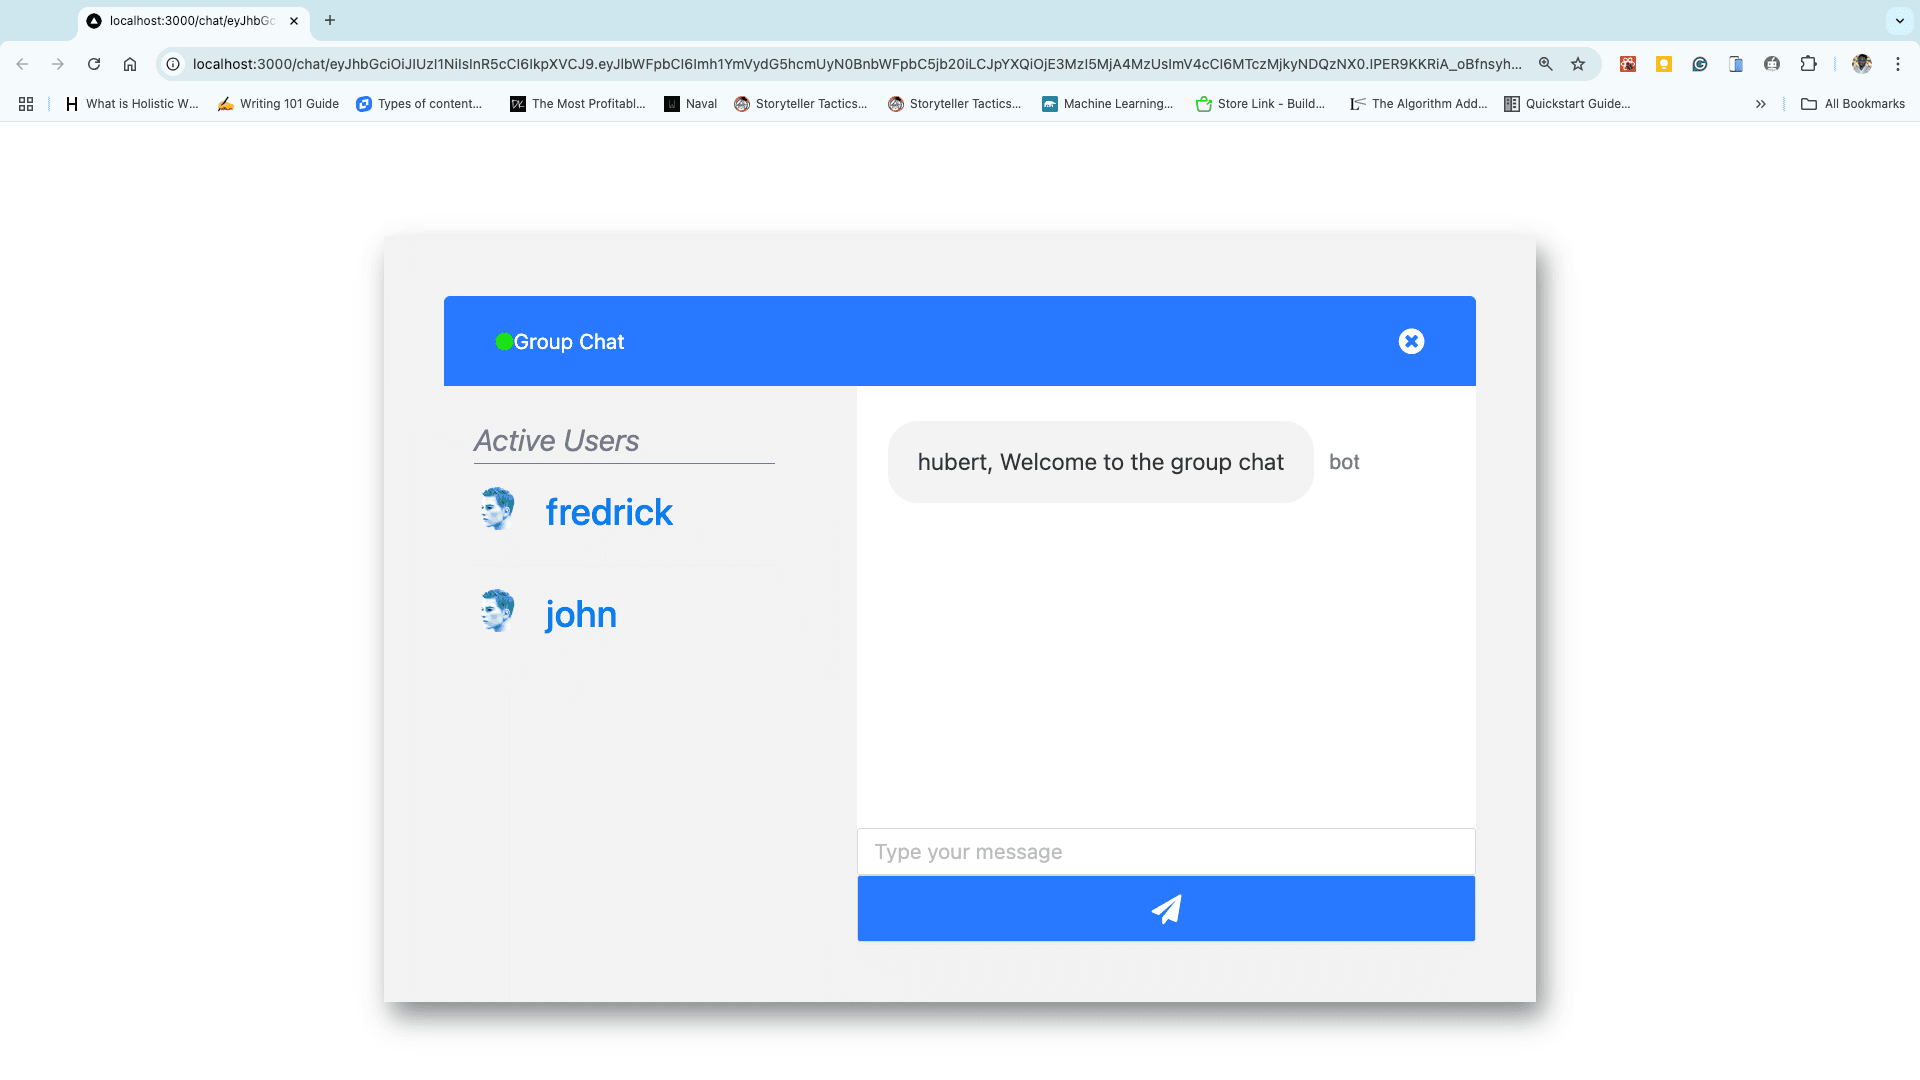
When the chat application is up and running, head on to "http://localhost:3000", create a new account and check your inputted email for the verification link. Once you click on the link you will be brought to a clean User Interface shown below.
Setting up Socket.io
After starting up the chat application, the next step is to add chat functionality to the application.
Backend
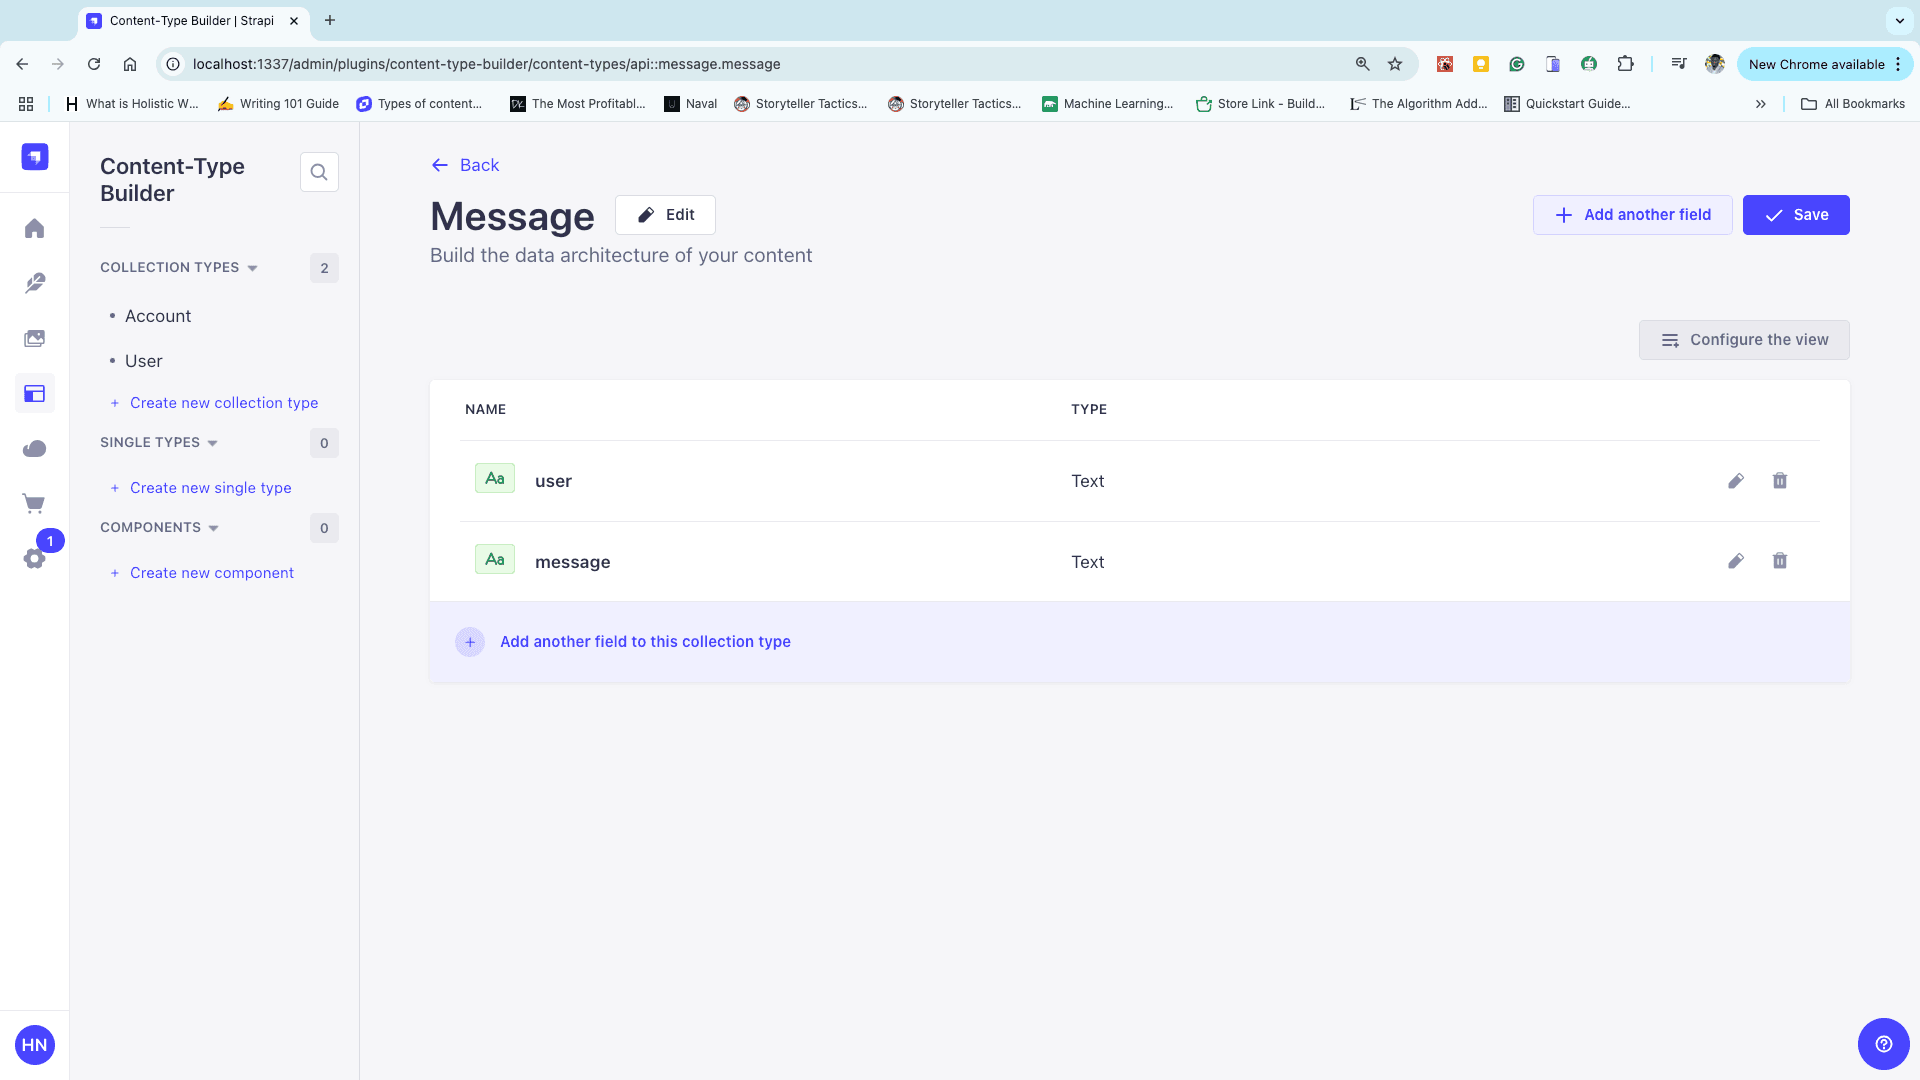
Create a new collection named message in Content-Type Builder and add 2 fields, a user field, and a message field.
Now, open up the chatapp folder and add the backend functionality for socket.io to the index.js file in the src folder.
"use strict";
const { Server } = require("socket.io"); // Use CommonJS syntax

module.exports = {
  register(/*{ strapi }*/) {},

  bootstrap(/*{ strapi }*/) {
    const io = new Server(strapi.server.httpServer, {
      cors: {
        origin: "http://localhost:3000",
        methods: ["GET", "POST"],
        allowedHeaders: ["my-custom-header"],
        credentials: true,
      },
    });

    io.on("connection", function (socket) {
      socket.on("join", ({ username }) => {
        console.log("user connected");
        console.log("username is ", username);
        if (username) {
          socket.join("group");
          socket.emit("welcome", {
            user: "bot",
            text: `${username}, Welcome to the group chat`,
            userData: username,
          });
        } else {
          console.log("An error occurred");
        }
      });

      socket.on("sendMessage", async (data) => {
        const axios = require("axios");
        const strapiData = {
          data: {
            user: data.user,
            message: data.message,
          },
        };

        await axios
          .post("http://localhost:1337/api/messages", strapiData)
          .then(() => {
            socket.broadcast.to("group").emit("message", {
              user: data.username,
              text: data.message,
            });
          })
          .catch((e) => console.log("error", e.message));
      });
    });
  },
};
Frontend
Add the following code to the index.js file in next-chat/components to set up socket.io and send messages.
import React, { useEffect, useState } from "react";
import { Input } from "antd";
import "antd/dist/antd.css";
import "font-awesome/css/font-awesome.min.css";
import Header from "./Header";
import Messages from "./Messages";
import List from "./List";
import { io } from "socket.io-client";
import {
  ChatContainer,
  StyledContainer,
  ChatBox,
  StyledButton,
  SendIcon,
} from "../pages/chat/styles";

function ChatRoom({ username, id }) {
  const [messages, setMessages] = useState([]);
  const [message, setMessage] = useState("");
  const [users, setUsers] = useState([]);
  const [socket, setSocket] = useState(null); // Store socket instance
  const BASE_URL = "http://localhost:1337";

  useEffect(() => {
    // Initialize socket connection
    const ioInstance = io(BASE_URL);
    setSocket(ioInstance);

    // Handle "join" event
    ioInstance.emit("join", { username }, (error) => {
      if (error) alert(error);
    });

    // Listen for "welcome" event
    ioInstance.on("welcome", async (data) => {
      const welcomeMessage = {
        user: data.user,
        message: data.text,
      };
      setMessages((prev) => [welcomeMessage, ...prev]);

      // Fetch all messages from Strapi
      try {
        const res = await fetch(`${BASE_URL}/api/messages`);
        const response = await res.json();
        const allMessages = response.data.map((one) => one.attributes);
        setMessages((prev) => [...prev, ...allMessages]);
      } catch (err) {
        console.error("Error fetching messages:", err.message);
      }
    });

    // Listen for "message" event
    ioInstance.on("message", async () => {
      try {
        const res = await fetch(`${BASE_URL}/api/messages`);
        const response = await res.json();
        const allMessages = response.data.map((one) => one.attributes);
        setMessages(allMessages);
      } catch (err) {
        console.error("Error fetching new messages:", err.message);
      }
    });

    // Clean up on component unmount
    return () => {
      ioInstance.disconnect();
    };
  }, [username]);

  const sendMessage = () => {
    if (!message.trim()) {
      alert("Message can't be empty");
      return;
    }

    if (socket) {
      socket.emit("sendMessage", { message, user: username }, (error) => {
        if (error) alert(error);
      });
      setMessage("");
    }
  };

  const handleChange = (e) => {
    setMessage(e.target.value);
  };

  const handleClick = () => {
    sendMessage();
  };

  return (
    <ChatContainer>
      <Header room="Group Chat" />
      <StyledContainer>
        <List users={users} id={id} usersname={username} />
        <ChatBox>
          <Messages messages={messages} username={username} />
          <Input
            type="text"
            placeholder="Type your message"
            value={message}
            onChange={handleChange}
          />
          <StyledButton onClick={handleClick}>
            <SendIcon>
              <i className="fa fa-paper-plane" />
            </SendIcon>
          </StyledButton>
        </ChatBox>
      </StyledContainer>
    </ChatContainer>
  );
}

export default ChatRoom;
Add the following code to the index.js file in next-chat/components/Messages. This code will loop through the messages and display them on the screen.
import React, { useEffect, useRef } from "react";
import Message from "./Message/";
import styled from "styled-components";
function Messages(props) {
  const { messages, username: user } = props;
  const messagesEndRef = useRef(null);
  const scrollToBottom = () => {
    messagesEndRef.current?.scrollIntoView({ behavior: "smooth" }); //Scroll to bottom functionality.
  };
  useEffect(() => {
    scrollToBottom();
  }, [messages]);
  return (
    <StyledMessages>
      {messages.map((message, i) => (
        <div key={i} ref={messagesEndRef}>
          <Message message={message} username={user} />
        </div>
      ))}
    </StyledMessages>
  );
}
export default Messages;
const StyledMessages = styled.div`
  padding: 5% 0;
  overflow: auto;
  flex: auto;
`;
Lastly, add the following code to the index.js file in next-chat/components/Messages/Message. This code will neatly format the messages and position the messages in their rightful place.
import React from "react";
import { MessagesContainer, MessageBox, MessageText, SentBy } from "./styles";

function Message(props) {
  const {
    username,
    message: { user, message },
  } = props;
  let sentByCurrentUser = false;

  if (user === username) {
    sentByCurrentUser = true;
  }

  const background = sentByCurrentUser ? "blue" : "dark";
  const textPosition = sentByCurrentUser ? "end" : "start";
  const textColor = sentByCurrentUser ? "white" : "dark";
  const sentBy = sentByCurrentUser ? "right" : "left";
  return (
    <MessagesContainer textPosition={textPosition}>
      <MessageBox background={background}>
        <MessageText color={textColor}>{message}</MessageText>
      </MessageBox>
      <SentBy sentBy={sentBy}>{user}</SentBy>
    </MessagesContainer>
  );
}

export default Message;
Role-Based Auth
The previous section covered how to set up socket.io for both the client and server sides of the application. This section will cover how to implement role-based authentication in the chat application.
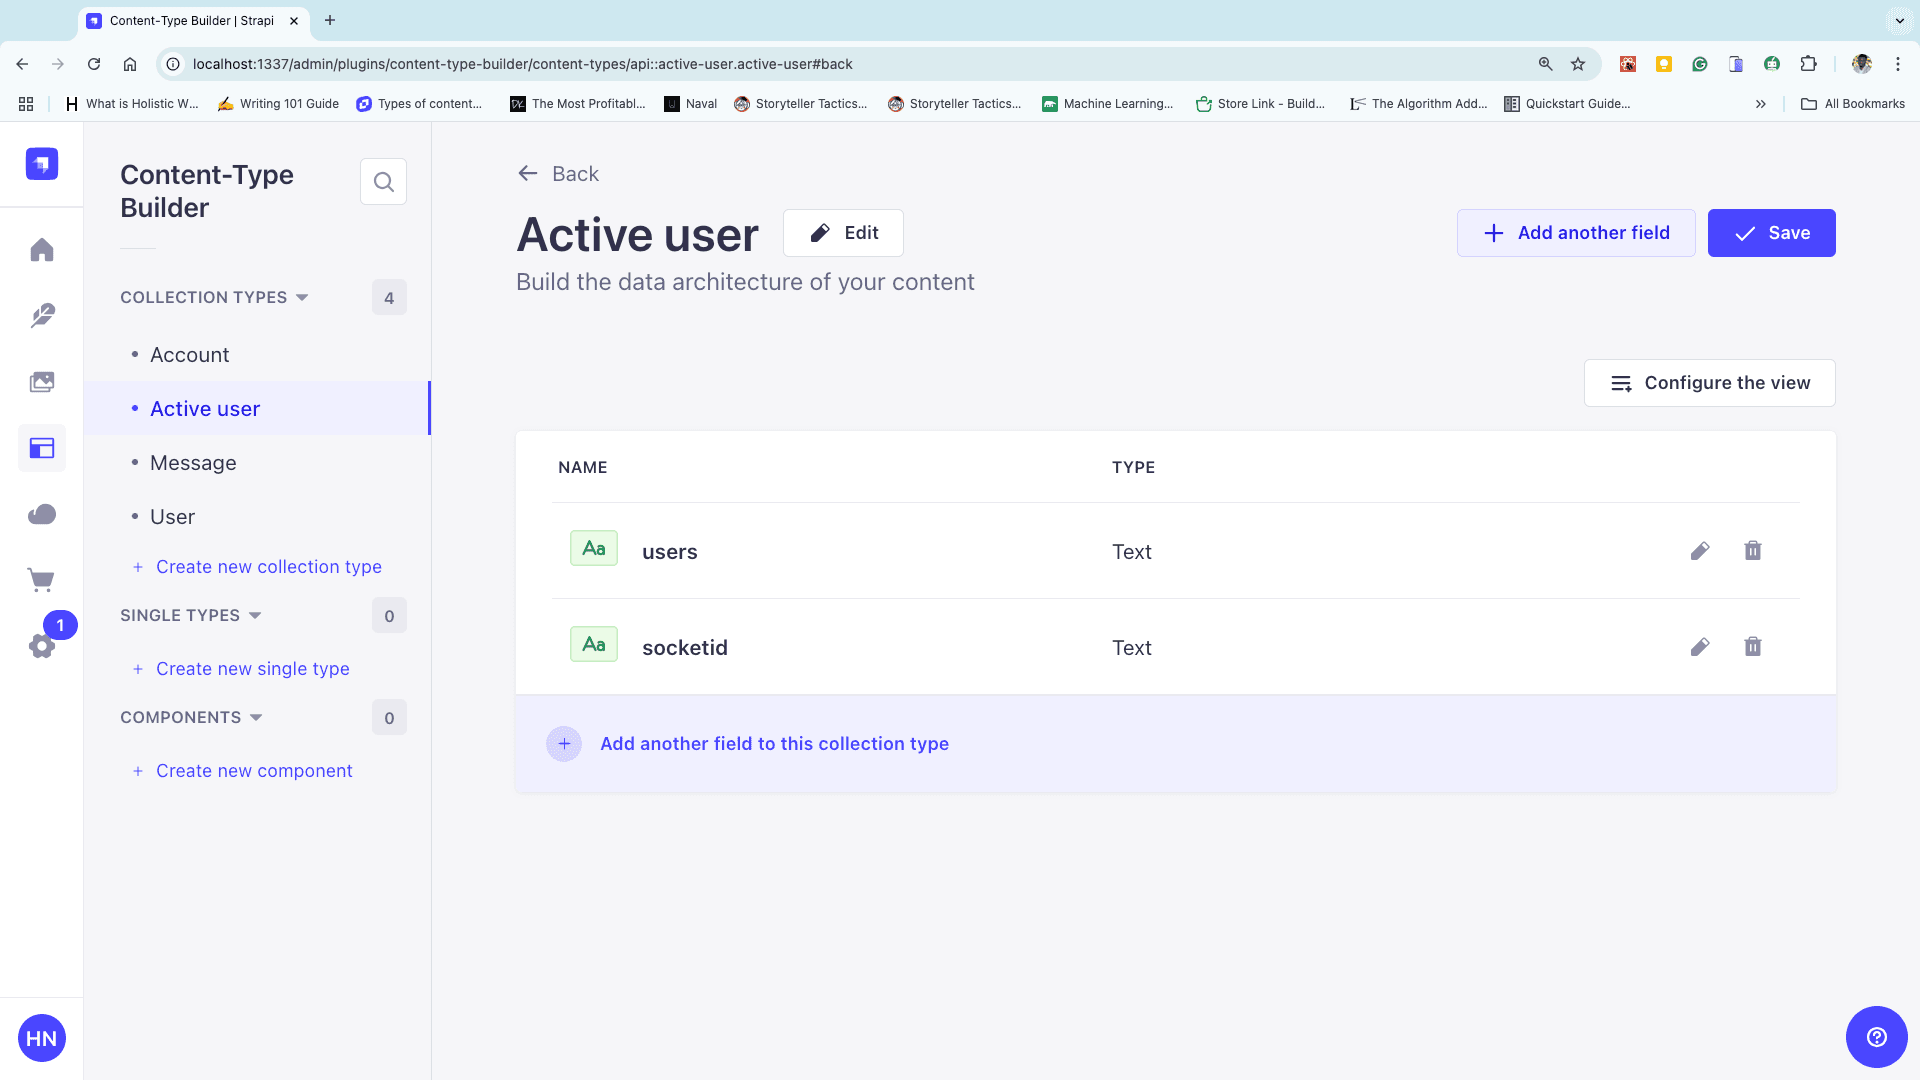
Create an active user collection type in Strapi, add a users field and socketid field, make sure it is set to a unique field and configure the roles permission.
Add the following code to the index.js file in chat-app/src to make a POST and request to the active users collection type.
//rest of the code
io.on("connection", function (socket) {
  socket.on("join", ({ username }) => {
    console.log("user connected");
    console.log("username is ", username);
    if (username) {
      socket.join("group");
      socket.emit("welcome", {
        user: "bot",
        text: `${username}, Welcome to the group chat`,
        userData: username,
      });
    } else {
      console.log("An error occurred");
    }
  });

  socket.on("sendMessage", async (data) => {
    const axios = require("axios");
    const strapiData = {
      data: {
        user: data.user,
        message: data.message,
      },
    };

    await axios
      .post("http://localhost:1337/api/messages", strapiData)
      .then(() => {
        socket.broadcast.to("group").emit("message", {
          user: data.username,
          text: data.message,
        });
      })
      .catch((e) => console.log("error", e.message));
  });
});
//rest of the code
After storing and sending the user data from the server, add the following code to the index.js file in next-chat/components to listen for the server's roomData event and fetch the list of active users.
useEffect(() => {
  // Initialize socket connection
  const ioInstance = io("http://localhost:1337");

  // Listen for "roomData" event
  ioInstance.on("roomData", async () => {
    try {
      const res = await fetch("http://localhost:1337/api/active-users");
      const response = await res.json();
      setUsers(response); // Fetch and store active users
    } catch (err) {
      console.error("Error fetching active users:", err.message);
    }
  });

  // Clean up on component unmount
  return () => {
    ioInstance.disconnect();
  };
}, [username]);
Add the code below to the index.js file in next-chat/components/List to get the users from the props passed to the List component and display them.
import React from "react";
import styled from "styled-components";
import { List as AntdList, Avatar } from "antd";

function List({ users, username }) {
  const userList = users?.data || []; // Safely access users array

  return (
    <StyledList>
      <ListHeading>Active Users</ListHeading>
      <AntdList
        itemLayout="horizontal"
        dataSource={userList}
        renderItem={(user) => (
          <AntdList.Item>
            <AntdList.Item.Meta
              avatar={
                <Avatar src="https://zos.alipayobjects.com/rmsportal/ODTLcjxAfvqbxHnVXCYX.png" />
              }
              title={user.users} // Display user name from Strapi data
            />
            <button
              style={
                user.users === "Admin" || username !== "Admin"
                  ? { display: "none" }
                  : null
              } // Only show delete button for Admin
            >
              Delete
            </button>
          </AntdList.Item>
        )}
      />
    </StyledList>
  );
}

export default List;

const StyledList = styled(AntdList)`
  margin-right: 10px;
  flex: 0 0 35%;
  padding: 20px;
  .ant-list-item-meta-content {
    flex-grow: 0;
  }
  h4 {
    font-size: 25px;
  }
  a {
    color: #097ef0;
  }
`;

const ListHeading = styled.div`
  color: #757591;
  font-size: 20px;
  font-style: oblique;
  border-bottom: 1px solid #757591;
`;
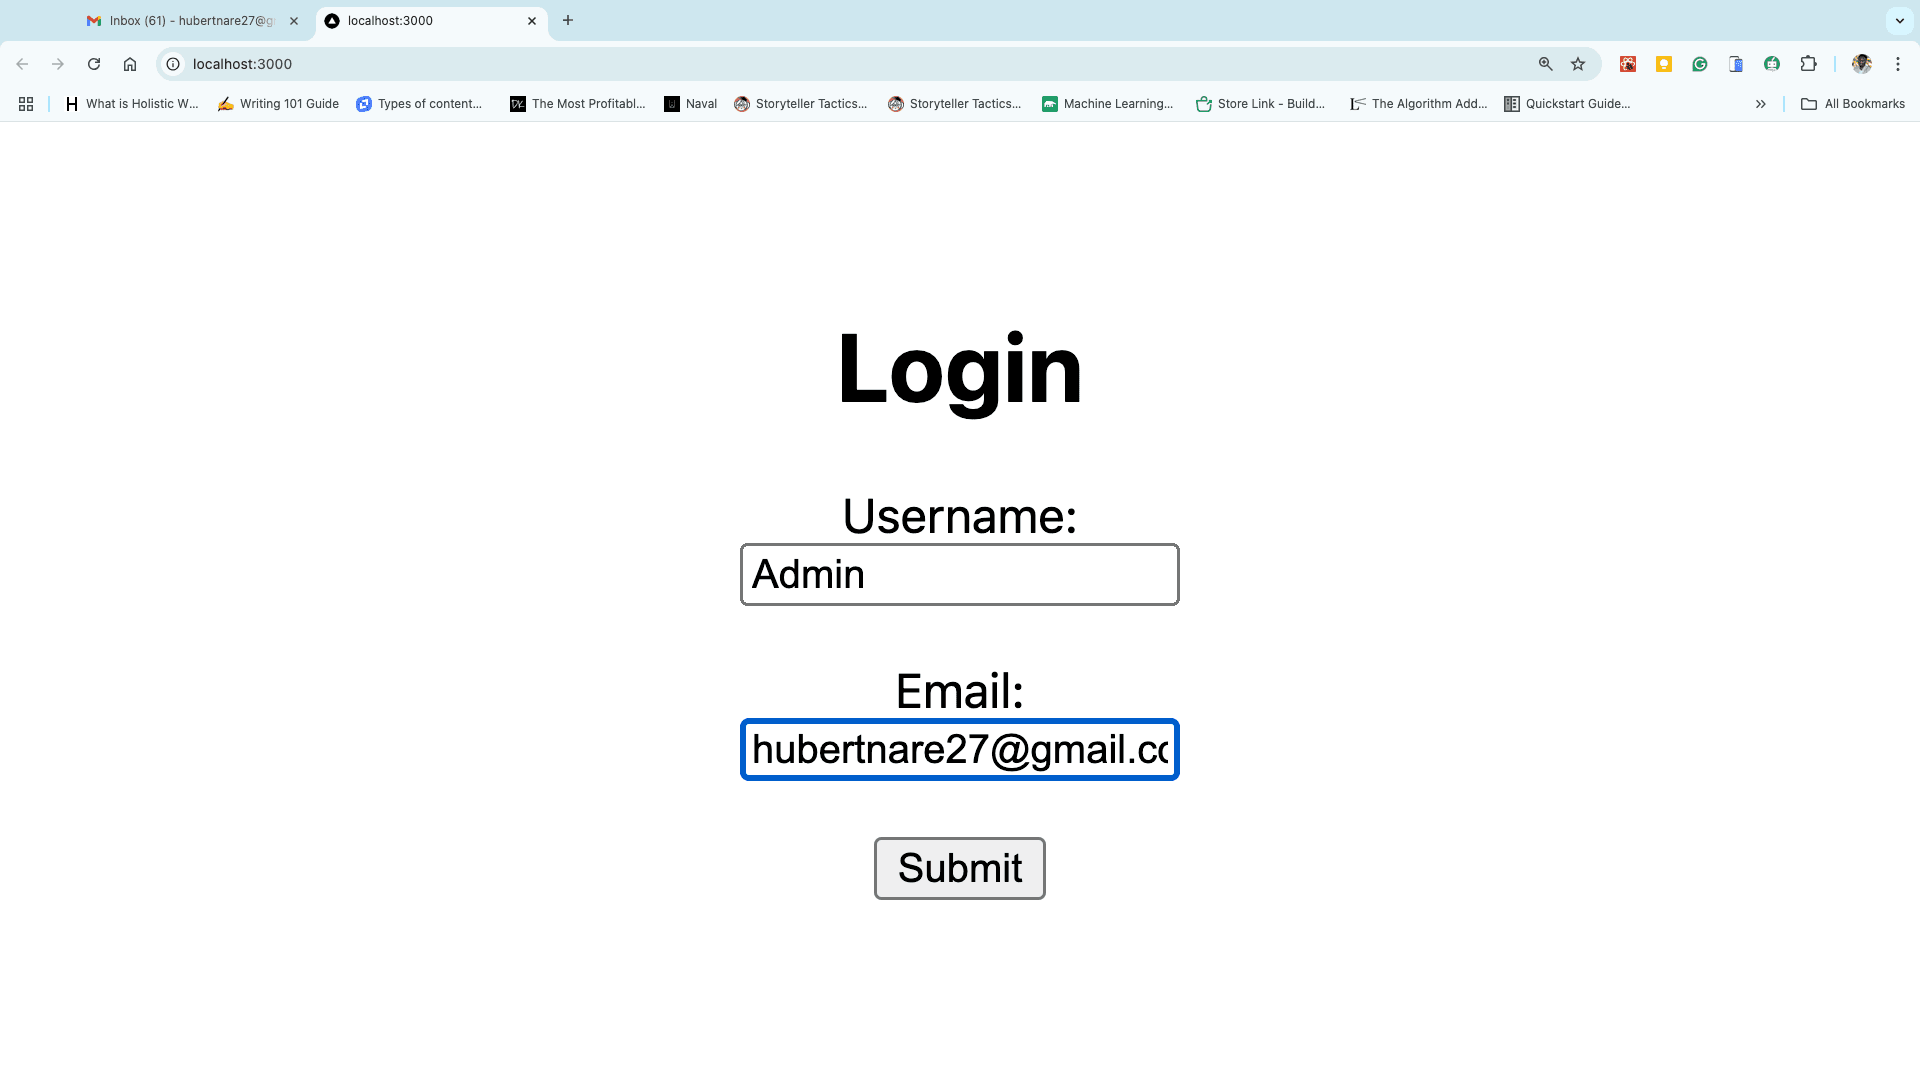
Populate the Account collection type with Admin as username. Head on to http://localhost:3000 to do so.
Click on Content-Type Builder in your Strapi’s admin dashboard and edit the username field to take in unique sets of usernames for the Account collection type.
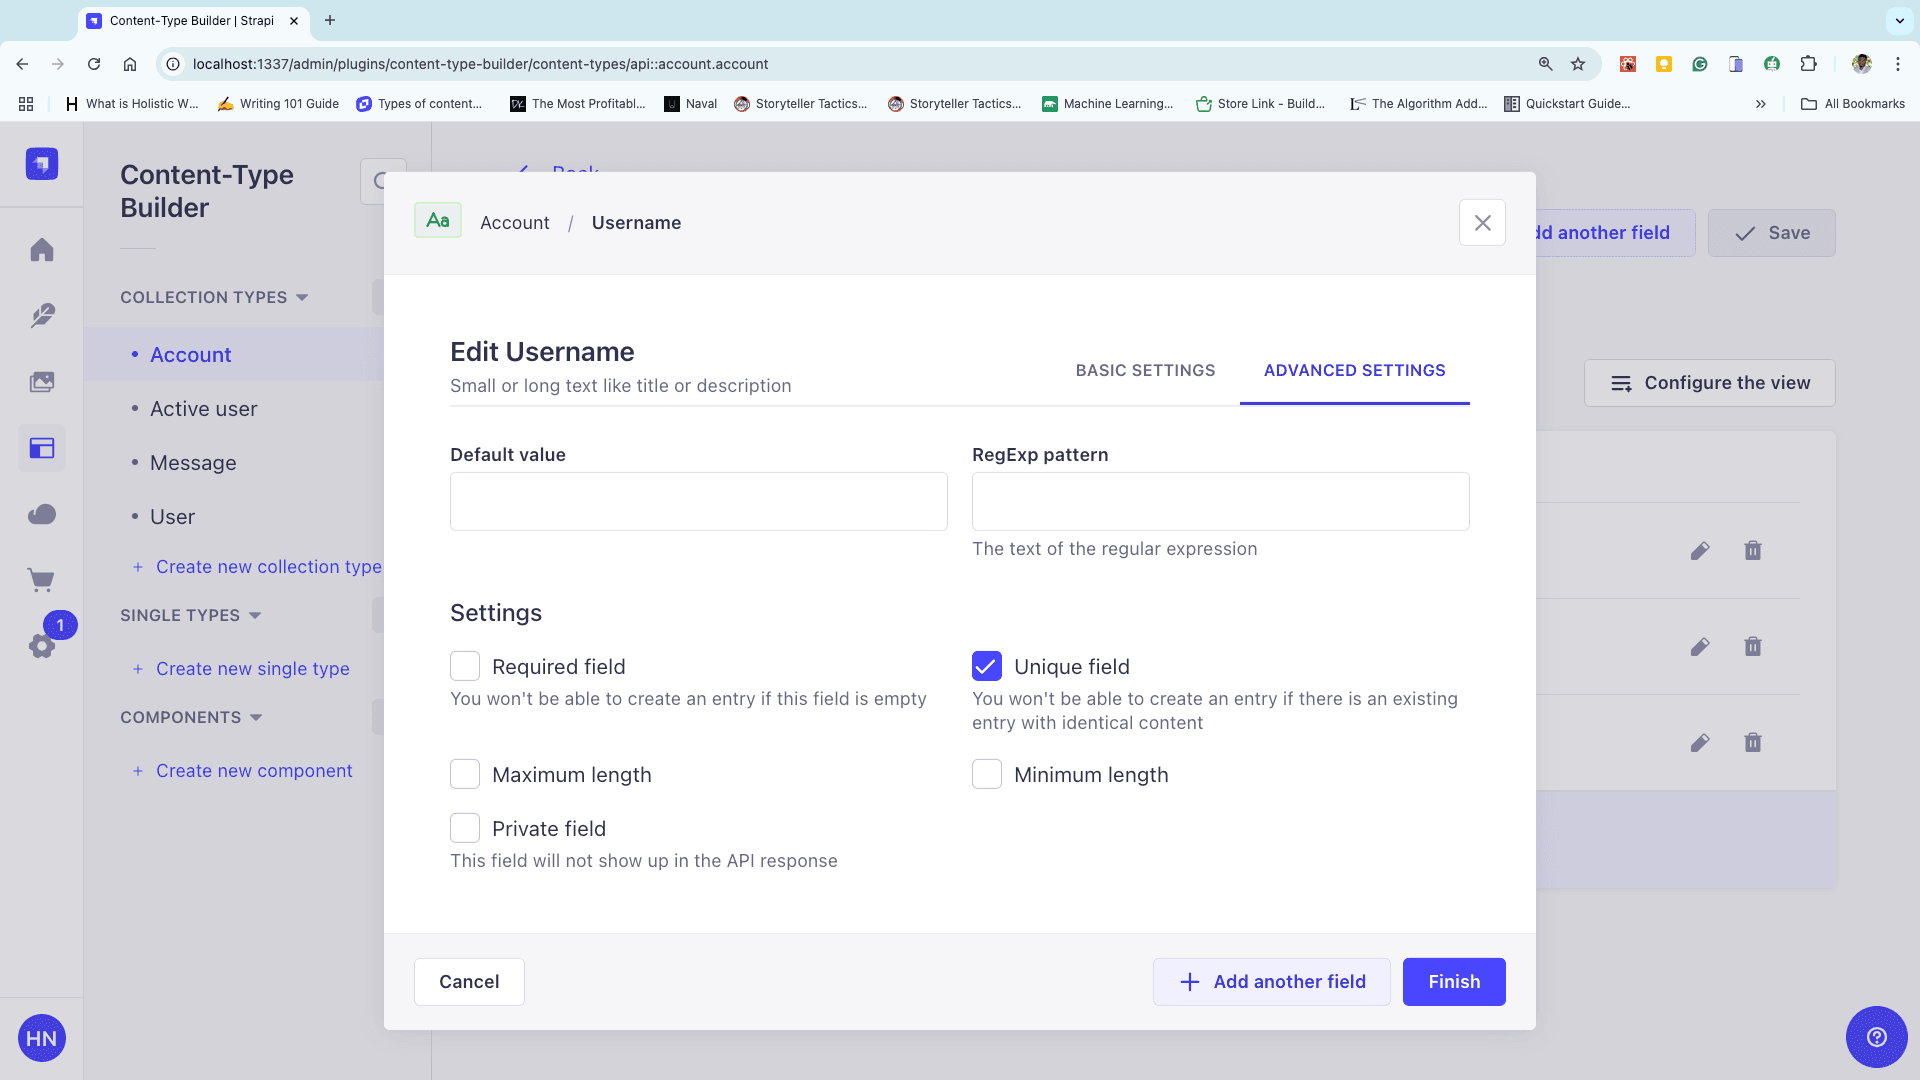
Hit finish and click on save.
Adding Delete functionality.
This delete function is a feature made accessible to only the Admin user.
Points to Note
- Every user will always have to reload the page to view active users.
- When the Admin deletes a user, the page has to be refreshed to view changes.
- The deleted user will be redirected to the home page
It’s time to Configure The Delete Function
Open up the index.js file in chatapp/src and add the code below to set up the backend.
"use strict";
const { Server } = require("socket.io");
const axios = require("axios");

module.exports = {
  register() {},

  bootstrap() {
    const io = new Server(strapi.server.httpServer, {
      cors: {
        origin: "http://localhost:3000",
        methods: ["GET", "POST"],
        allowedHeaders: ["my-custom-header"],
        credentials: true,
      },
    });

    io.on("connection", (socket) => {
      console.log("User connected with socket ID:", socket.id);

      // Handle user join
      socket.on("join", async ({ username }) => {
        if (username) {
          socket.join("group");
          socket.emit("welcome", {
            user: "bot",
            text: `${username}, Welcome to the group chat`,
          });

          const strapiData = { data: { users: username, socketid: socket.id } };

          try {
            await axios.post(
              "http://localhost:1337/api/active-users",
              strapiData,
            );
            socket.emit("roomData", { done: "true" });
          } catch (error) {
            if (error.response?.status === 400) {
              socket.emit("roomData", { done: "existing" });
            } else {
              console.error("Error adding user:", error.message);
            }
          }
        }
      });

      // Handle "kick" event
      socket.on("kick", (data) => {
        io.sockets.sockets.forEach((s) => {
          if (s.id === data.socketid) {
            s.disconnect(); // Disconnect the user
            s.removeAllListeners(); // Cleanup socket listeners
            console.log("User kicked:", s.id);
          } else {
            console.log("Couldn't kick user:", s.id);
          }
        });
      });

      // Handle user disconnect
      socket.on("disconnect", async () => {
        try {
          await axios.delete(
            `http://localhost:1337/api/active-users/${socket.id}`,
          );
          console.log("User disconnected:", socket.id);
        } catch (error) {
          console.error("Error removing user:", error.message);
        }
      });
    });
  },
};
("use strict");
const { Server } = require("socket.io");
const axios = require("axios");

module.exports = {
  register() {},

  bootstrap() {
    const io = new Server(strapi.server.httpServer, {
      cors: {
        origin: "http://localhost:3000",
        methods: ["GET", "POST"],
        allowedHeaders: ["my-custom-header"],
        credentials: true,
      },
    });

    io.on("connection", (socket) => {
      console.log("User connected with socket ID:", socket.id);

      // Handle user join
      socket.on("join", async ({ username }) => {
        if (username) {
          socket.join("group");
          socket.emit("welcome", {
            user: "bot",
            text: `${username}, Welcome to the group chat`,
          });

          const strapiData = { data: { users: username, socketid: socket.id } };

          try {
            await axios.post(
              "http://localhost:1337/api/active-users",
              strapiData,
            );
            socket.emit("roomData", { done: "true" });
          } catch (error) {
            if (error.response?.status === 400) {
              socket.emit("roomData", { done: "existing" });
            } else {
              console.error("Error adding user:", error.message);
            }
          }
        }
      });

      // Handle "kick" event
      socket.on("kick", (data) => {
        io.sockets.sockets.forEach((s) => {
          if (s.id === data.socketid) {
            s.disconnect(); // Disconnect the user
            s.removeAllListeners(); // Cleanup socket listeners
            console.log("User kicked:", s.id);
          } else {
            console.log("Couldn't kick user:", s.id);
          }
        });
      });

      // Handle user disconnect
      socket.on("disconnect", async () => {
        try {
          await axios.delete(
            `http://localhost:1337/api/active-users/${socket.id}`,
          );
          console.log("User disconnected:", socket.id);
        } catch (error) {
          console.error("Error removing user:", error.message);
        }
      });
    });
  },
};
After setting up the backend, open up your index.js file in next-chat/components/List and add the following code. The code below will get the socket id, emit it to the server and delete the user from the database.
import React from "react";
import styled from "styled-components";
import { List as AntdList, Avatar } from "antd";
import socket from "socket.io-client";

function List(props) {
  const users = props.users.data; // Strapi 5 no longer uses `attributes`, so data is already structured directly.

  const handleClick = async (id, socketid) => {
    const io = socket("http://localhost:1337");

    try {
      // Delete user from active users collection
      await fetch(`http://localhost:1337/api/active-users/${id}`, {
        method: "DELETE",
        headers: { "Content-Type": "application/json" },
      });

      // Emit "kick" event to disconnect the user
      io.emit("kick", { socketid }, (error) => {
        if (error) return alert("Failed to kick user:", error);
      });

      // Refresh the page after a short delay
      setTimeout(() => location.reload(), 3000);
    } catch (error) {
      console.error("Error deleting user:", error.message);
      setTimeout(() => location.reload(), 3000);
    }
  };

  return (
    <StyledList>
      <ListHeading>Active Users</ListHeading>
      <AntdList
        itemLayout="horizontal"
        dataSource={users}
        renderItem={(user) => (
          <AntdList.Item>
            <AntdList.Item.Meta
              avatar={
                <Avatar src="https://zos.alipayobjects.com/rmsportal/ODTLcjxAfvqbxHnVXCYX.png" />
              }
              title={user.users} // Directly access the `users` field.
            />
            <button
              style={
                user.users === "Admin" || props.username !== "Admin"
                  ? { display: "none" }
                  : null
              }
              onClick={() => handleClick(user.id, user.socketid)} // Use `user.id` and `user.socketid`.
            >
              Delete
            </button>
          </AntdList.Item>
        )}
      />
    </StyledList>
  );
}

export default List;

// Styled Components
const StyledList = styled(AntdList)`
  margin-right: 10px;
  flex: 0 0 35%;
  padding: 20px;
`;

const ListHeading = styled.div`
  color: #757591;
  font-size: 20px;
  font-style: oblique;
  border-bottom: 1px solid #757591;
`;
Conclusion
This article primarily aimed at teaching you how to set up different authenticating techniques in your application as well as enlightening you on how to utilize Strapi 5.
Feel free to clone or fork the final code from the GitHub repo. As a next step, try to use this knowledge gained to build more complex applications using Strapi.