Deploy Strapi on Kubernetes with HTTPS
Disclaimer This article was written by Rajat Badjatya, a member of the Write for the community program
What is Strapi?
Strapi is a headless Content Management System. What does headless CMS mean? A headless CMS is a back-end only content management system (CMS) that makes content accessible via a RESTful API for display on any device.
Why Headless CMS?
An omnichannel experience of a product is the need of the hour. To deliver a seamless experience, you need an API-first headless CMS that can deliver content to multiple channels(Websites, Android Apps, iOS Apps, etc). To learn more about Strapi and headless CMS visit strapi.io
Though Strapi installation is quite easy on Linux and Windows host machine. But as all you know, Kubernetes adds a layer of abstraction which makes Strapi deployment somewhat effortful job. Also, Strapi doesn’t support HTTPs/SSL communication out of the box . So in this tutorial I will step by step walk you through the process of setting up and deploying production grade Strapi with HTTPs on Kubernetes.
As they say, let’s get started without any further delay.
Setup
Prerequisites: A basic knowledge of Kubernetes along with access to a Kubernetes cluster. I recommend Google Kubernetes Engine (GKE), but the majority of this tutorial can be used on any Kubernetes cluster. In a pinch, you can also use minikube so you have a zero-cost way to follow along with me.
I have divided the whole deployment process into 4 steps to make it more understandable
Steps:
- Setting up the namespace and storage-class.
- Installing MongoDB for our Strapi project.
- Creating a docker image for Strapi with MongoDB and HTTPs configuration.
- Creating and deploying Kubernetes resources for Strapi.
Step 1: Setting up the namespace and storage-class
Namespace:
By separating different projects in different namespaces, you can easily deploy as many Strapi projects. All you need to do is use a different namespace, and the new definitions will not overlap with the existing ones.
If you choose to use the default namespace, then you can skip this step. Otherwise, you should apply the namespace file given below:
namespace.yml
---
apiVersion: v1
kind: Namespace
metadata:
  name: ns-strapi
  labels:
    name: ns-strapi
$ kubectl apply -f namespace.yml
namespace/my-es-cluster created
$ kubectl get namespaces
NAME STATUS AGE
default Active 50m
kube-system Active 50m
ns-strapi Active 1mStorageClass
The next step is to define a new StorageClass for providing the persistent volumes for MongoDB and Strapi.
Each StorageClass contains the fields provisioner, parametersand reclaimPolicy, which are used when a PersistentVolume belonging to the class needs to be dynamically provisioned. If you are using the GCP then volume provisioner would be gce-pd. Alternatively, you can look for a more suitable option for StorageClass here.
sc-strapi.yml
kind: StorageClass
apiVersion: storage.k8s.io/v1
metadata:
  name: sc-strapi
provisioner: kubernetes.io/gce-pd
reclaimPolicy: Retain
parameters:
  type: pd-ssd
Step 2: Installing MongoDB for our Strapi project
Strapi gives you the option to choose the most appropriate database for your project. It currently supports PostgreSQL, MongoDB, SQLite, MySQL, and MariaDB.
We will be setting up MongoDB for this tutorial and will be deploying it as a special Kubernetes resource known as StatefulSet instead of normal Deployment and the rationale behind that is “Containers are stateless!” they say, and “databases are pointless without state!”.
We want the volume with the mongo data to get attached again to a new Pod when the old Pod vanishes. If we don’t do this, we will lose all the data in the database after any of Pod goes down. The StatefulSet controller will give the replacement Pod the same name and access to the resources of the Pod it replaced.
If you want to learn more about MongoDB installation on Kubernetes you can refer to this article from Kubernetes Team or if you are in a hurry then just replace the name of your StorageClass and name of mongo service in below YAML to make your MongoDB pods up and running.
mongo.yml
apiVersion: apps/v1
kind: StatefulSet
metadata:
  name: strapi-mongo
  namespace: ns-strapi
spec:
  serviceName: strapi-mongo-svc
  replicas: 3
  selector:
    matchLabels:
      app: strapi-mongo
  template:
    metadata:
      labels:
        app: strapi-mongo
        selector: strapi-mongo
    spec:
      affinity:
# Try to put each mongo pod on a different node in the K8s cluster
        podAntiAffinity:
          preferredDuringSchedulingIgnoredDuringExecution:
            - weight: 100
              podAffinityTerm:
                labelSelector:
                  matchExpressions:
                    - key: app
                      operator: In
                      values:
                        - strapi-mongo
                topologyKey: kubernetes.io/hostname
      initContainers:
 # Fix the permissions on the volume.
        - name: fix-the-volume-permission
          image: busybox
          resources:
            requests:
              cpu: 100m
              memory: 256Mi
            limits:
             cpu: 100m
             memory: 256Mi
          command: ['sh', '-c', 'chown -R 1000:1000 /data/db']
          securityContext:
            privileged: true
          volumeMounts:
           - name: mongo-volume
             mountPath: /data/db
      containers:
        - name: strapi-mongo
          image: mongo:4.0.8
          ports:
            - containerPort: 27017
              name: tcp
          securityContext:
            runAsUser: 1000
            runAsGroup: 1000
          resources:
            limits:
              cpu: 500m
              memory: "1Gi"
            requests:
              cpu: 500m
              memory: "1Gi"
          volumeMounts:
            - name: mongo-volume
              mountPath: /data/db
  volumeClaimTemplates:
    - metadata:
        name: mongo-volume
      spec:
        accessModes:
          - ReadWriteOnce
        storageClassName: sc-strapi
        volumeMode: Filesystem
        resources:
          requests:
            storage: 10Gi
---
apiVersion: v1
kind: Service
metadata:
  labels:
    app: strapi
  name: mongo
  namespace: ns-strapi
spec:
  type: LoadBalancer
  ports:
  - name: mongo
    port: 30144
    protocol: TCP
    targetPort: 27017
  selector:
    app: strapi-mongo
The above YAML is pretty much the same as the YAML Kubernetes Team is using for MongoDB installation at this link. I just did 2 modifications, First, I added the pod’s affinity & anti-affinity to ensure the high availability of mongo pods these properties tell Kubernetes to schedule our pods to a different-different node that could be helpful in a case when a node gets crashed. Second, I added a security context to avoid permissions error and seamlessly access path data/db inside the container.
If you are following me then after applying the above YAML, you should have three pods with a service created in your cluster. These correspond to the three nodes in your MongoDB set. You can see them with this command:
kubectl get pods -n ns-strapi

NAME   READY STATUS RESTARTS AGE

strapi-mongo-0 1/1  Running 0     3m

strapi-mongo-1 1/1  Running 0     3m

strapi-mongo-2 1/1  Running 0     3m**kubectl get svc -n ns-strapi**NAME     TYPE           CLUSTER-IP      EXTERNAL-IP   PORT
mongo    LoadBalancer   10.97.135.233   xxx.xx.xx.xx 30144:30129/TCP
Step 3: Setting up Strapi with MongoDB configuration.
Now comes the critical step of setting up the Strapi, let’s start by creating a docker file.
- Creating a docker file
To have more control in our hand I am creating a Strapi image from scratch instead of using community image.
dockerfile
FROM node:11.1.0-alpine

WORKDIR /usr/src/api

RUN echo "unsafe-perm = true" >> ~/.npmrc

# Installing Strapi
RUN npm install -g strapi@3.0.0-beta.18

# Installing nginx
RUN  apk add nginx
RUN mkdir -p /etc/nginx/certs

# Copying the certificates and nginx config
COPY domain.crt  /etc/nginx/certs/domain.crt
COPY domain.key  /etc/nginx/certs/domain.key
COPY nginx.conf /etc/nginx/nginx.conf

# Moving the start-up script to the appropriate location
COPY strapi.sh /root

# Giving read and execution permissions
RUN chmod +x /root/strapi.sh

WORKDIR /etc/init.d/

RUN mkdir -p /run/nginx
EXPOSE 1337

ENTRYPOINT [ "/root/strapi.sh" ]
Most of the statements in above docker file are self-explanatory but I want to bring your attention to a few things:
- I have chosen
node:11.1.0-alpineas a base image for our app. - I have installed Nginx in our container and kept SSL certs to a path
/etc/nginx/certs/and nginx.conf to the path/etc/nginx/nginx.conf - Gave read and execution permission to the startup script which we’ll be creating in the immediate next step.
- Creating a Startup script for Strapi image
We’ll use the shell script as the ENTRYPOINT of a container and execute the necessary steps in order to set up the environment for our Strapi project.
strapi.sh
#!/bin/sh

strapiCount=1
count=1
####################START_SERVICES#################################################
while :
do
sleep 5
namespace=${NAMESPACE}
APP_NAME=${APP_NAME}
DATABASE_CLIENT=${DATABASE_CLIENT}
# Kubenrnetes DNS URL for your mongo service: my-svc.my-namespace.svc.cluster-domain.example
DATABASE_HOST=${DATABASE_HOST}
DATABASE_PORT=${DATABASE_PORT}
DATABASE_NAME=${DATABASE_NAME}

if [ ! -f "/persistent/$namespace/${APP_NAME}/package.json" ] && [ ${strapiCount} == 1 ]
then
echo "====> creating project for strapi <===="
mkdir -p /persistent/$namespace/

cd /persistent/$namespace
strapi new ${APP_NAME} --dbclient=${DATABASE_CLIENT} --dbhost=${DATABASE_HOST} --dbport=${DATABASE_PORT} --dbname=${DATABASE_NAME} --dbusername=${DATABASE_USERNAME}   --dbpassword=${DATABASE_PASSWORD}

chown -R  /persistent/$namespace/${APP_NAME}
elif [ ! -d "/persistent/$namespace/${APP_NAME}/node_modules" ]
then
  echo "===> installing node modules in existing strapi project <====="
  npm install --prefix ./$APP_NAME
fi
if [ ${strapiCount} == 1 ]
then
echo "====> starting strapi <===="
cd /persistent/$namespace/${APP_NAME}
npm run build
strapi start &
fi
strapiCount=`expr $strapiCount + 1`
apk add openrc
nginx -g "daemon off;"
cd
sleep 60
done
else
   echo "not valid"
fi

while :
do
sleep 50
done
With the help of the above script, we are not only configuring the MongoDB required for Strapi but we are also handling the scenario in which our K8s pod got terminated and we want to start our Strapi project from the same stage where it was earlier. Also, we are kicking off Nginx using nginx -g “daemon off;
- Nginx reverse proxy setting for redirecting HTTPs requests to HTTP
If you want to expose Strapi over HTTPs you need to apply some hack as native SSL support from Strapi was removed. A simple way to do so is by using the Nginx reverse proxy to listen to HTTPs traffic and redirect to Strapi running over HTTP.
nginx.conf
worker_processes 1;

events { worker_connections 2048; }

http {

    sendfile on;
    ssl_certificate     /etc/nginx/certs/domain.crt;
    ssl_certificate_key /etc/nginx/certs/domain.key;
    ssl_ciphers         EECDH+AESGCM:EDH+AESGCM:AES256+EECDH:AES256+EDH;
    ssl_protocols       TLSv1.1 TLSv1.2;

# Strapi upstream server
    server {

        client_body_buffer_size     32k;
        client_header_buffer_size   8k;
        large_client_header_buffers 8 64k;
        listen              443 ssl;
        listen              [::]:443 ssl;


         location / {
            proxy_pass         http://localhost:1337;
            proxy_redirect     off;
            proxy_set_header   Host $host;
            proxy_set_header   X-Real-IP $remote_addr;
            proxy_set_header   X-Forwarded-For $proxy_add_x_forwarded_for;
            proxy_set_header   X-Forwarded-Host $server_name;
        }
    }

}
If you want to learn more about Nginx reverse proxy you can refer to this link.
Now we have dockerfile and startup script strapi.sh ready, let’s create the docker image and push it to the Docker repository.
Build and push image:
sudo docker build -f dockerfile -t YOUR\_REGISTRY:5000/strapi-image:v1 .sudo docker push YOUR\_REGISTRY:5000/strapi-image:v1Step 4: Creating and deploying Kubernetes resources for Strapi
If you played your cards right so far you could have a namespace, storage classand animage ready. If that’s the case, then you are only 2 steps away to make your Strapi project up and running on Kubernetes.
First, let’s use the sc-strapi a storage class that we created in step-1 and create aPVC which will help us to connect to the Persistent Volume which will in turn connect to the underlying storage where we want to keep our Strapi project’s data.
kubectl apply -f pvc.yml -n ns-strapipvc.yml
apiVersion: v1
kind: PersistentVolumeClaim
metadata:
  name: pvc-sc-strapi
  namespace: ns-strapi
spec:
  accessModes:
    - ReadWriteMany
  resources:
    requests:
      storage: 1G
  storageClassName: sc-strapi
Specify the newly created PVC name in the below YAML. You might also need to change the value of these variablesDATABASE_CLIENT, DATABASE_HOST, DATABASE_PORT, DATABASE_NAME in the below YAML according to your setup.
strapi.yml
kind: Service
metadata:
  name: strapi
  labels:
    app: strapi
spec:
  type: LoadBalancer
  ports:
  - name: strapi
    targetPort: 443
    protocol: TCP
    port: 30143
  selector:
    app: strapi
apiVersion: v1

---

kind: Deployment
spec:
  replicas: 1
  template:
    metadata:
      labels:
        app: strapi
    spec:
      containers:
      - image: YOUR_REGISTRY:5000/strapi-image:v
        imagePullPolicy: Always
        env:
        - name: NAMESPACE
          value: "ns-strapi"
        - name: "DATABASE_CLIENT"
          value: "mongo"
        - name: "DATABASE_NAME"
          value: "strapi-mongo"
        - name: "DATABASE_PORT"
          value: "30144"
        - name: "DATABASE_HOST"
          value: "mongo.ns-strapi.svc.cluster.local"
        - name: "APP_NAME"
          value: "strapi-app"
        name: masterstrapi
        ports:
        - containerPort: 1337
        resources:
          requests:
            cpu: '2'
            memory: 4Gi
          limits:
            cpu: '2'
            memory: 4Gi
        volumeMounts:
        - name: strapi-volume
          mountPath: "/persistent"
      volumes:
      - name: strapi-volume
        persistentVolumeClaim:
          claimName: pvc-sc-strapi
apiVersion: extensions/v1beta1
metadata:
  name: masterstrapi
After applying the above YAML you will see new pod(s) and service added in your namespace.
kubectl get pods -n ns-strapi

NAME              READY STATUS RESTARTS AGE

strapi-mongo-0     1/1  Running 0       20m

strapi-mongo-1     1/1  Running 0       20m

strapi-mongo-2     1/1  Running 0       20m**masterstrapi-6c5bs** **1/1  Running 0        3m****kubectl get svc -n ns-strapi**NAME     TYPE           CLUSTER-IP      EXTERNAL-IP   PORT
mongo    LoadBalancer   xx.xx.xx.xx     xxx.xx.xx.xx 30144:30129/TCP
**strapi   LoadBalancer   xx.xx.xx.xx     xxx.xx.xx.xx 30143:31745/TCP**
You can access the Strapi from your browser once your cloud provider controller configures the network load balancer and generate a stable IP address for Strapi service.
Note: Two or three links including
open the administrationbutton in Strapi UI panel will redirect you tohttp://localhost:1337/which is happening because inside the container Strapi is still running on protocol HTTP and default port 1337. To access those links you need to copy the route and append it to your Strapi’s service load balancer IP.
To access the admin panel in the browser just copy the load balancer IP for Strapi service and append the route /admin to it.
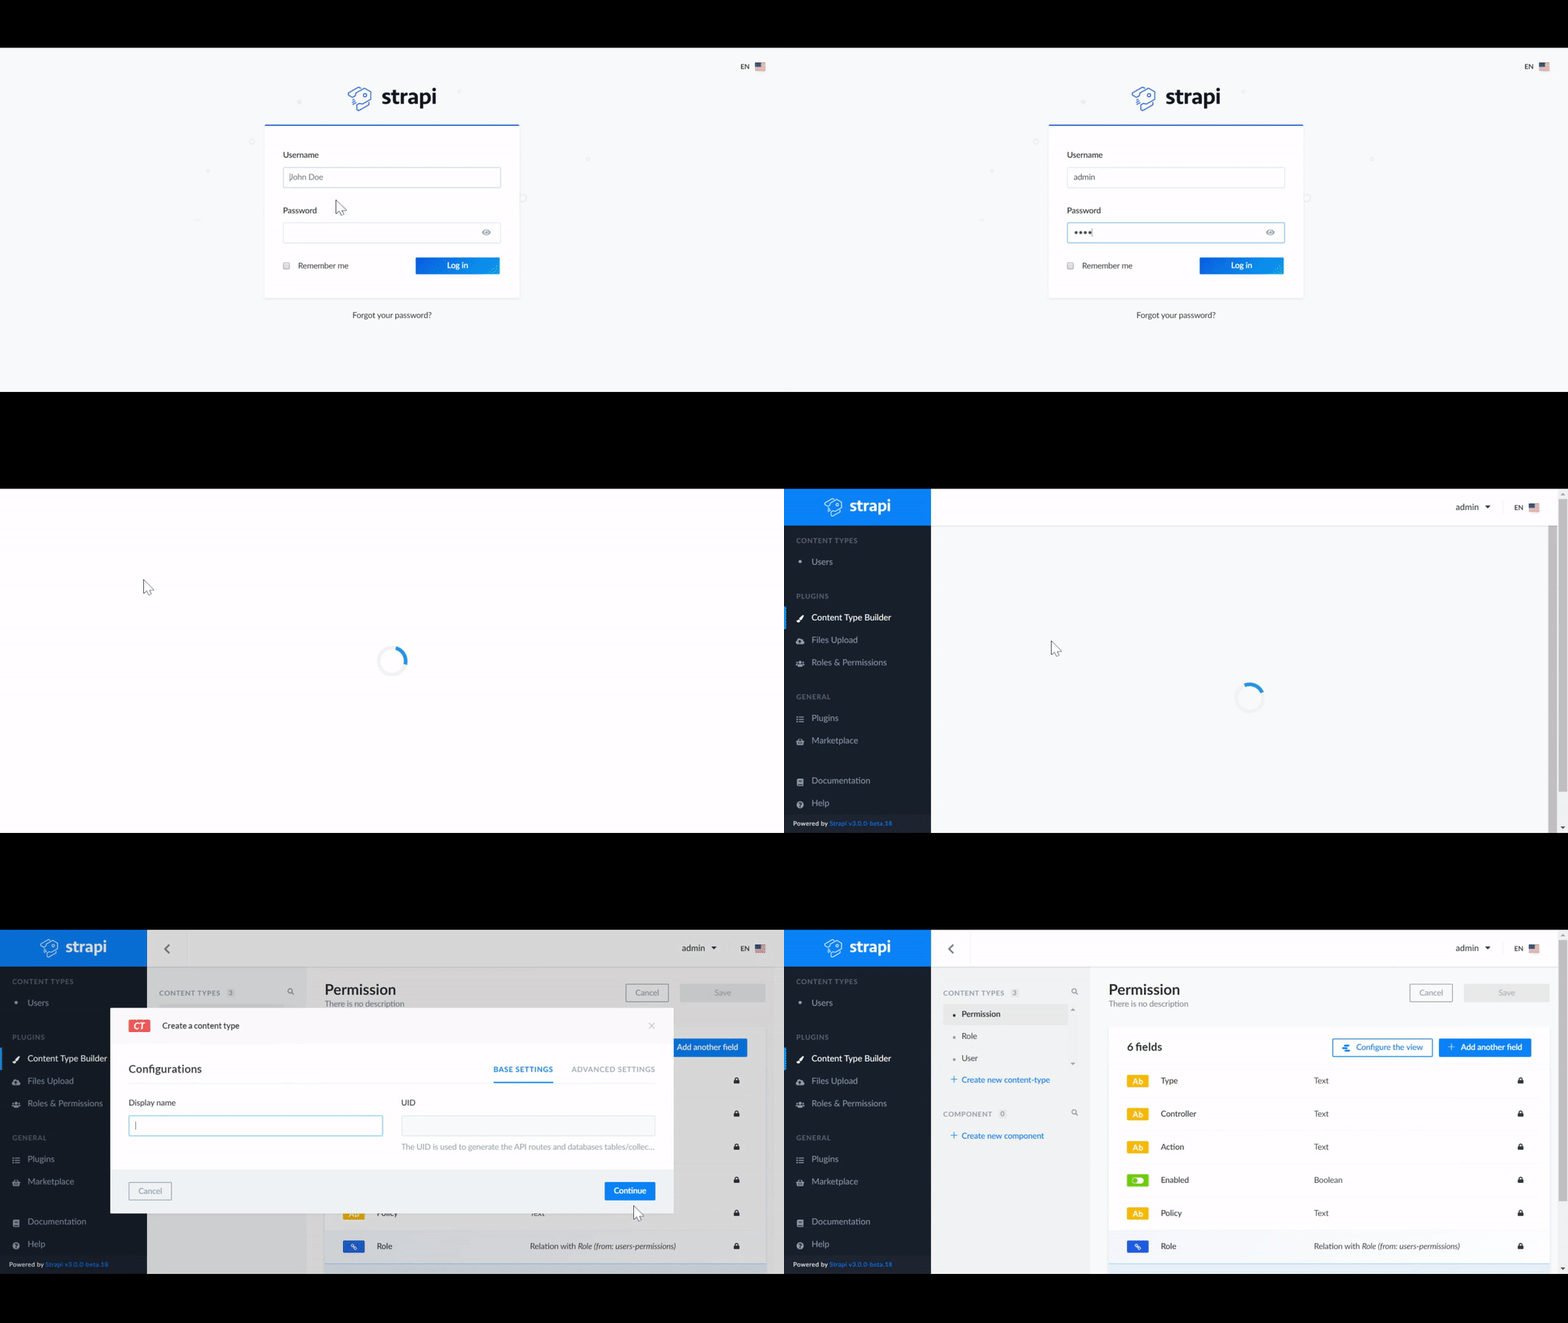
Strapi accessible over browser
And, it brings us to the end of this article. I hope this article has enabled you to successfully deploy Strapi over HTTPs on Kubernetes. Feel free to comment out your thoughts and let me know if you face any issues in the implementation. Thank you Nitesh Ratnaparkhe and @Shubham Khatri for taking the time out to proofread this article and providing constructive feedback.